

Looking to make Simple Homemade Kimchi but don't know where to start? Stop right here! This simple, delicious, and naturally vegan recipe comes straight from my Mom's kitchen and is perfect for beginners.
Save This Recipe! 💌
I am finally ready to send my Mom's Simple Kimchi Recipe out into the world. Called Baechu Kimchi in Korean, it is what most people think of when they hear the word Kimchi. My mother has been gone for over 20 years now, so I had to recreate her kimchi through what I call "taste memories." It's probably the hardest (emotionally) and most important recipe I have ever written for my blog.
I tinkered with it for nearly a decade, adjusting here and there, until one day I took a bite and was instantly transported back to her kitchen. I could see myself squatting on the floor in front of her giant kimchi bowl, tasting with her, learning without words. And now I'm sending it out to you. I hope you enjoy it ❤️
Jump to:
Why you'll love this recipe
- Flavor - Bold, spicy, tangy, and deeply cravable.
- Tradition - An authentic recipe rooted in generations of my Korean family.
- Fermentation - Bubbly, alive, and only gets more flavorful over time.
- Versatile - Serve as a side dish at dinner, add to stews, mix into fried rice, or eat straight from the jar.
- Make-ahead - A single batch keeps in the fridge for months.
You might be asking yourself, "Why is she posting a recipe for kimchi when this is a breakfast and brunch blog?" Because in the Korean culture kimchi is served with all meals and I think once you taste my mom's recipe, you'll see why!
Ingredients & Substitutions
Below is a photo of the ingredients I used to make my Mom's easy kimchi recipe. Her recipe was vegan by necessity because these were the ingredients that were available to her when she learned from her mother during wartime.
Made simply with napa cabbage, green onions (scallions), and a bold, garlicky paste, the most important ingredient is time. Let's take a minute to go over the other ingredients and see where you can make changes if you need to:
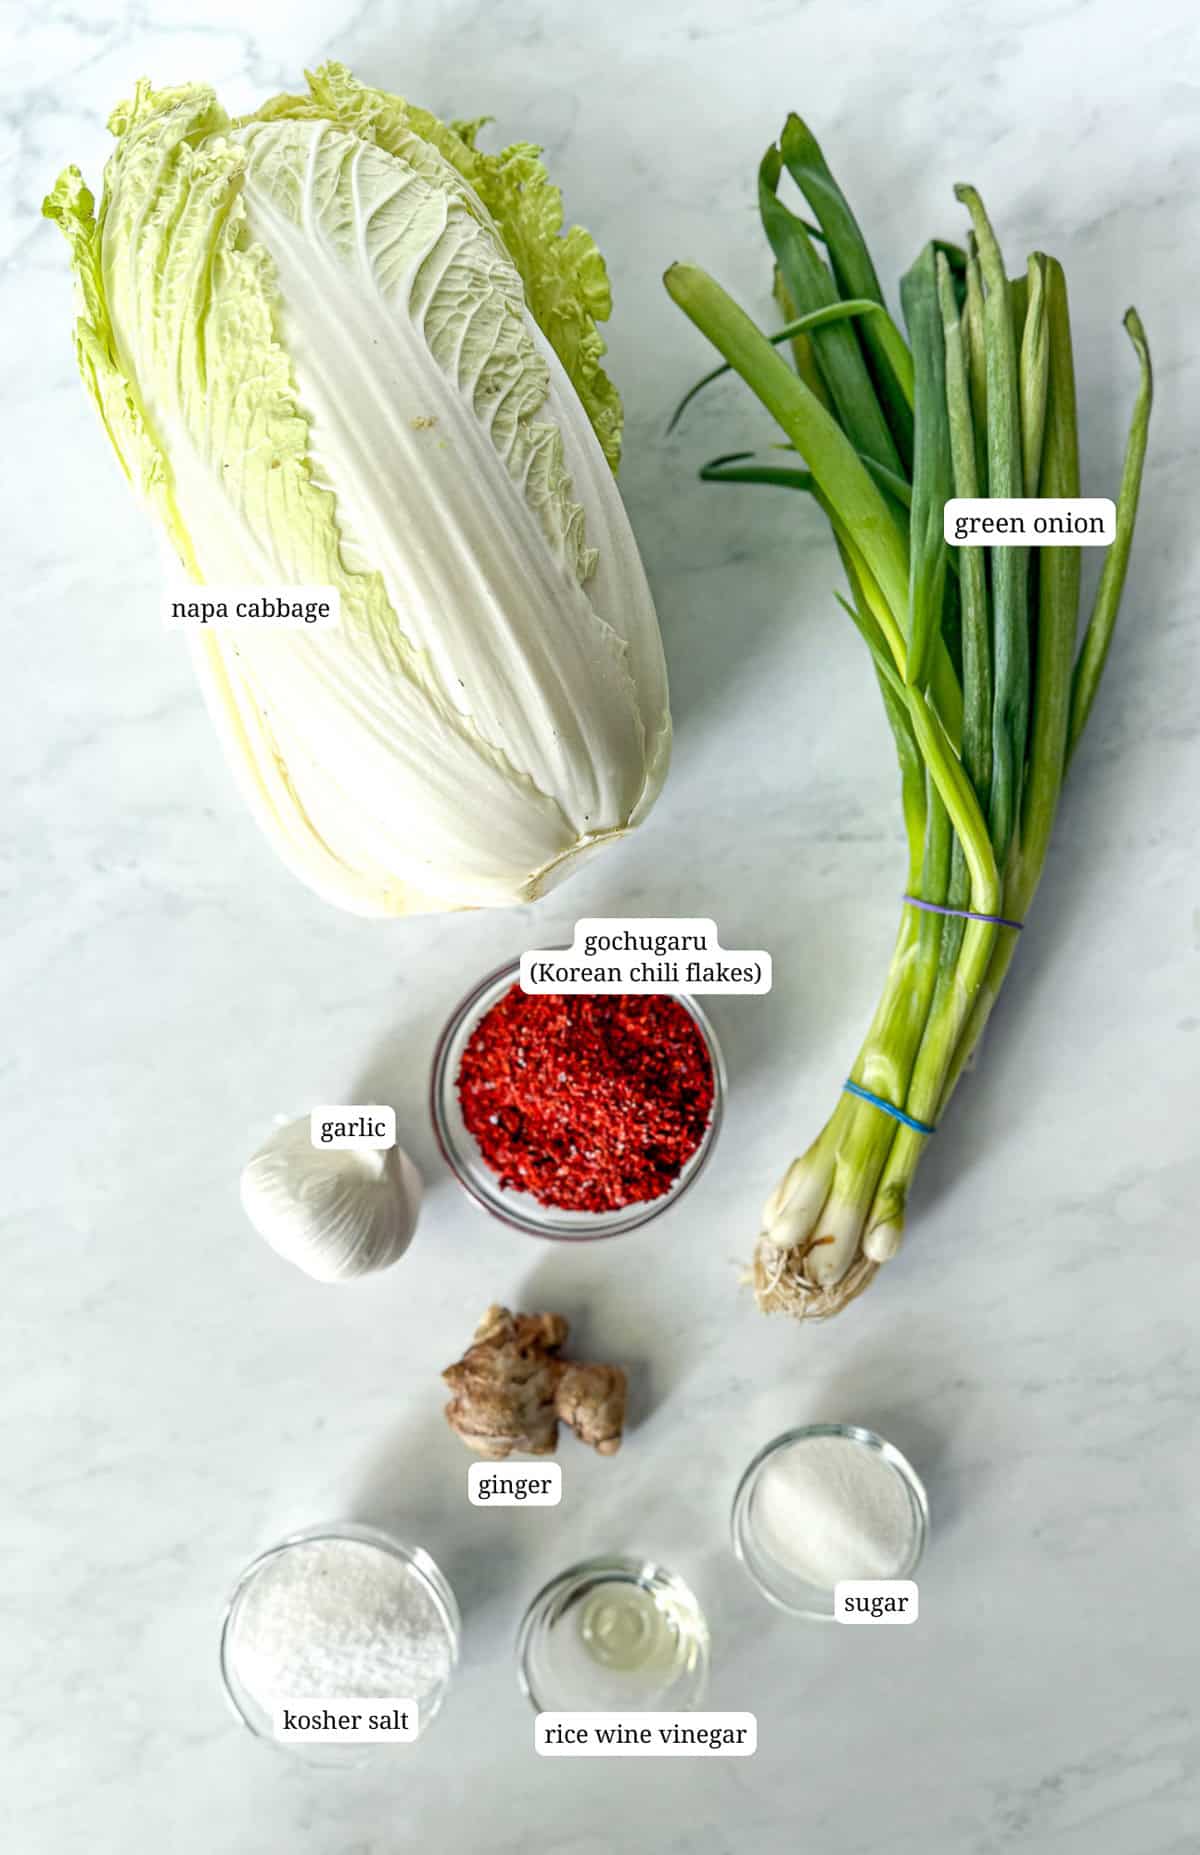
- Napa cabbage - This is the traditional cabbage for baechu kimchi. Green cabbage or savoy can substitute, but the texture will be different.
- Korean sea salt - My mom used Korean sea salt (cheonilyeom) for brining her cabbage. If you don't have it Maldon flaky sea salt, coarse sea salt, or kosher salt will do the job. Avoid table salt, which is too harsh and may contain additives.
- Gochugaru (Korean red pepper flakes) - Gochugaru is essential for authentic kimchi. You can adjust up or down to suit your spice tolerance, but there is no substitute.
- Garlic and ginger - Fresh is best for sharp, aromatic flavor. Using powders or commercially prepared products may alter the basic chemistry of the fermentation process.
- Rice wine vinegar - Adds brightness. White vinegar may be substituted but will be sharper. The recipe uses very little, so if you don't have it, this is the one ingredient you can leave out.
- Sugar - The small amount of sugar included will "kickstart" the fermentation process, giving the microorganisms responsible for fermentation something to eat. Just a bit of table sugar. Don't leave it out and don't try something else.
- Cold water - Bottled or filtered helps ensure clean fermentation. We are dealing with science here, you know - bacteria and microorganisms; let's not add anything extra to the mix. Good clean cool water.
- Green onion - Typically, my Mom only added green onion to her cabbage, but occasionally she would put other vegetables like julienned carrots, turnips, or daikon radish.
See recipe card below for a full list of ingredients and measurements.
Variations
Kimchi is endlessly flexible. Try one of these changes:
- Whole kimchi - Whole leaf kimchi is very traditional. To make this, keep your cabbage in quarters, keeping the core attached. Rub your kimchi paste generously between each leaf and store in a very tall glass jar or rectangular airtight container.
- Radish kimchi - Add Korean radish (mu) or daikon for crunch and sweetness.
- Seafood boost - Traditional kimchi often includes shrimp paste or fish sauce for depth. My Mom never did this as far as I know, but there are endless recipes on the Internet.
- Fruit- In place of sugar, some recipes add pureed Asian pear or apple to their kimchi paste, or even julienned fruit to the cabbage for natural sweetness.
- Spicy upgrade - Increase Korean chili flakes to taste.
- White kimchi - Make a lighter, non-spicy version by skipping the gochugaru.
Cynthia's Recipe Review
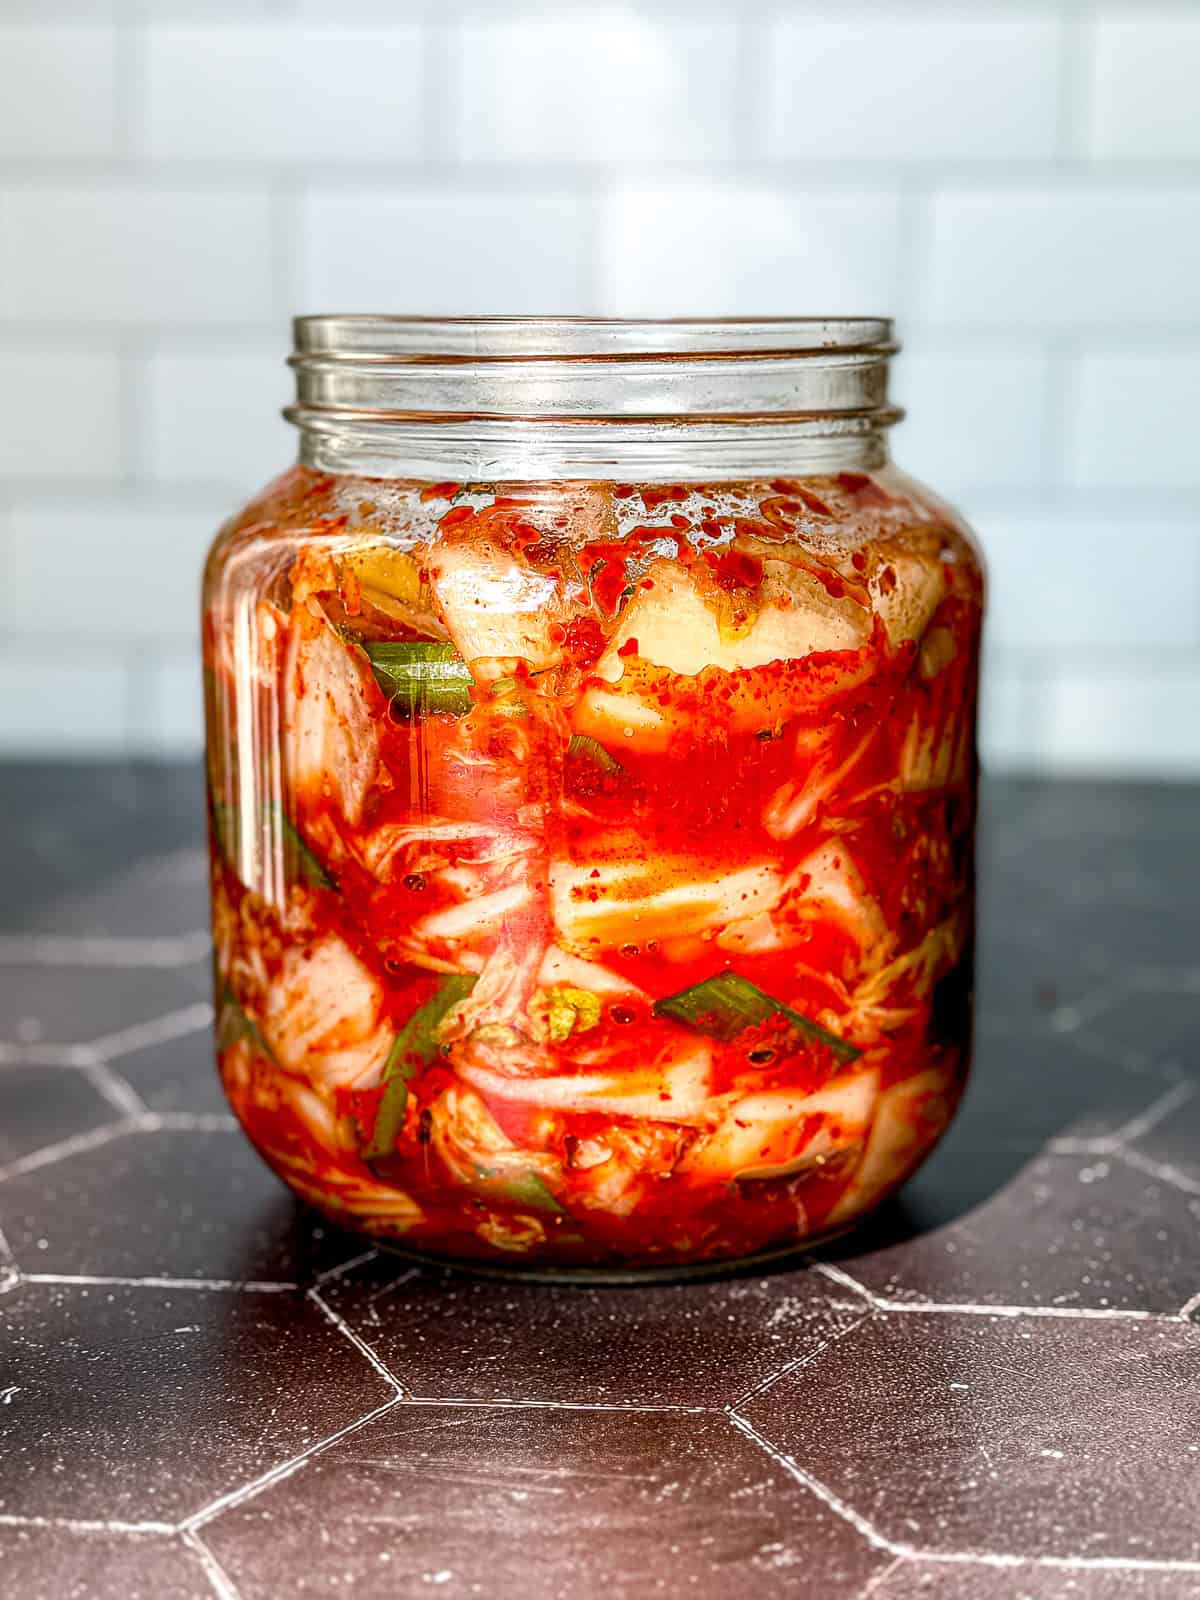
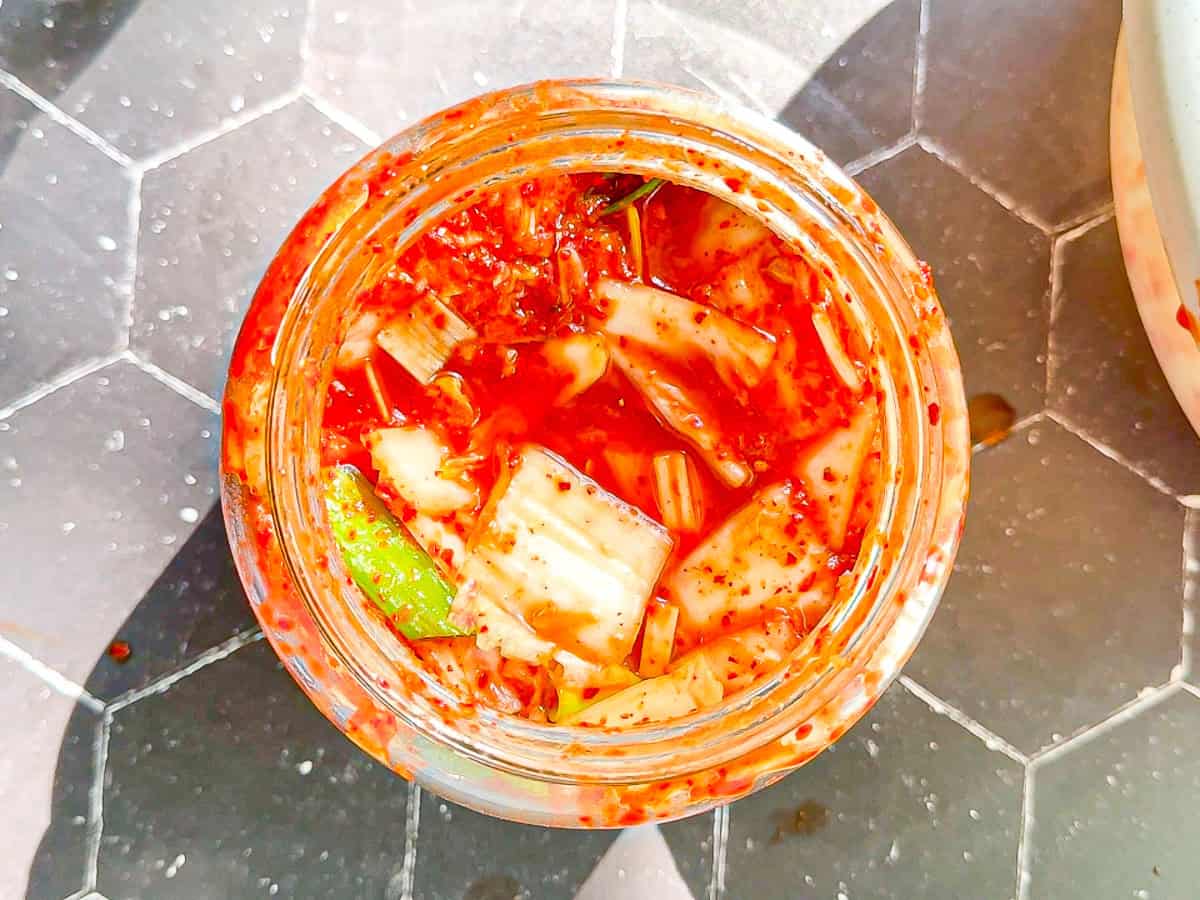
This Vegan Kimchi is one of the recipes that makes me feel closest to my mother. When I see the bubbles rise in the jar and I smell that heady fermentation, I know it is alive, just like hers. I love that I can taste it young and fresh after a day, or let it grow into something funky and complex over weeks. It is food, memory, and comfort all at once.

Storing Your Kimchi
You can store your homemade kimchi in any container you like. Just know that whatever you're going to use is going to smell like kimchi forever and ever, amen. My mom always used a large glass jar, and that's what I prefer to use, but I have seen people use airtight plastic containers with a rubber gasket or a specialized kimchi container.
Technically, your container doesn't even have to be airtight. Kimchi is alive and likes to breathe, but not everyone wants to breathe their kimchi every time they open their refrigerator door, so you will probably want to use something airtight. But remember to only fill your jar about three-quarter full, so it has room to expand as it bubbles. To be safe, place a plate underneath your jar during the initial fermentation process, just in case it bubbles over.
Quick Recipe Video
Step-by-Step Instructions
Making kimchi for the first time might feel intimidating but it is really a simple process. Follow these steps and let the fermentation do its work.
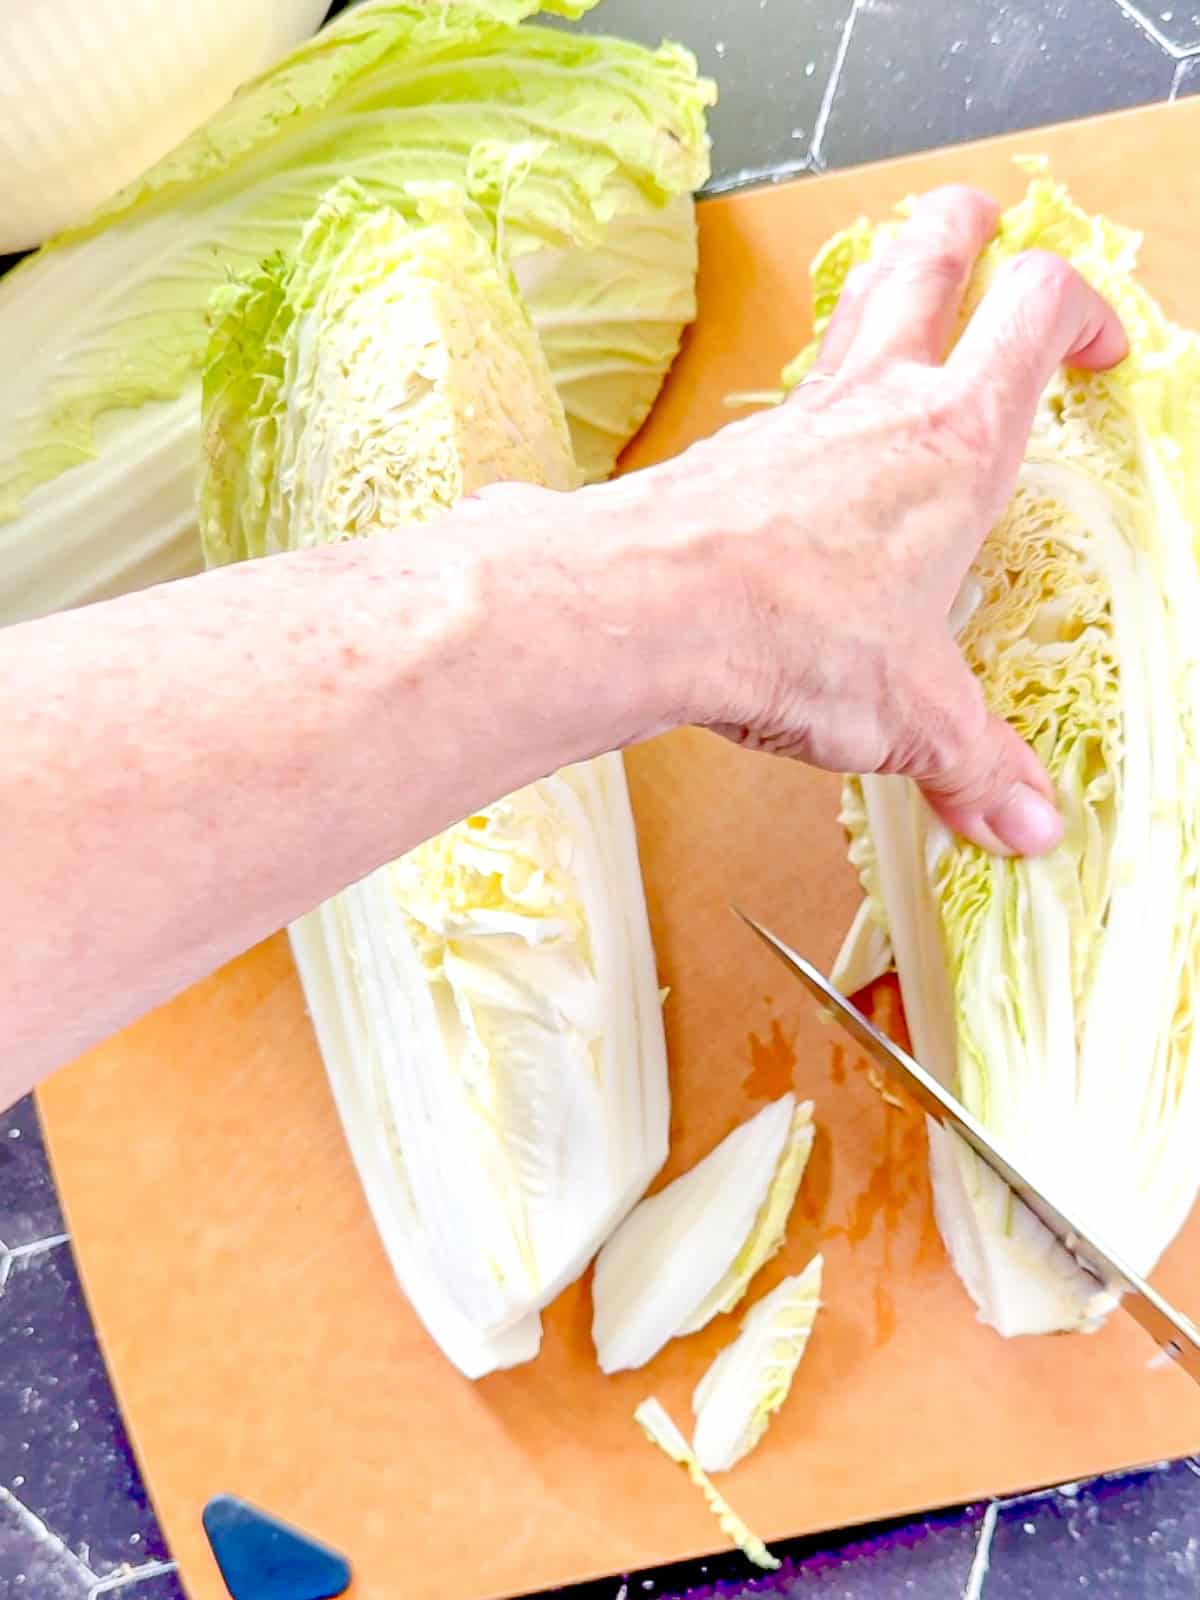
Step 1: Use a large chef knife to cut your Napa cabbage into quarters and remove the core at the base of each one.
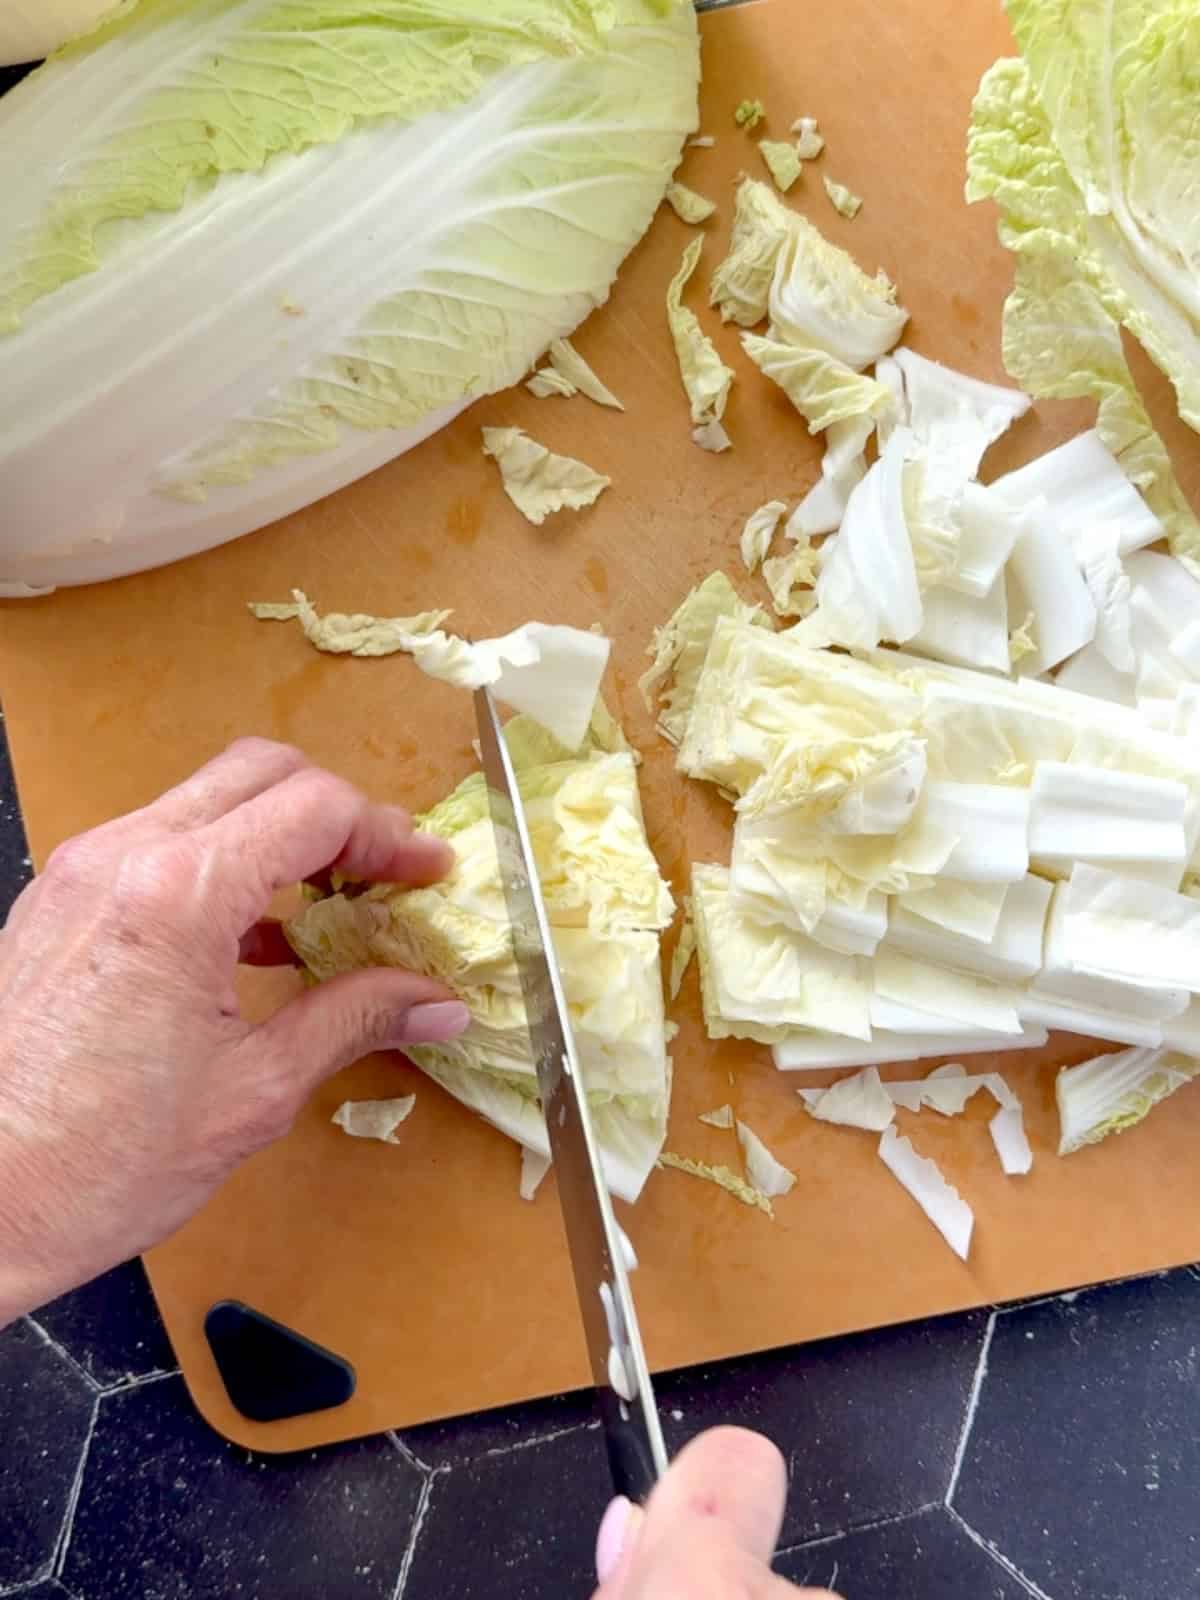
Step 2: Cut your cabbage into bite size pieces, about 2 inches.
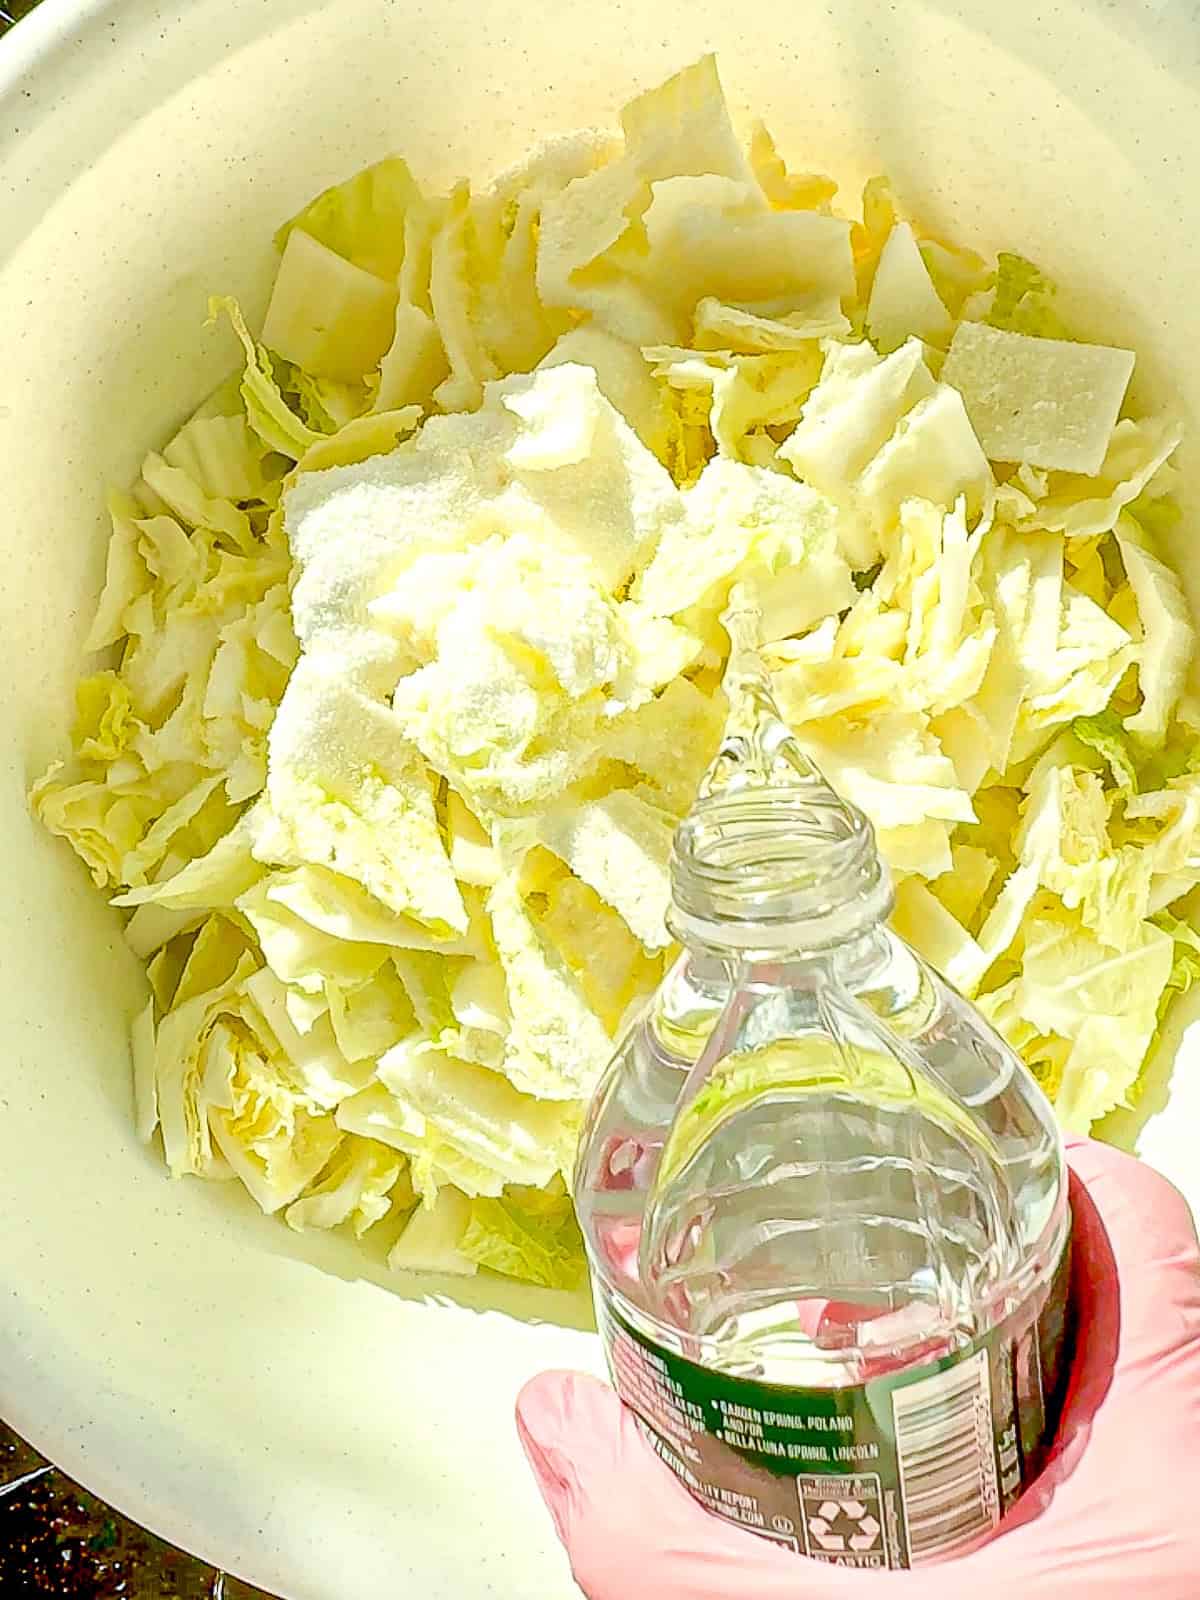
Step 3: Sprinkle with salt and massage it into the cabbage leaves. Add enough water to come halfway up the height of the cabbage. Press down to submerge the cabbage into the salty water as much as possible.
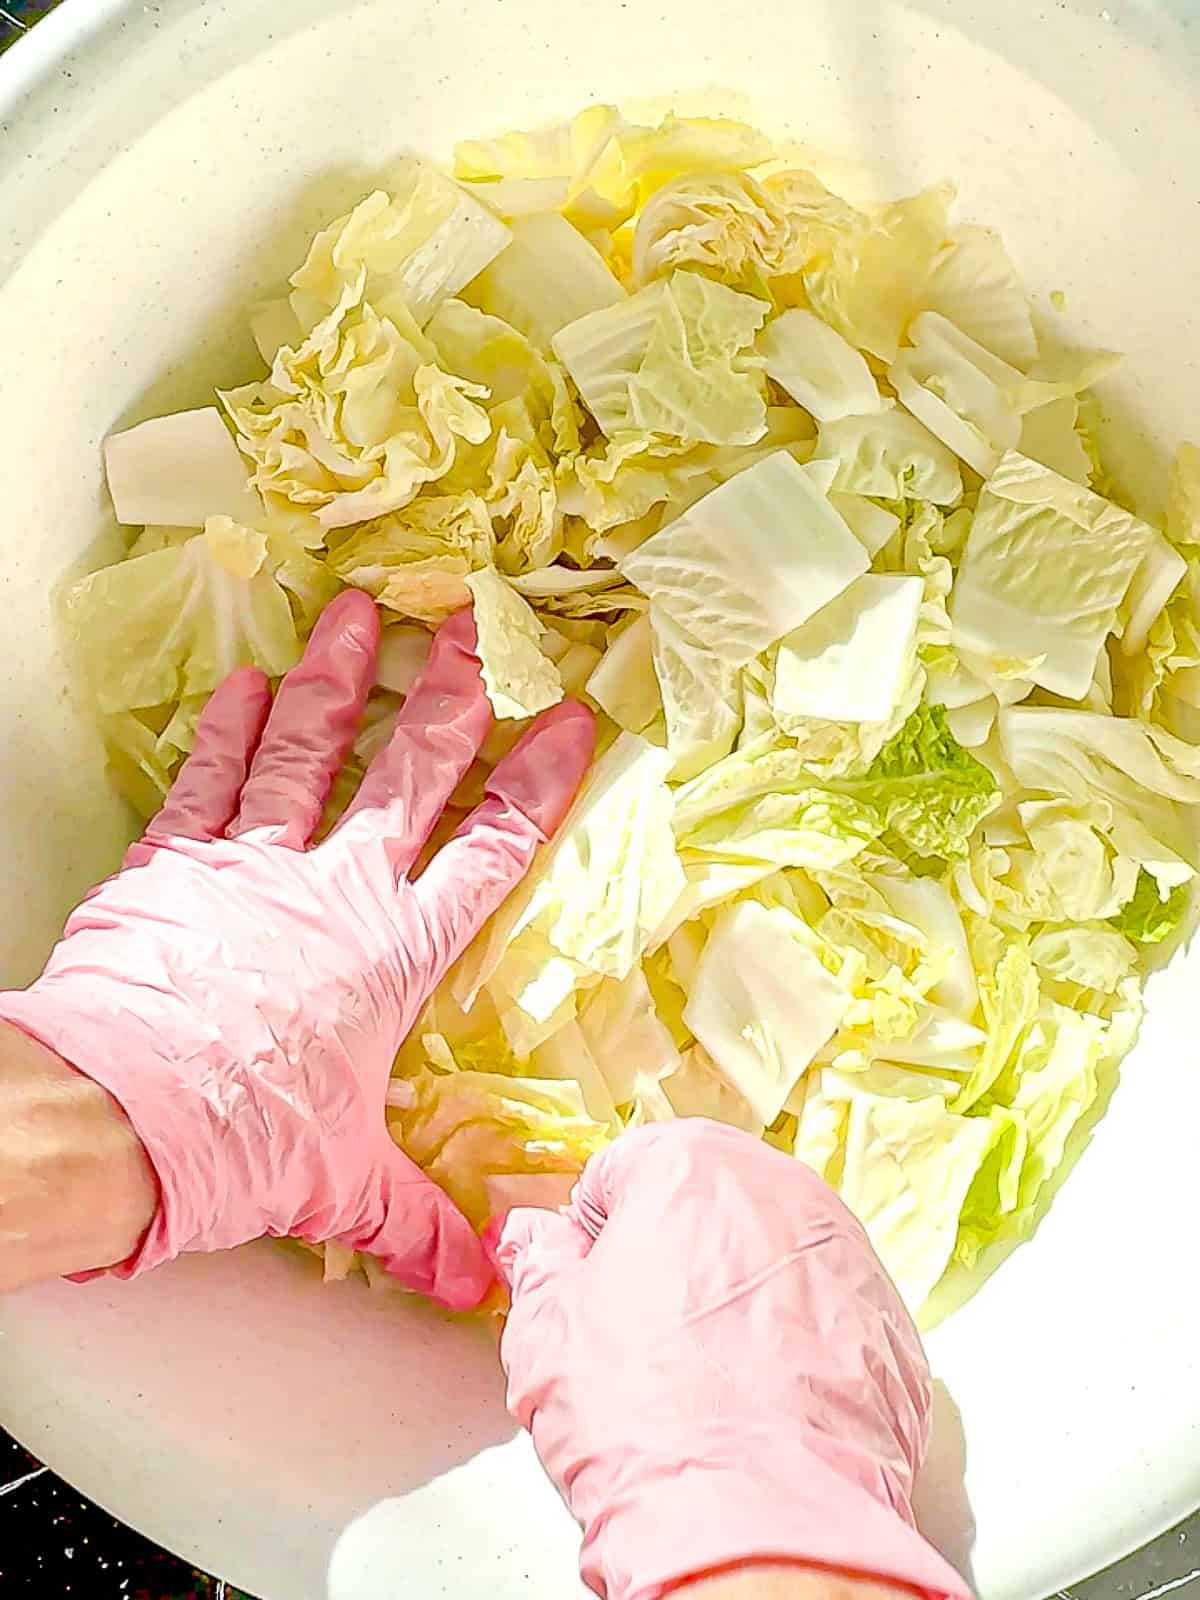
Step 4: Let sit for 2 hours, turning everything over every 30 minutes.
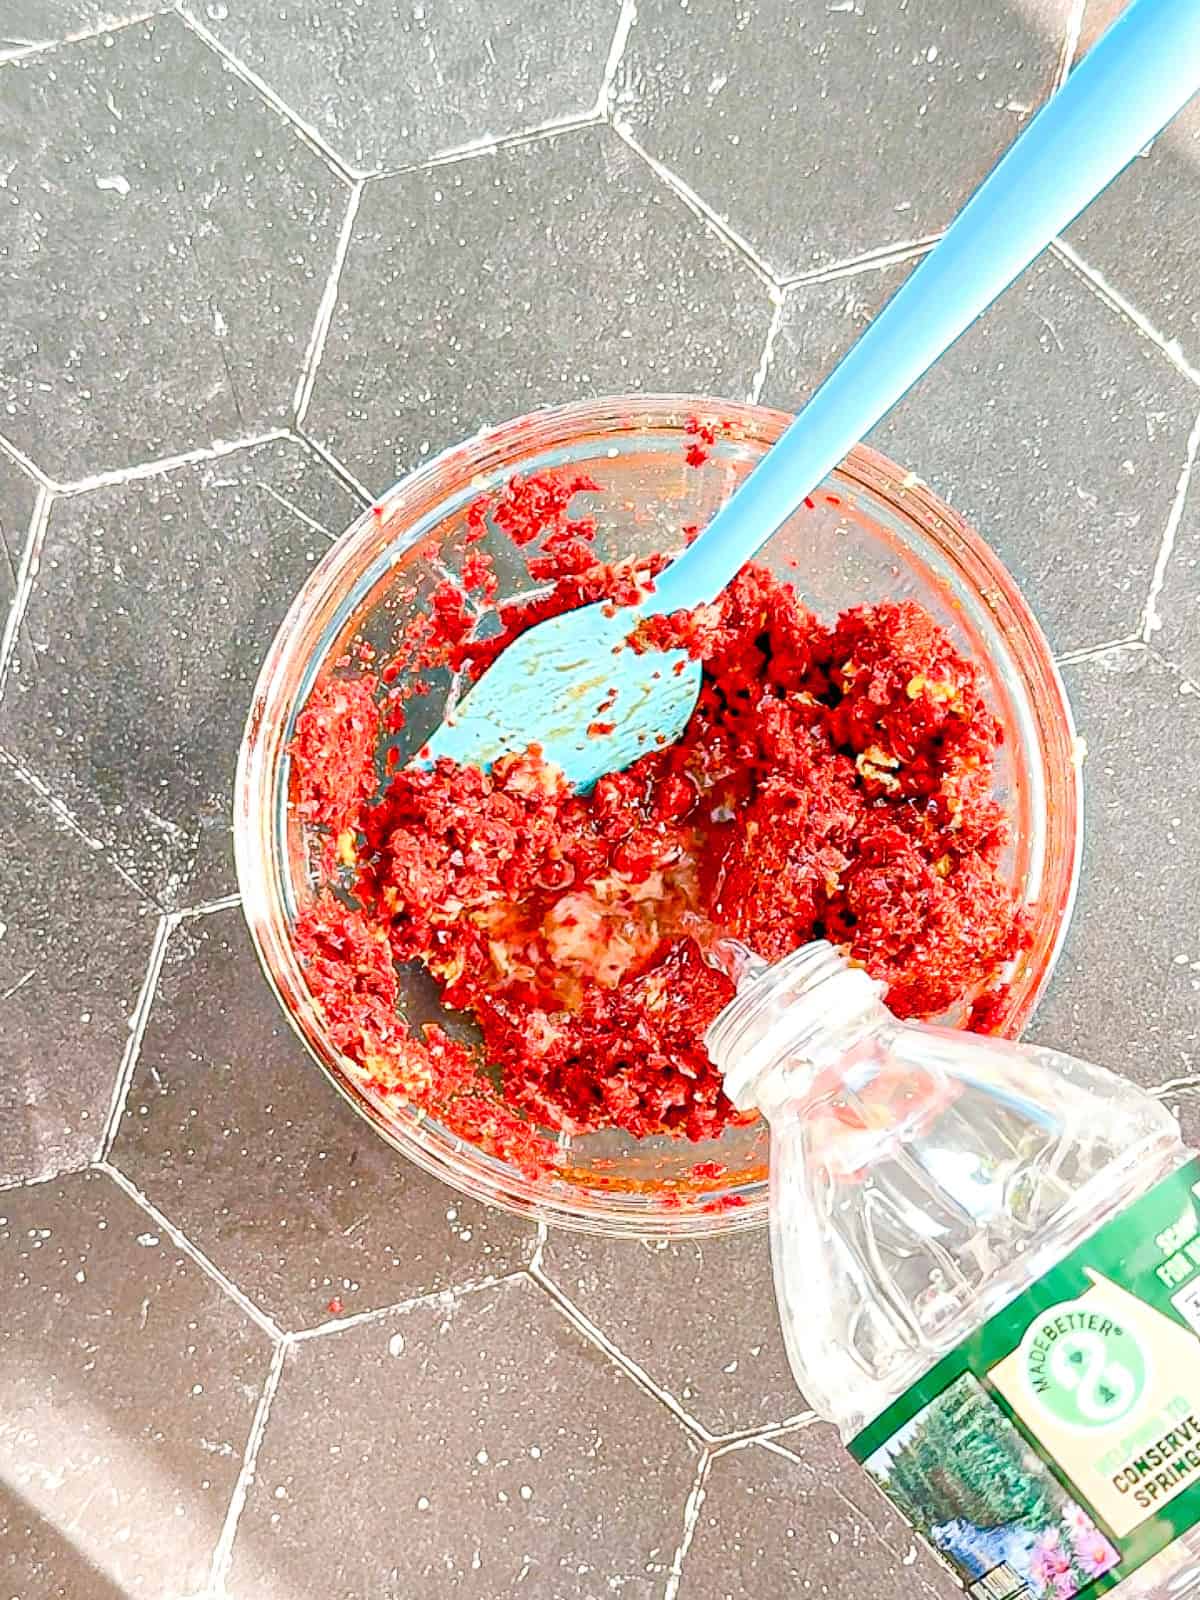
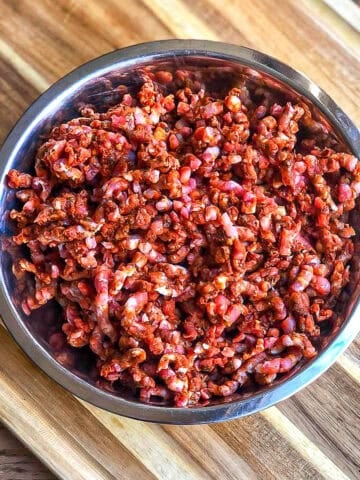
Step 5: While the cabbage is brining, make the kimchi paste by combining garlic, ginger, gochugaru, rice wine vinegar, sugar, and enough water to create a paste the texture of thick jam.
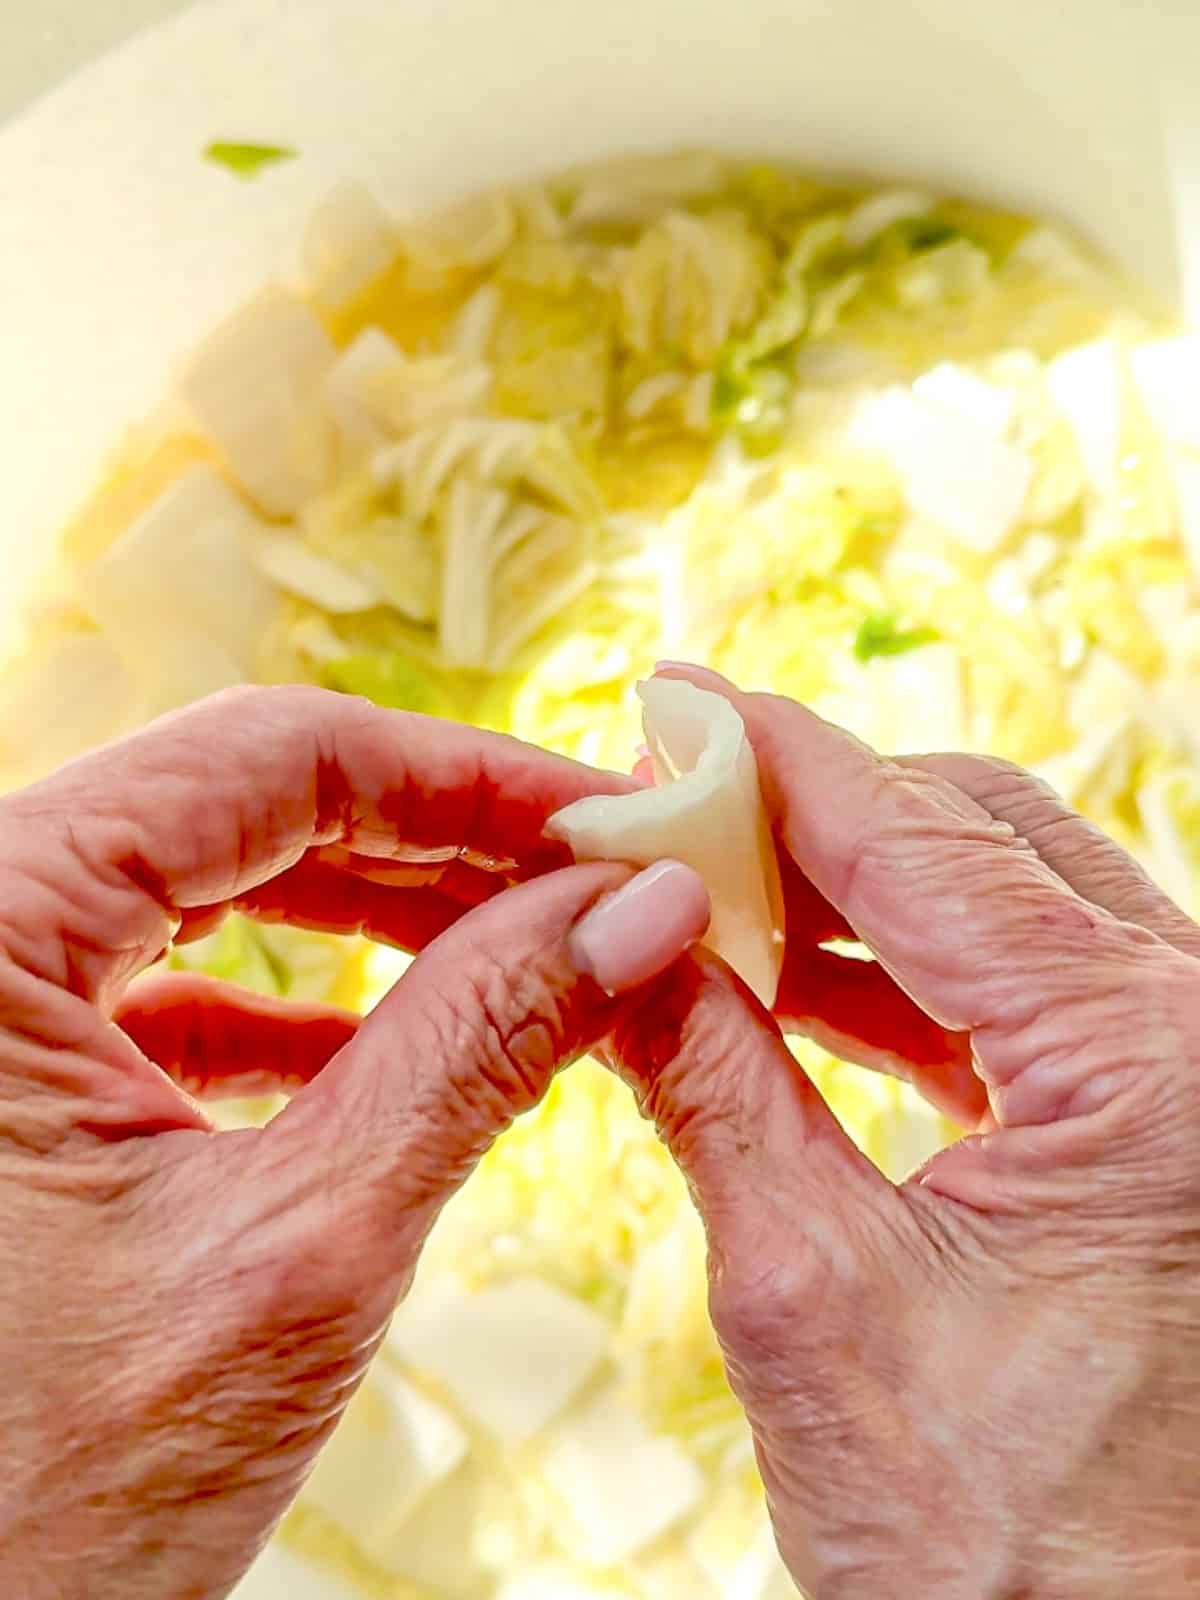
Step 6: After about 2 hours, test if your cabbage is ready to use by rolling a thick part of the leaf between your fingers. If it bends easily without snapping, it's ready. Otherwise, turn over the cabbage again and let sit for another 30 minutes.
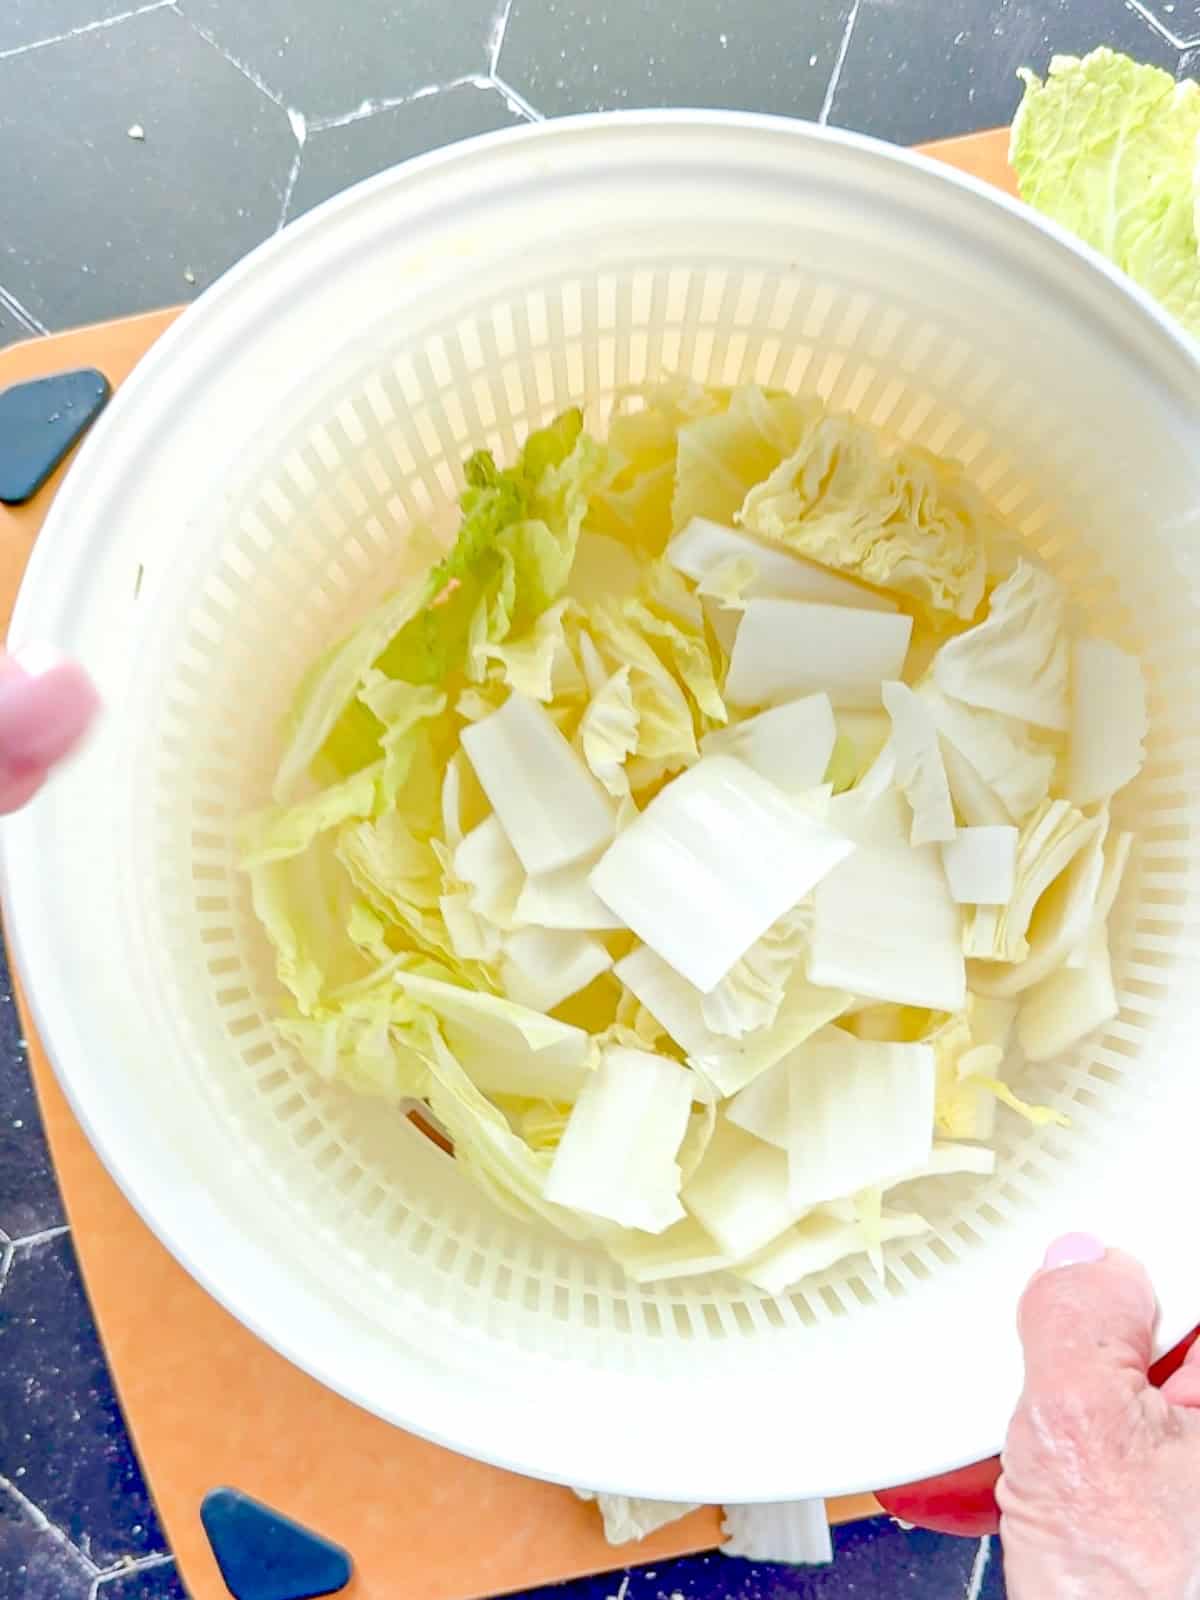
Step 7: When ready, rinse the cabbage thoroughly to remove the salt. Drain well and return to the bowl.
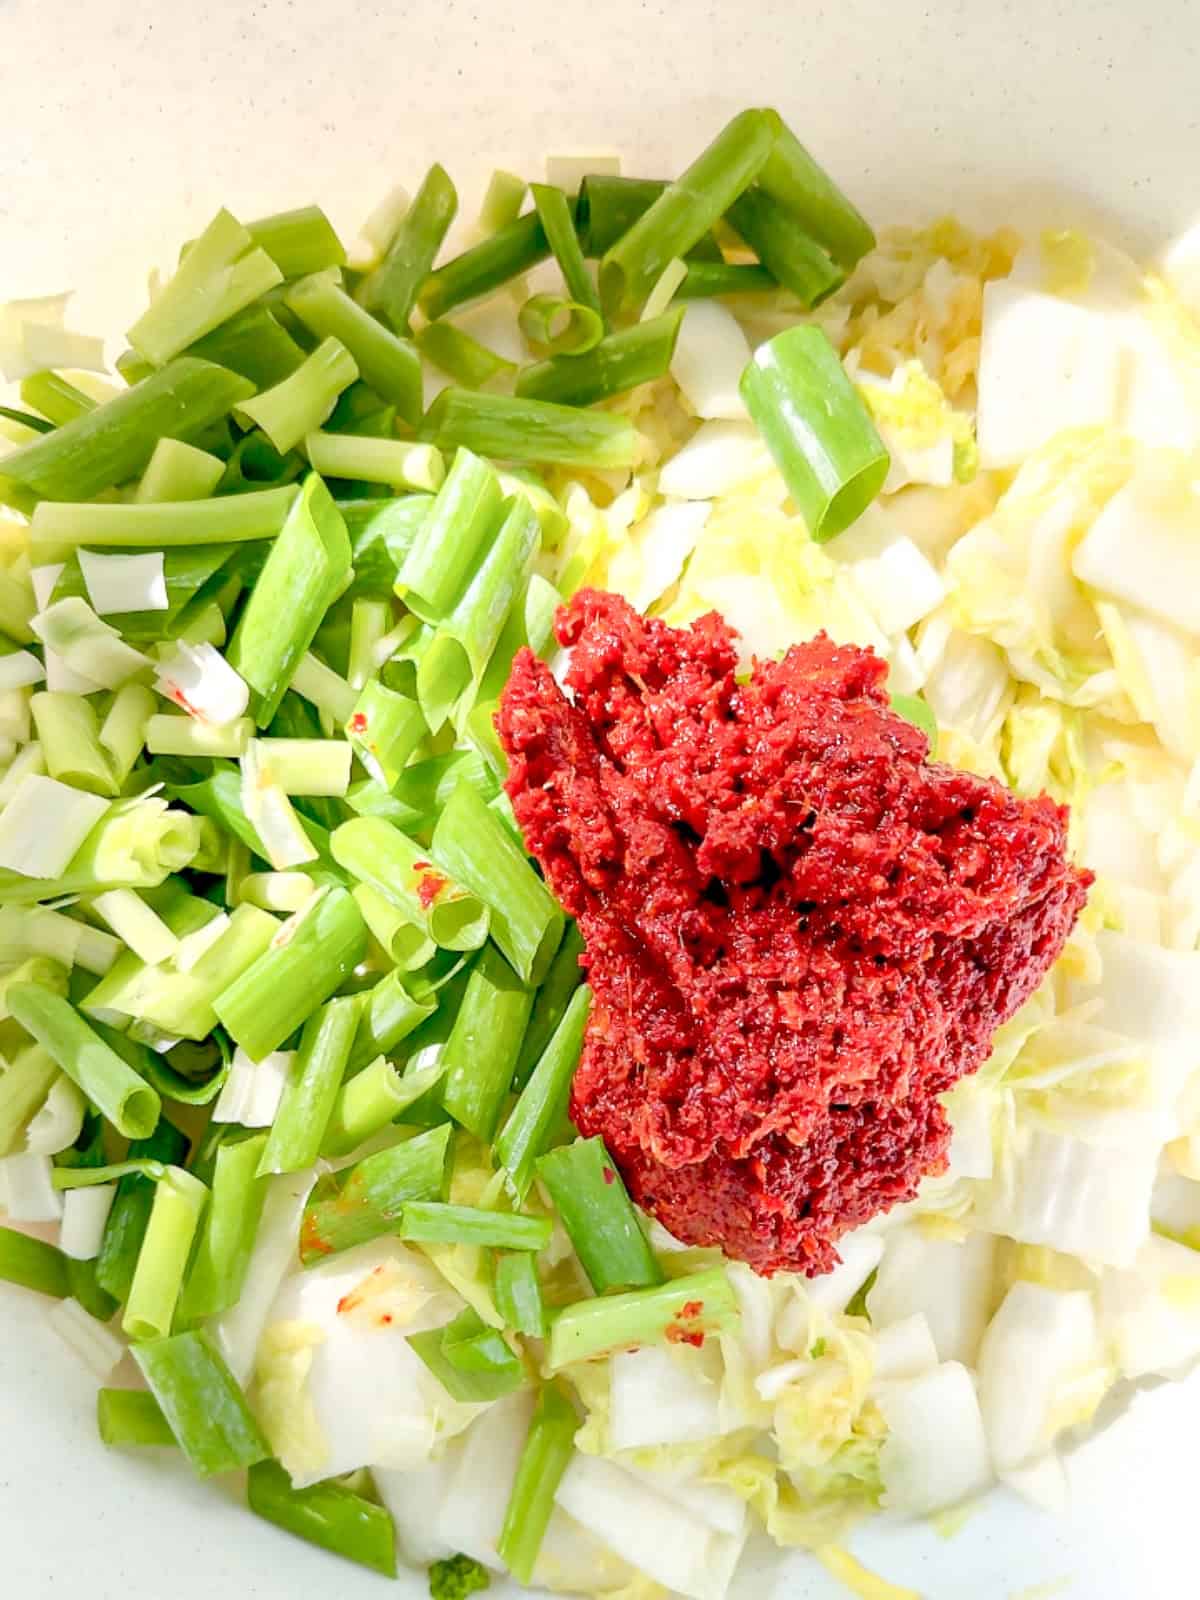
Step 8: Add green onions and the kimchi paste.
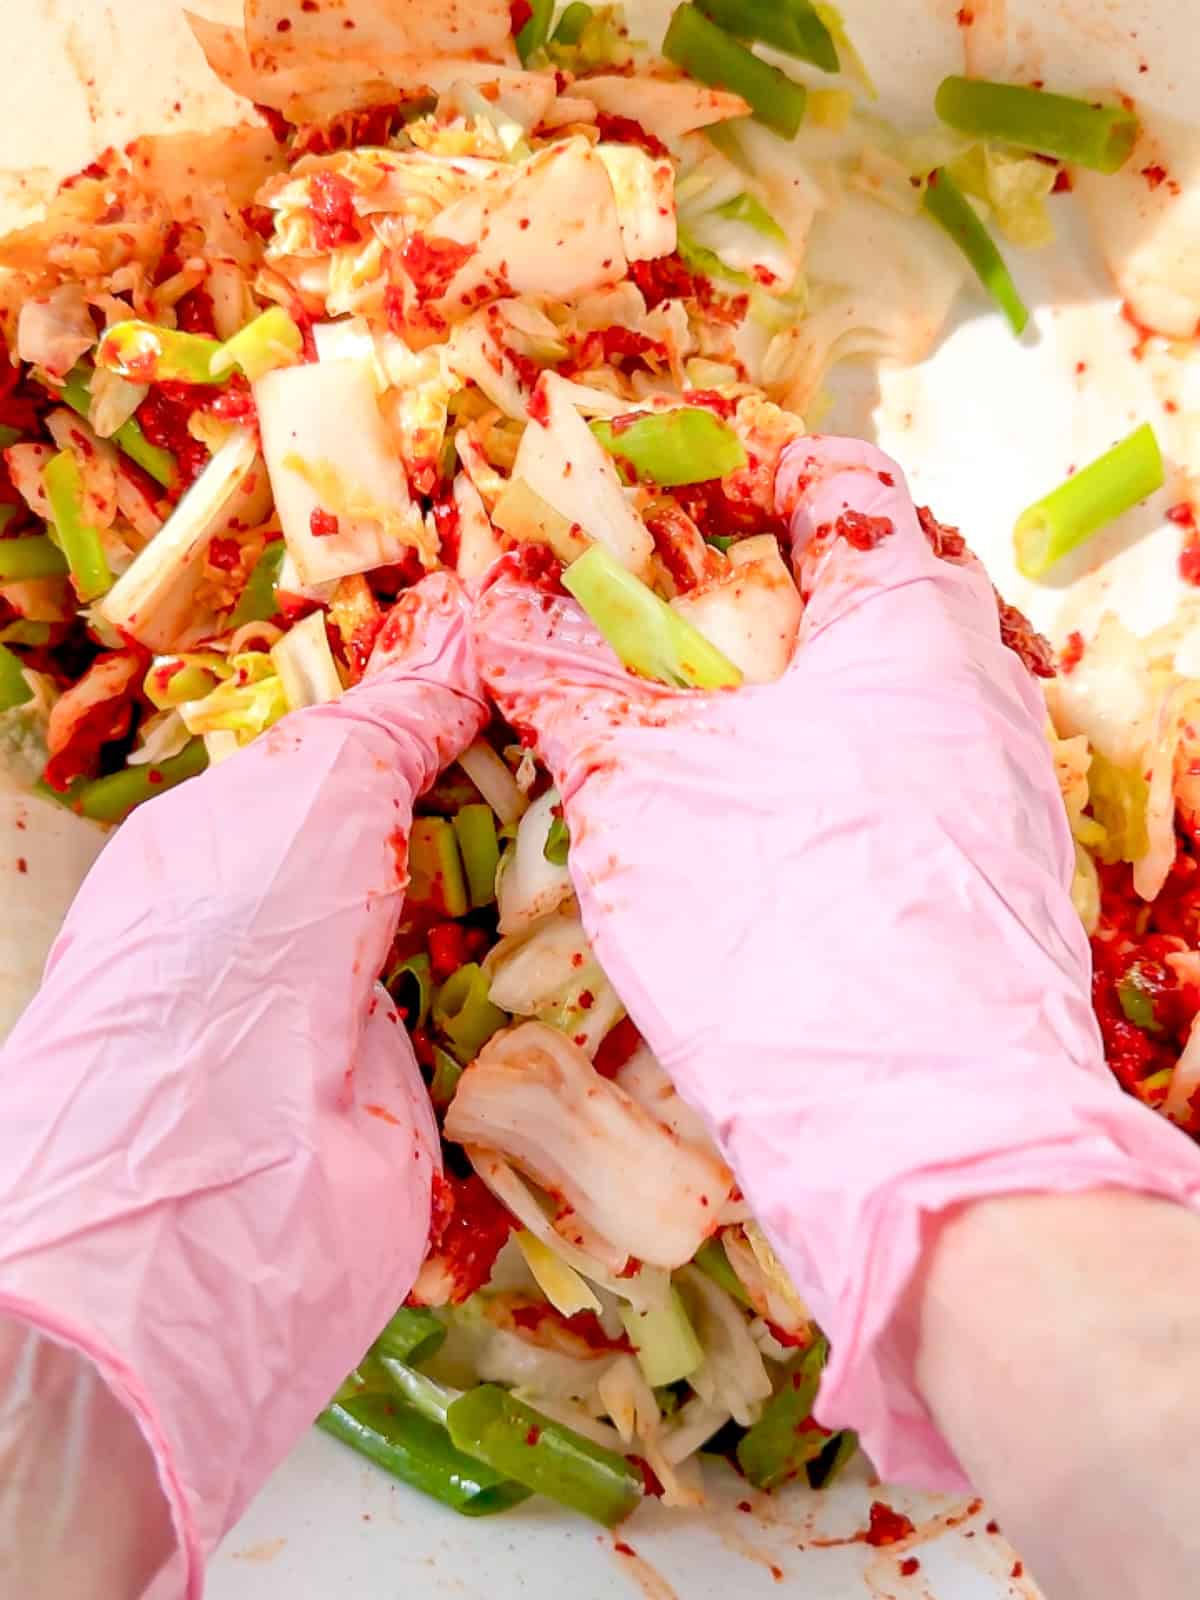
Step 9: Wearing gloves, massage the kimchi paste into the cabbage and onions until everything is evenly coated.
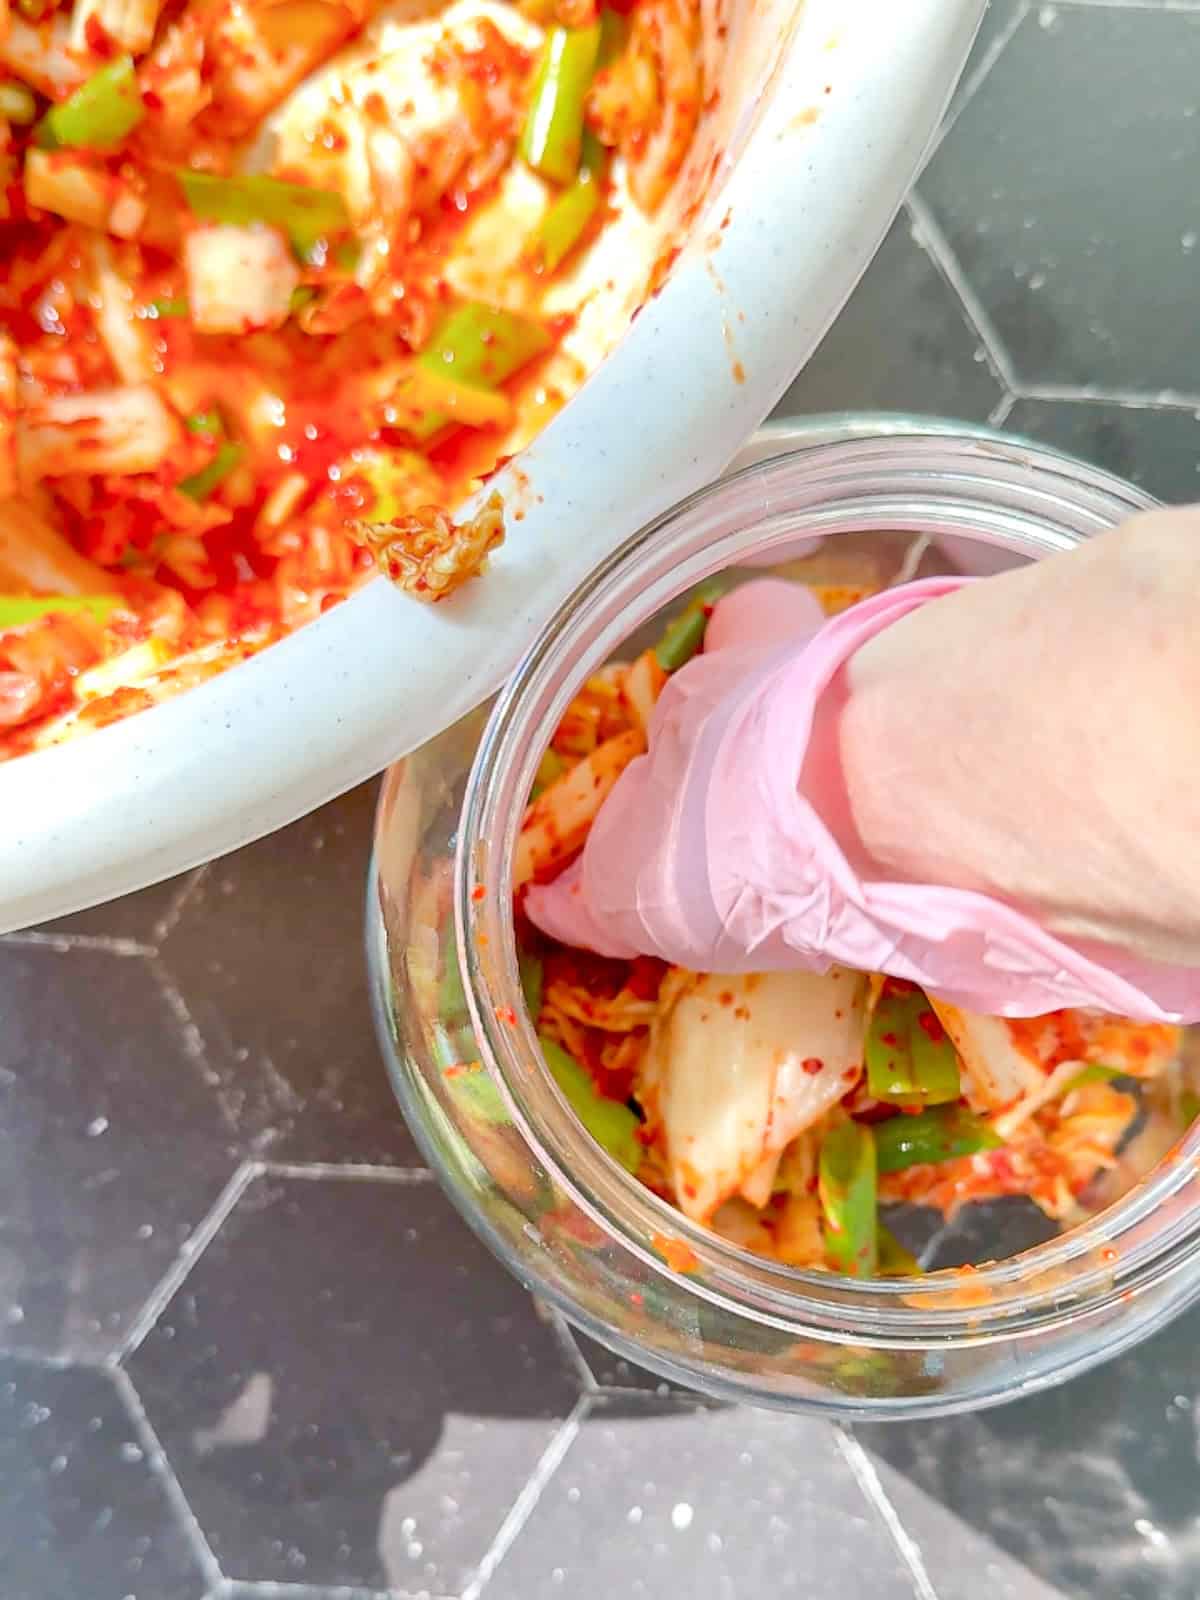
Step 10: Pack the mixture into your chosen container, pressing down firmly to remove air pockets. Pour over any remaining liquid, adding water if needed to cover the cabbage.
Fermentation
For fresh kimchi, you can let it sit for as little as 2 hours and enjoy as a salad (this is called Baechu Geotjeori). To ferment your kimchi, you will leave the jar covered at room temperature for 1 to 5 days, tasting for doneness and then pressing the kimchi back under the liquid daily, transferring to the refrigerator when the flavor is right for you.
When you ferment kimchi you will see bubbles forming in the jar because one of the byproducts of fermentation is carbon dioxide. Guess what? It has to go somewhere. If you place the lid on tightly pressure can build-up and potentially pop off the lid, or even crack your container.
One alternative is to place your lid loosely so gas can escape, but you will smell kimchi strongly in your kitchen. Or you can just "burp" the jar, releasing the gas, once a day when you taste your kimchi, then tightening the lid again when done. If the fermentation is very active, and you see lots of bubbles, you may need to burp yours twice a day.
Cynthia's Helpful Tips
- Heat Level - I have been eating kimchi almost straight out of the womb, but if this is your first foray into the world of kimchi, you might want to dial back the heat. Maybe start with only ¼ cup of gochugaru and you can always go up a bit in future attempts.
- Brining - Brining (salting) your cabbage properly is key to fermentation. Do not rush this step.
- Gloves/Bowl - Protect your hands when mixing the paste into the cabbage and use a bowl that is either stain resistant or that you don't mind taking on a bit of color.
- Cleanliness - Always use clean jars and utensils to keep kimchi safe and avoid introducing unwanted organisms.
- Liquid - Always keep your kimchi submerged both during fermentation and in storage to prevent spoilage.
- Patience - Let fermentation happen naturally. Tasting daily guides the timing. When it tastes good to you, it's ready.
Serving Suggestion

When I was growing up, my mom put kimchi on the table with every meal. Didn't mean I always ate it, but it was always there. One of my favorite ways to serve kimchi is on the side of my egg fried rice with some spicy pork and toasted nori sheets (seaweed).
Recipe FAQs
Absolutely you can. Fermentation will still take place in the refrigerator. It may take longer, up to 3 to 4 weeks, but if it makes you feel safer, go for it.
Anywhere from 1 to 5 days at room temperature, then let it continue to ferment in the refrigerator.
Look for bubbles in the jar, taste daily, and refrigerate when it reaches the tanginess you like.
Properly stored in the fridge, it lasts several months. It will continue to sour as it ages.


Did you try this recipe?
Please consider leaving a comment with a ⭐️ rating below and tell me all about it! It helps me to continue to improve my content and lets others know what you think!
I appreciate it so much!
-Cynthia
📖 Recipe

Easy Vegan Kimchi
Equipment
- Extra large mixing bowl glass, metal, or ones you don't mind staining
Ingredients
- 3 pounds napa cabbage 1 medium cabbage
- ½ cup Korean sea salt
- 6 green onions whites chopped, greens in 2 inch pieces
- Water preferably bottled or filtered
Kimchi Paste
- 8 to 10 cloves garlic grated
- 1 inch fresh ginger grated
- ½ cup gochugaru adjust to taste
- 1 tablespoon rice wine vinegar
- 1 ½ tablespoons sugar
- 4 to 6 tablespoons water preferably bottled or filtered
Instructions
- Cut the napa cabbage into quarters, remove the core, and chop into 2-inch pieces. Place in a large bowl.
- Sprinkle with kosher salt and massage into the leaves. Add enough water to come halfway up the cabbage.
- Press down on the cabbage to submerge into the salty water as much as possible. Let sit for 2 hours, turning every 30 minutes.
- Meanwhile, make the kimchi paste by combining garlic, ginger, gochugaru, rice wine vinegar, sugar, and enough water to create a paste the texture of thick jam.
- Test if your cabbage is ready to use by rolling a thick part of the leaf between your fingers. If it bends easily without snapping, it's ready. Otherwise, turn the cabbage again and let sit for another 30 minutes.
- When ready, rinse the cabbage thoroughly to remove the salt. Drain well and return to the bowl. Add green onions.
- Wearing gloves, massage the kimchi paste into the cabbage and onions until evenly coated.
- Pack tightly into jars, pressing down to remove air pockets. Pour in any remaining liquid, adding water if necessary to keep the cabbage submerged.
- For fresh kimchi, let sit for 2 hours and enjoy as a salad. For fermentation, leave the jars at room temperature for 1 to 5 days, tasting and then pressing the kimchi back under the liquid daily. Transfer to the refrigerator when the flavor is right for you.
Save This Recipe! 💌
Video
Notes
- Always keep kimchi submerged under brine to prevent spoilage.
- Taste daily during fermentation to decide when to refrigerate. This is also an opportunity to release some of the carbon dioxide gases that build up from the fermentation process.
- Kimchi can be eaten almost immediately, but flavor improves after 1 to 2 weeks in the refrigerator.
- Store kimchi in the refrigerator for several months, using a clean utensil each time you remove some from the container.


Leave a star rating and review, ask a question, or share a tip!