


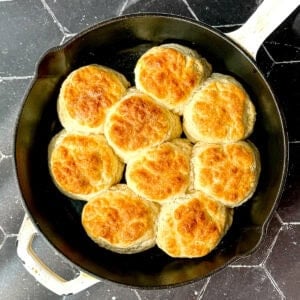
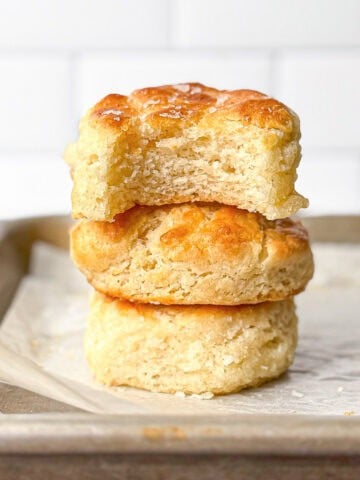
Discover my Grandmother's secrets to making Fluffy Cast Iron Biscuits with this easy recipe. Perfect for breakfast or as a side dish with dinner, these soft-as-a-cloud biscuits will absolutely melt in your mouth.
Save This Recipe! 💌
I have been trying for years to recapture the incredibly tender texture of my grandmother's Fluffy Cast Iron Biscuits. She made them simply, with soft winter wheat flour, buttermilk, baking powder, butter, and salt, but the texture felt like there was some kind of magic in there.
You guys know how much I love all of my biscuit recipes. My flaky buttermilk biscuits, soft and fluffy cream biscuits, and sweet shortcake biscuits are all variations on some of the biscuits my grandmother used to make.
But it was when she would mix up this soft sticky dough, barely touch it at all, and lay tall biscuit rounds into her cast iron pan (smeared with bacon fat thank you very much) that the best biscuits came out of her kitchen.
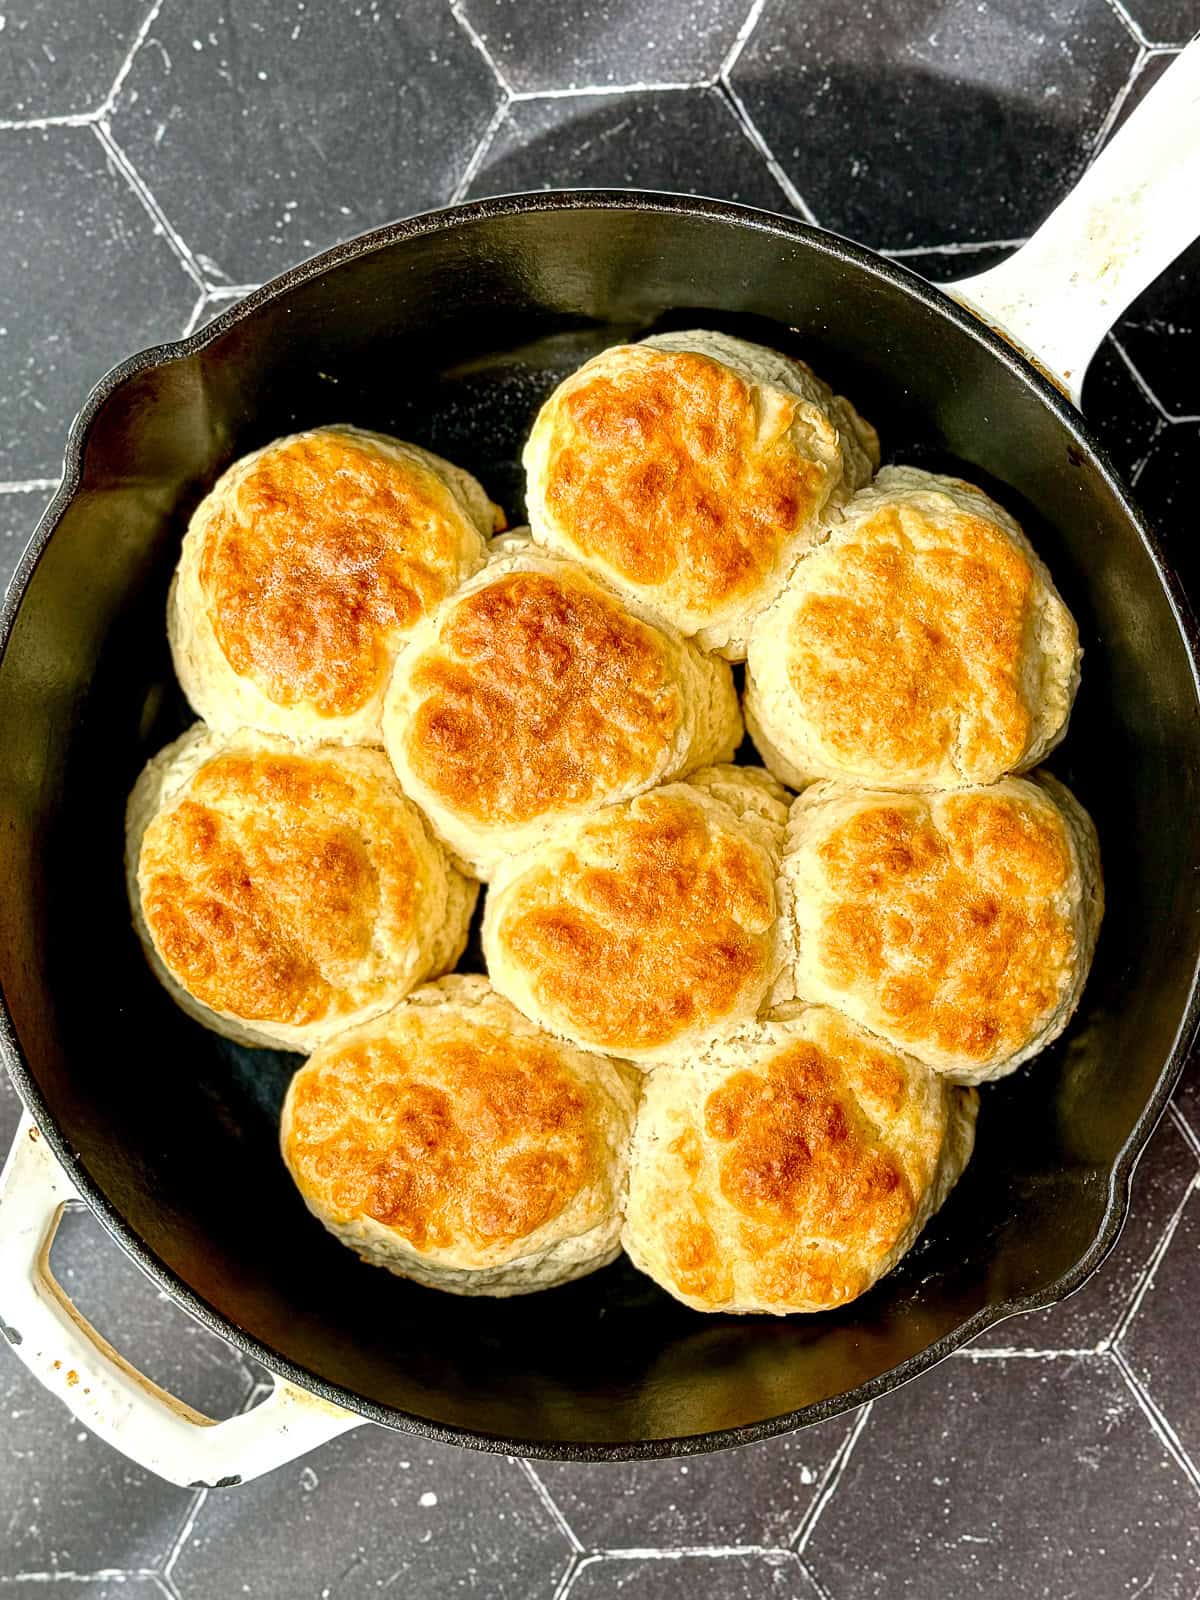
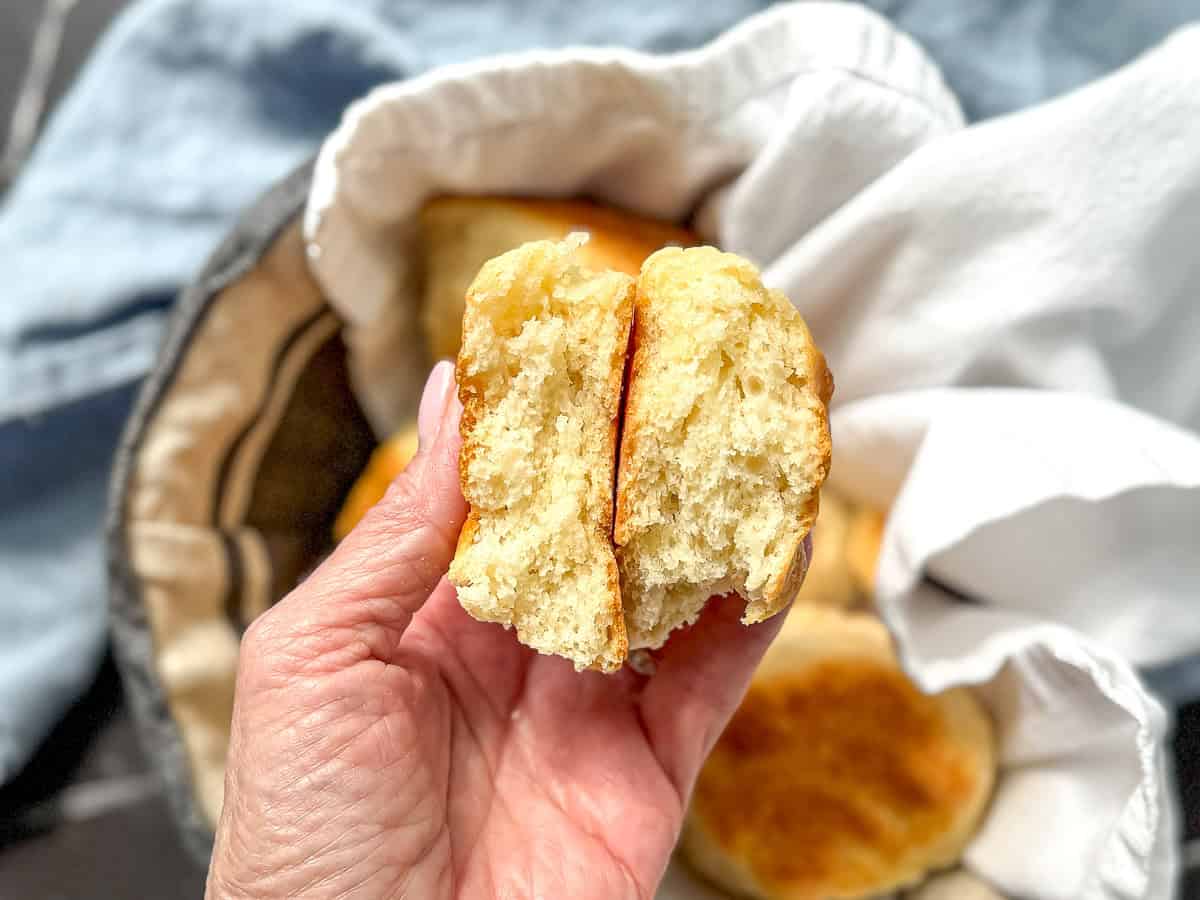
She would cut them impossibly tall, but by placing them shoulder to shoulder in her cast iron pan they would rise straight up to the sky, leaning on each other for support. The bottoms and the edges would get so crispy but where they touched... tender, cloudy perfection. Sometimes she would split them open and add a schmear of pimento cheese spread... Southern to the core.
Jump to:
Ingredients & Substitutions
Five simple ingredients stand between you and absolute cloudy-textured fluffy cast iron biscuits. Even though she used buttermilk, Grandma never added baking soda to her recipe. She called them baking powder biscuits, because it does all of the heavy lifting (no pun intended). Let's go over the very few ingredients and see where you can make changes if you need to:
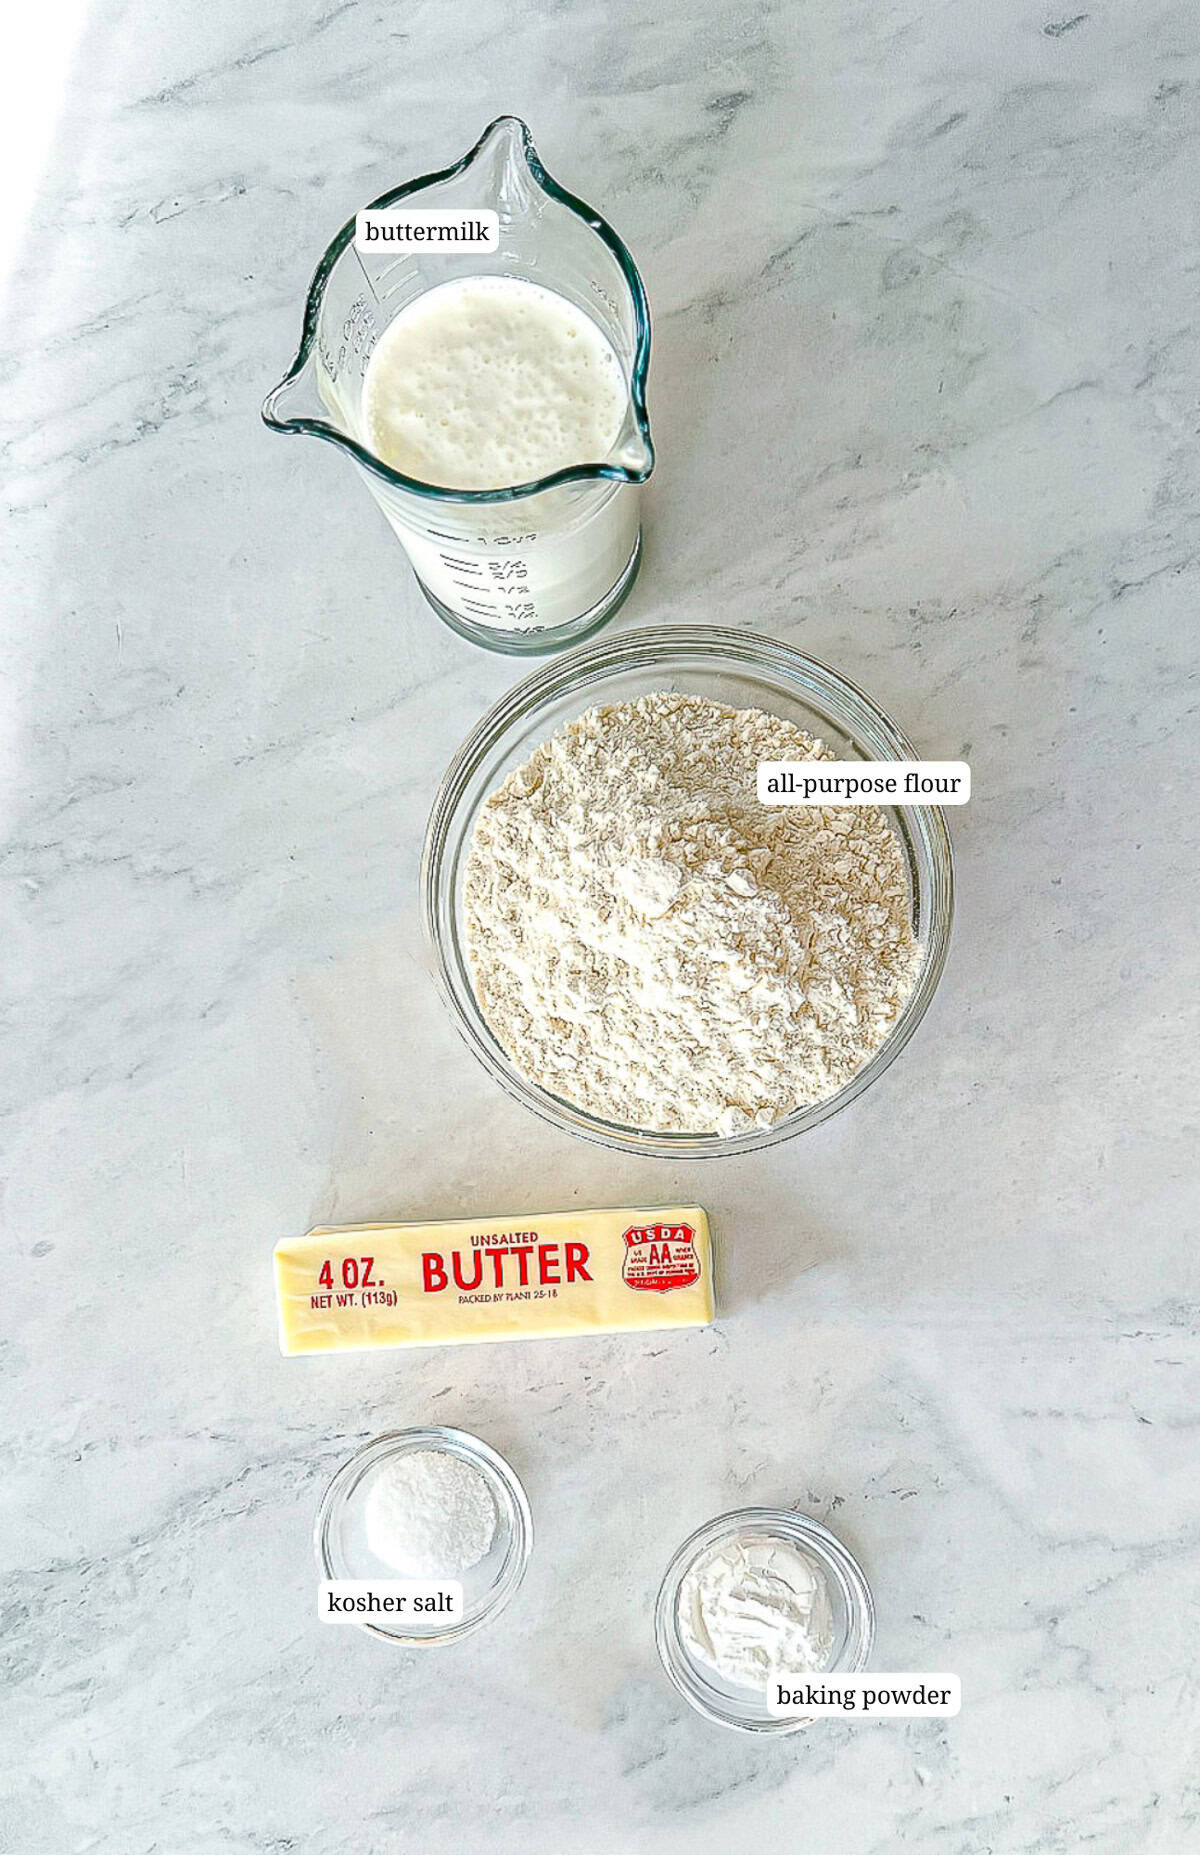
- All-purpose flour - My Grandmother only used White Lily flour. It is an super-soft flour made from 100% red winter wheat, but it's very difficult to buy anywhere outside of the American South. In trying to re-create her recipes I've also tried to re-create the silky texture of her favorite flour by using cake flour, 00 pizza flour, and adding cornstarch to the flour, but it's really more about using the right ratios and the right technique. Use the best all-purpose flour you can find and afford. My Grandma will take care of the rest.
- Buttermilk - Buttermilk not only adds a tantalizing tang to the flavor of your biscuits, it also helps to tenderize them, which just means making them super soft. If you can't find buttermilk, or are afraid you won't use all of it, you can substitute with milk or even heavy cream.
- Butter - I only use unsalted butter. That's because there is no standard amount of salt that is added to differing brands of salted butter. if you only have salted butter, cut the added salt in the recipe in half. Bonus note: my grandma often used lard or shortening to make her biscuits. Use whatever solid fat you feel like using. I've used bacon fat, butter flavored shortening, and lard and I loved all of the biscuits that resulted. I even used solid coconut oil to make vegan biscuits that are pretty tasty.
- Baking powder - Grandma just used baking powder and called these her baking powder biscuits. The only thing she used baking soda for was brushing her teeth (to which I say 😖). Since baking powder is actually derived from baking soda, I get it. Only one container to worry about expiring. I tried adding baking soda to these but I didn't notice any discernible difference in the fluffiness.
- Kosher salt - I could get into a whole thing about how kosher salt versus table salt, but as long as you're using the same salt for everything, you will come to learn how salty things are going to taste. If you aren't using Diamond crystal kosher salt (my preferred brand) start with half the amount of salt stated in the recipe. You can always sprinkle flaky salt on top if you want.
See recipe card below for a full list of ingredients and measurements.
Why Use Cast Iron?
Cast iron is a great conductor of heat, and once a cast iron pan gets hot, it stays hot. This mean faster-baking biscuits and biscuits that can be served warm from the skillet long after they are done baking.
Many Southern biscuit recipes tell you that biscuits should be placed close to each other so that they touch while they bake. The reasoning is that the biscuits actually pull up on each other as they rise, creating a taller, fluffier biscuit. Biscuits in a skillet are in even tighter quarters, and they touch the sides of the skillet, so they have nowhere to go but up.
Skillet biscuits also get crisped by the hot bottom of the cast iron pan in a way that baking pans just cannot beat. While all those biscuits are snuggled up against each other, they don't have room to get crusty around their edges, so they bake up more tender than their baking sheet counterparts.
Hot Tip: Make sure to butter the bottom and sides of the skillet before baking to get ultra-crispy sides and bottom.
Quick Recipe Video
Step-by-Step Instructions
The keyword to remember in making these soft and fluffy cast-iron biscuits is "gentle". We're going to handle our dough like it is a newborn baby. This tender touch is going to give you the best results.
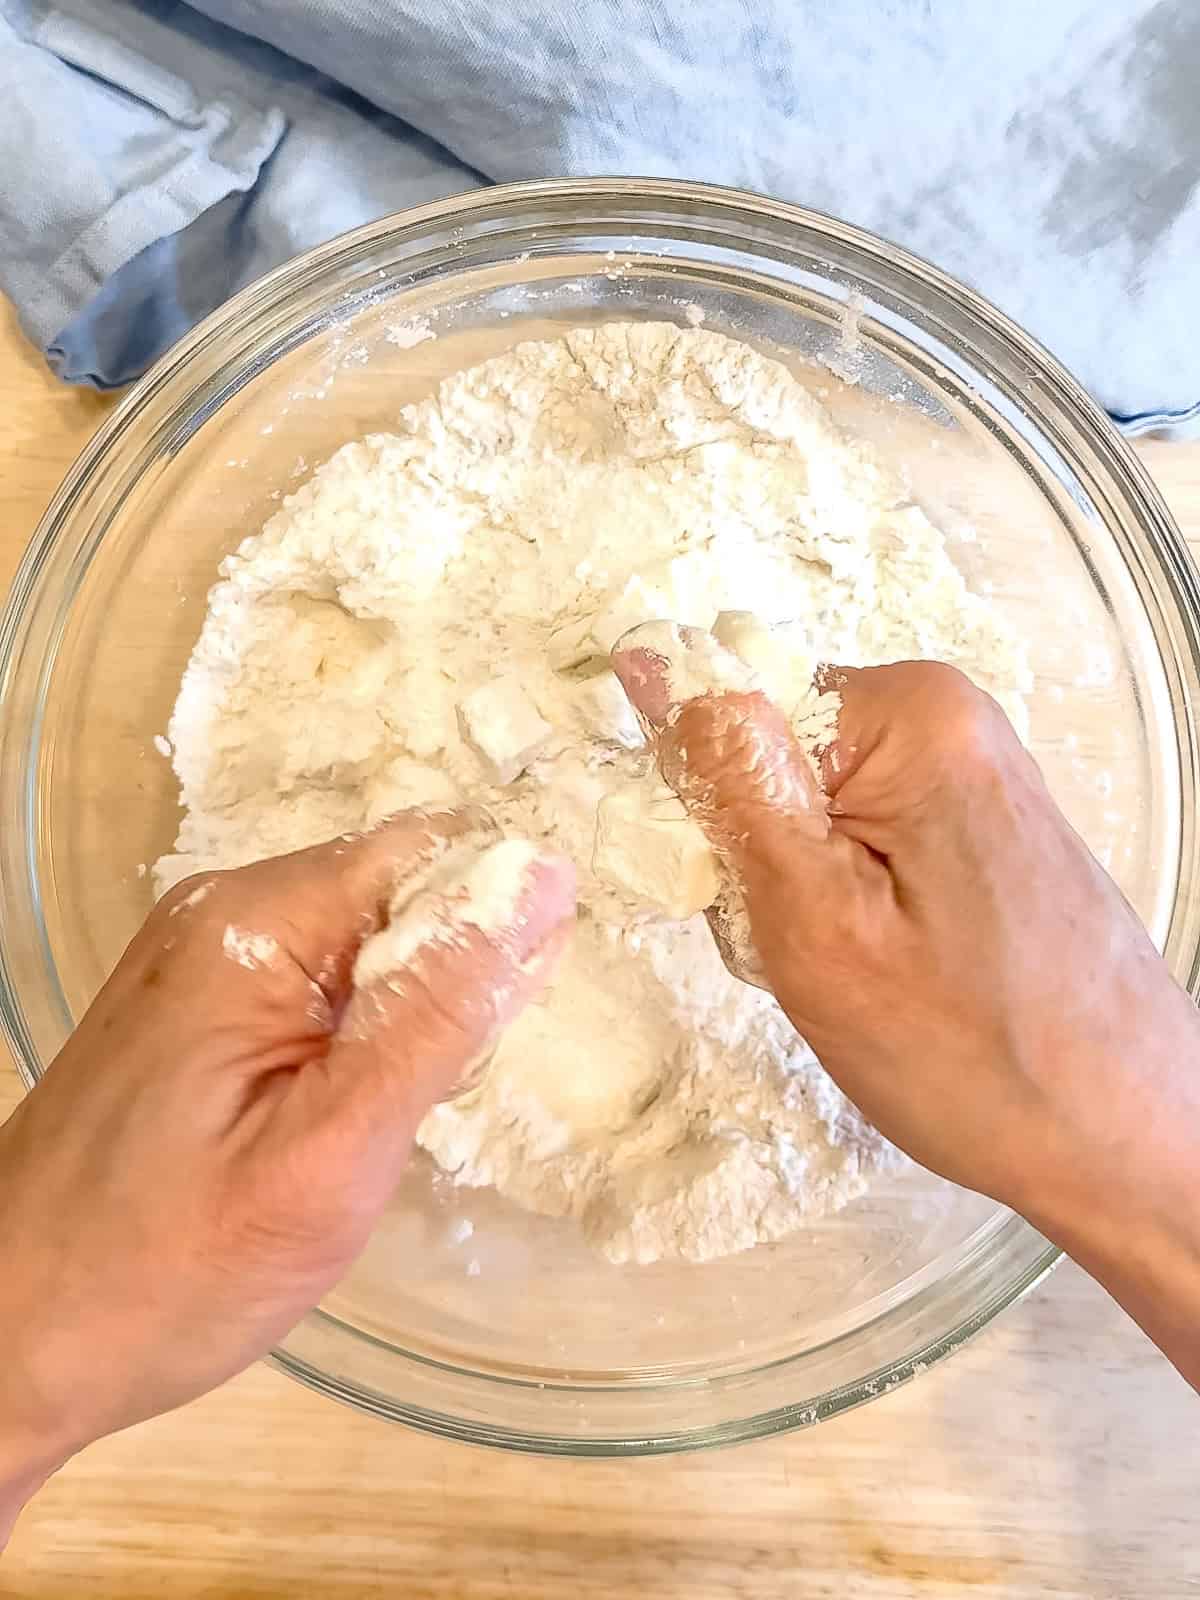
Step 1: In a large bowl combine all-purpose flour, baking powder, and kosher salt. Toss in cold cubed butter and use your fingers and a "finger-snapping motion" to cut the butter into the flour. You can also grate your butter on the large holes of a grater or pulse the mixture in a food processor about 5 to 6 times.
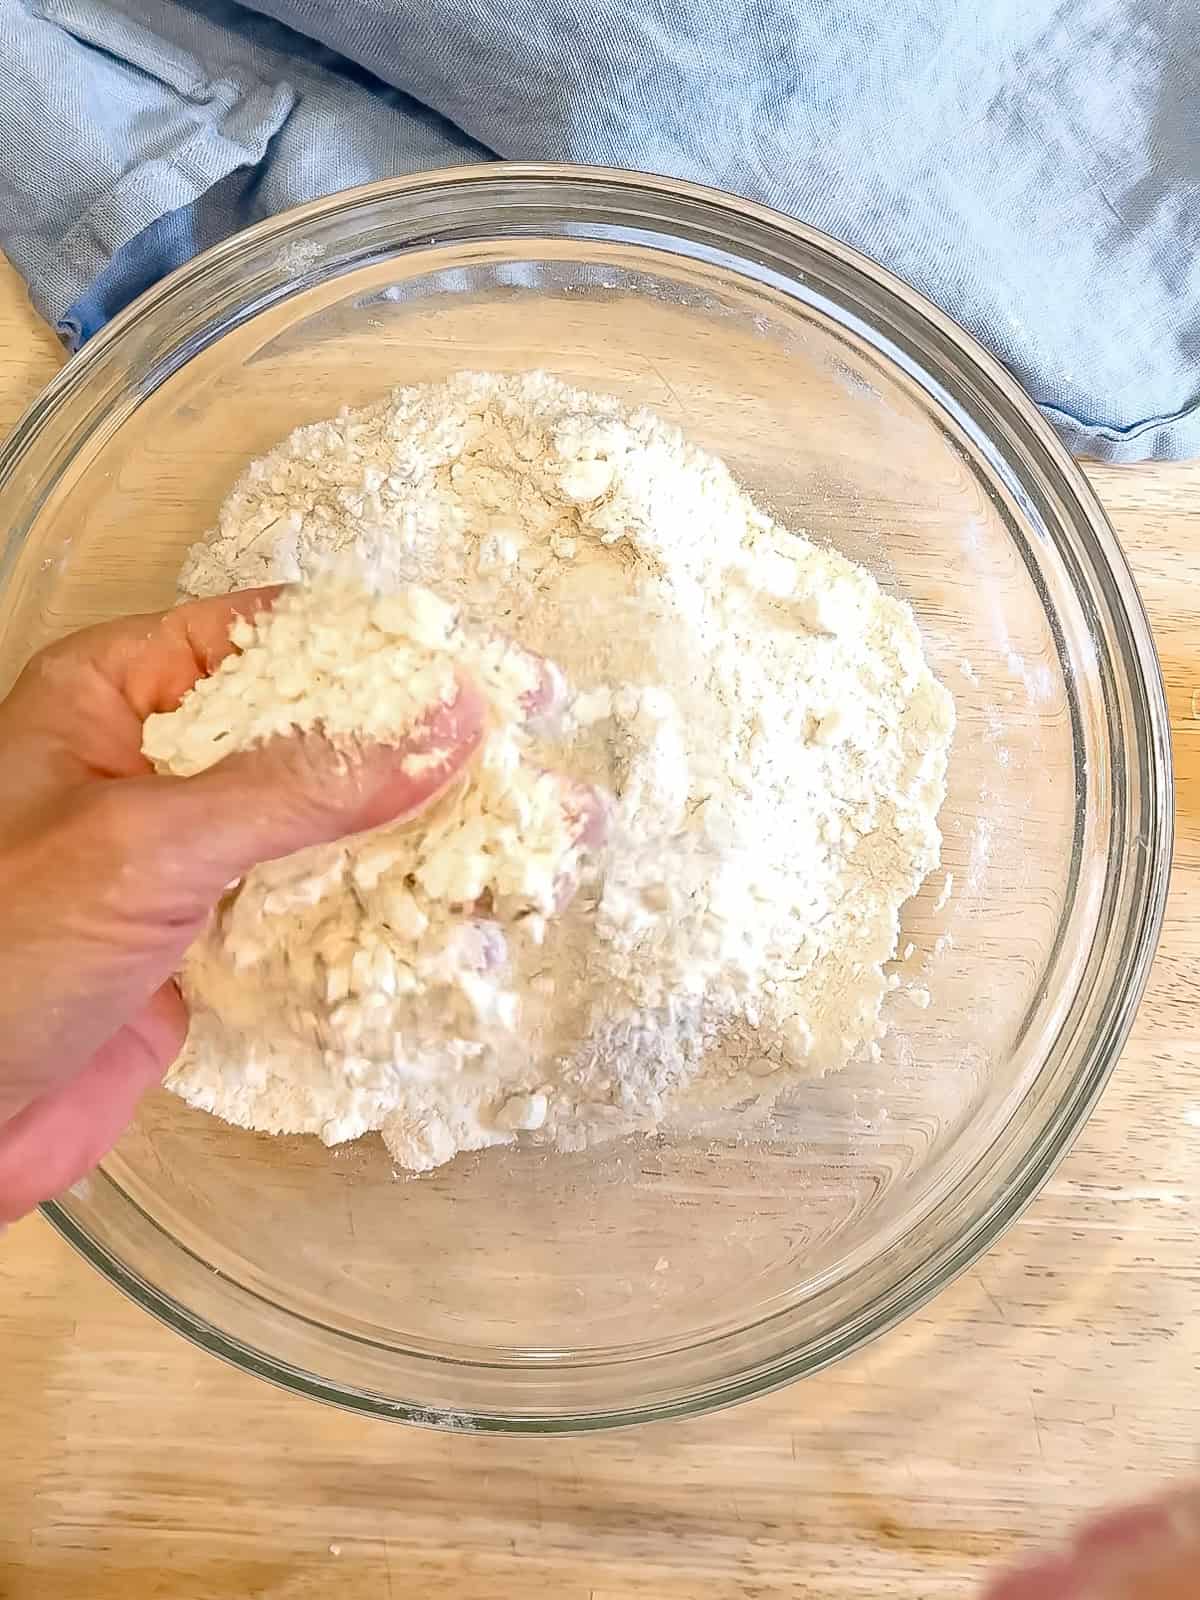
Step 2: When properly cut in, the butter should be in small pieces, no larger than a small pea, and the rest of the flour should have a cornmeal-like texture.
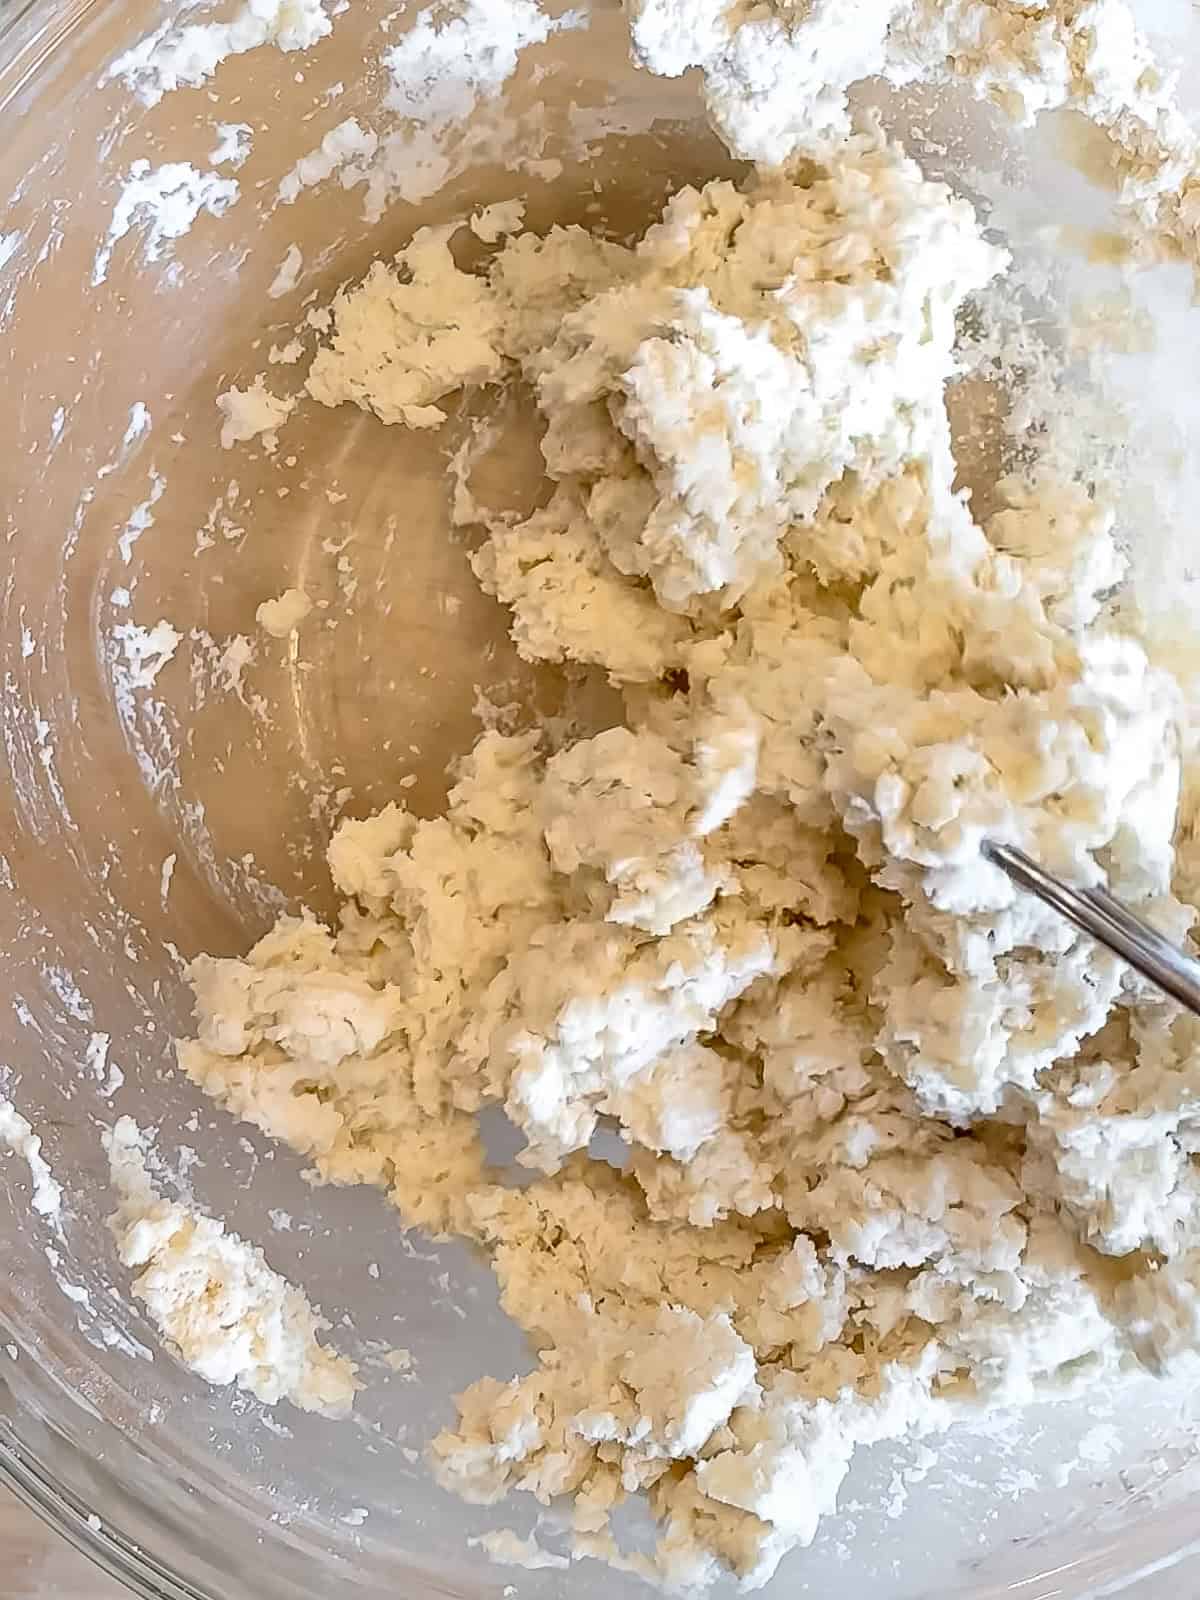
Step 3: Pour in your buttermilk and mix until you have a wet cohesive dough.
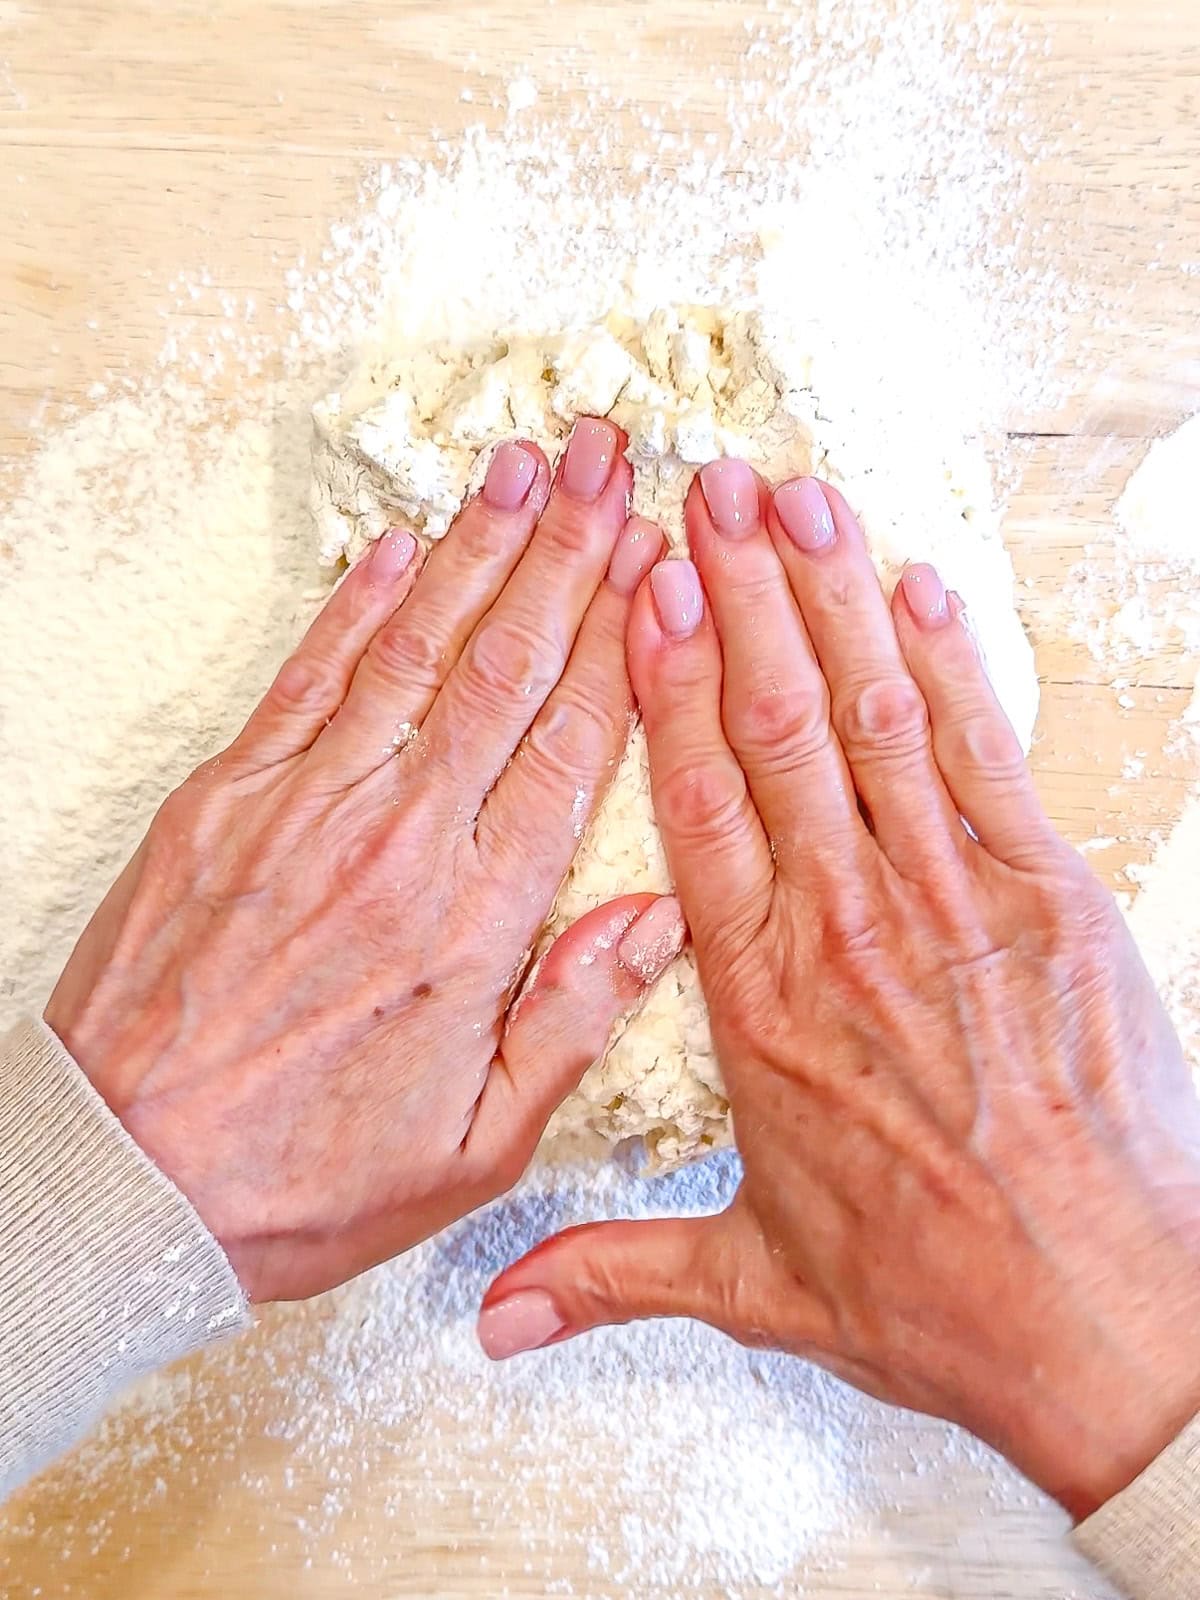
Step 4: Turn the dough out onto a floured counter, dusting your hands and the top of the dough as needed, and gently bring it together into a square-ish shape about 1 inch thick.
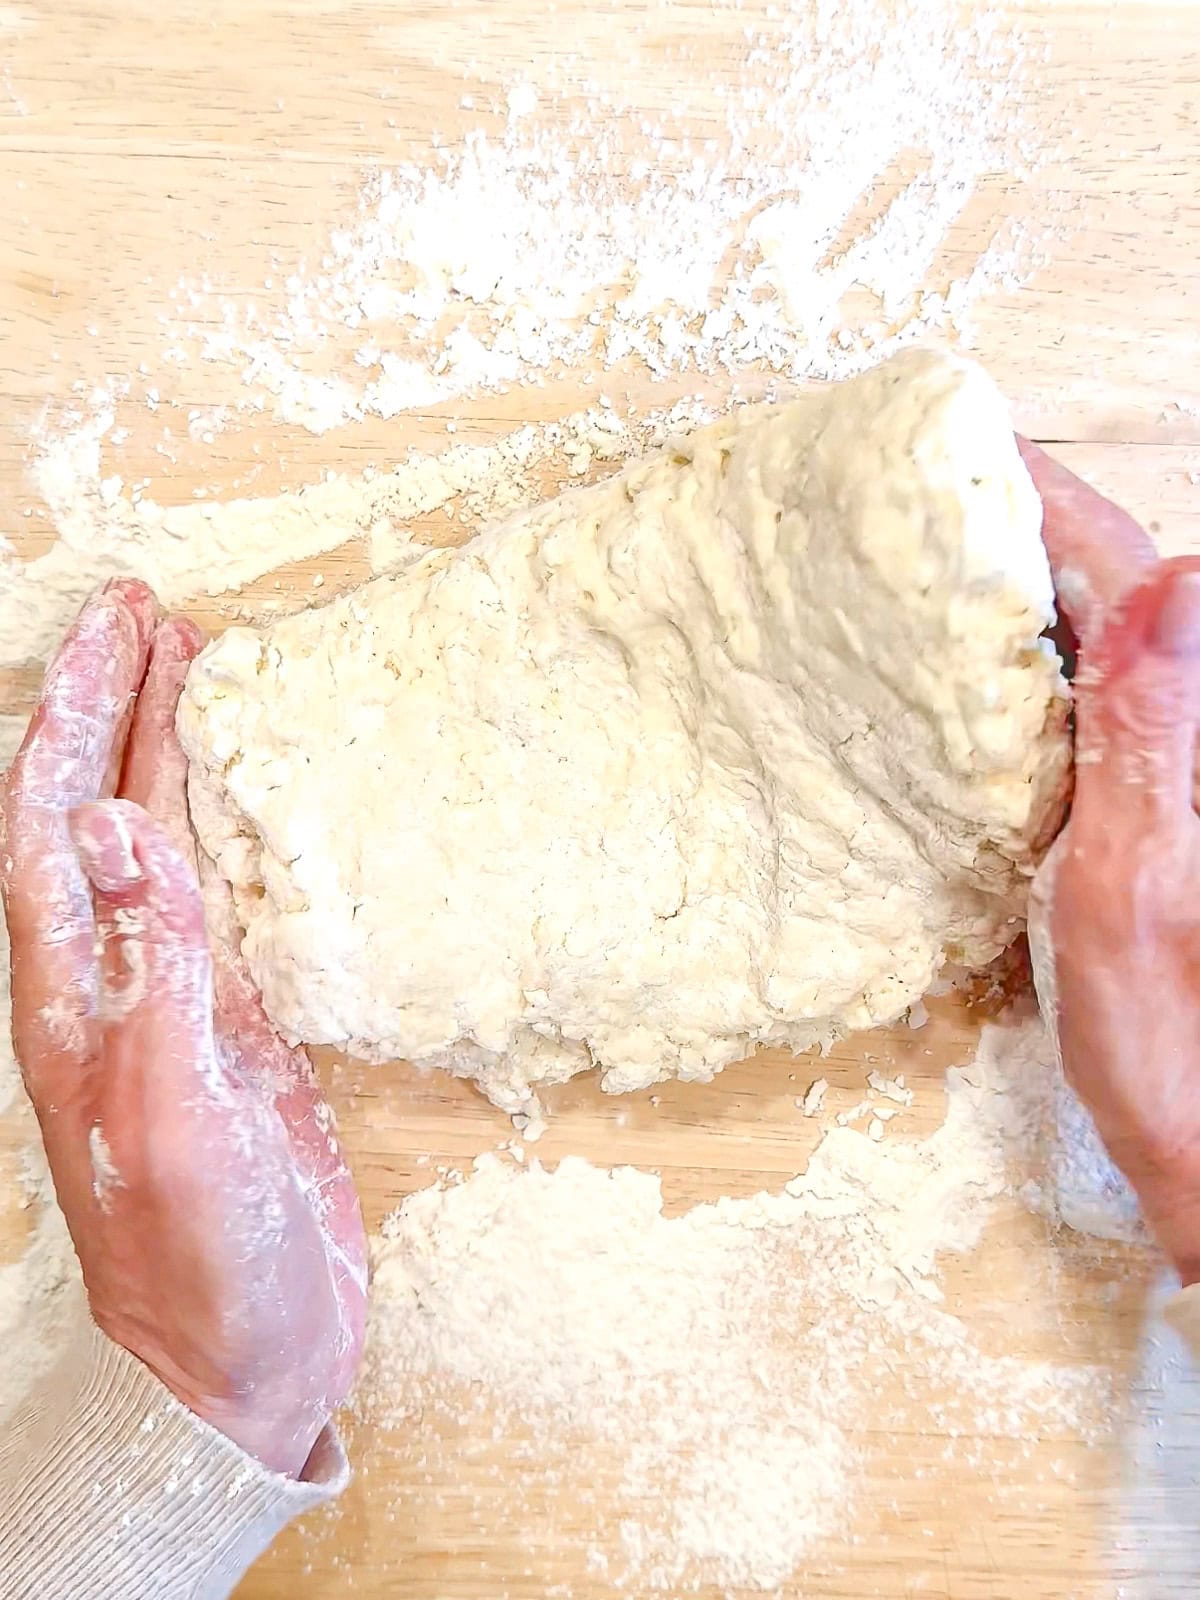
Step 5: Gently fold over the dough twice, forming a smaller square.

Step 6: Gently (I told you that was the word of the day) pat the dough back out to a 1 to 1 ½ inch thickness.

Step 7: Cut rounds out with a cookie or biscuit cutter, without twisting the cutter. If you don't have either of those, cut into squares with a sharp knife. Gently press the scraps together and cut out as many biscuits as you can. I usually get 8 to 10 two inch biscuits.
If you have time, place your biscuits on a small tray in the freezer for 15 minutes while you preheat your oven to 450°F.
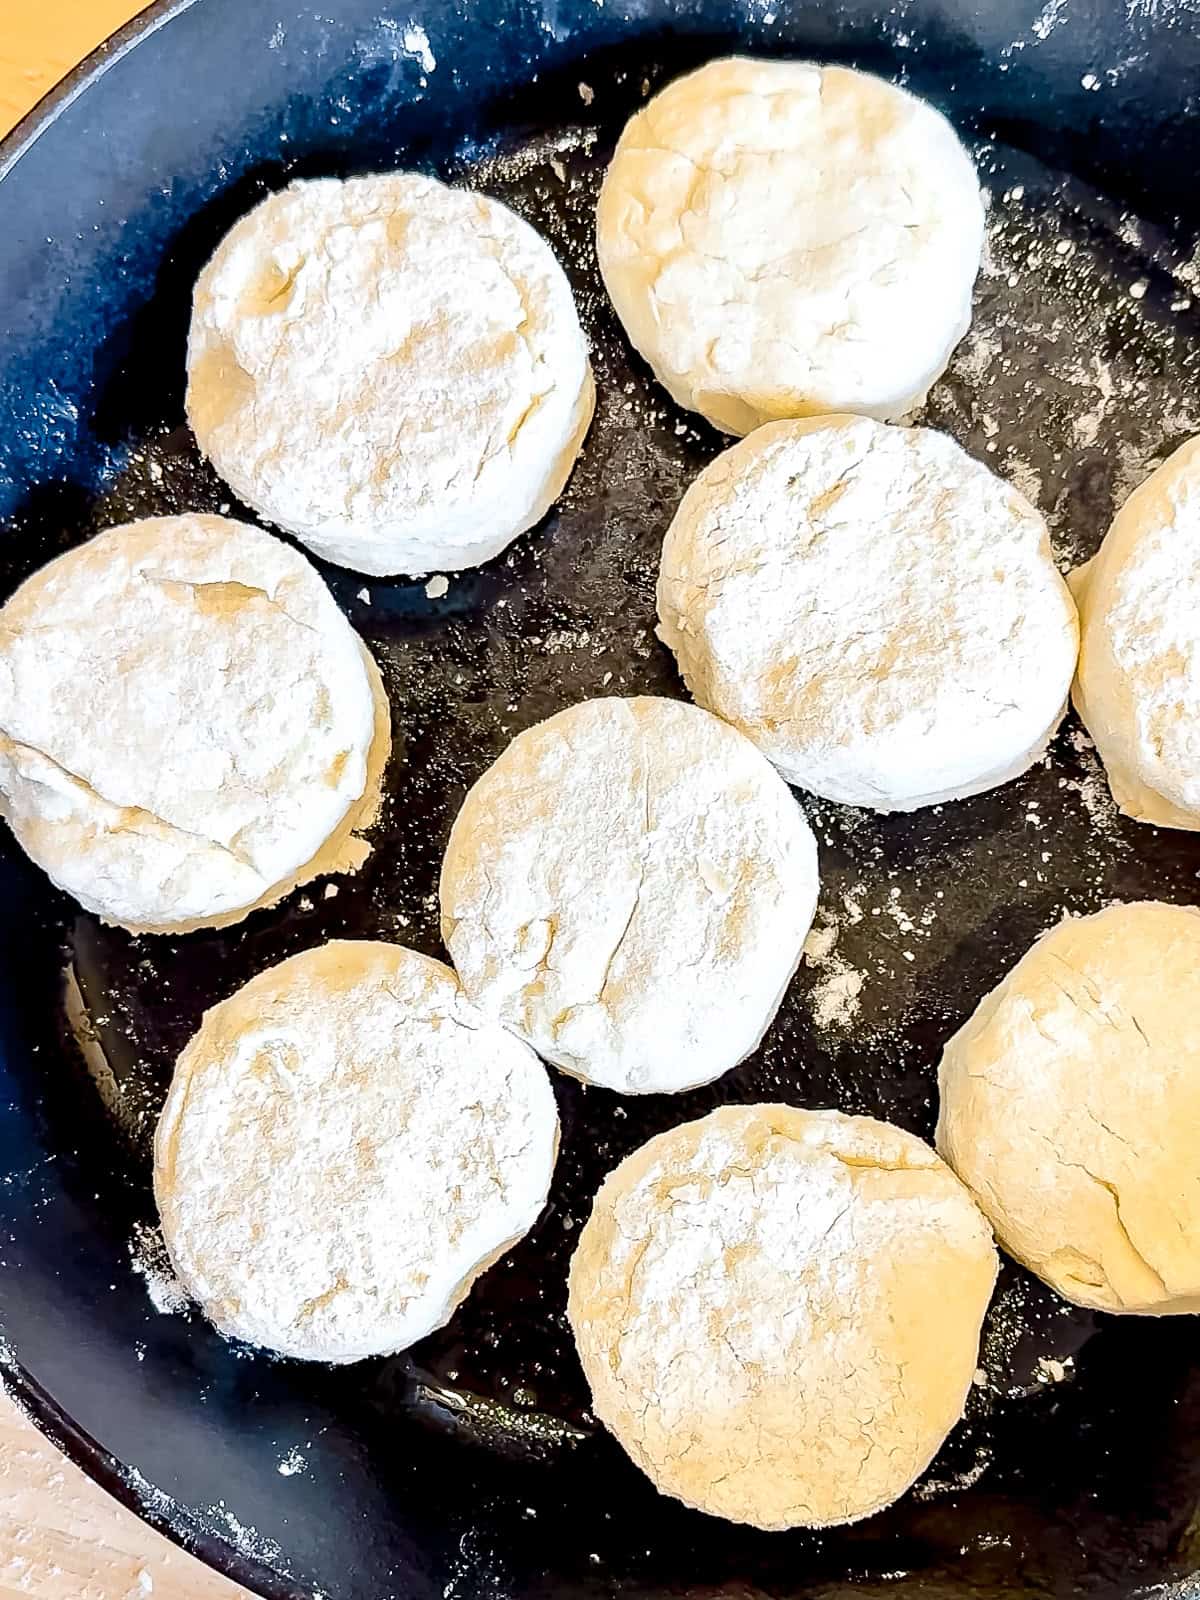
Step 8: Place the biscuits close together in a butter or bacon fat greased cast iron pan. Brush with more buttermilk, or an egg wash, and bake on a lower rack for 15 minutes. Move the pan to an upper rack for 3 minutes, or until the tops of your biscuits are golden brown. Brush with melted butter or just rub the stick of butter over the top of each biscuit.
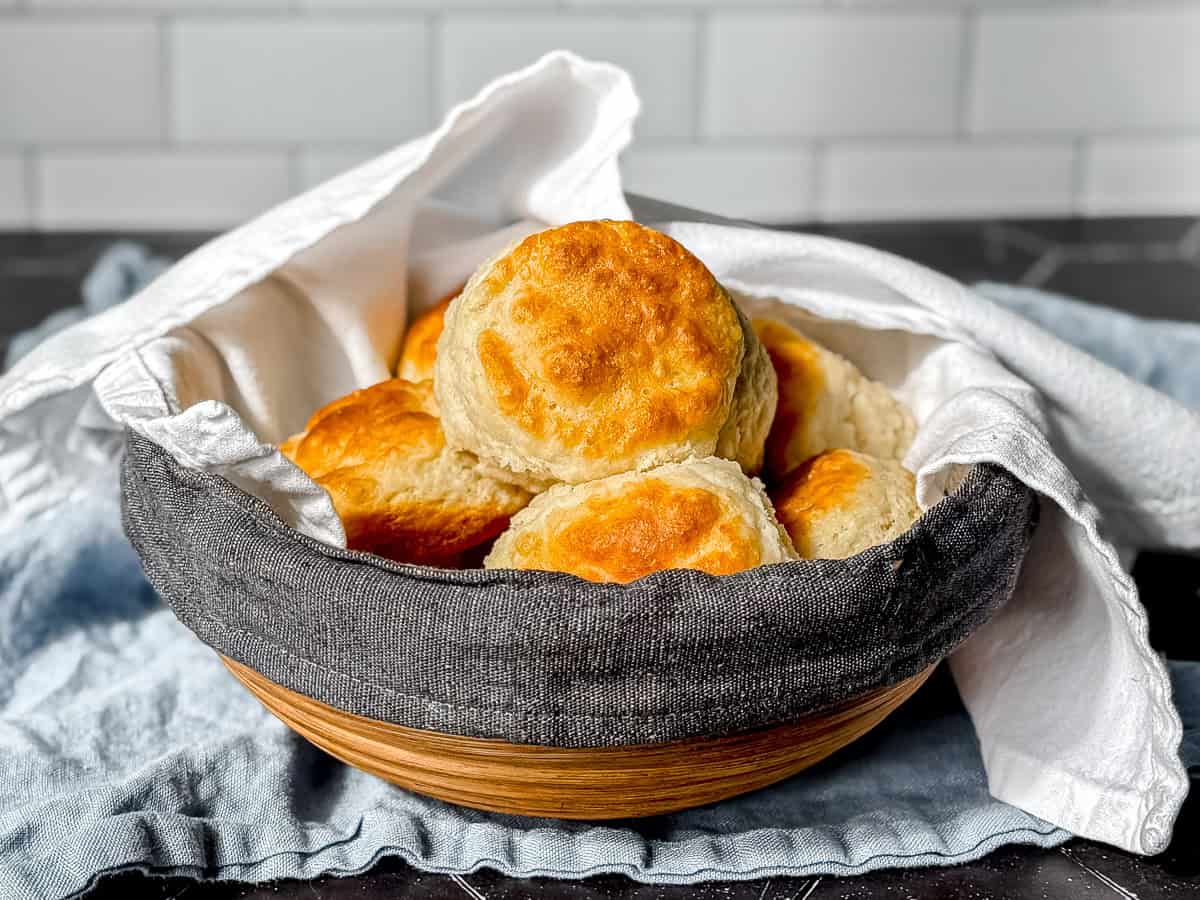
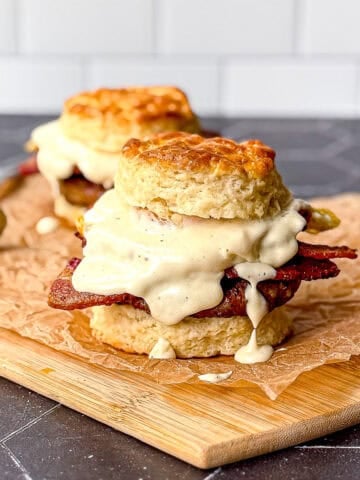
Finish: Allow to sit on the counter for 10 minutes, then serve right from the skillet while they're still warm, or place them in a bread basket and cover with a napkin, just like Grandma did. Then she would pull one open and slide a piece of country ham in the middle. I like to cover mine with country gravy and eat it with a side of skillet potatoes (I like carbs, okay? 🤷🏻♀️). The Boy likes lots of butter and honey 🍯 and flaky salt. Discover your favorite biscuit combo and tell me about it in the comments!
Tips to the Softest Biscuits
Whether you are an expert biscuit maker or this is your first biscuit adventure, we all can benefit from a few tips from a friend who's been making biscuits for a loooong time:
- Handle with care: Biscuit dough loves a gentle touch. Mix just until it comes together, and when you pat it out, keep it thick and light-handed. Overworking the dough makes for tough biscuits, and nobody wants that.
- Keep 'em cozy: If you don't have a cast iron skillet, no problem! A round cake pan, pie plate, or even a square baking dish works just fine. The key is to arrange the biscuits so they're almost touching so they can help each other rise high and fluffy.
- Fat is your friend: Whether you're using a skillet or another pan, always grease the bottom and sides first. I like butter or bacon fat, but shortening, lard, or even cooking spray will do. It gives the biscuits that golden, crispy crust that makes them extra special.
- Chill if you can: If you have a few extra minutes, before you put them in the skillet, pop your cut biscuits in the fridge or freezer while the oven heats. Cold butter creates steam as the biscuits bake, giving you extra lift and fluff.
- Hot oven, happy biscuits: Make sure your oven is fully preheated before those biscuits go in. That blast of heat helps them puff up tall and proud.
Serving Suggestion

My father recently passed away but I was lucky enough to be able to cook breakfast for him a few times in his last days. In my mind he will always be a biscuits and gravy, sunny side up eggs, crispy hash browns kind of guy. it was a darn good plate of food and my favorite as well. Try it for yourself!
Recipe FAQs
Absolutely! A round cake pan, pie plate, or square baking dish will do the trick. The key is to keep the biscuits close together so they rise up nice and fluffy.
There might be a few reasons. First, be sure your baking powder is fresh (it loses its oomph over time). Then, be sure to use a gentle hand and don't overwork the dough. Finally, be sure your oven is fully preheated so that the baking powder and the steam from the butter have the best environment to work their magic.
Keep leftover biscuits in an airtight container at room temperature for a day or two. For longer storage you can pop them into the freezer for up to a month. To reheat, wrap in foil and warm in a 300ºF oven until heated through, or split open and toast them in your cast iron pan for a crispy treat.

Did you try this recipe?
Please consider leaving a comment with a ⭐️ rating below and tell me all about it! It helps me to continue to improve my content and lets others know what you think!
I appreciate it so much!
-Cynthia
📖 Recipe
My Grandma's Fluffy Cast Iron Biscuits
Equipment
Ingredients
- 2 cups (240 g) all-purpose flour
- 1 tablespoon (12 g) baking powder
- 1 teaspoon (6 g) kosher salt
- 8 tablespoons (113 g) unsalted butter cold and cubed
- 1 cup (240 g) buttermilk plus more for brushing (optional)
Instructions
- In a large bowl, whisk together the flour, baking powder, and salt.
- Add the cold, cubed butter to the flour mixture. Use a pastry cutter, fork, or your fingertips to work the butter in until it looks like coarse crumbs with some pea-sized bits of butter remaining.
- Pour in the buttermilk and stir gently, just until the dough comes together. Be careful not to overmix.
- Turn the dough out onto a lightly floured surface. Pat it into a rectangle about 1 inch thick. Gently fold the dough over onto itself 2 times to create layers. Pat it back down to about 1 inch thick.
- Use a floured biscuit cutter to cut out biscuits, pressing straight down without twisting. Place them close together in a well-buttered 10-inch cast-iron skillet (or another baking dish if needed).
- Put the biscuits on a small baking tray and pop in the fridge or freezer while the oven preheats to 450ºF. This helps keep the butter cold for extra fluffy biscuits.
- Place biscuits close togther in a greased cast iron pan. If you'd like, brush the tops of the biscuits with buttermilk or an egg wash (1 egg beaten with a splash of water) for a golden, shiny top.
- Bake for 15 minutes on a low rack, then move them to an upper rack for 3 more minutes, or until the tops are golden and the biscuits are tall and fluffy.
- Brush with melted butter or just rub the stick of butter over the top of each biscuit.
- Allow to sit on the counter for 10 minutes, then serve right from the skillet while they're still warm, or place them in a bread basket and cover with a napkin, just like Grandma did.

Cynthia says
These are exactly like the biscuits my grandma would serve on Sunday mornings!