

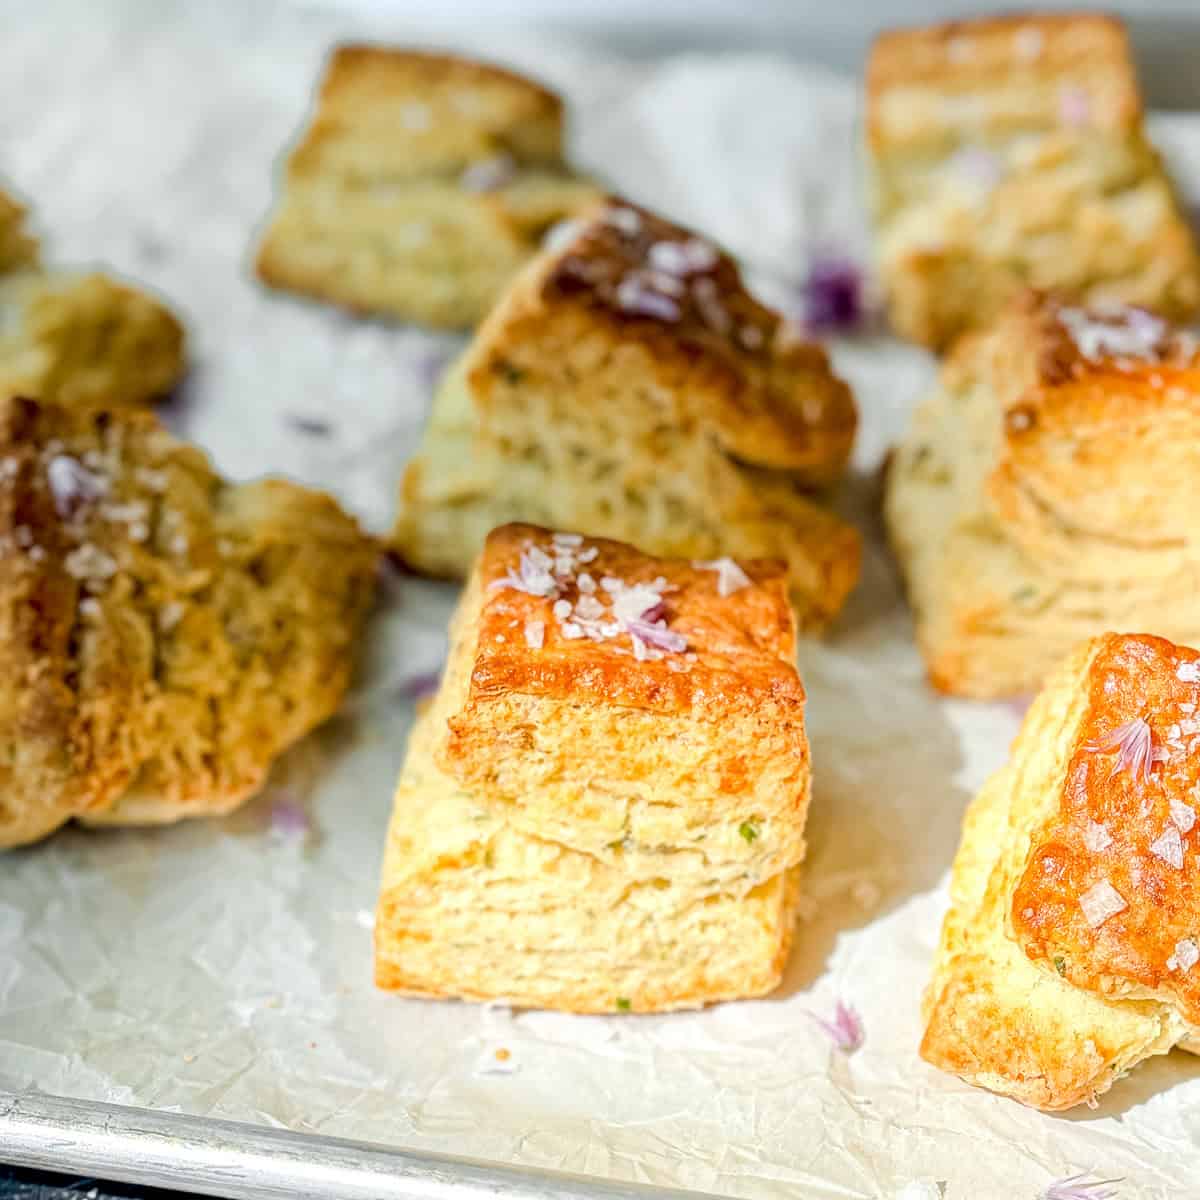
When your chive plant suddenly turns into a purple pom-pom factory, these Chive Blossom Biscuits are the best reason to grab your scissors and start snipping. The biscuits come together in about 45 minutes, not counting the drying time for the salt, and they are exactly the kind of spring recipe that makes you feel very smug about owning a plant you almost can't kill.
Save this recipe for later
Enter your email and I'll send this recipe straight to your inbox.
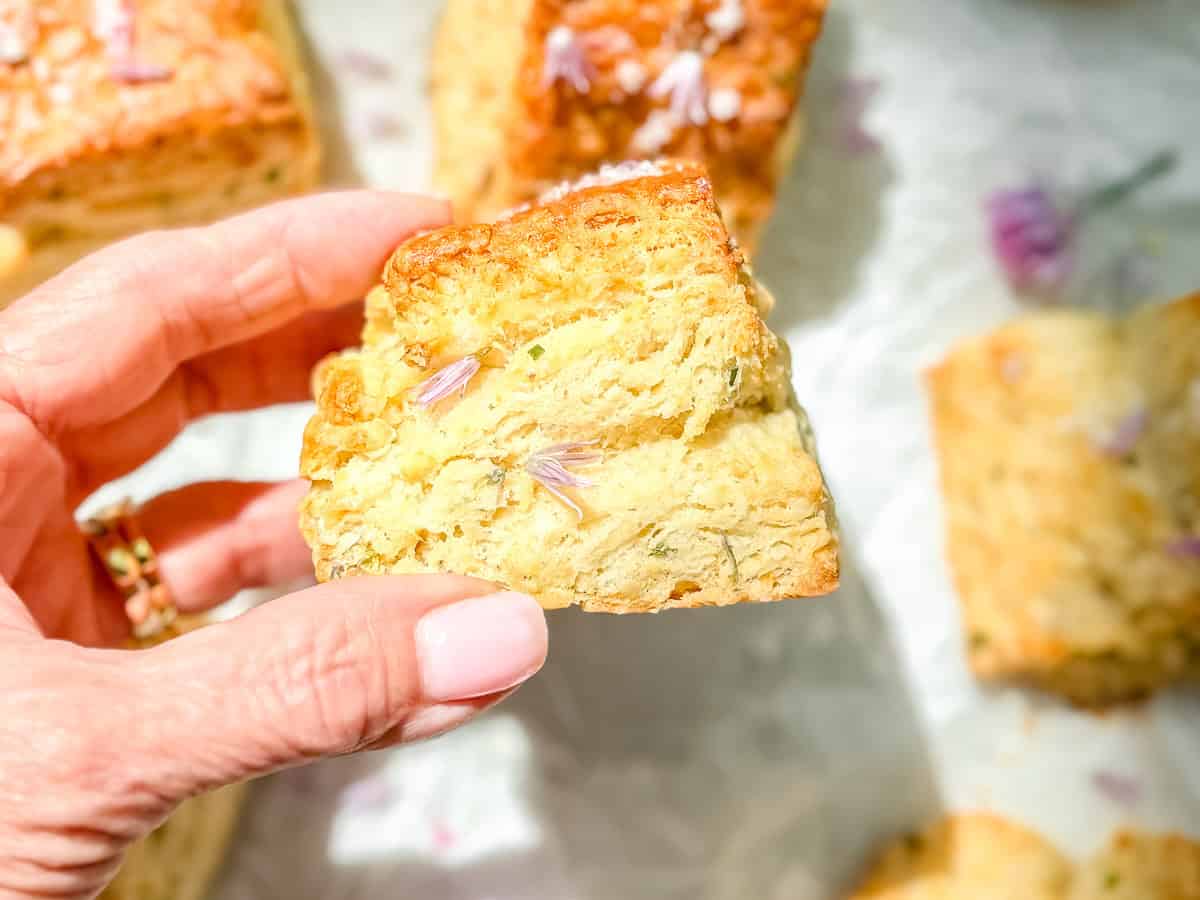
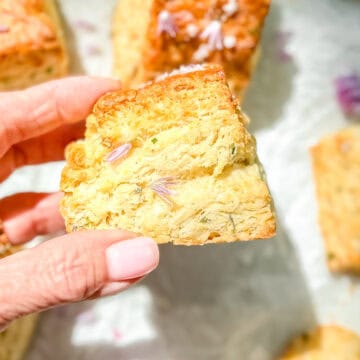
As someone who inadvertently kills almost everything she tries to plant, I am so thrilled that every year my chive plant just keeps coming back. These Chive Blossom Biscuits are my love letter to my (limited) green thumb: tender, buttery, flaky, and filled with little purple edible flowers that peek through the layers like they knew they were supposed to be photographed.
The chive blossoms bring a mild onion flavor that is softer and more floral than regular chives, while the chopped chives make sure the flavor actually shows up and does not disappear into the biscuit dough.
After trimming every blossom off my chive plant, I immediately decided that one chive blossom recipe was simply not enough. So yes, we are making biscuits, but we are also making chive blossom salt and chive blossom butter because when the garden hands you flowers that taste like spring onions, I do not stop at "cute garnish." I go full biscuit trifecta.
Jump to:
What are chive blossoms?
Chive blossoms are the edible purple flowers that grow on common chive plants in late spring and early summer. They taste lightly oniony, a little grassy, and more delicate than the green chive leaves.
The flowers are edible, but the blossom stems are usually tough and fibrous, so for this recipe you want to use the flower petals and the tender green chive leaves only. Use them while the flowers are fresh, bright, and fully open.
How to harvest, clean, and prep chive blossoms
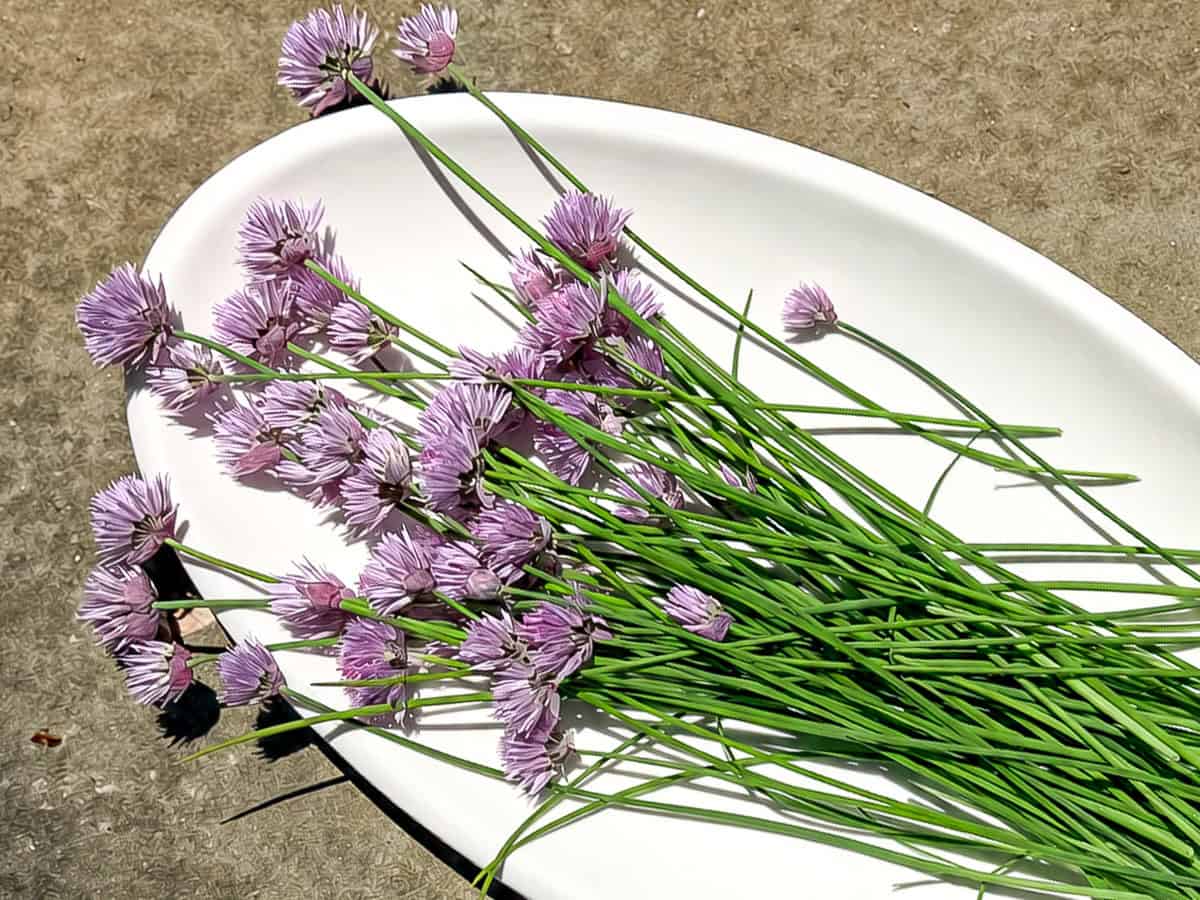
Use clean scissors or garden snips to cut each blossom stem all the way down near the base of the plant. The blossom stems are tough, hollow, and fibrous, so you do not want them in your biscuits.
Shake the blossoms gently to remove any dirt or tiny garden visitors. Rinse briefly in cold water, then dry completely on a clean towel. Once dry, pull or snip the purple florets from the flower head and discard the thick stem.
Ingredients & Substitutions
The photo below shows what you need to prepare these chive blossom biscuits. I will go over the major ingredients and how they can be substituted if needed.
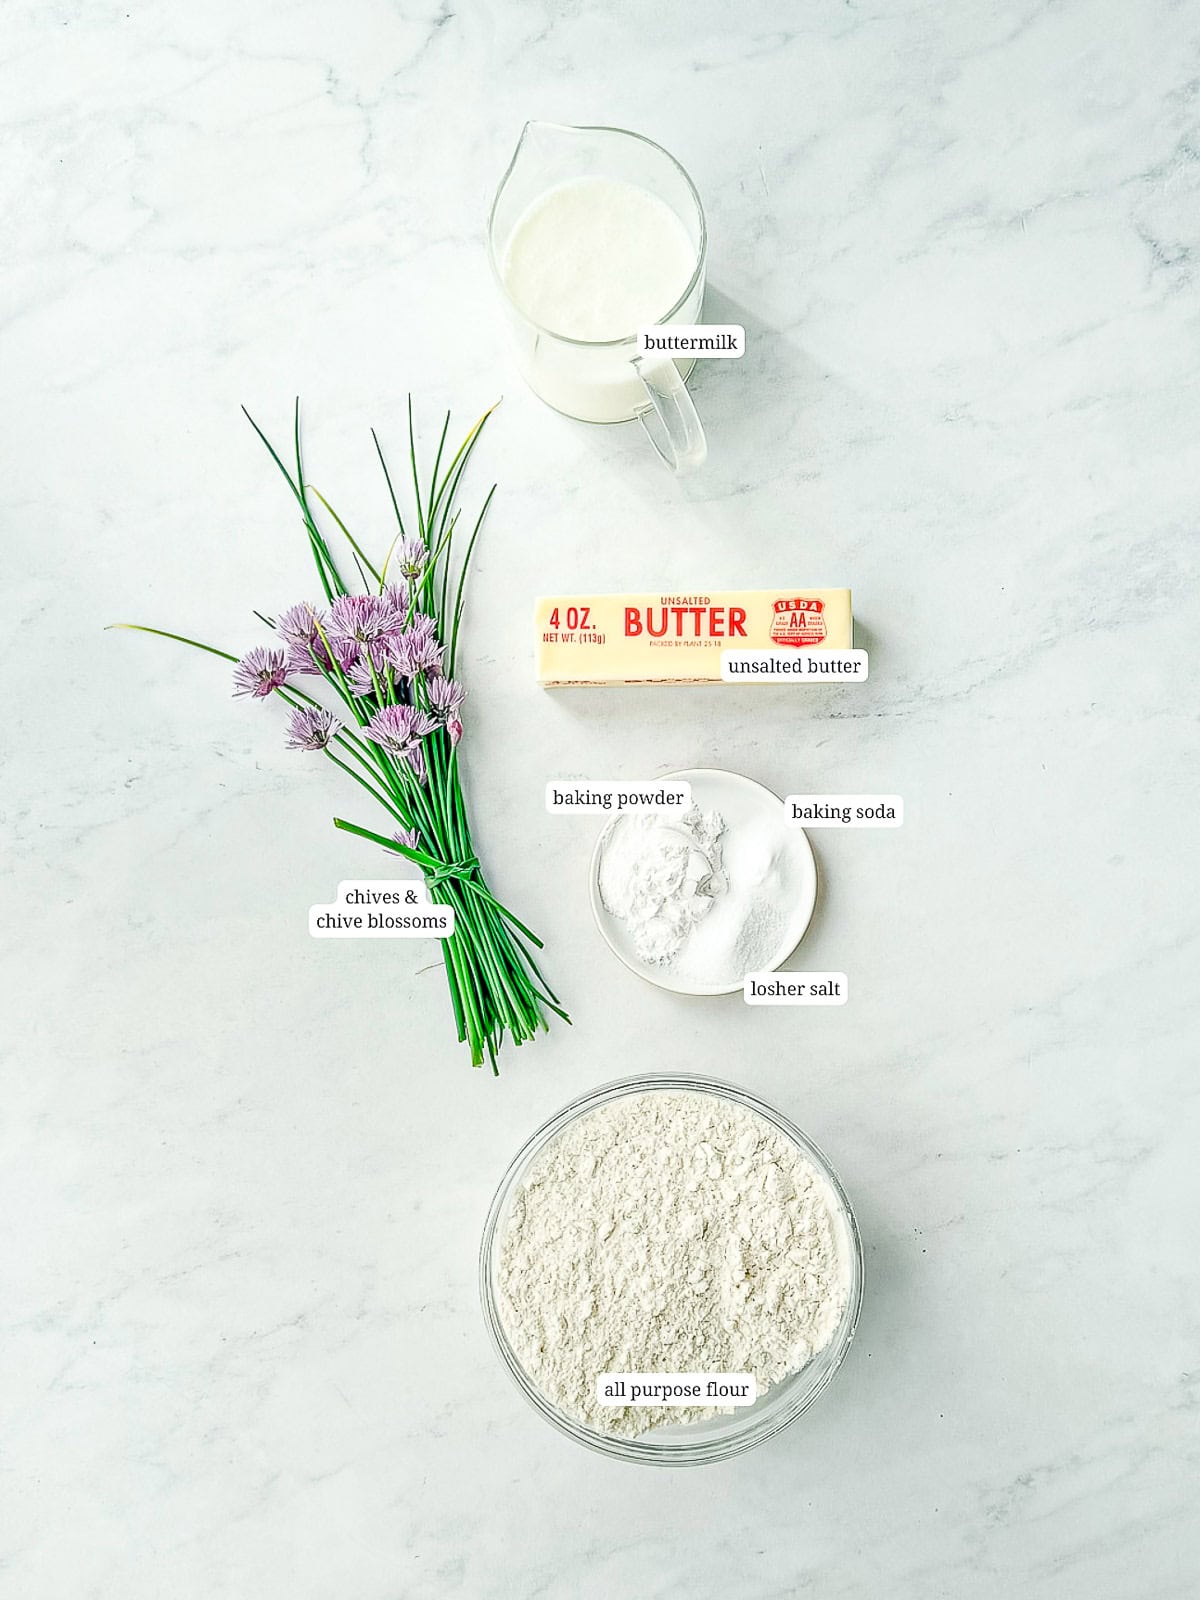
- All-purpose flour - Regular all-purpose flour gives these biscuits structure while keeping them tender. I do not recommend using bread flour because it can make biscuits tougher.
- Baking powder and baking soda - These help the biscuits rise. Make sure your baking powder is fresh because sad baking powder makes sad biscuits, and nobody invited those.
- Unsalted butter - Very cold butter creates steam in the oven, which helps build those flaky layers. You can grate the butter or cut it into small cubes.
- Chive blossoms - Use the tiny purple florets from fresh chive blossoms, not the tough blossom stems. If you do not have blossoms, you can make a regular chive biscuit, but it will not have the same delicate floral onion flavor or gorgeous purple flecks.
- Fresh chives - Chopped chives back up the blossom flavor and make sure every bite tastes herby and savory.
- Buttermilk - Cold buttermilk brings tang and tenderness. If you do not have buttermilk, use kefir, plain yogurt thinned with a little milk, or sour cream thinned with a little milk.
See recipe card below for a full list of ingredients and measurements.
Variations
I love these just the way they are, but there are technique changes that you can make if you want to make these a little more quick and easy to get on the table:
- Drop biscuits: Add two more tablespoons of buttermilk and mix into a more moist dough. Use a medium scoop (like an ice cream scoop) or a couple of spoons to place dollop of dough onto the sheet pan. Bake as directed.
- Fluffy biscuits: Skip the cut and stacks and just fold the dough over onto itself a few times to bring it together. Use a sharp biscuit cutter to cut out biscuits and bake shoulder to shoulder and a cast-iron pan or even a cake pan.
- Pot pie: Use the drop biscuit method to drop smaller scoops of biscuit dough on top of a traditional pot pie filling. Bake as directed for an amazing biscuit topped pot pie.
Cynthia's Recipe Review
I thought I was just trimming my chive plant and somehow ended up with biscuits, salt, butter, and a whole new personality. The biscuits I made are flaky, savory, springy, and just a little bit show-offy, because I'm a fancy gardening lady now. Like I'm actually thinking about getting a straw gardening hat and one of those little knee cushions.

Quick Recipe Video
Step-by-Step Instructions
Use this section for process shots, alternating between the step and image showing the step. Users don't like seeing process shots cluttering up the recipe card, so include your process shots here. Use 1a.,1b.../2a.,2b..., etc if numerous steps. Otherwise number them individually 1.,2.,3....
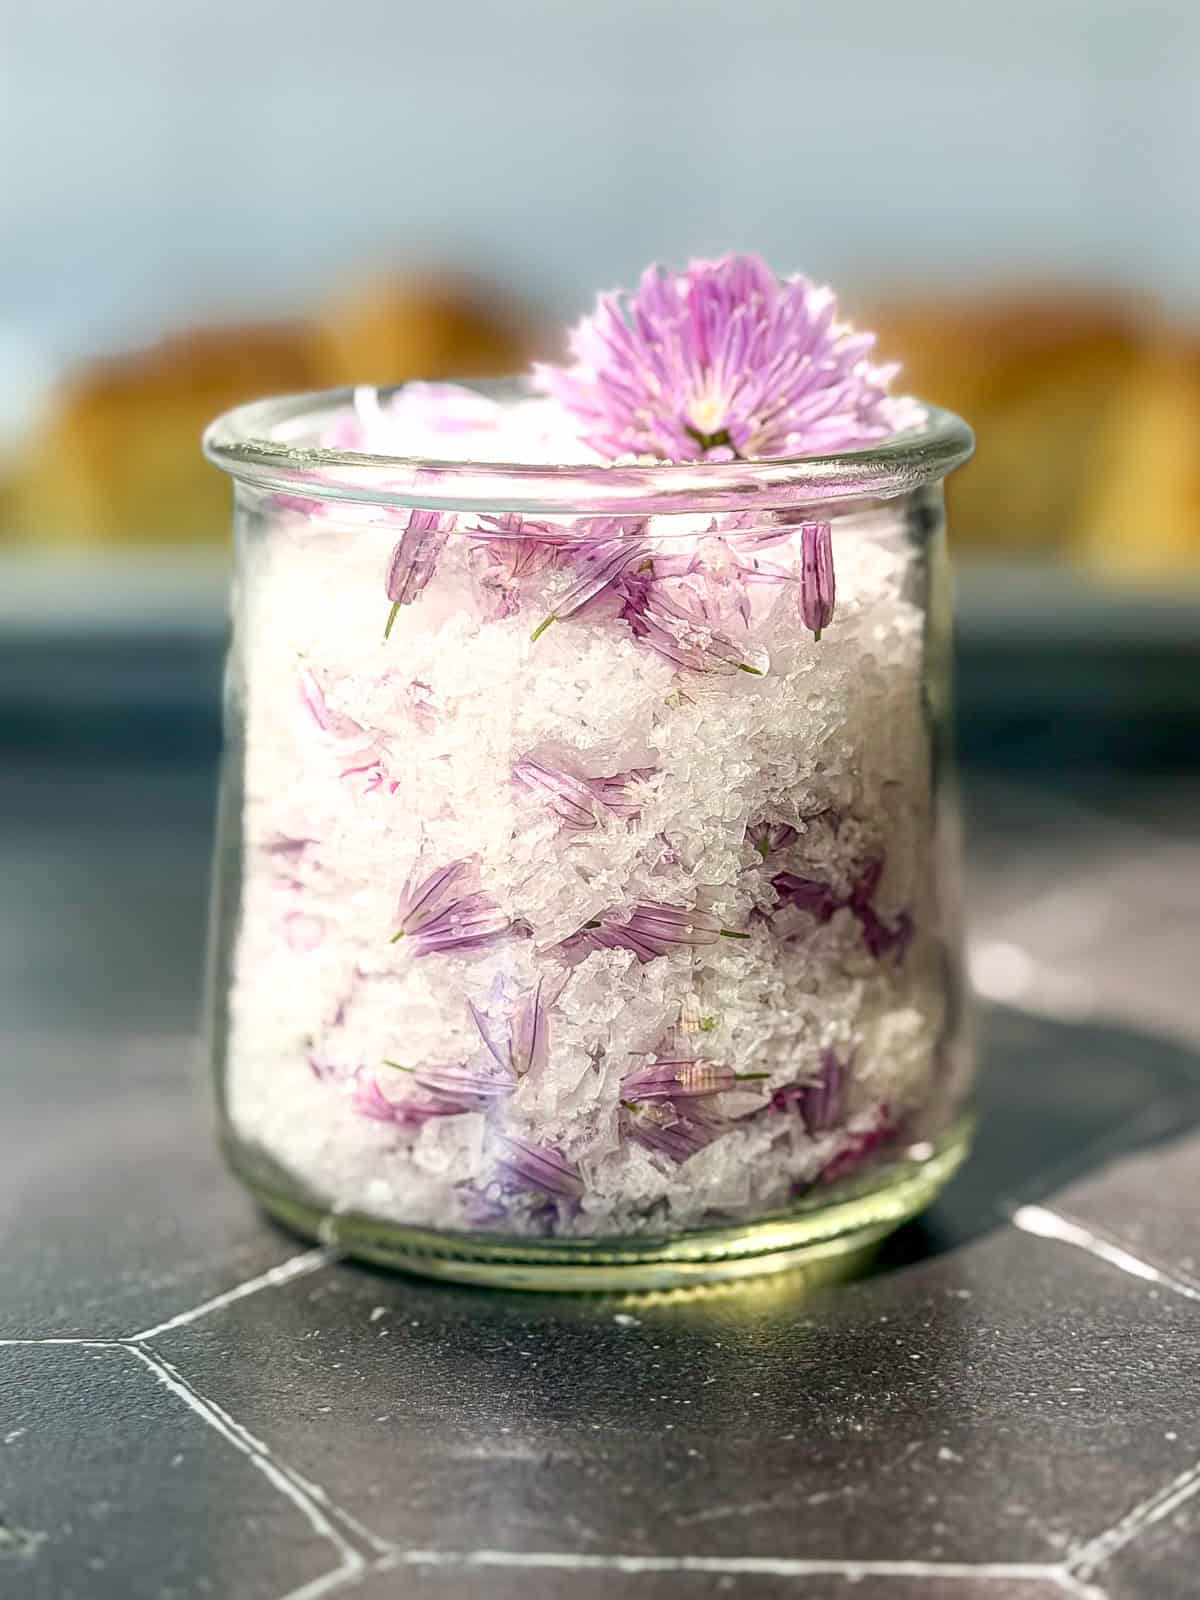
Step 1: In a small bowl, combine the chive blossom petals with flaky sea salt. Spread the mixture onto a sheet pan and allow it to dry for 24 hours. Transfer to an airtight jar and store in a cool pantry for up to 3 months.
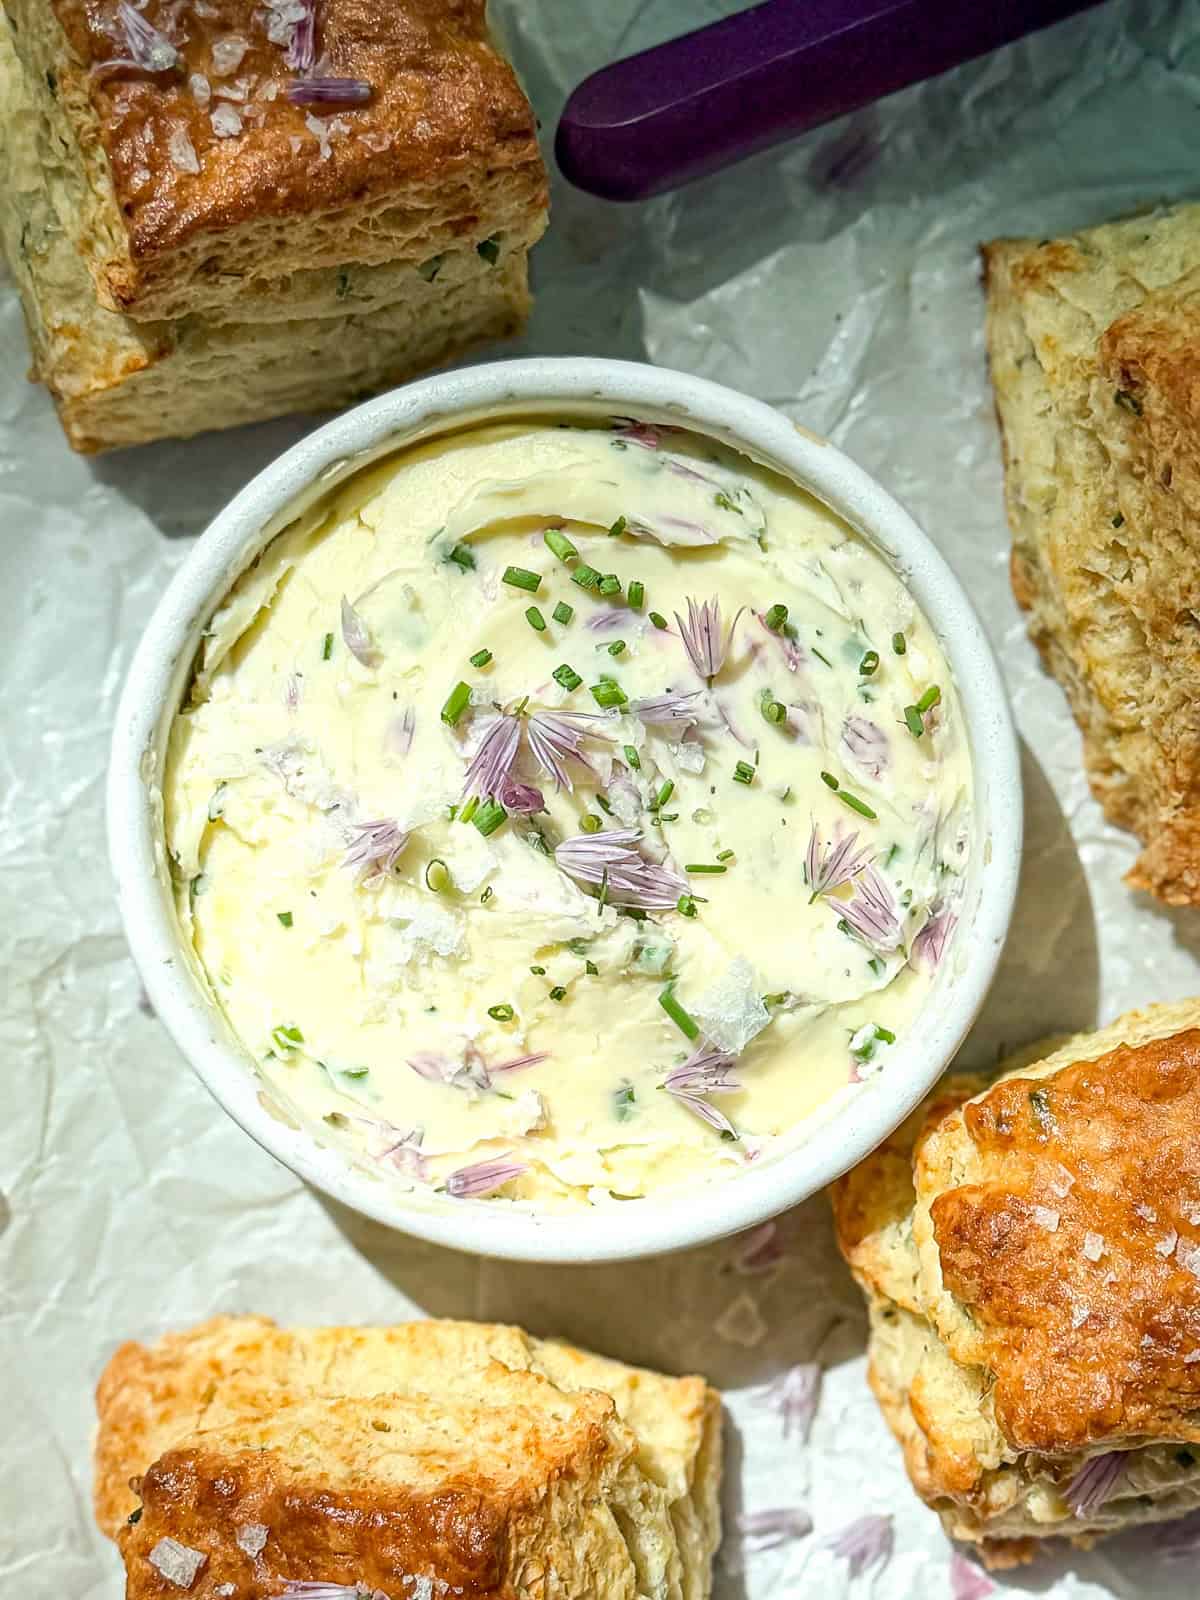
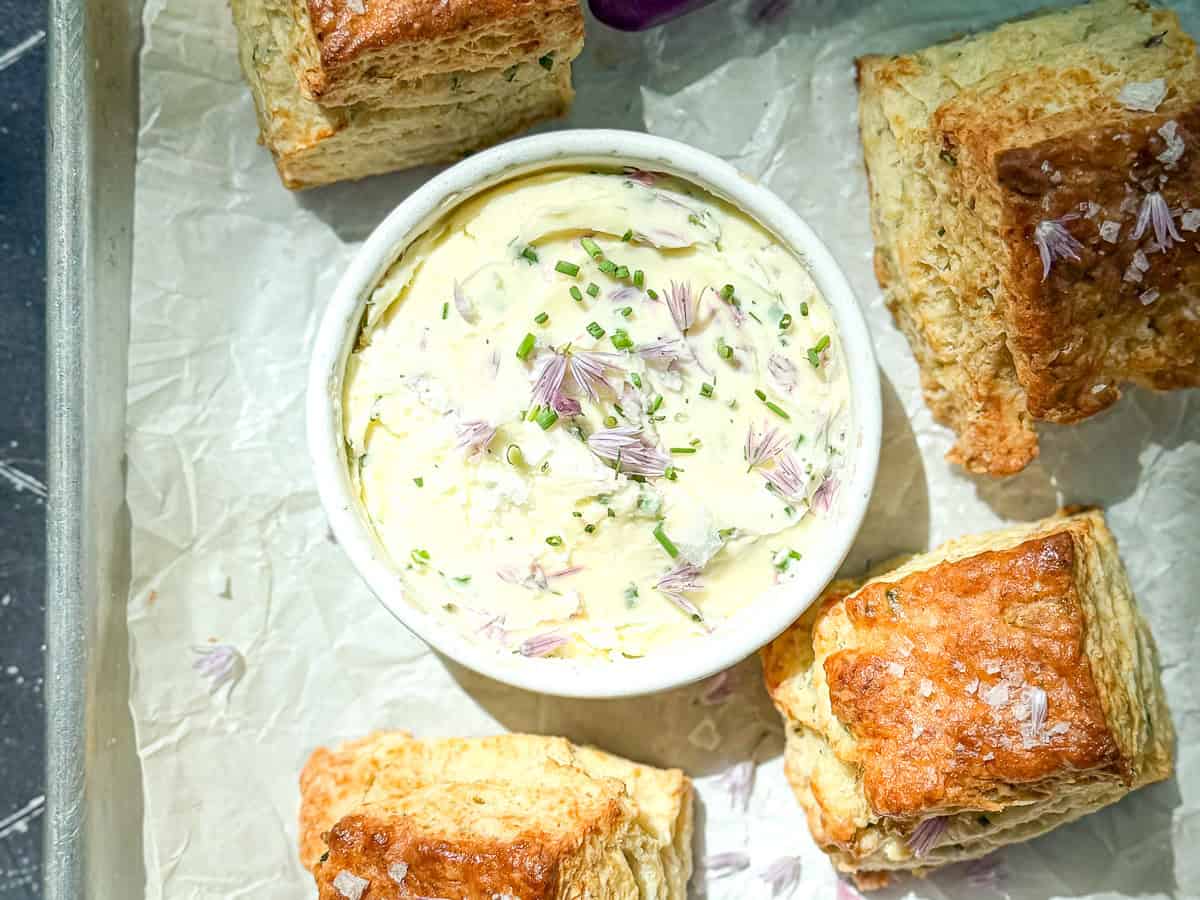
Step 2: Place softened butter in a small bowl. Add chive blossom petals, chopped chives, and chive blossom salt (or regular salt). Use a wooden spoon or spatula to mix until completely combined. Place in an airtight container and refrigerate for up to 2 weeks.
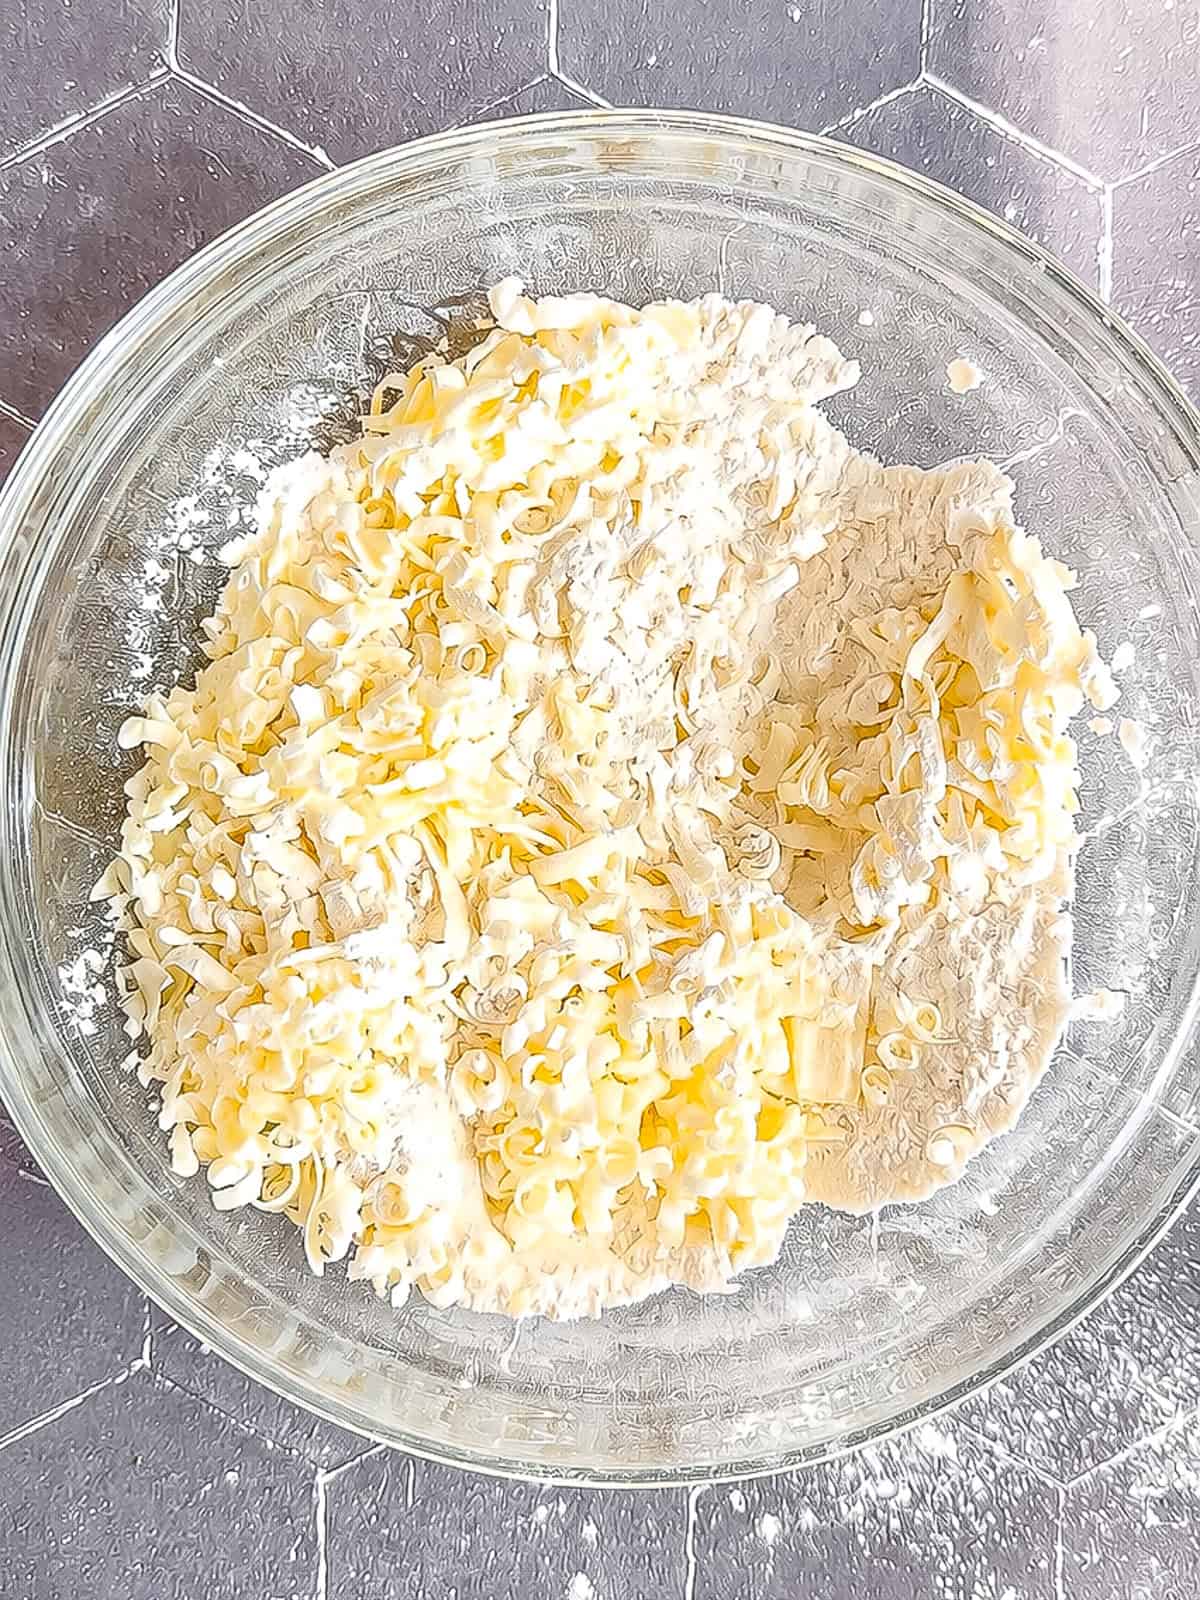
Step 3: Whisk the flour, baking powder, baking soda, and salt in a mixing bowl. Add the cold grated butter.
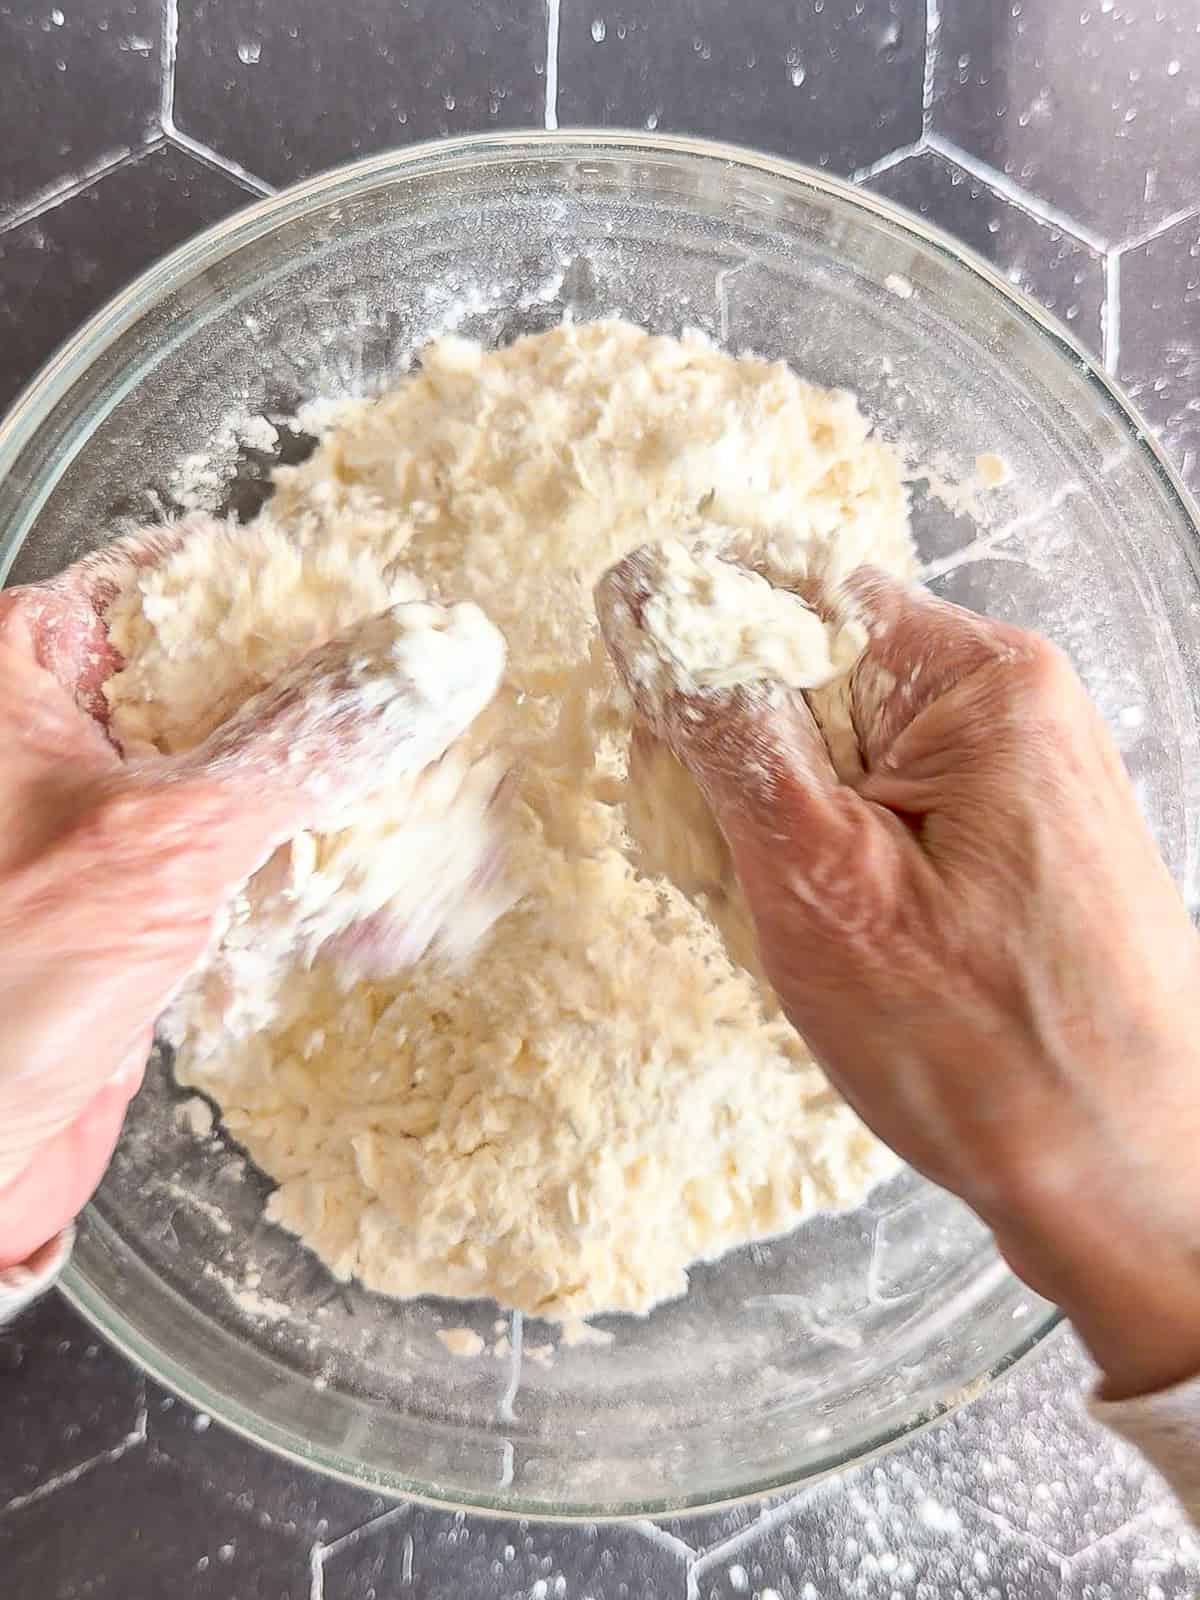
Step 4: Use finger-snapping motions to cut the butter into the dry ingredients until the mixture has flat, crumbly pieces of butter throughout. (this can also be done in the food processor)
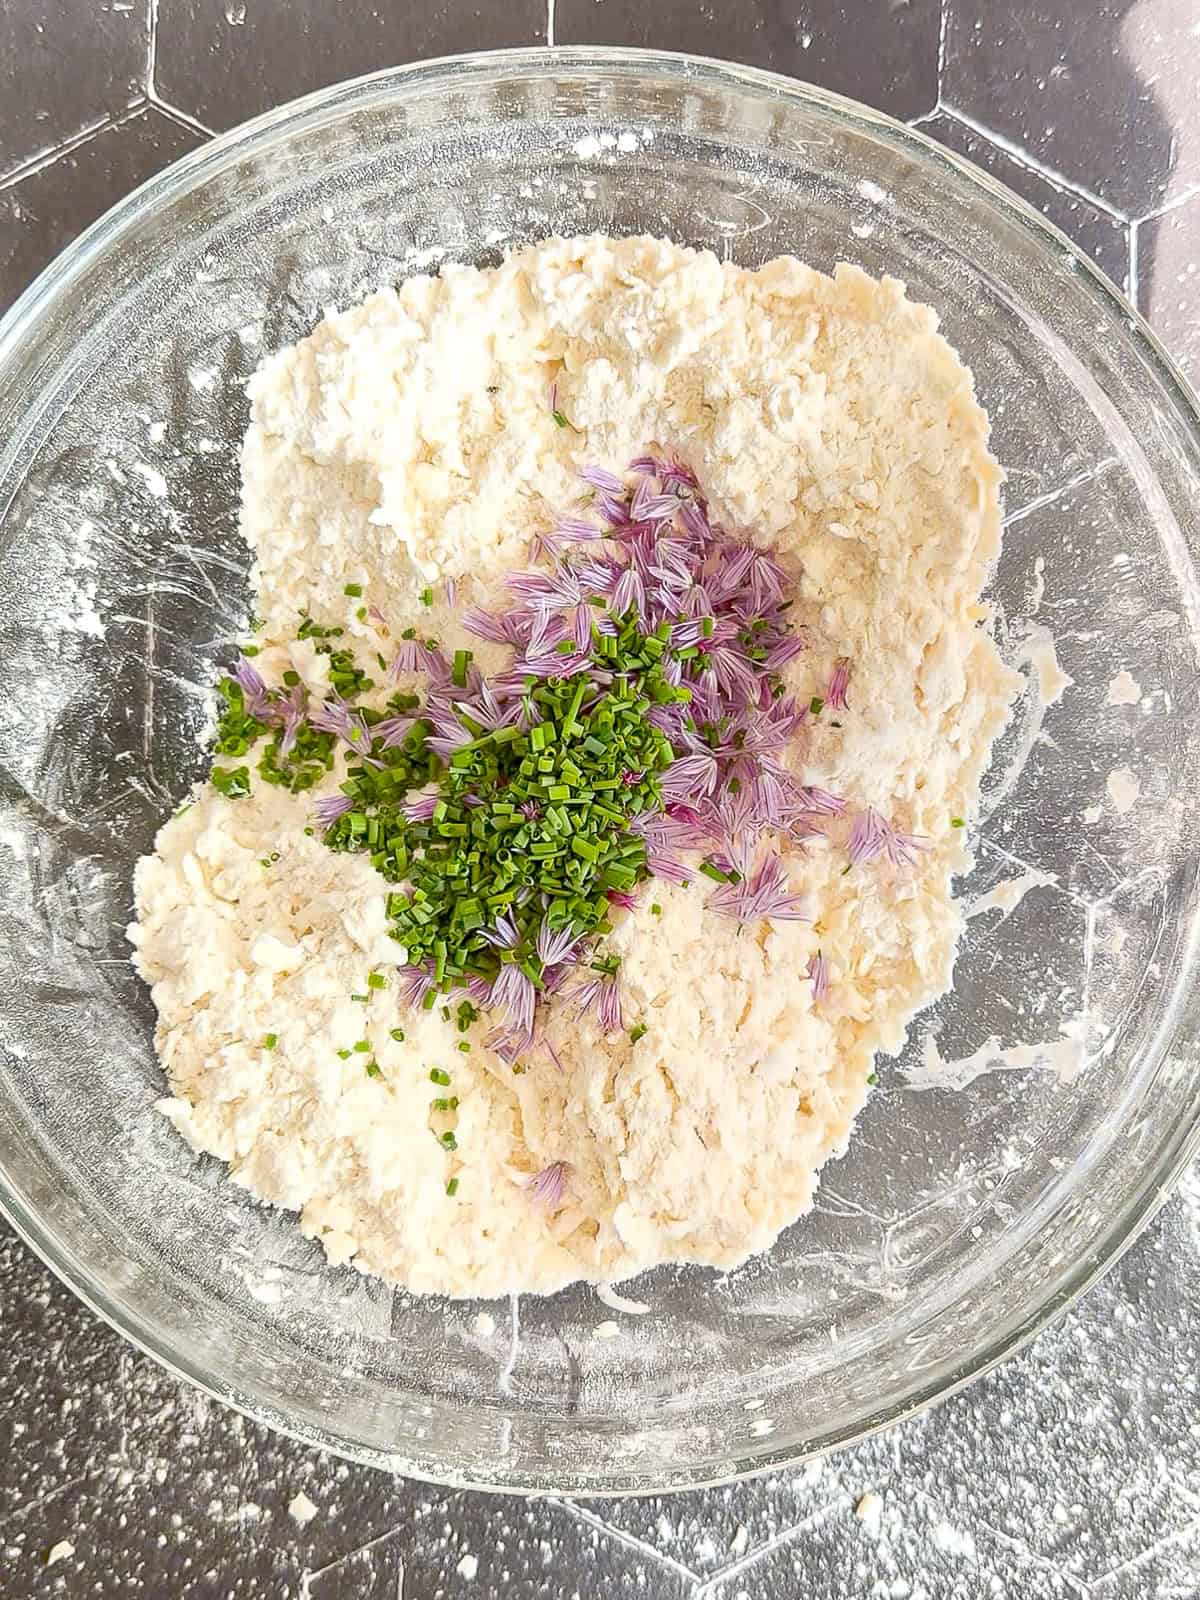
Step 5: Mix in the chive blossom petals and chopped chives. Pour the cold buttermilk evenly over the top.
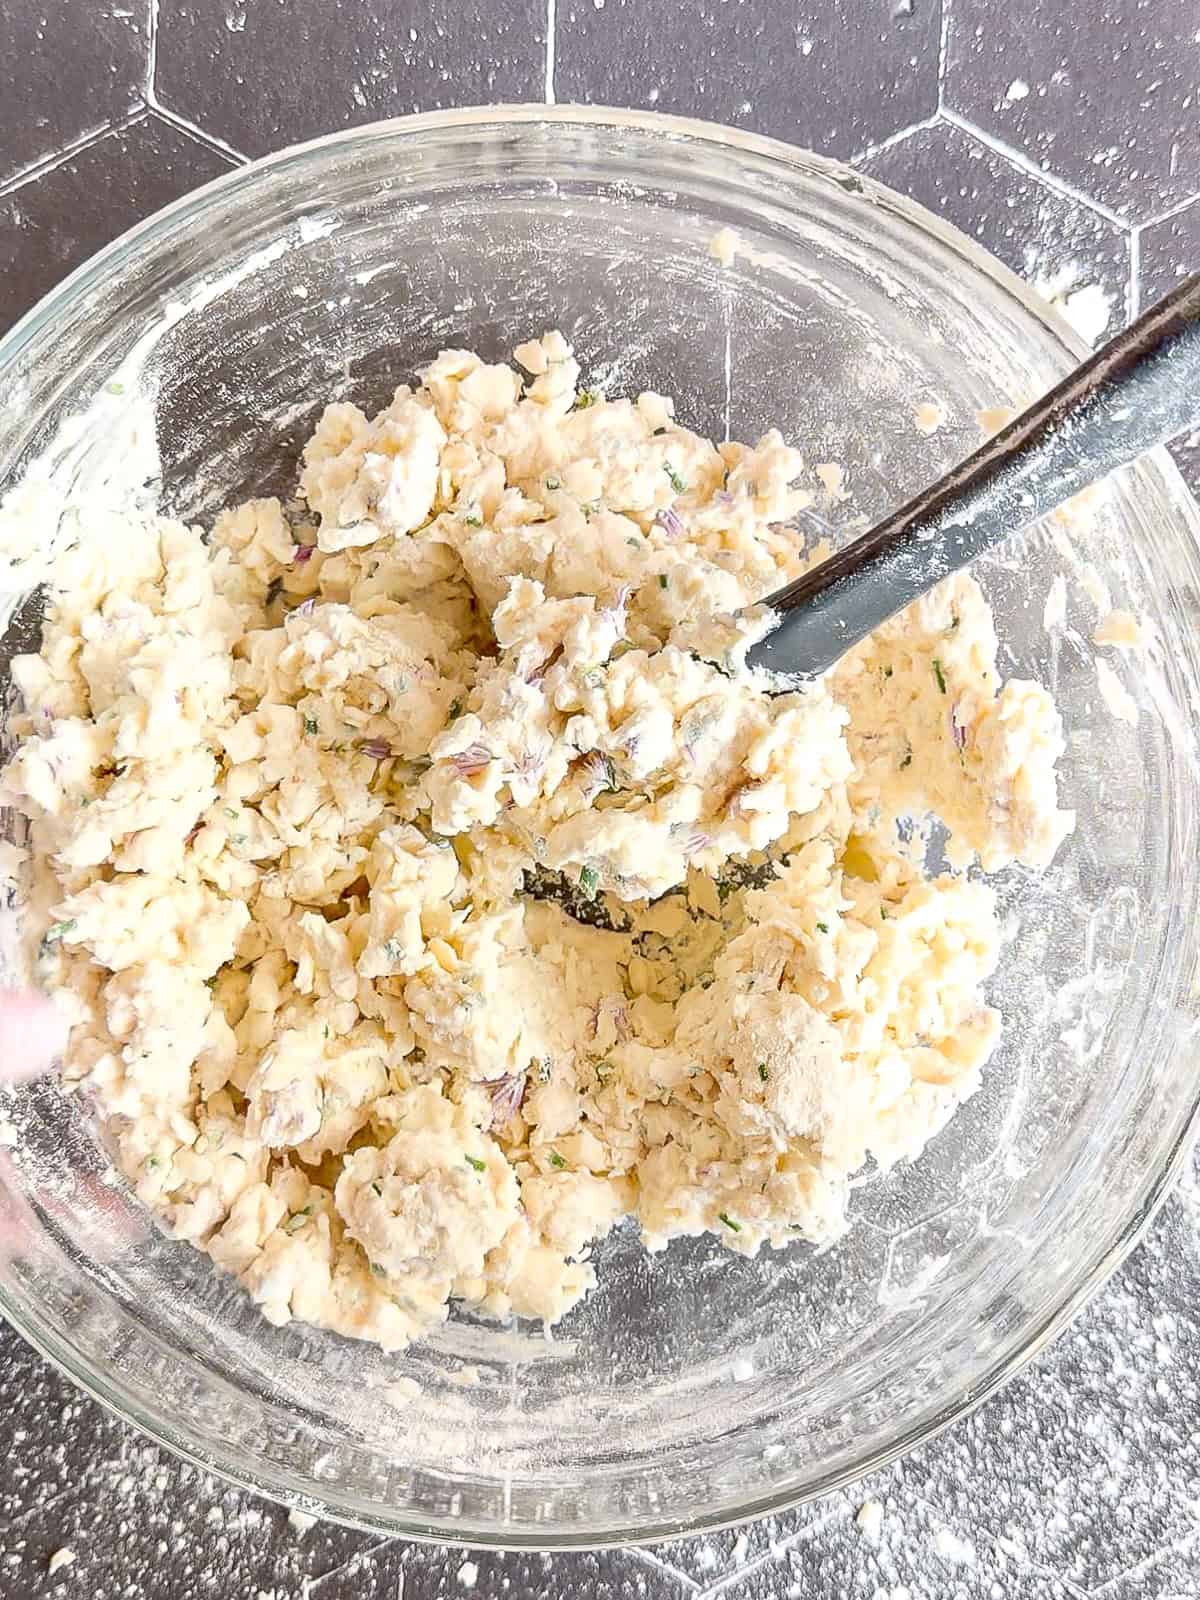
Step 6: Mix until you have a rough, shaggy dough with only a very small amount of dry bits on the bottom of the bowl.
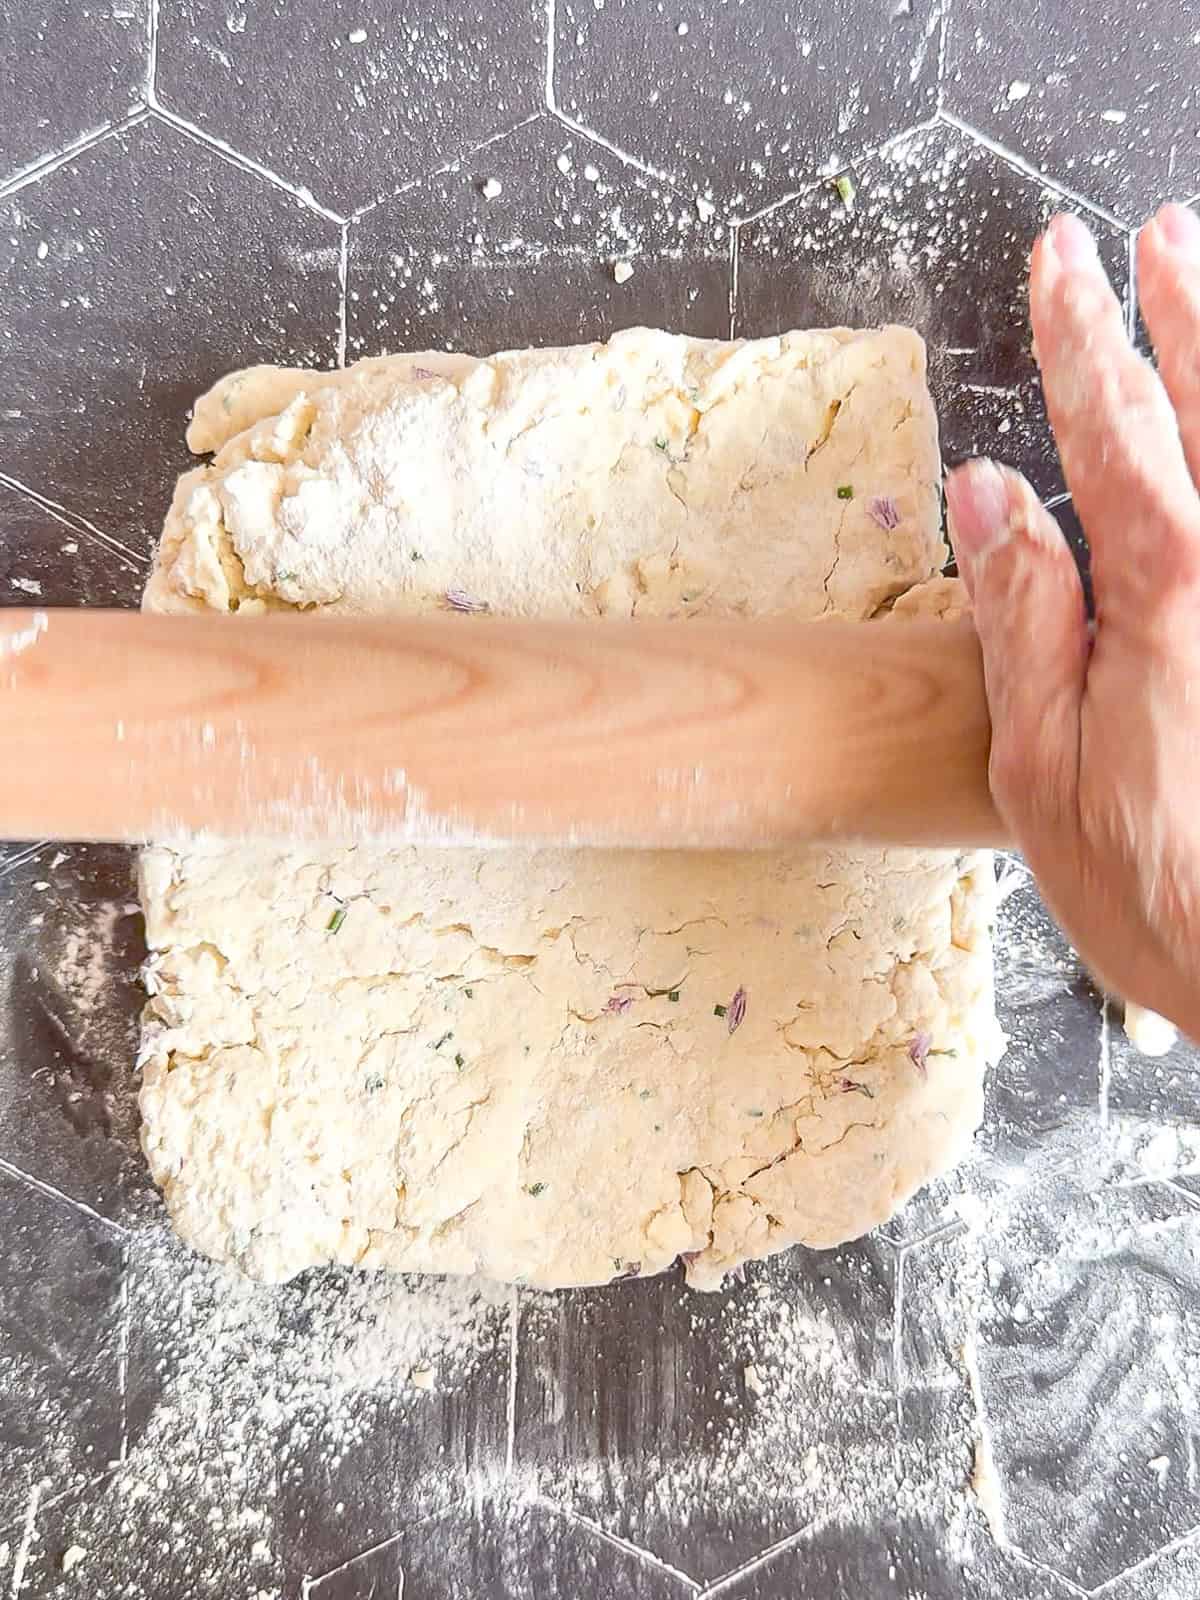
Step 7: Dump the dough onto a lightly floured surface and use your hands to bring it together without kneading. Roll it into a thin square.
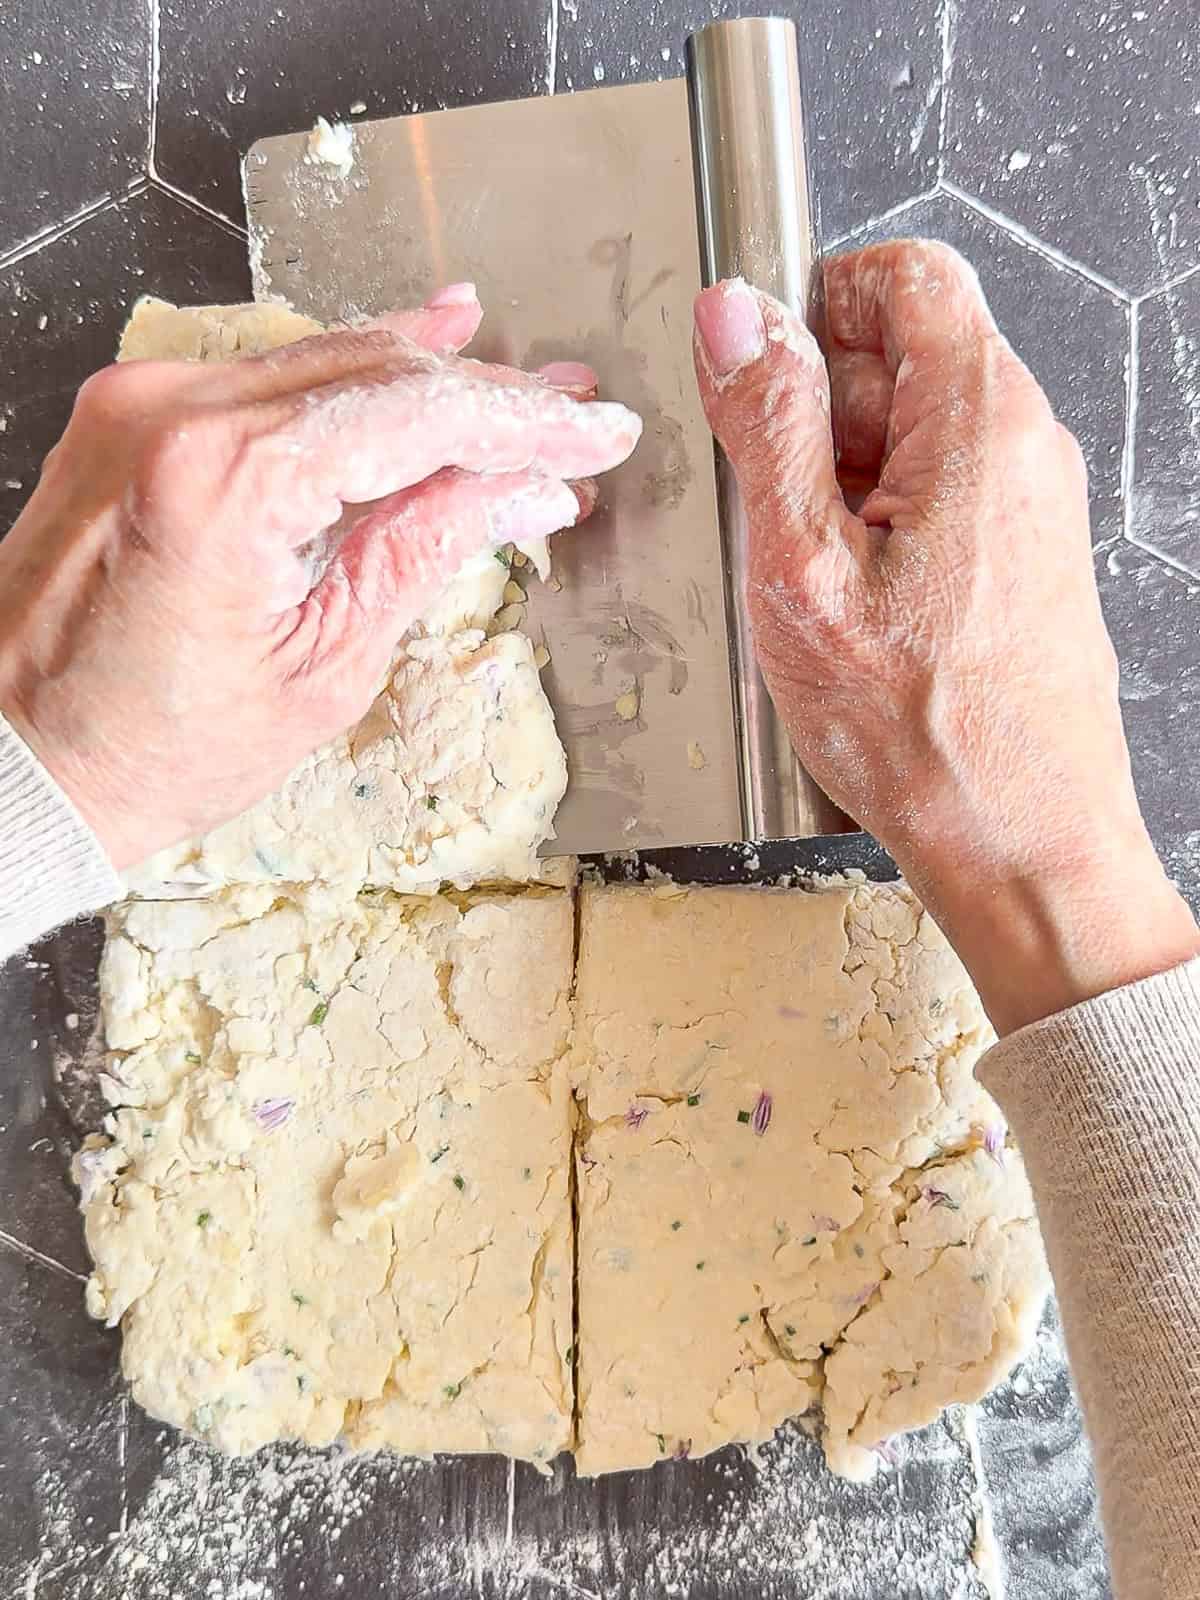
Step 8: Cut the dough into 4 equal pieces and stack them one on top of the other. Roll the dough back out into a thin square and repeat the cutting and stacking process 2 more times.
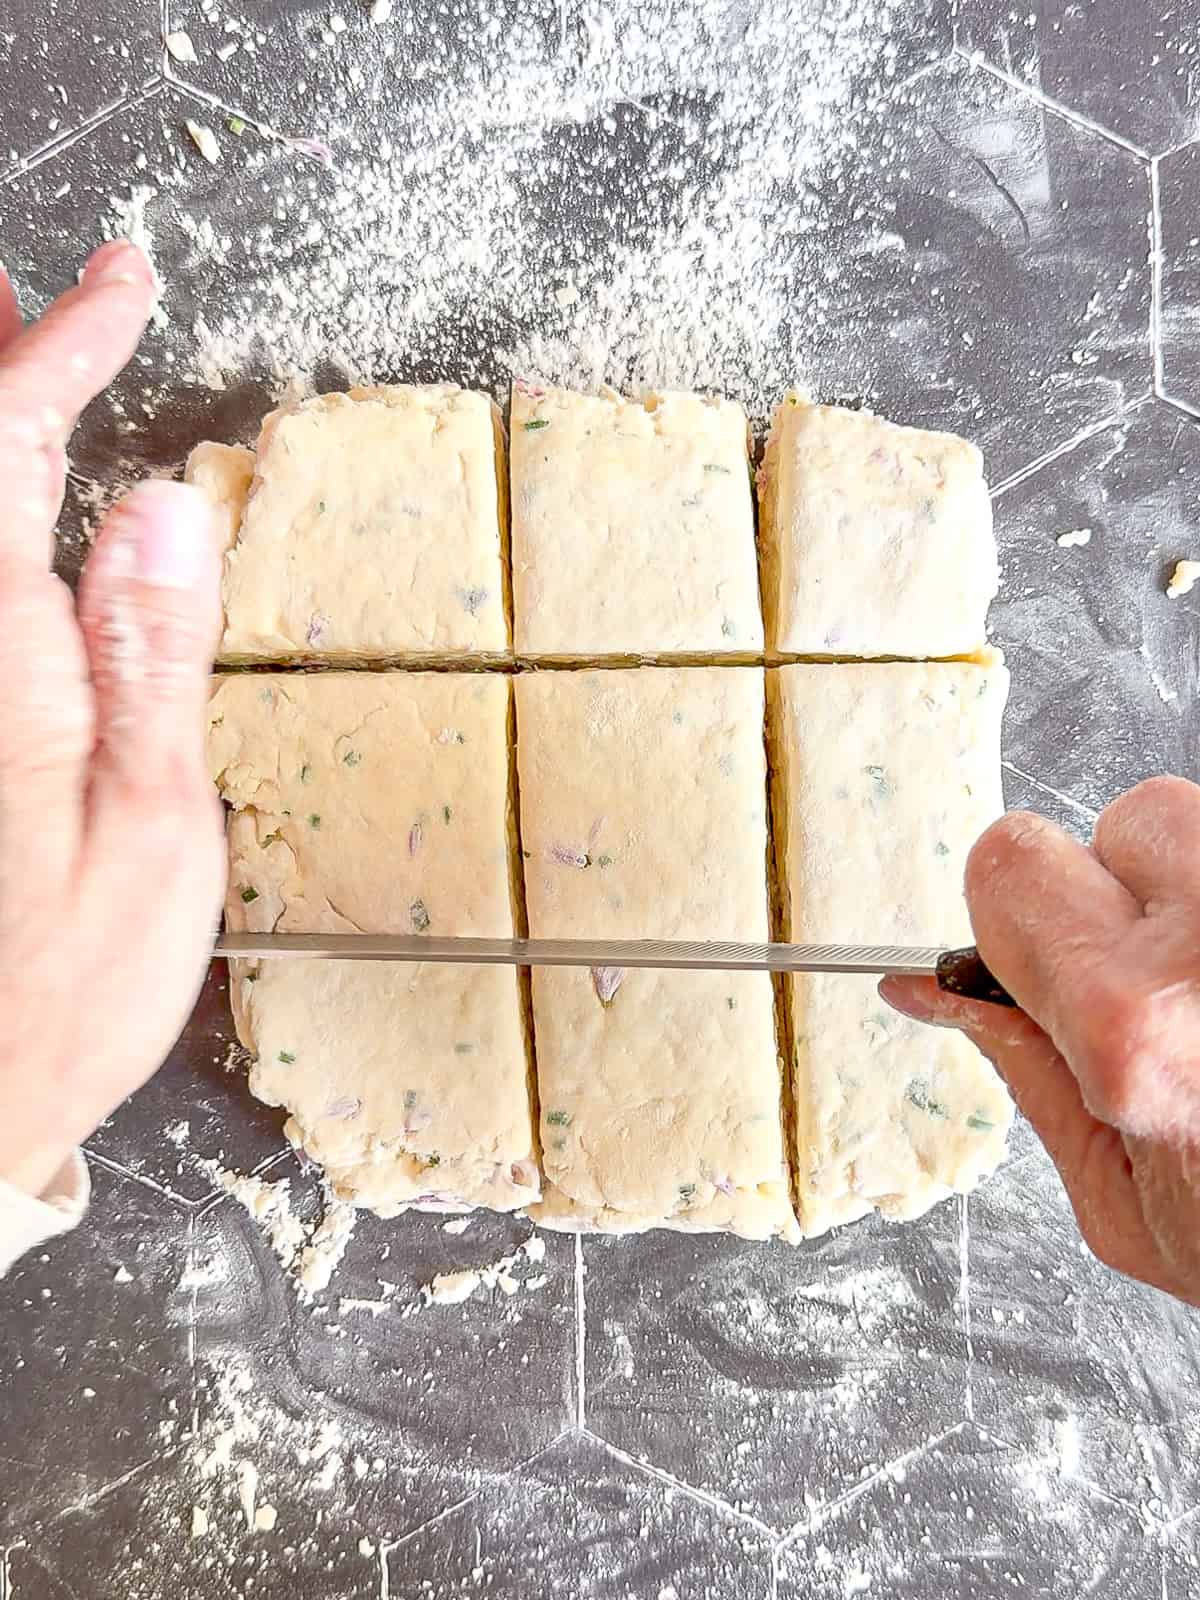
Step 9: Roll the dough out to about 1 inch thick. Use a sharp knife to cut square biscuits, or use a biscuit cutter to cut round biscuits, gathering the scraps and cutting out as many biscuits as possible.
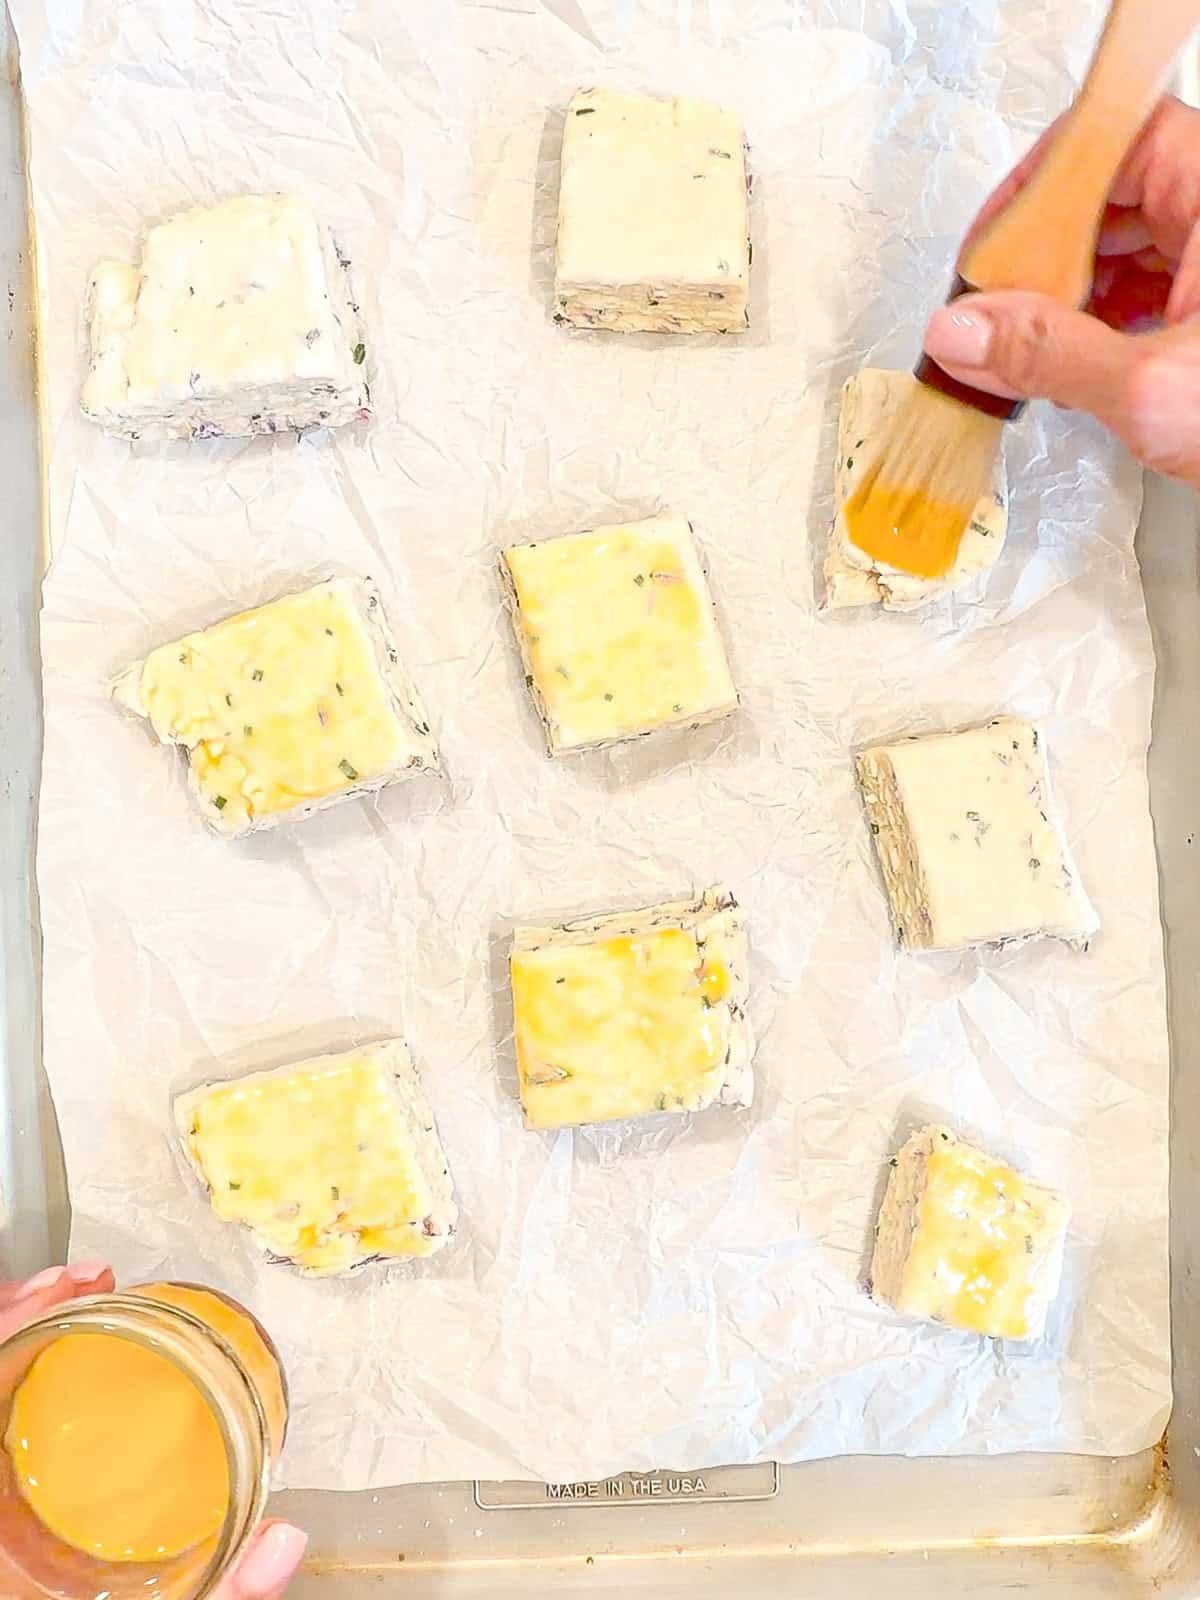
Step 10: Place the biscuits on a parchment paper-lined sheet pan and freeze for 15 minutes while you preheat the oven to 450°F. Remove from the freezer and brush the tops with egg wash.
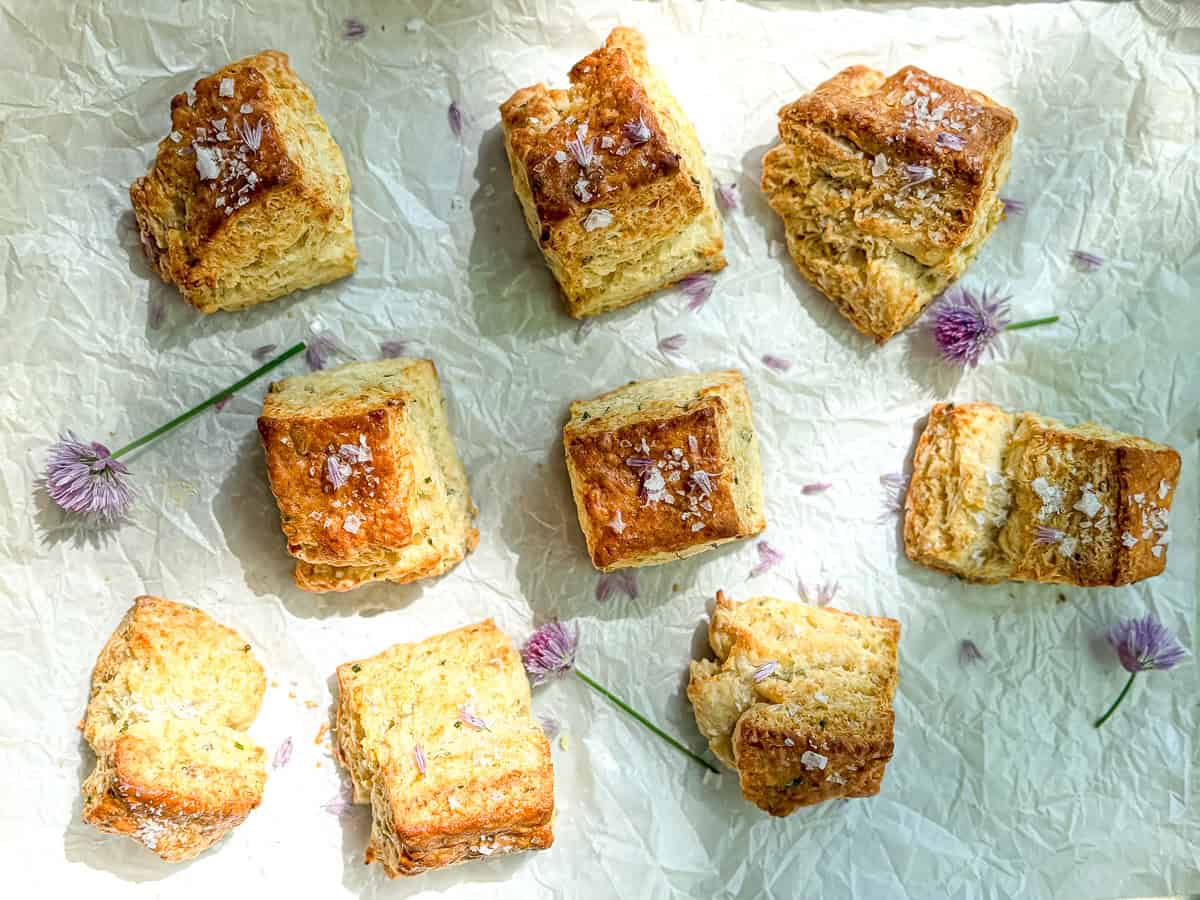
Finish: Bake for 15 to 18 minutes, or until the biscuits are golden brown. Brush the warm biscuits with melted butter and sprinkle with a little chive blossom salt. Serve with chive blossom butter, preferably while making direct eye contact with anyone who doubted you could keep a chive plant alive.
Cynthia's Helpful Tips
- Dry - Make sure the chive blossoms are completely dry before adding them to the dough, salt, or butter.
- Gentle - Bring the dough together without kneading so the biscuits stay tender.
- Stack - Cutting and stacking the dough is what builds all those beautiful flaky layers and helps the blossoms show through the sidesh.
- Sharp - Use a sharp knife or biscuit cutter and press straight down so the biscuit edges can rise cleanly.
- Cold - Start with cold butter and buttermilk very cold and place your cut biscuits into the freezer for 15 minutes to chill them before baking. This gives you a more flaky result.
Recipe FAQs
Chive blossoms taste mildly oniony, a little grassy, and slightly floral. They are softer in flavor than regular chives, which is why this recipe uses both blossoms and chopped chives.
Yes, you can make chive biscuits with regular fresh chives and they will be delicious, but they will not have the same purple flecks or delicate blossom flavor. I like to add cheese, like in my cheddar chive biscuits, to enhance the flavor.
Store leftover biscuits in an airtight container at room temperature for up to 2 days or in the refrigerator for up to 5 days. Reheat in a 350°F oven for 5 to 8 minutes, or until warmed through. You can also freeze baked biscuits and reheat them straight from frozen in a 350°F oven.


Did you try this recipe?
Please consider leaving a comment with a ⭐️ rating below and tell me all about it! It helps me to continue to improve my content and lets others know what you think!
I appreciate it so much!
-Cynthia
📖 Recipe
Flaky Chive Blossom Biscuits
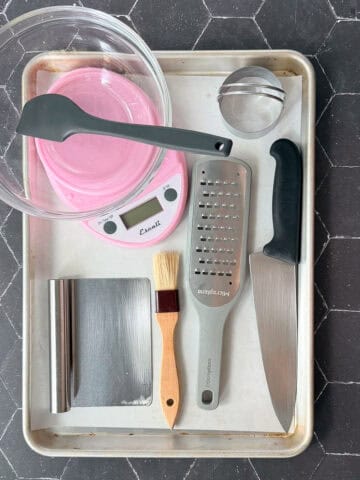
Recommended Equipment
- Bench scraper or sharp knife
Ingredients
For the chive blossom biscuits
- 2 cups (240 g) all-purpose flour
- 1 tablespoon (12 g) baking powder
- 1 teaspoon (6 g) kosher salt
- ¼ teaspoon baking soda
- 8 tablespoons (112 g) unsalted butter very cold and cut into small cubes or grated
- 2 tablespoons chive blossom petals from about 2 to 3 blossoms
- 1 tablespoon fresh chives finely chopped
- ¾ cup (g) buttermilk very cold, plus more if needed
For the optional egg wash
- 1 large egg
- 1 tablespoon water
For the chive blossom salt
- 1 cup flaky sea salt
- 2 tablespoons chive blossom petals
For the chive blossom butter
- ½ cup (113.5 g) unsalted butter softened
- 1 tablespoon chive blossom petals
- 1 teaspoon fresh chives finely chopped
- ½ teaspoon chive blossom salt
For finishing
- Melted butter optional
- Chive blossom salt optional
Instructions
Prepare the chive blossoms
- Use clean scissors or garden snips to cut the chive blossom stems near the base of the plant.
- Do not use the tough blossom stems in the recipe. They are fibrous and not pleasant to eat.
- Shake the blossoms gently outside to remove any dirt or insects. Rinse the blossoms briefly in cool water. Spread them on a clean towel or paper towel and let them dry completely.
- Pull or snip the small purple florets from the flower heads and discard the tough stems and any firm green pieces at the base of the blossoms.
Make the chive blossom salt (optional)
- In a small bowl, combine the flaky sea salt and chive blossom petals.
- Spread the salt mixture onto a sheet pan or plate in an even layer. Let it dry at room temperature for 24 hours, stirring once or twice.
- Transfer the dried chive blossom salt to an airtight jar. Store in a cool pantry for up to 3 months.
Make the chive blossom butter (optional)
- Place the softened butter in a small bowl.
- Add the chive blossom petals, chopped chives, and chive blossom salt.
- Mix with a wooden spoon or spatula until evenly combined.
- Transfer to an airtight container and refrigerate for up to 2 weeks. Let the butter soften slightly before serving.
Make the biscuits
- Line a sheet pan with parchment paper.
- In a large mixing bowl, whisk together the flour, baking powder, salt, and baking soda.
- Add the cold grated or cubed butter to the flour mixture.
- Use your fingers to snap and rub the butter into the flour until the mixture has flat, crumbly pieces of butter throughout. You want visible pieces of butter, not a perfectly sandy mixture.
- Add the chive blossom petals and chopped chives and toss gently to distribute.
- Pour the cold buttermilk evenly over the flour mixture.
- Use a fork or spatula to mix until a rough, shaggy dough forms. There should be only a small amount of dry flour left at the bottom of the bowl. If the dough seems very dry, add a little more cold buttermilk, 1 tablespoon at a time.
- Turn the dough out onto a lightly floured surface.
- Use your hands to gently bring the dough together without kneading.
- Roll the dough into a thin square.
- Cut the dough into 4 equal pieces and stack the pieces on top of each other.
- Roll the stack back out into a thin square.
- Repeat the cutting, stacking, and rolling process 2 more times.
- Roll the dough to about 1 inch thick.
- Use a sharp knife to cut square biscuits, or use a biscuit cutter to cut round biscuits. If using a biscuit cutter, press straight down without twisting.
- Gather scraps gently and cut out as many biscuits as possible.
- Place the biscuits on the prepared sheet pan.
- Freeze the biscuits for 15 minutes while you preheat the oven to 450°F.
- In a small bowl, whisk together the egg and water for the egg wash, if using.
- Brush the tops of the chilled biscuits with egg wash.
- Bake for 15 to 18 minutes, or until the biscuits are puffed, golden brown, and baked through.
- Brush the warm biscuits with melted butter, if desired.
- Sprinkle with chive blossom salt and serve warm with chive blossom butter.
Save this recipe
We'll email it to you.Video
Notes
- Use only the chive blossom petals, not the tough blossom stems.
- Make sure the blossoms are dry before adding them to the biscuit dough, salt, or butter.
- Keep the butter and buttermilk cold for the flakiest biscuits.
- Do not knead the dough. Gently bring it together, then use the cutting and stacking method to create layers.
- A sharp knife works beautifully for square biscuits and avoids leftover scraps.
- If using a round biscuit cutter, press straight down and do not twist. Twisting can seal the edges and keep the biscuits from rising as high.
- Storage: Store baked biscuits in an airtight container at room temperature for up to 2 days or in the refrigerator for up to 5 days.
- Reheating: Reheat biscuits in a 350°F oven for 5 to 8 minutes, or until warmed through. Frozen biscuits can be reheated directly from frozen in a 350°F oven until hot in the center.
- Freezing: Freeze baked biscuits in an airtight freezer-safe bag or container for up to 2 months. You can also freeze unbaked cut biscuits after the 15 minute sheet pan freeze, then transfer them to a freezer bag. Bake from frozen at 450°F, adding a few extra minutes as needed.
Comments
No Comments