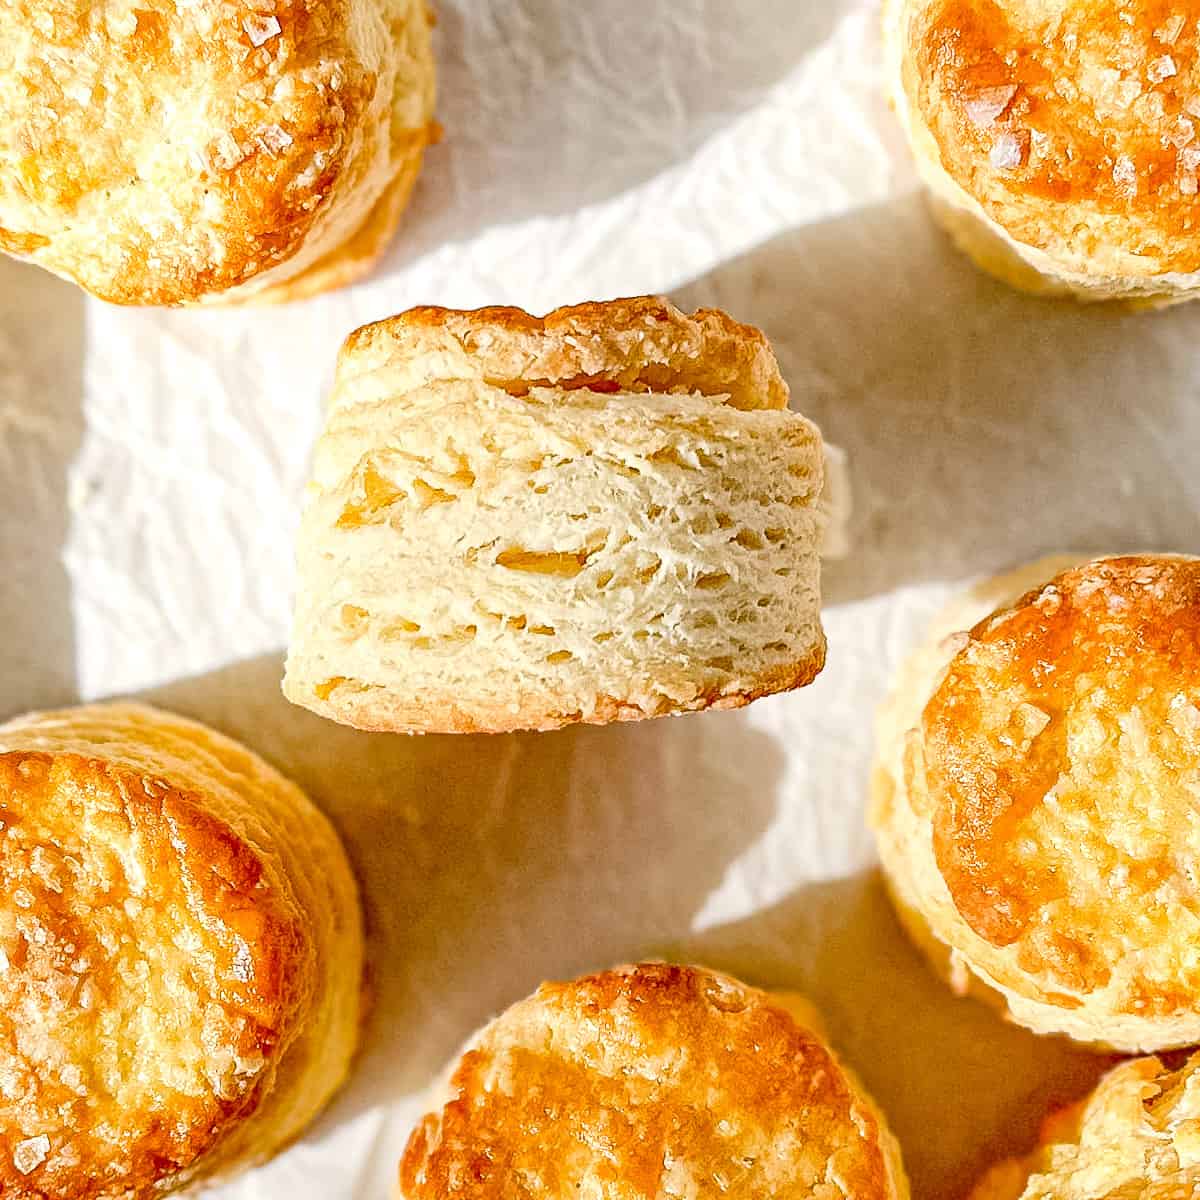
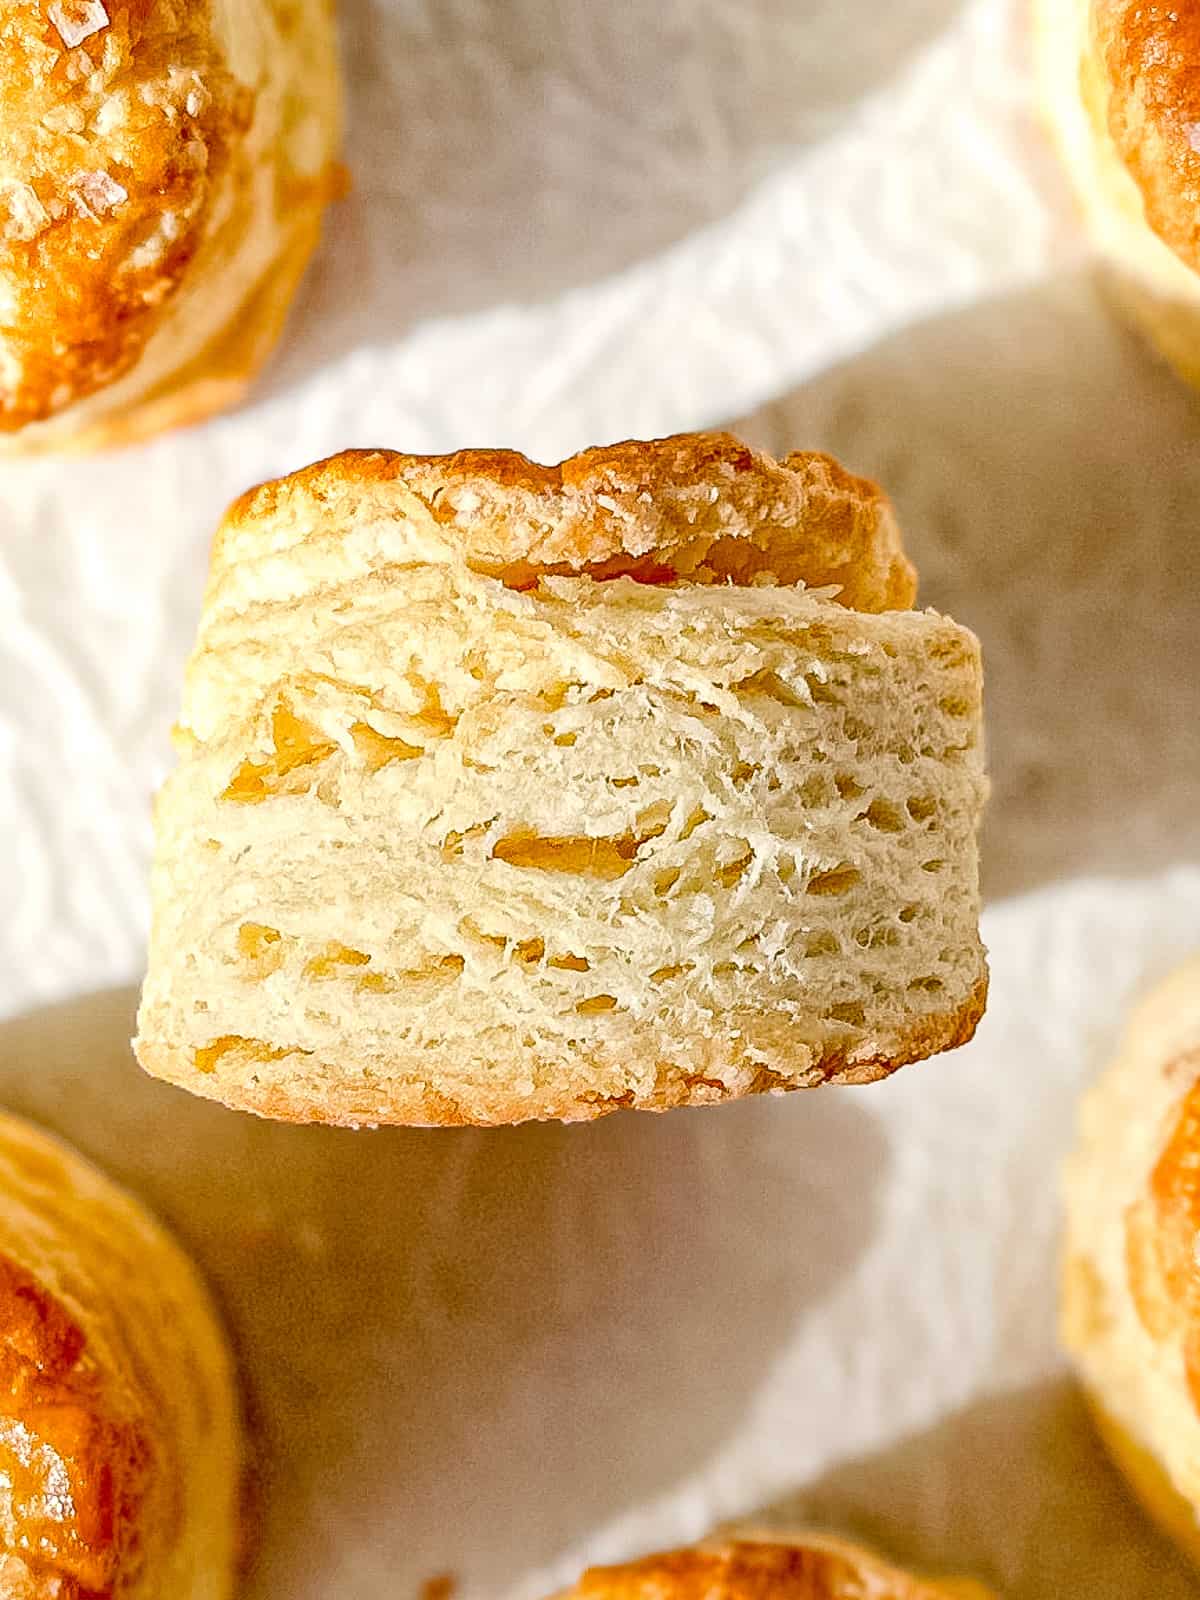
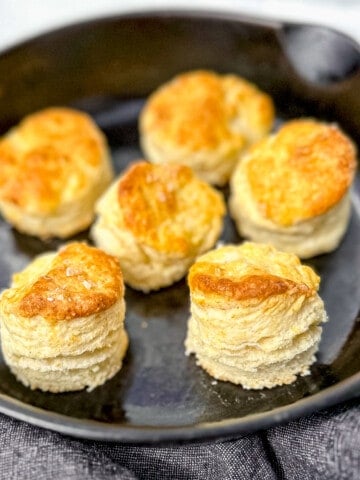
No buttermilk? No problem! These Easy Yogurt Biscuits bake up tall and flaky and perfectly moist, without buttermilk! Now there’s no reason not to make biscuits all the time!
Save This Recipe! 💌
Sometimes it takes a lot of time and research and testing to come up with a new recipe for the blog. Figuring out what people are looking to eat for breakfast, getting all the ingredient ratios just right, making sure the Google gods like what you've written. And then sometimes it's pure chance. These Easy Yogurt Biscuits fall into the second category.
One morning I was gathering my ingredients to make my Original Biscuits when I discovered I was out of buttermilk! This never happens to me. Well, almost never. I guess I forgot to put buttermilk on the shopping list, and when I went to start biscuits, I audibly gasped!
I didn't panic. I remembered that I used to make the bakery's Crumb Cake with crème fraîche, which is very similar in flavor and texture to yogurt, which I did have... and I knew that breakfast was saved. I added yogurt to my biscuits and I'm never looking back!
Jump to:
❤️ Why you'll love this recipe
- Tender and moist - You need to use more yogurt than you would buttermilk in this recipe, and that brings extra moisture and tenderness to your biscuits.
- Tall and fluffy - The small amount of baking soda in this recipe is just enough to react with the acidity in the yogurt, activating it to give your biscuits even more lift.
- Flaky layers - The cut-and-stack technique in this recipe helps bring you layer upon flaky layer, almost like building a puff pastry.
- Golden brown - Using a simple egg wash ensures that your biscuit tops will bake up shiny and irresistibly golden brown.
- Customizable - There is almost no end to the variations of biscuits, both sweet and savory, that you can make with this recipe fore yogurt biscuits. This is just the first step in your biscuit empire!
Ingredients
Now that we're incorporating yogurt into our biscuits, everything you need should be in your kitchen right now! If not, we'll wait, but in the future, you're going to want to have a full biscuit pantry at all times. You're going to be using it when you see how easy this is!

See recipe card below for quantities.
Have extra yogurt? If you love yogurt as much as I do, try my Yogurt Peach Parfait. It has brown sugar peaches, layered with honey vanilla yogurt, and is topped with crunchy homemade granola, for an easy and elegant breakfast treat.
Substitutions
I just want to you have biscuits, so here's a few ways you can make it happen if you need to make substitutions:
- Yogurt - If you don't have plain yogurt, you can substitute with Greek yogurt, but you may need to add some milk to absorb all of the flour. Mix in your Greek yogurt and if there is a lot of dry flour at the bottom of the bowl, add one tablespoon of milk at a time (up to 2 tablespoons) until it is all incorporated.
- Flour - I haven't used it in this recipe, but a reader used King Arthur Flour's gluten free flour to make my Buttermilk Biscuits with great results and it would probably work here.
- Butter - In a pinch, you can use margarine or butter flavored shortening to make biscuits, but the layers probably won't be as distinct, due to their low water content.
Make my Easy Chocolate Chip Muffins with your extra yogurt. With extra tall muffin tops and just the right touch of chocolaty goodness, they are perfect for breakfast or an afternoon snack!
Variations
I have almost two dozen Biscuit Recipes for you to choose from, because they are the perfect blank slate for flavor! Here's some suggestions:
- Spicy - Add a diced jalapeño to your biscuits, and you can even add some cheese like in my Jalapeño Cheddar Biscuits.
- Sweet - Add extra sugar and top with fruit, like my Shortcake Biscuits.
- Cheesy - There is no limit to the fun you can add to your biscuits with cheese. From my Cheddar Biscuits to my Gruyère Biscuits, cheese brings flavor to the party!
All out of yogurt? Try making my simple Sour Cream Biscuits. Light, fluffy, and flaky, they're the perfect side for breakfast or dinner!
Cold vs Frozen Butter
I know a lot of other recipes have you use grated frozen butter, but I am not a fan of that method, and I'll tell you why:
- Having grated frozen butter listed as an ingredient assumes that you are going to remember to put butter in the freezer the night before biscuits. No more last minute biscuit spontaneity!
- Have you ever held an unwrapped stick of butter? Go ahead and do it. I'll wait. Even if it's half wrapped and frozen, that thing is going to start getting soft and melty and slippery on you as you try to grip the last nubbin while running it along a box grater.
- The uniformly small pieces of butter that a grater produces almost completely disappear into the flour and melt more quickly in the hot oven.
- My preferred method of cutting in the butter by hand or with a pastry cutter leaves you with a variety of small, large, and flat pieces, all of which will evaporate their water at different rates, giving you flakier, more buttery tasting biscuits.
- Placing your biscuits into the freezer while you preheat the oven allows the butter in your biscuits to re-harden, so you never have to worry about having frozen butter on hand. Be free!
Using yogurt in baking
Being a Southern girl, and a professional baker, I've always had buttermilk in the refrigerator. So many of my recipes call for buttermilk and it always surprises me that not everyone keeps a couple bottles on hand at all times. I constantly have to remind myself to address buttermilk substitutions when writing my blog posts.
I'm not a big fan of adding vinegar or lemon juice to milk to make a buttermilk substitution. It only addresses the acidity of buttermilk, without taking its consistency into consideration. Those additions give a bitter acidic taste, instead of the subtle tang of buttermilk.
Instead I recommend using yogurt. The thickness of yogurt helps in maintaining the same texture of my batters and doughs as I have with buttermilk. Because Greek yogurt is so much thicker than buttermilk, if you use it, you may need to add some milk to incorporate all the flour.
At first I was afraid that adding the thicker yogurt would result in gummy or stodgy biscuits, but it didn't. Adding just a tiny bit of baking soda, ¼ teaspoon in this case, caused a reaction with the yogurt that added all the lift and fluffiness I could ever want!
In summation, this whole recipe for Yogurt Biscuits would not have happened had it not been for me forgetting to buy buttermilk. I'm glad I did. This time.
Have extra Greek yogurt? Try making my 2-Ingredient Yogurt Bagels. They use just Greek yogurt and self rising flour to make incredible quick and easy bagels!
Equipment
Food processor - I sometimes have mobility issues (pain and stiffness) in my hands, making cutting the butter in with my fingers difficult. On those days I utilize my food processor to incorporate the butter into the dry ingredients. Here's how I do it:
- Measure all of the dry ingredients into the bowl of your food processor. Pulse a few times to mix it all together. Add cold, cubed butter to the dry ingredients and pulse 5 to 6 times, or until most of the butter is in pea sized or smaller pieces. Pour into a mixing bowl and proceed with the rest of the biscuit recipe.
Biscuit cutter - I've read some articles that suggest that you can cut biscuits with any old round thing you find laying around your kitchen. I disagree wholeheartedly. The technique I use to build flaky layers is amazing. Using a rounded-edge drinking glass to cut out the biscuits would ruin that. The dull edge would seal the biscuit edges, keeping them from rising to their full potential.
For best results, use a sharp metal edge, like a biscuit cutter, or a even a knife, to cut clear, sharp edges to your biscuits. To avoid sealing the edges, do not twist your cutter. Press straight down and lift straight up.
Biscuits in a hurry: Out of butter, buttermilk, and time? Make my 5 Ingredients Cream Biscuits, made with just the dry ingredients and heavy cream. In 20 minutes you can have light and fluffy biscuits on the table!
Instructions
Making biscuits is a learned skill. Like any new skill, practice makes perfect. I'm telling you, my cut-and-stack technique gets the best flaky biscuits and yours are going to get better every time! And these Easy Yogurt Biscuits are so good - I see A LOT of practice in your future!
Mixing the biscuit dough
Start by preheating your oven to 450°F. Line a large sheet pan with parchment paper or foil and set aside.
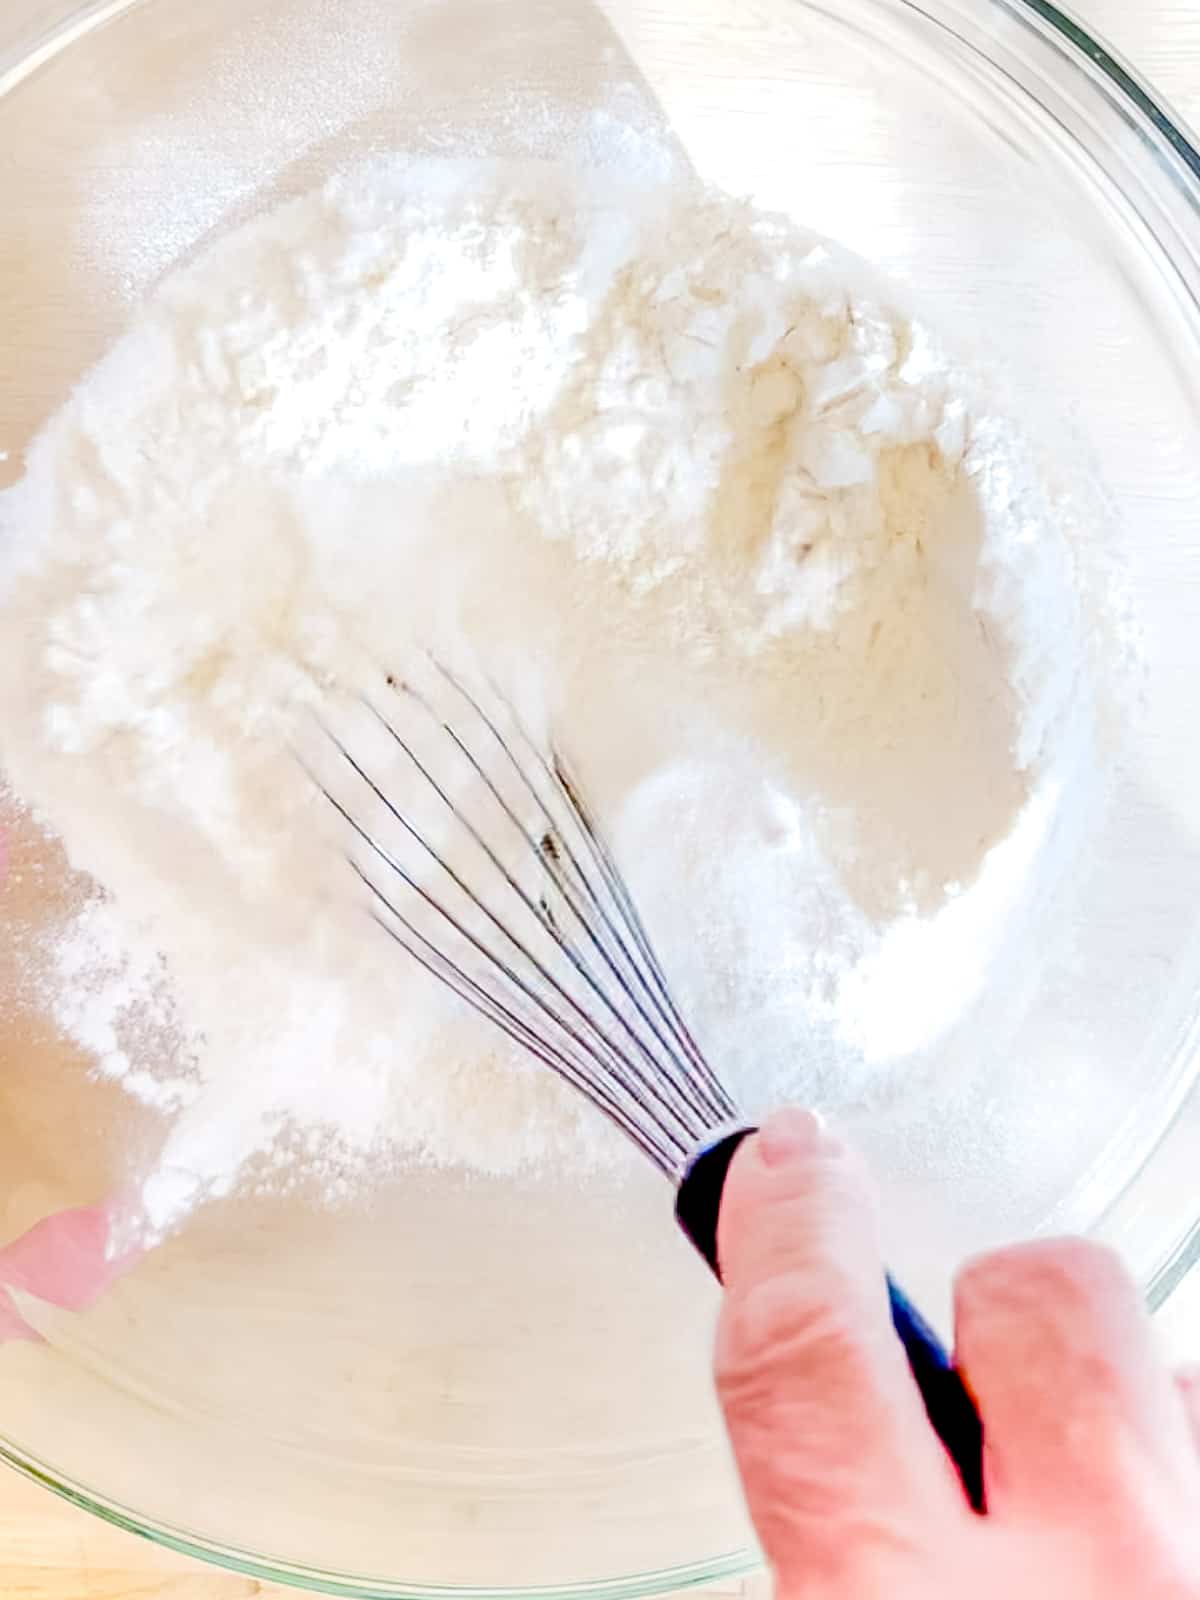
1. In a medium bowl, whisk together flour, baking powder, baking soda, sugar, and kosher salt.

2. Cut cold butter into small cubes and add to your dry ingredients.
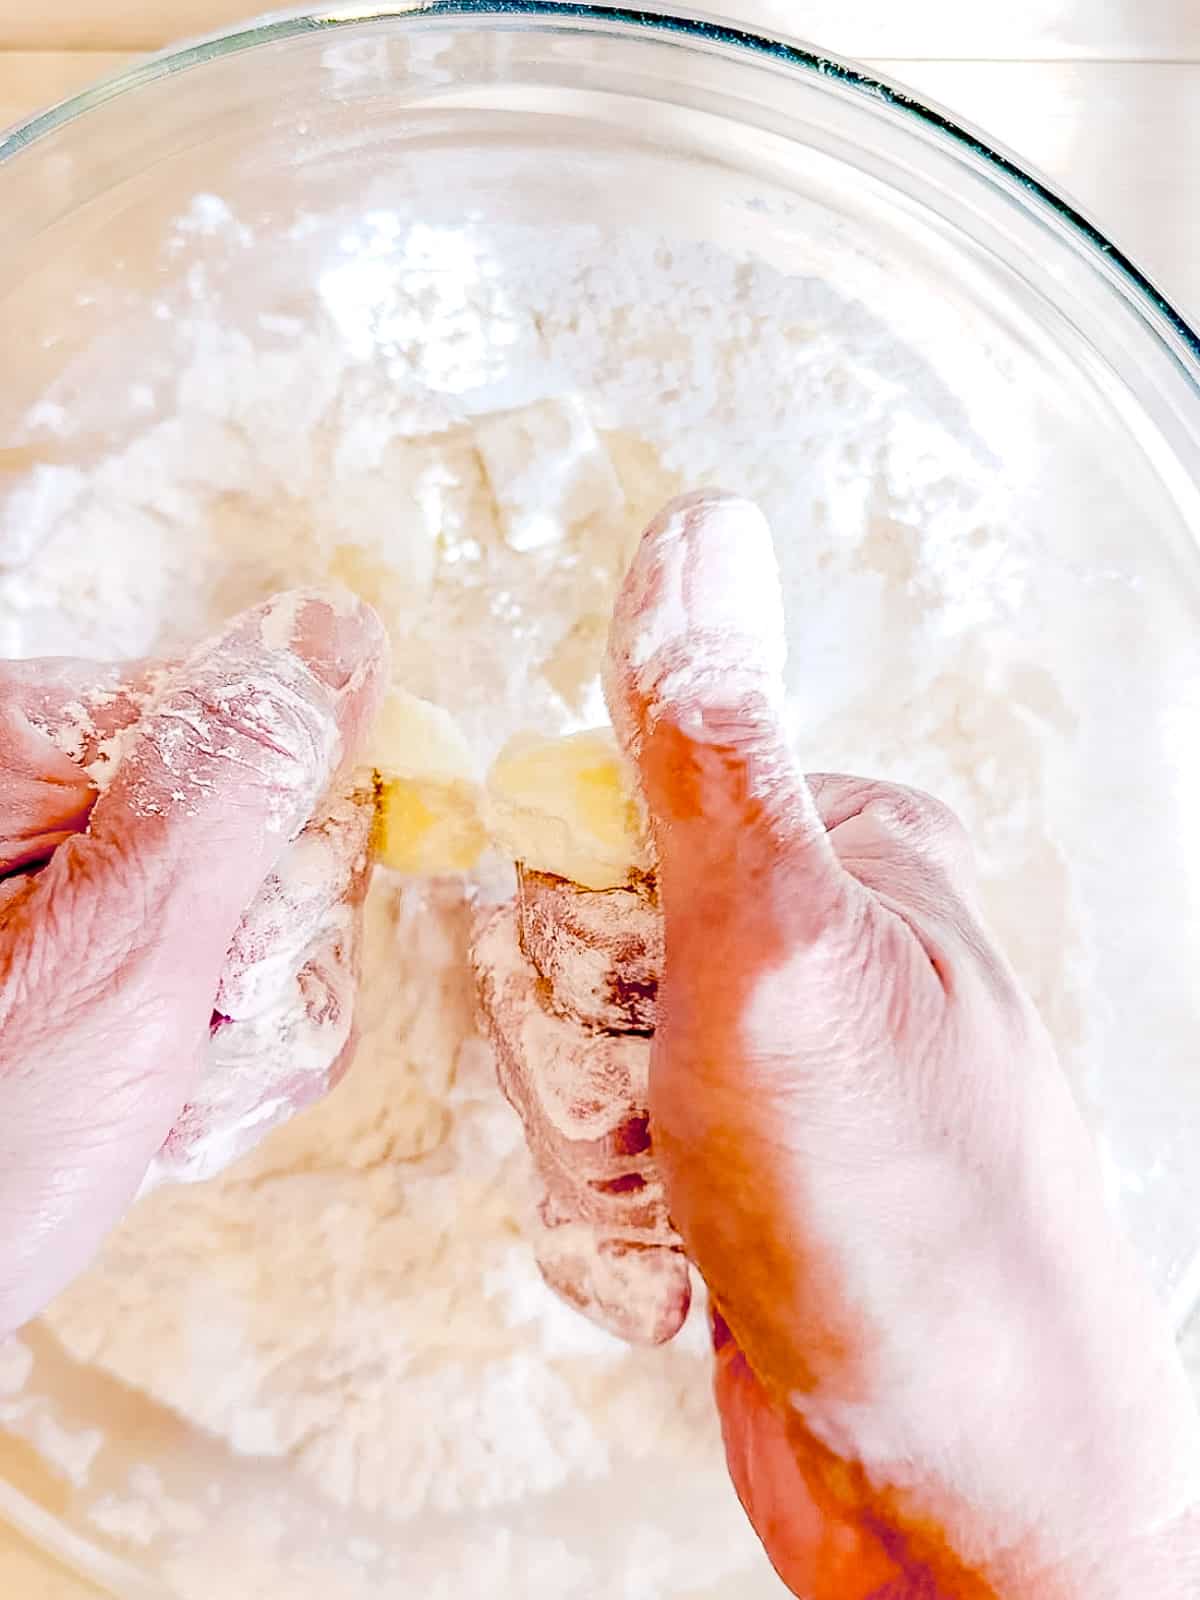
3. Using a finger snapping motion, rub the butter and the flour together.
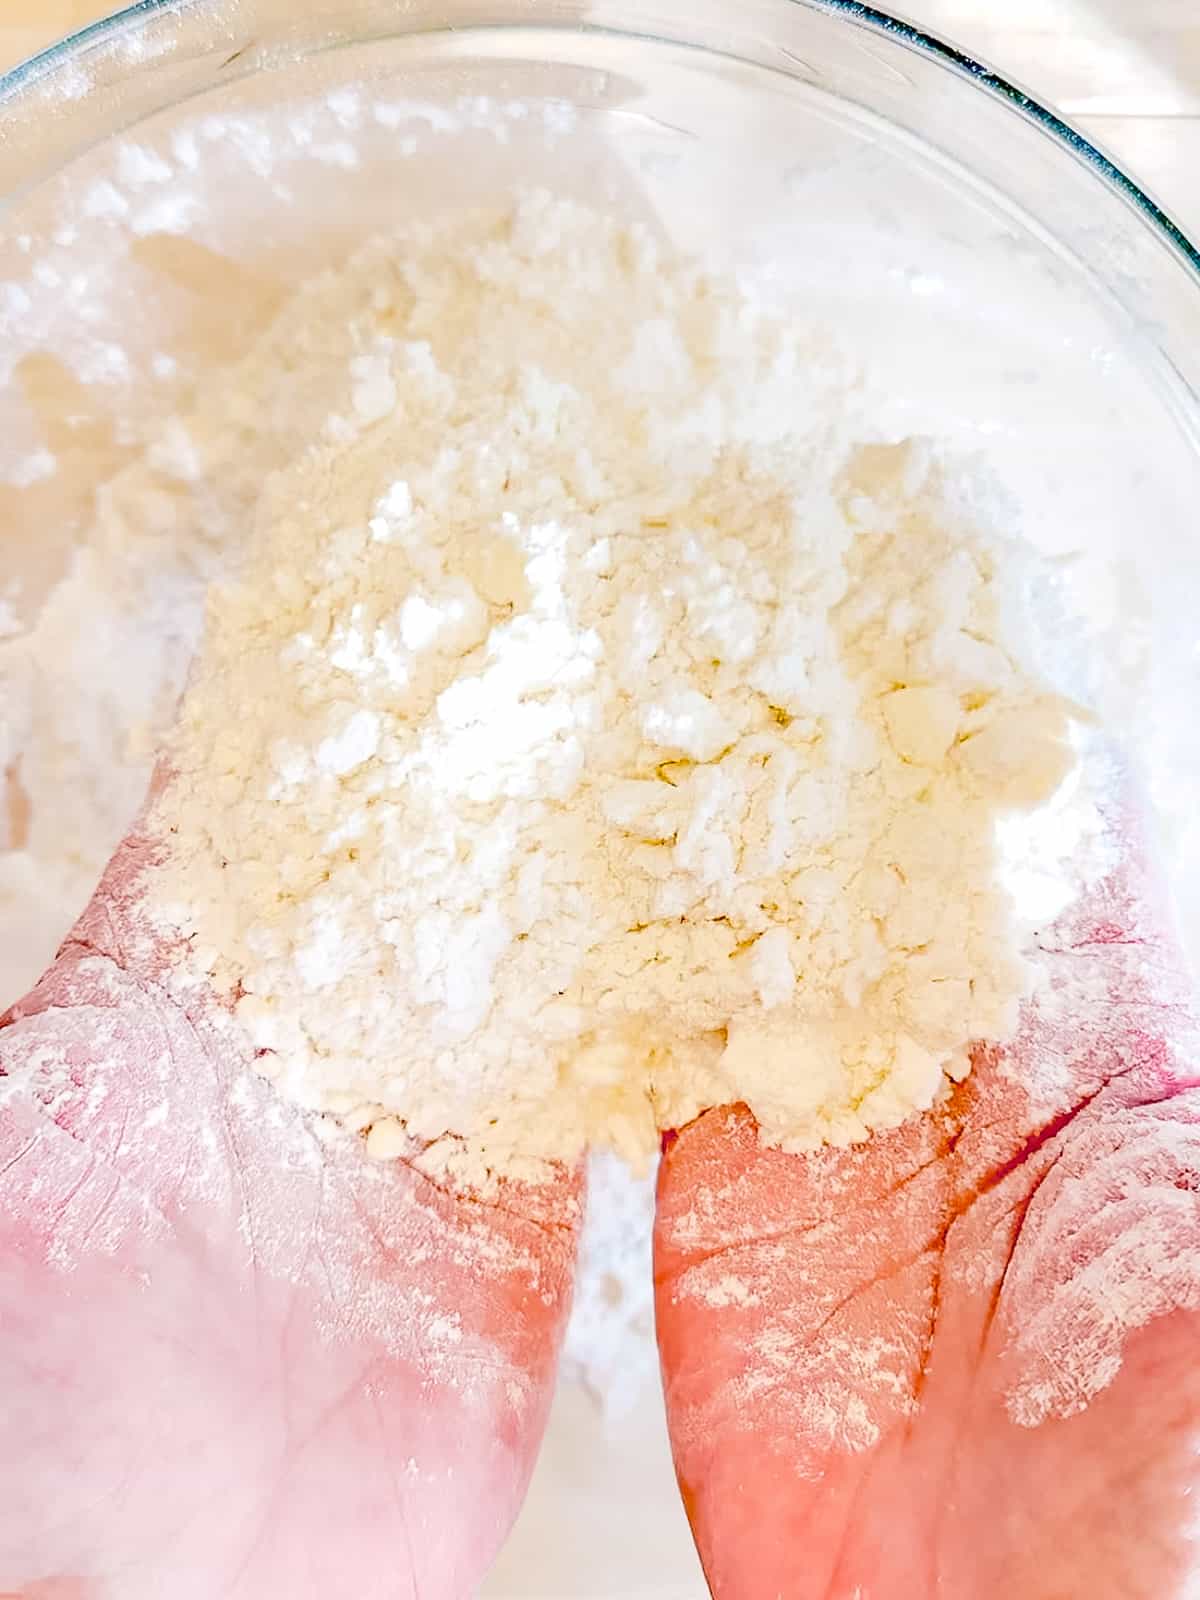
4. Continue until you have a mixture of pea sized and flat pieces of butter mixed with flour that is the texture of cornmeal.

5. Add the cold yogurt and use a spatula or dough whisk to mix together with the dry ingredients until you have a loose shaggy dough. It will look like the flour is not all mixed in, but that's okay. It will combine in the next steps.
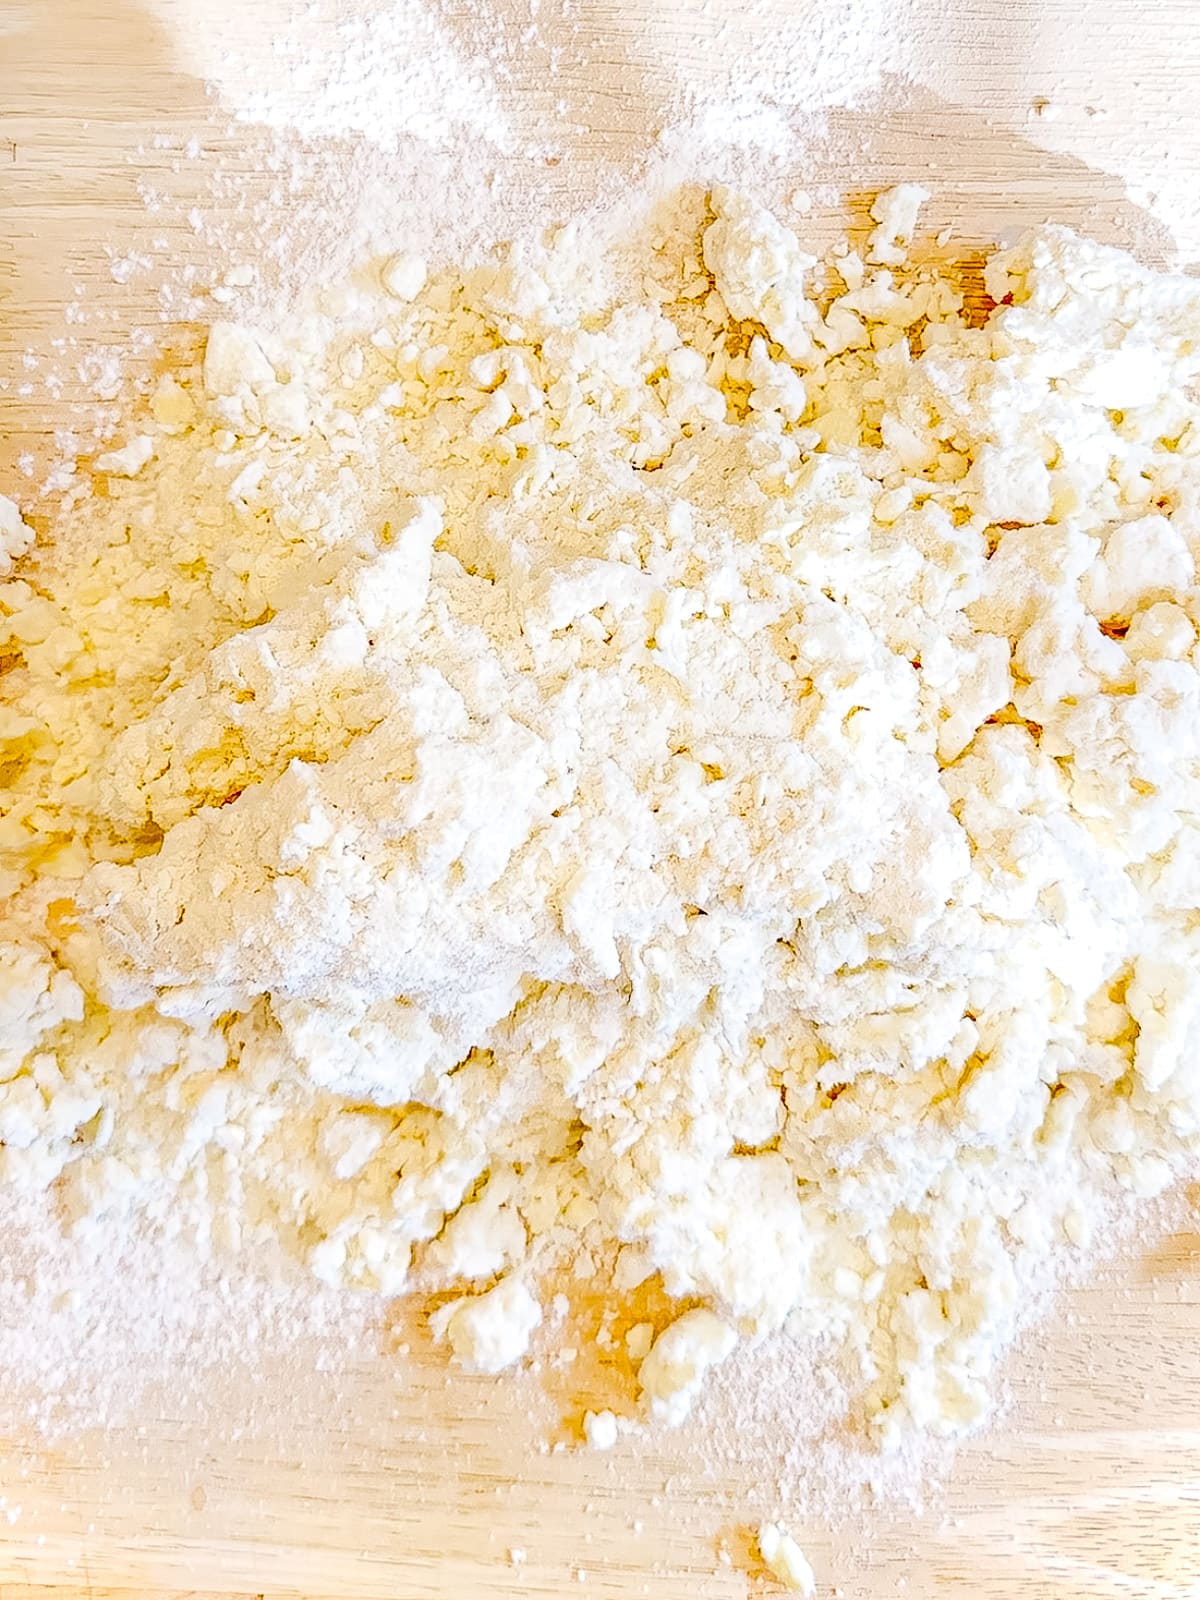
6. Dump the shaggy dough out onto a lightly floured counter.
Creating flaky layers
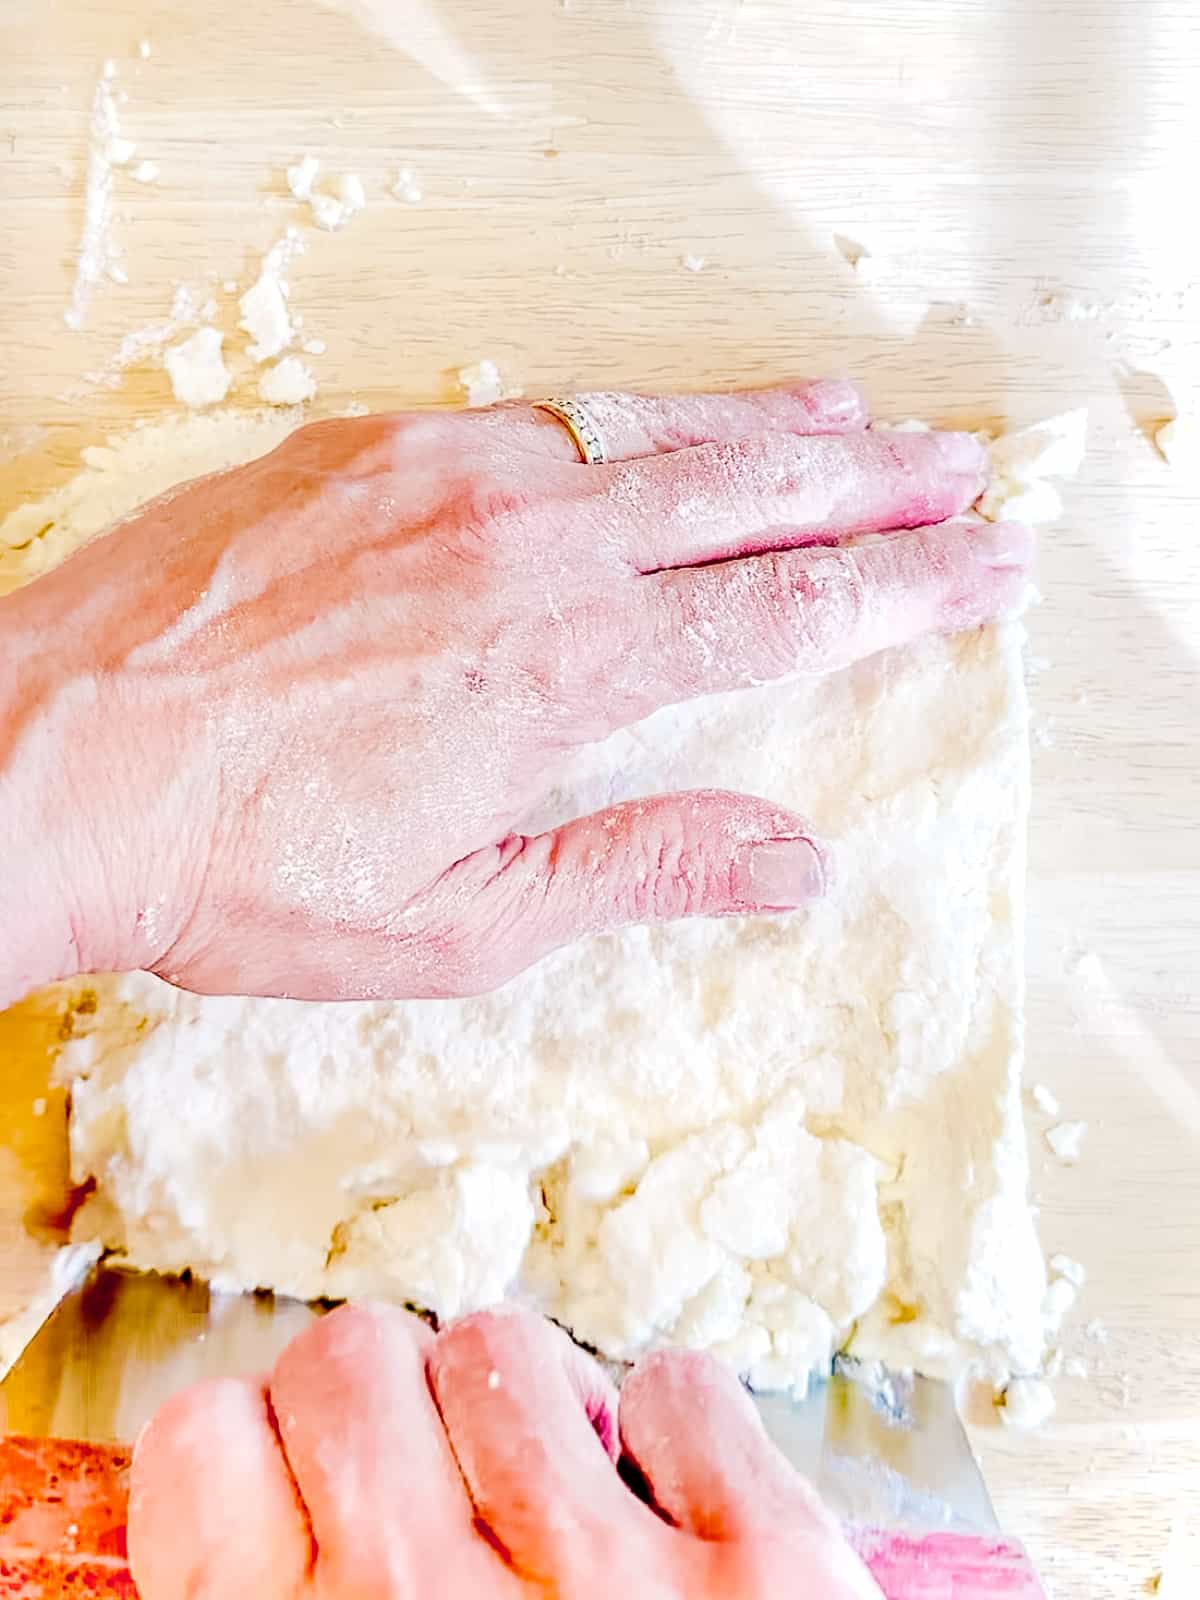
7. Use your hands, and a bench scraper, or other flat edge, to form the dough into a square, pressing down gently to help the dough stick together.
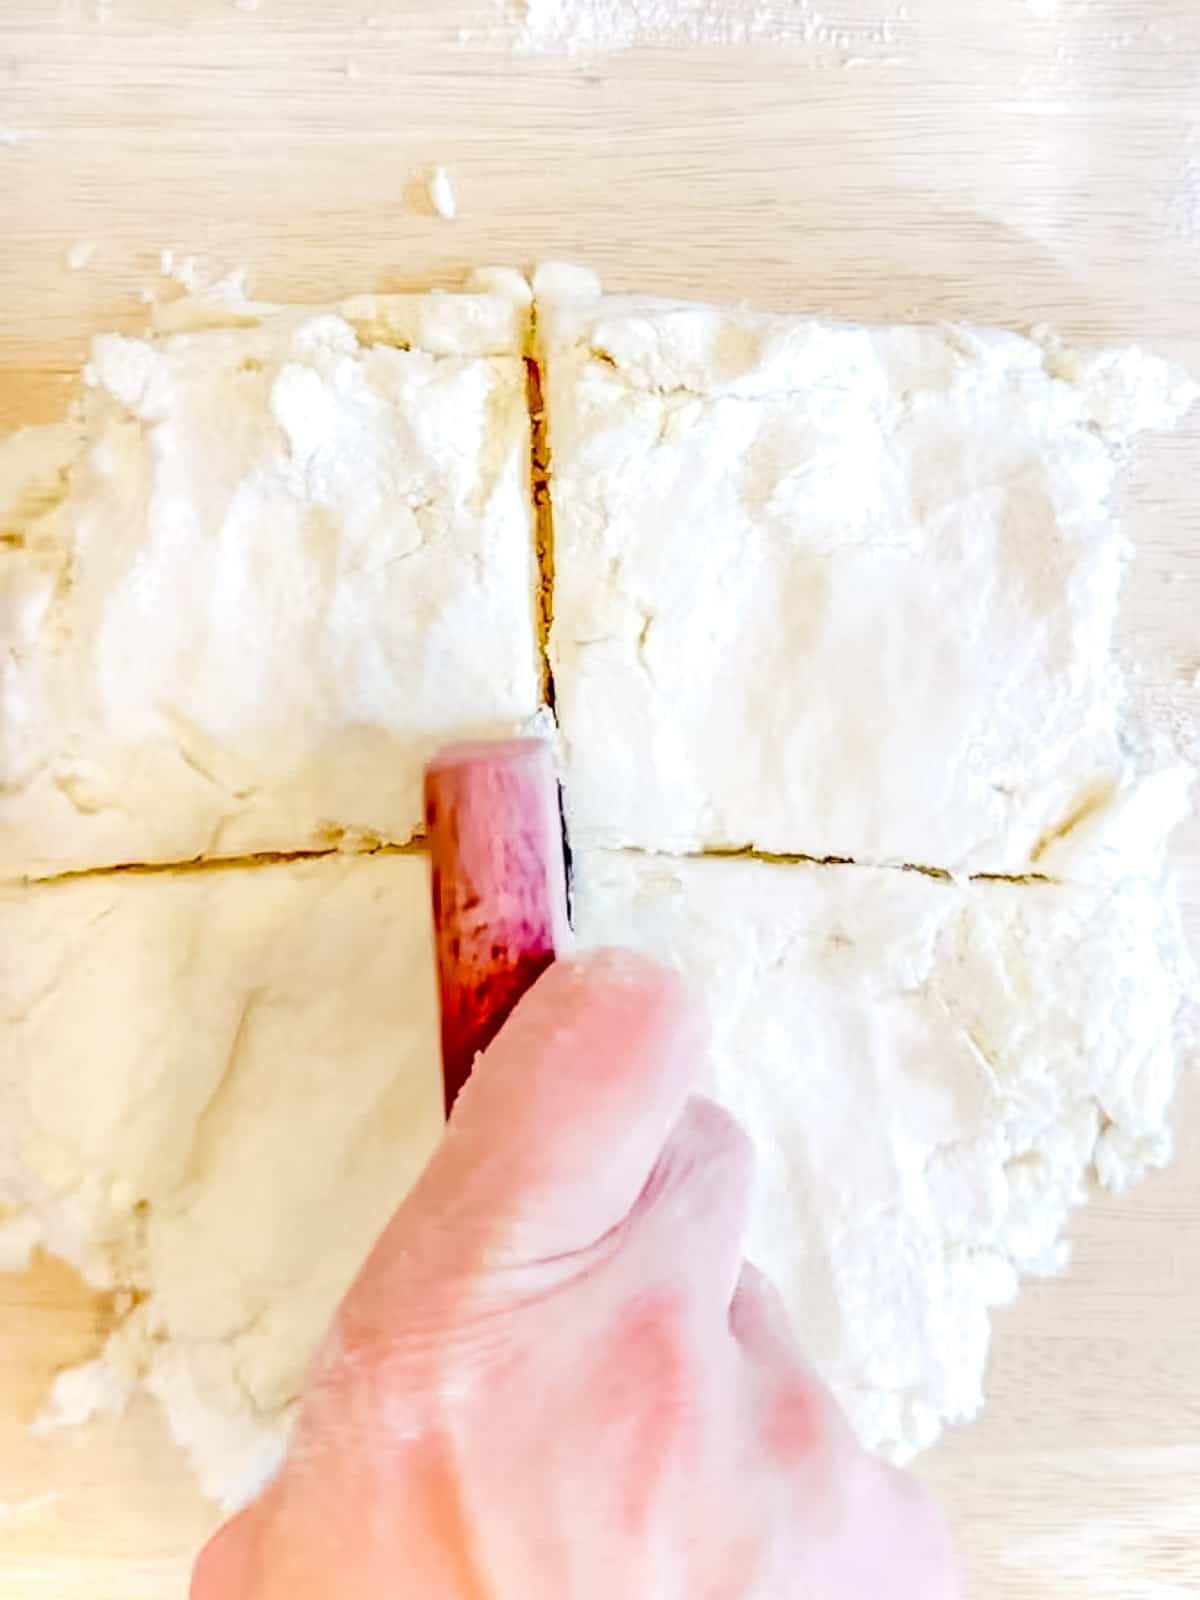
8. Use the bench scraper to cut the dough into 4 pieces. Stack them on top of each other, placing loose bits between the pieces. Press back down into a square.
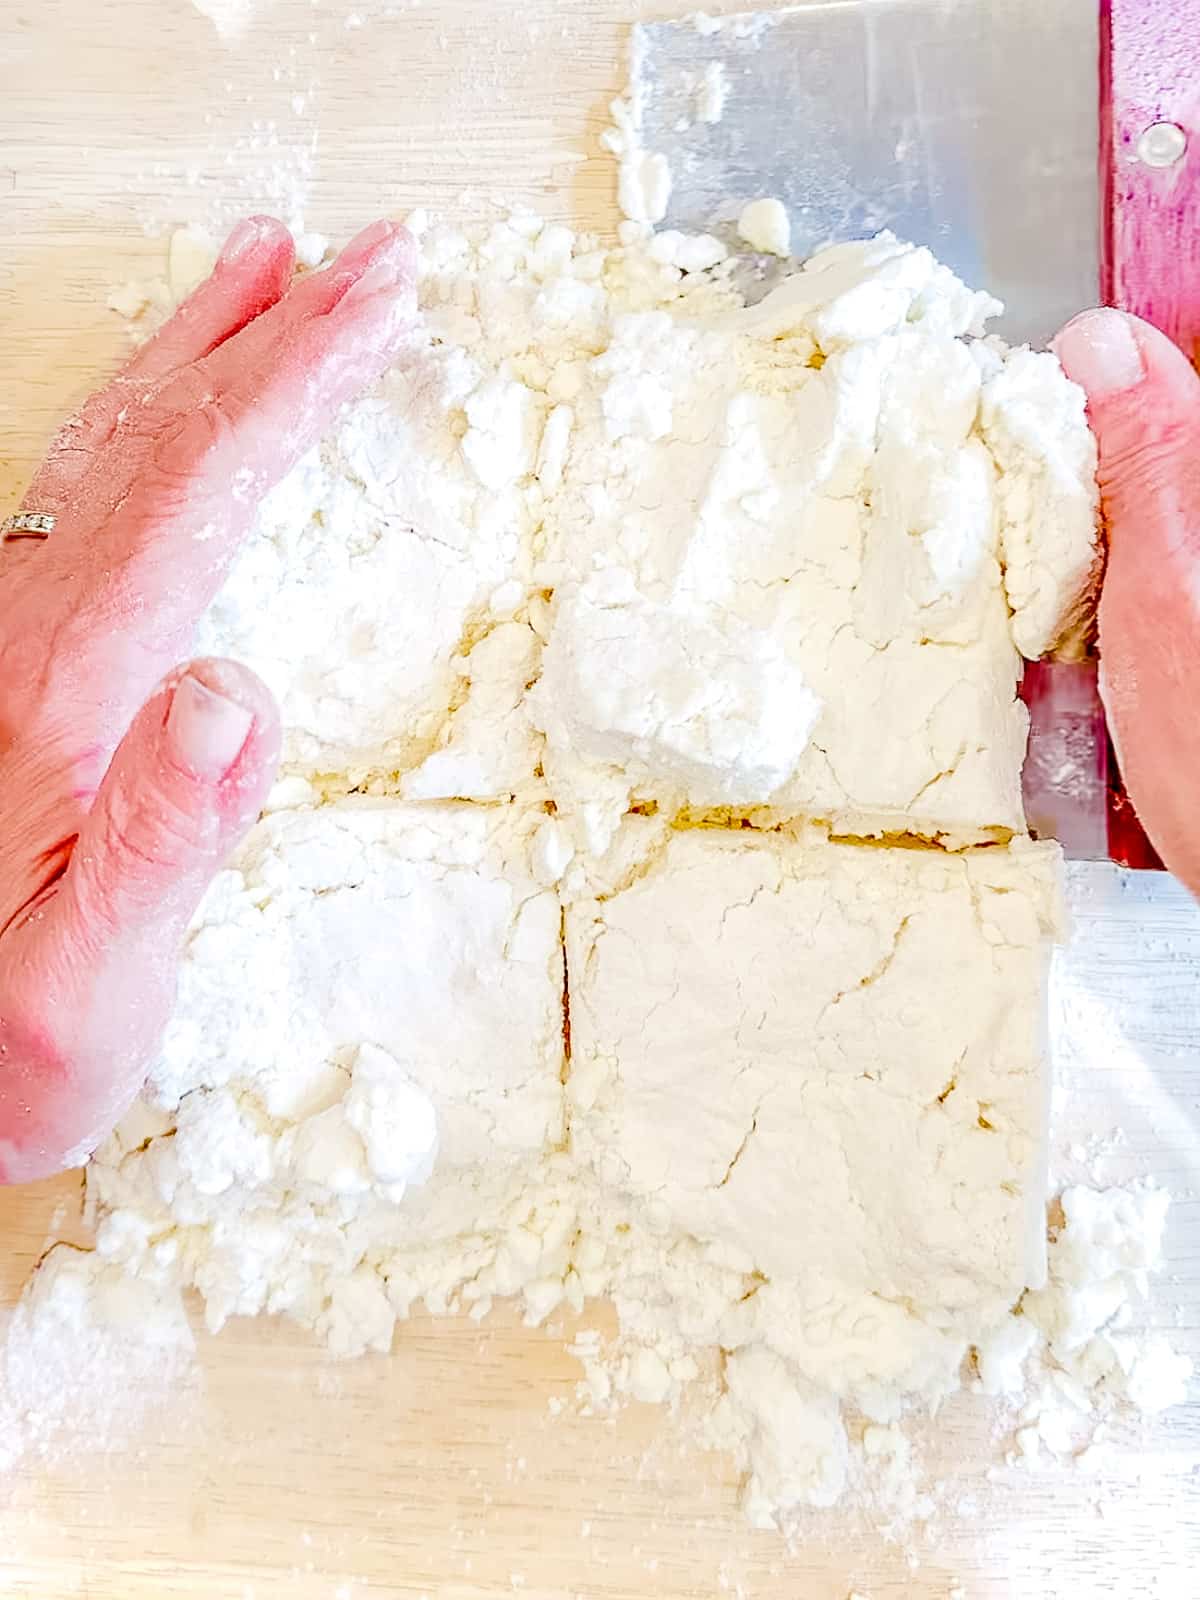
1. Repeat the cut-and-stack 2 more times, for a total of 3. The dough will come together and be more cohesive with each round of cut-and-stacks.
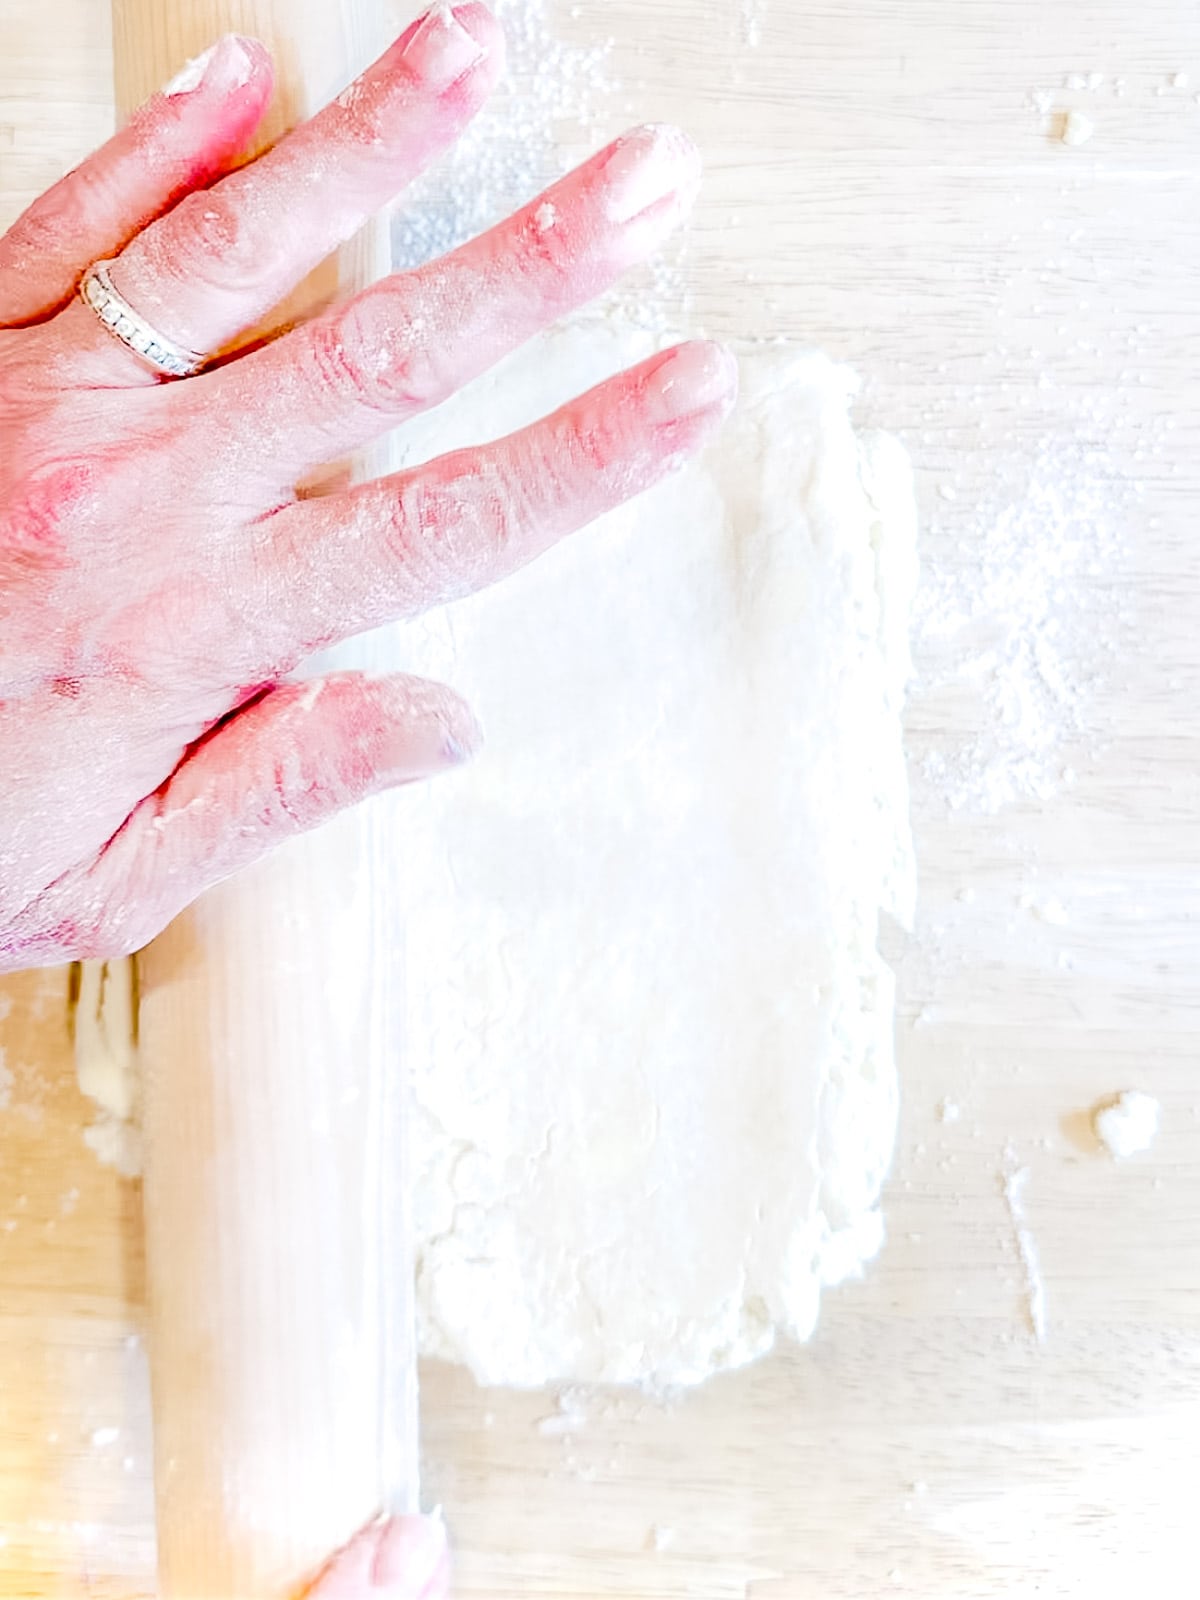
2. Use your hands or a rolling pin to shape the dough into a rectangle about ½ inch thick.
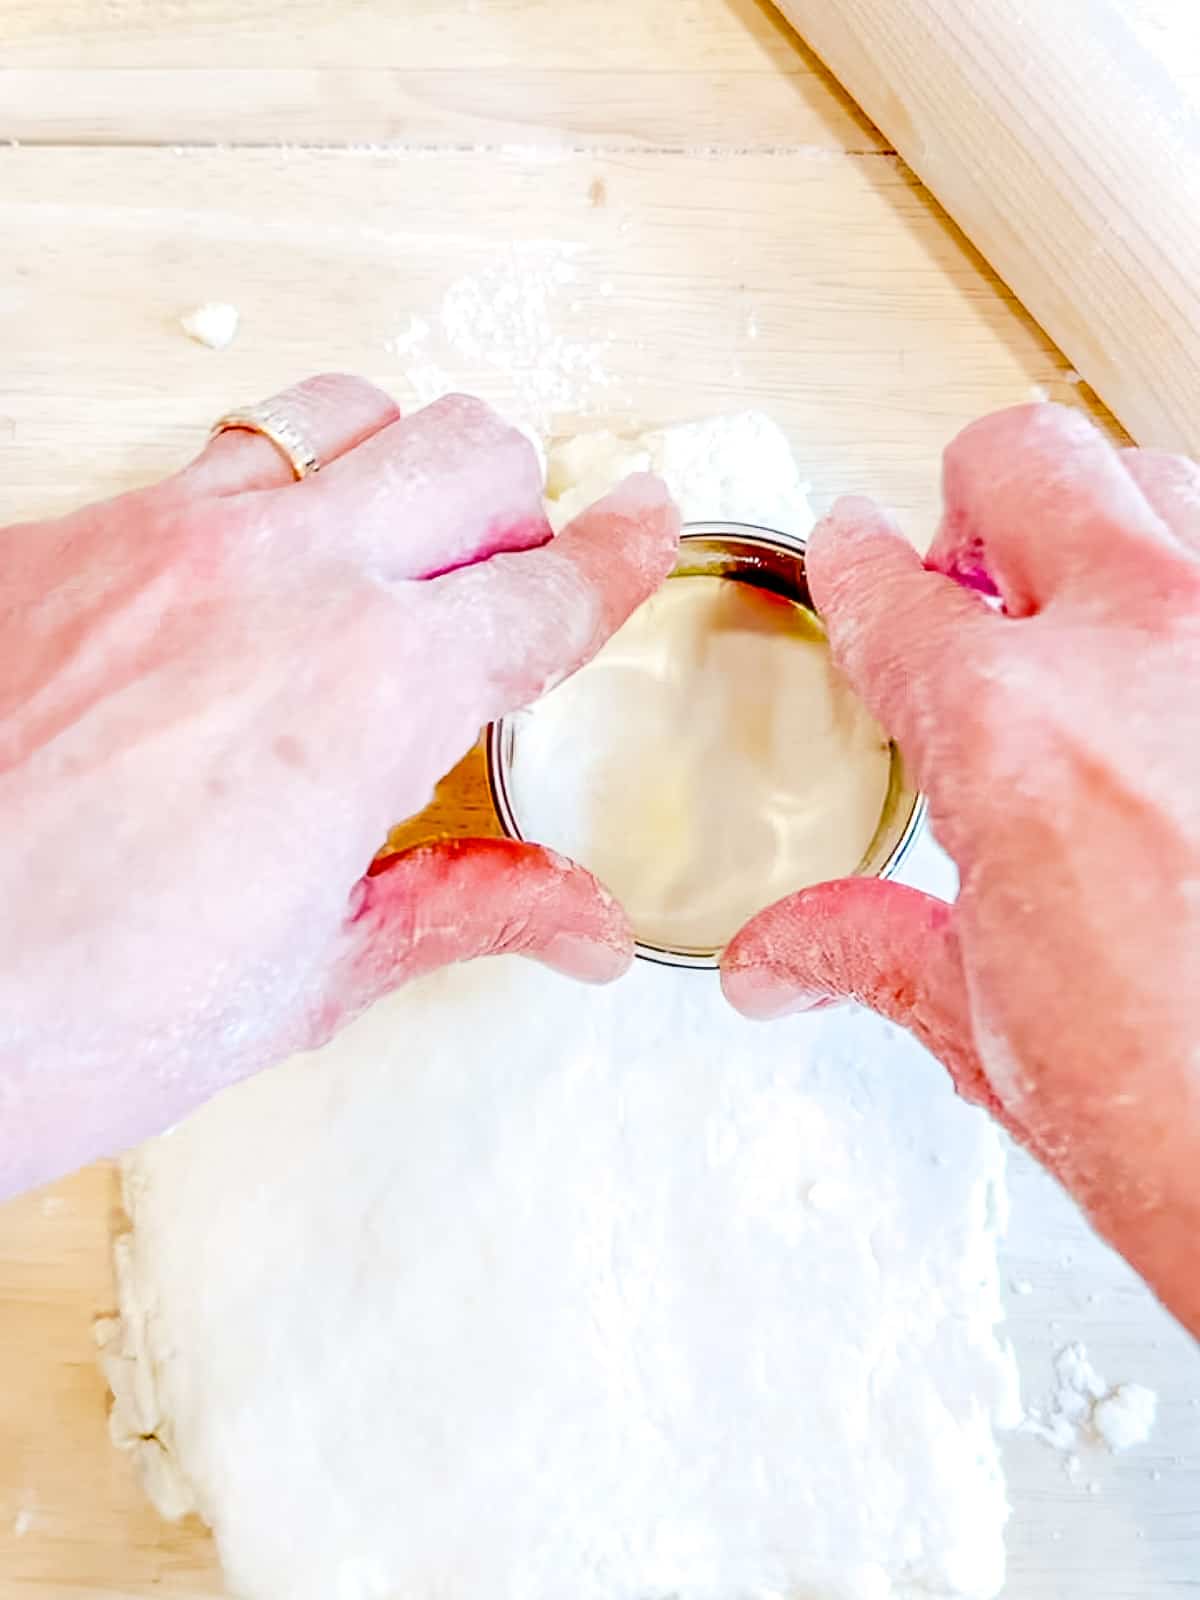
3. Use a cookie cutter, biscuit cutter, or ring cutter to cut out biscuit rounds. Do not twist your cutter, or you will seal your flaky layers shut. Place cut biscuits in the freezer while you preheat your oven to 450°F.
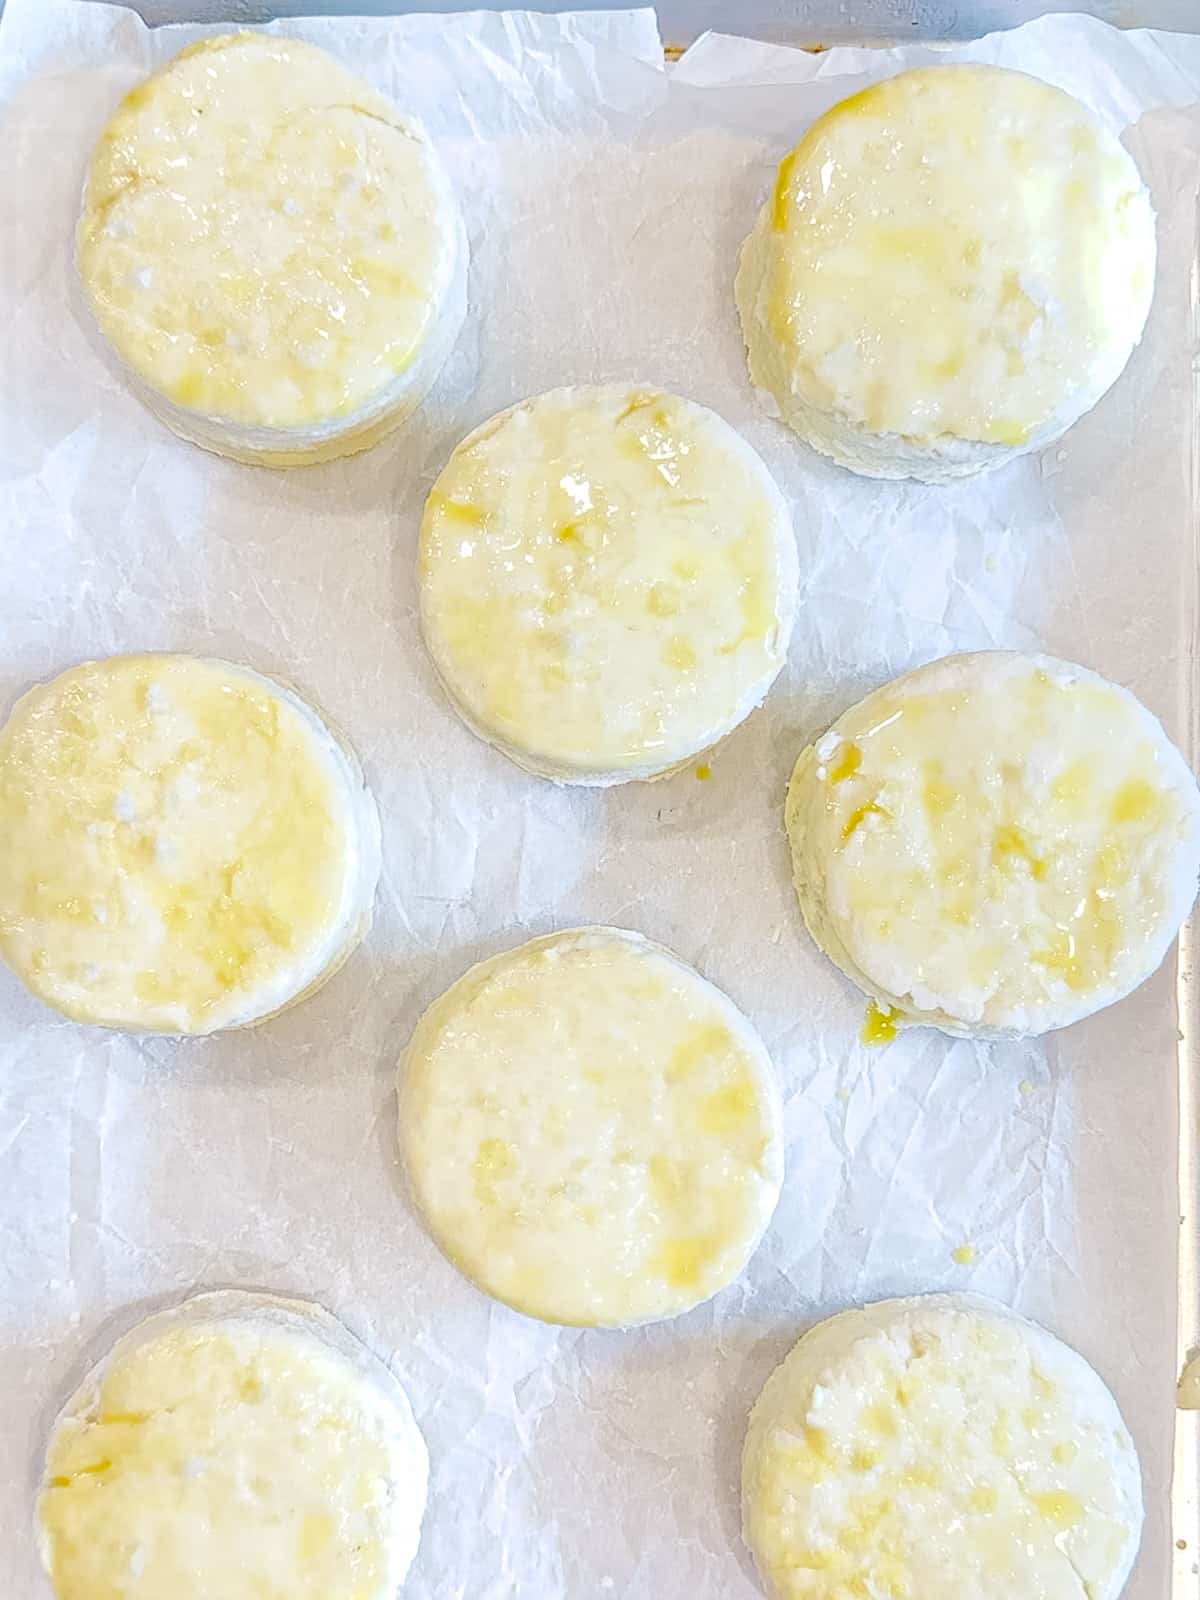
4. Remove your biscuits from the freezer and brush with an egg wash made of one egg whisked with a tablespoon of water. Sprinkle with flaky sea salt, if desired.
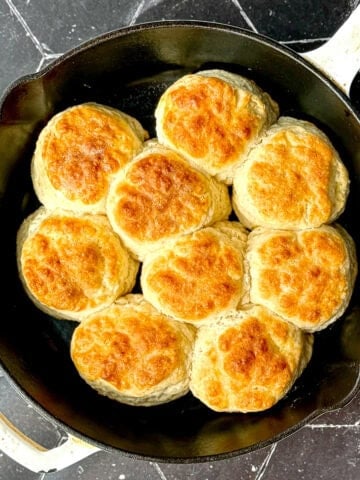
Bake for 18 to 20 minutes, or until the tops are golden brown and your biscuits are tall and flaky.
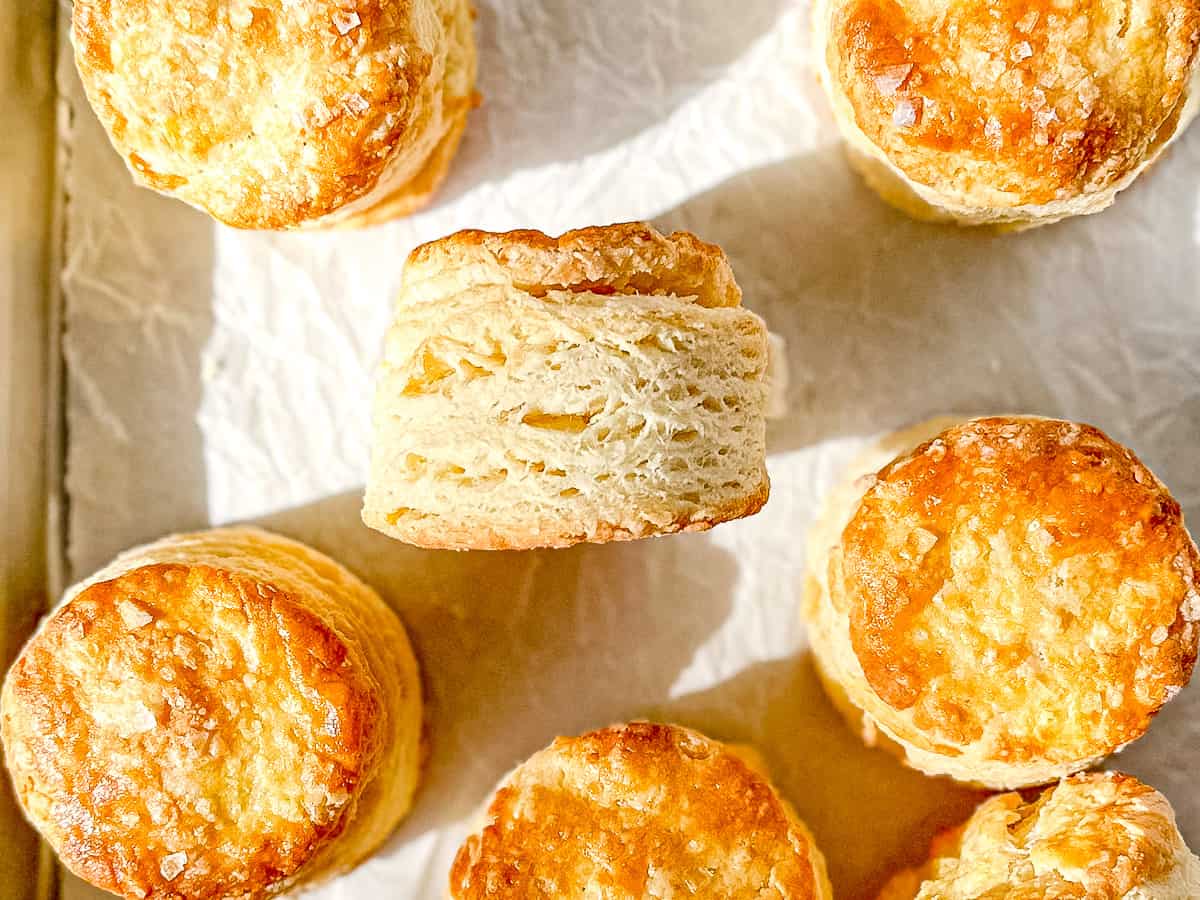
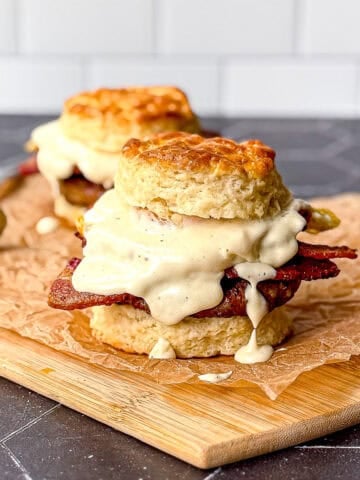
Hint: Allow to cool for at least 10 minutes as they will continue cooking from the residual heat. Serve with butter or jam or a piece of ham or make into a sandwich or... However you want to eat your biscuits is the right way to eat your biscuits!
Need biscuits even faster?! Try my 2-Ingredient Biscuits that use self rising flour. You couldn't make quicker biscuits if you had a time machine!
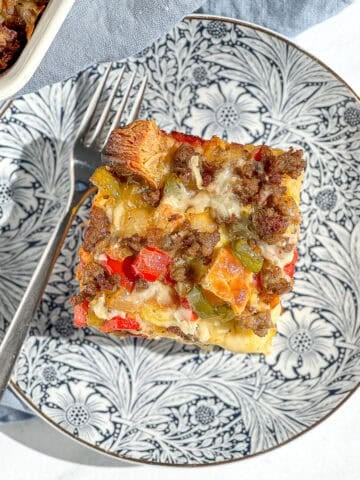
Got leftover biscuits? Don't waste them! Save them and make my Leftover Biscuit Breakfast Casserole. Combine yesterday's biscuits with sauteed vegetables and your favorite breakfast protein and bake in a creamy egg custard.
Want more tender and fluffy biscuits? Try my Everything Seasoning Cream Cheese Biscuits!
Recipe FAQ's
You can, but you may need to thin it out with up to two tablespoons of milk to fully hydrate the flour. Mix your Greek yogurt with the dry ingredients and if there is a lot of dry flour at the bottom of the bowl, add one tablespoon of milk at a time (uo to 2 tablespoons) until it is all incorporated.
Oh my gosh YES! Try a vanilla yogurt, but a strawberry or peach flavored would taste amazing. I would probably skip any with actual fruit, as the fruit can change the moisture compostion of the biscuits, making them gummy. I would also avoid any yogurts with a blue or purple tint, as they would bake up with an unnattractive grey color.
Yes, you can, and you should! My suggestion is to follow the instructions in my Freezer Biscuit Recipe to freeze some, or all, of your biscuits ahead and bake them from frozen when you have a biscuit emergency!
Storage and Reheating
Storage
Store leftover biscuits in an airtight container at room temperature for up to 4 days. I do not recommend refrigerating biscuits as that can change their texture.
Reheating
I recommend wrapping the desired number of biscuits in aluminum foil, and reheating in a 400°F oven for 5 to 8 minutes. Unwrap and heat another 3 to 4 minutes. You can also microwave them for about 20 seconds on high.

Did you try this recipe?
Leave a comment with a ⭐️ rating below to tell me all about it, and don't forget to tag me on Instagram!
I appreciate you!
-Cynthia
📖 Recipe
Easy Yogurt Biscuits
Ingredients
Biscuits
- 2 cups (240 g) all-purpose flour
- 1 tablespoon (12 g) baking powder
- 2 teaspoons (8 g) sugar
- ¼ teaspoon baking soda
- 1 teaspoon kosher salt
- 8 tablespoons (112 g) butter cold and cut in cubes
- 1 cup (240 g) plain yogurt cold
- 1 to 2 tablespoons milk optional, if needed
Egg wash
- 1 large egg
- 1 tablespoon water
Instructions
- Preheat oven to 450°F. Line a large sheet pan with parchment paper or foil and set aside.
- In a mixing bowl, whisk together flour, baking powder, sugar, baking soda, and salt.
- Toss cold butter cubes into the dry ingredients and, using a pastry cutter or your fingers, rub in the cold butter until you have a mixture of flat pieces and crumbly, pea sized bits of butter mixed into flour that is the texture of cornmeal.
- Make a well in the center of the mixture and add cold yogurt. Gently mix the yogurt and the dry ingredients together until you have a fairly uniform, loose dough. The flour won't look all mixed in and that's okay. It will come together.
- If there is a lot of loose flour at the bottom of your bowl, add one tablespoon of milk and mix. If needed, you can add one more tablespoon of milk.
- Dump the shaggy dough out onto a lightly floured surface. Using your hands and a bench scraper, gently bring everything together into a rough square.
- With a bench scraper or knife, cut into four smaller squares. Stack the pieces of biscuit dough on top of each other. Gently press the dough down and shape into a square again. Repeat this cutting and stacking procedure 2 more times.
- Pat the dough into a rectangle at least ½ inch thick. Using a biscuit cutter or cookie cutter, cut out your biscuits. Gather your scraps as you go and gently re-form them together and cut as many biscuits as you can. Place sheet pan in the freezer for 10-15 minutes while you preheat your oven.
- Remove biscuits from the freezer. Brush the tops of the biscuits lightly with an egg wash made of one egg whisked with a tablespoon of water. Bake in a 450° oven for 18 to 20 minutes, or until golden brown.



Janet Pesaturo says
Simply the best biscuit recipe I've ever used, and I have tried many. Superb flavor and texture. The yogurt, the higher butter content, and the technique of stacking squares of dough made the difference.
Cynthia Christensen says
Amazing! So happy to hear this!
Lauren says
I was very impressed with this recipe, my family said they were just as good as my classic buttermilk biscuits!
Cynthia Christensen says
That's great to hear!
Desmond says
Created this lovely batch of biscuits with just a few short ingredients on hand. Created heart shapes for Valentine’s Day and they puffed up perfectly for the best biscuits and jam. Thank you.
Cynthia Christensen says
Oh my gosh how adorable! So glad you loved them!!
Mink Toochinda says
Made this today very good, great flavor. I used greek yogurt.
Cynthia Christensen says
I'm so glad they came out so well!
Traci Hernandez says
Lovely biscuit, with slices of bacon and jam, a little sweet and salty breakfast treat . Thank you for easy to follow recipe with ingredients I have on hand. First time making rolled biscuits, I usually drop and bake. 5 stars 🌟!
CH says
Not entirely sure what happened, but I had to keep adding flour back to the recipe.
I used whole milk yogurt, and while the consistency is quite the same to whatever plain yogurt might be mentioned in the recipe, this dough was more than wet. I kept everything refrigerated between steps, kept my hands cold, and this recipe still called for more than the initial amount listed, besides whatever you may account for sprinkling on the surface.
Cynthia Christensen says
I'm so sorry it didn't work out for you. Because I try to keep my recipes as a approachable as possible, there's no reason to keep everything refrigerated between steps or keep your hands cold. I'm sure there was either a mis-measuring or consistency of the yogurt problem. If you want to troubleshoot it with me I would be happy to help you.
Anita Sartori says
Perfect recipe. This will replace the buttermilk biscuit recipe I have been making for decades. Appreciate the details on the technique which did result in very flaky biscuits. Thank you.
Cynthia Christensen says
I’m so glad you like it so much!
Holly says
I tried the recipe and it worked well. I also like the notes regarding using an egg wash, using a biscuit cutter, and using Greek yogurt. I have book marked this recipe as a go-to favorite.
Cynthia Christensen says
Thank you so much! I’m so glad it worked so well for you ❤️
Julia McLean says
These are beyond amazing! soft, flaky and fluffy. Perfect texture and rise! just like cracker barrel! Thank you so much for such an amazing recipe, a keeper forever!
Cynthia Christensen says
I've never had Cracker Barrel, but I'm going to take that as a huge win 🙌 Thank you!!
Michael Tomaszewski says
Came out GREAT!
Cynthia Christensen says
Yay! 🙌