



Looking for a quick sandwich bread recipe that doesn't take all afternoon? This One-Hour Sandwich Bread is soft, fluffy, and sturdy enough for sandwiches or toast, and it comes together with just a few simple ingredients. Step-by-step photos and a short video show you exactly how to mix, shape, proof, and bake a homemade loaf in about an hour.
Save this recipe for later
Enter your email and I'll send this recipe straight to your inbox.
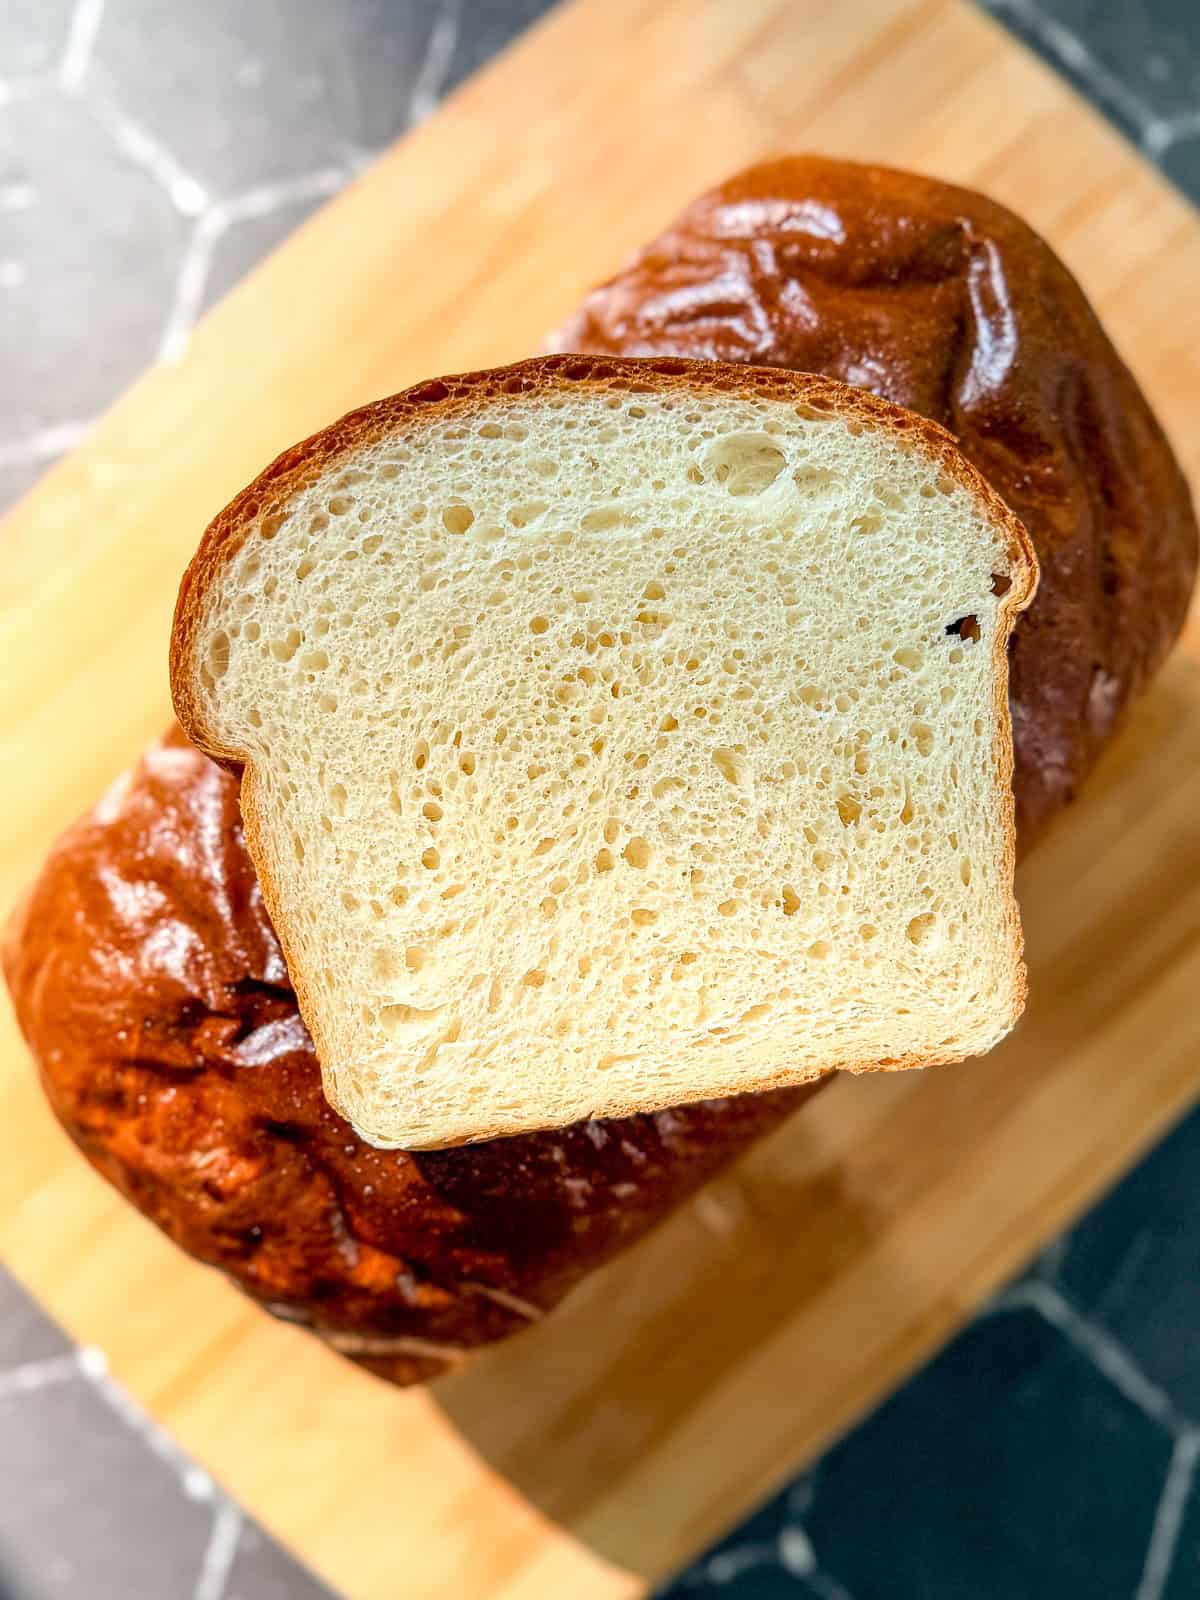
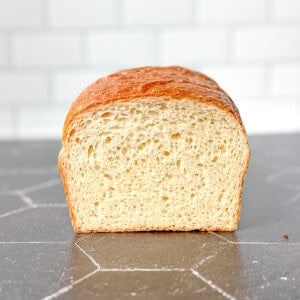
I am obsessed with this One-Hour Sandwich Bread. Like, cancel-my-plans, talk-about-it-to-strangers, never-stop-posting-about-it, this-bread-is-my-entire-personality kind of obsessed. The fact that I can go from craving bread to eating warm, fluffy bread in just about an hour? Life-changing. Give me a sharp knife, I'm slicing in.
This simple white bread recipe results in the perfect combination of soft and chewy bread, with just the right amount of crust, and I genuinely can't stop making it. I've made 5 loaves in the past 5 days and we've eaten every bite of it! Whether you're new to baking or just need a bread fix fast, this recipe is about to become your new best friend. Let's bake!
This quick sandwich bread recipe has become one of my favorite doughs because it is fast, reliable, and incredibly versatile. I use the same basic dough to make my one-hour hamburger buns and homemade hot dog buns, so once you learn how this dough should look and feel, you can turn it into just about any soft bread you need.
Jump to:
Why You'll Love this Quick Sandwich Bread Recipe
- Simple ingredients - Bread flour, yeast, milk, water, oil, sugar, and salt are all you need.
- Fast - Two short rises mean you can have homemade sandwich bread in about an hour.
- Soft but sturdy - The crumb stays fluffy but holds together well enough for sandwiches, toast, and French toast.
- Beginner-friendly - The step-by-step photos show you exactly what the dough should look like from mixing through shaping.
- Flexible - Make the dough by hand, in a food processor, or with a stand mixer.
Ingredients & Substitutions
The easiest thing about bread is the ingredient list. Let's go over things shall we?
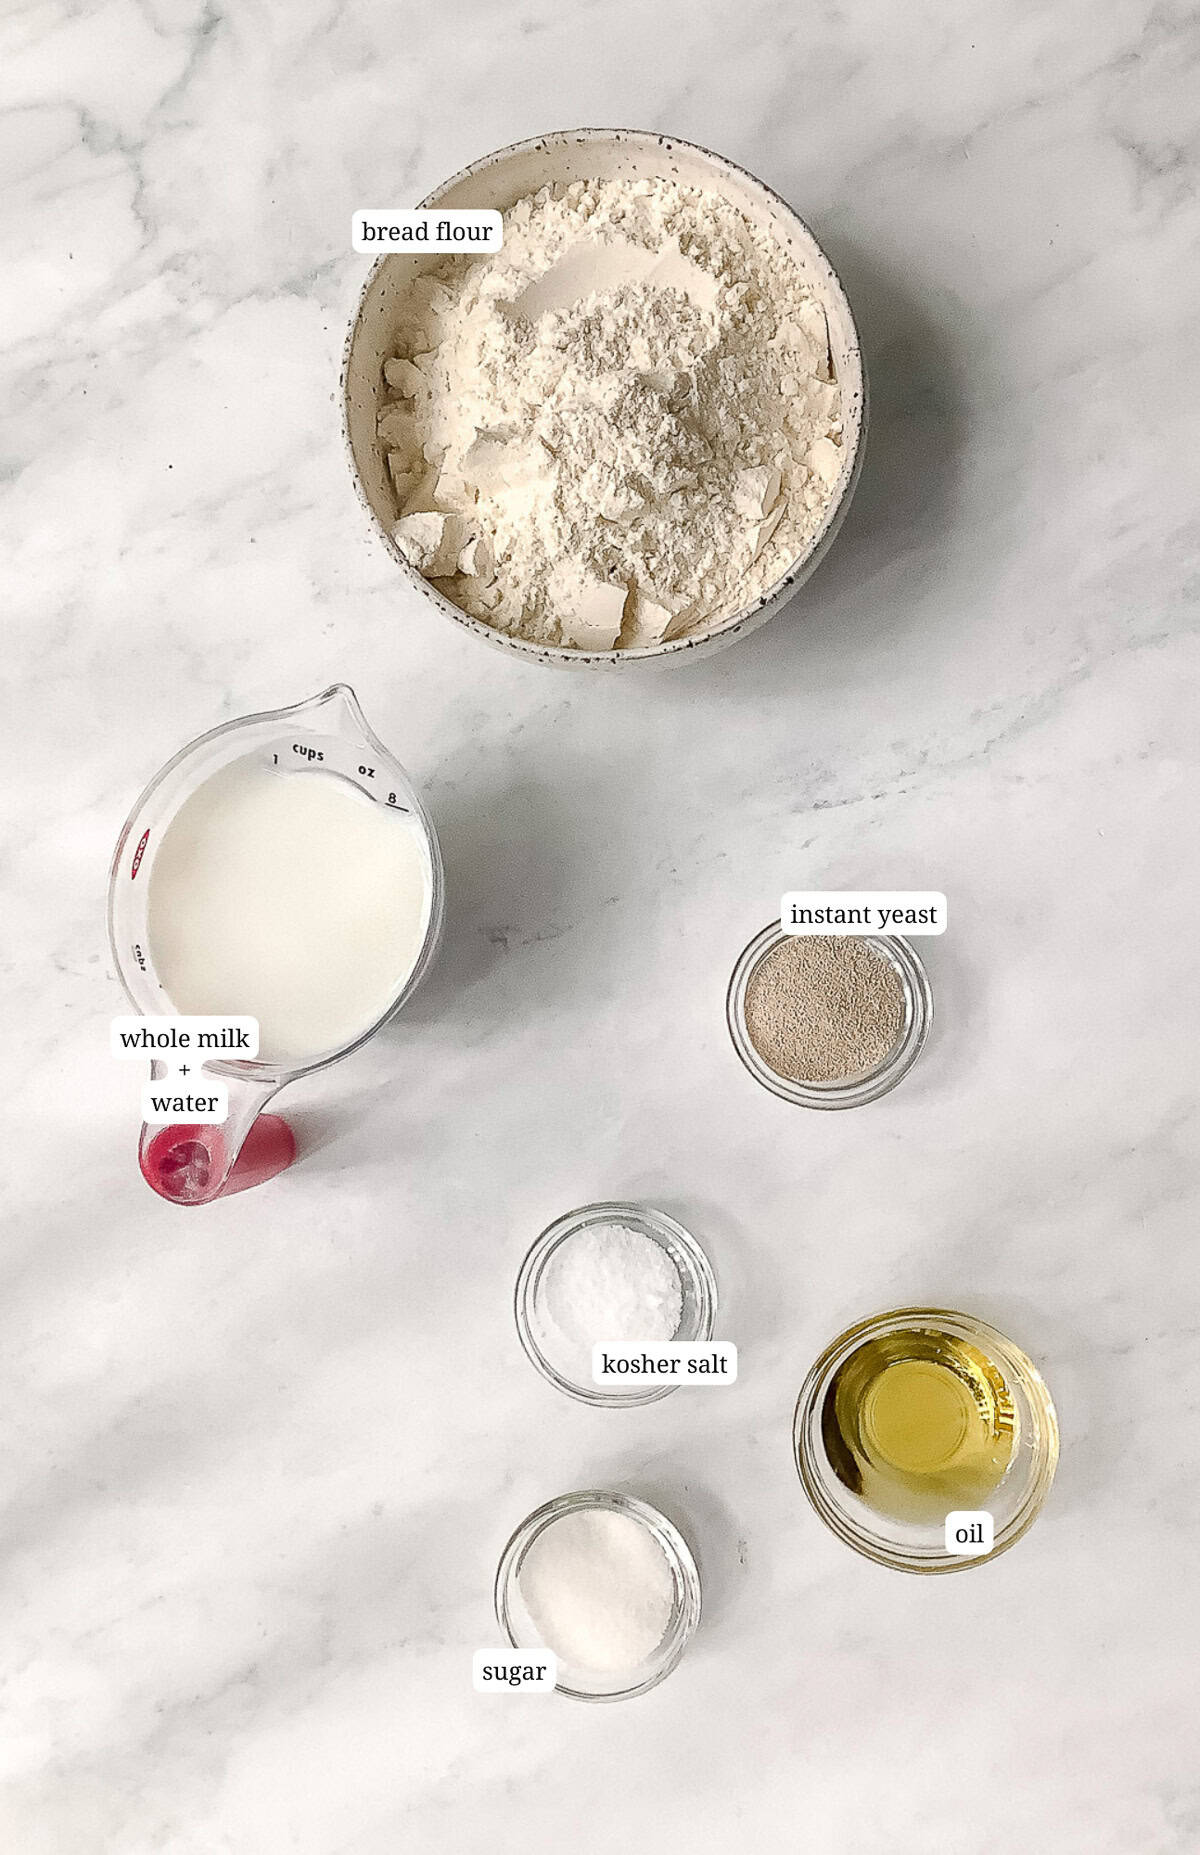
- Bread flour - I prefer to use bread flour for this sandwich loaf. All-purpose flour works fine, but bread flour gives a slightly chewier, more structured loaf.
- Instant yeast - I prefer instant yeast because besides amazing flavor, SPEED is my favorite part of this recipe. You can substitute active dry yeast 1:1 for the instant yeast. Active dry yeast works a little more slowly, so your dough may need additional rising time. Watch the dough rather than relying only on the clock.
- Milk - I use whole dairy milk because I like the flavor and the fat actually adds to the fluffy texture. If you prefer, you can use an alternate milk like oat, almond, or soy milk in this recipe. Just make sure the milk is unsweetened and unflavored so it doesn't affect the taste of the bread.
- Oil - If you decide to use a plant-based milk, luckily we're also adding oil to this bread. Try to use an oil that really doesn't have a distinct flavor. I prefer avocado oil, but any vegetable oil or very light olive oil is fine.
- Sugar - You can substitute with honey, but since honey is a liquid, it may make the dough slightly stickier, so you may need to add a pinch more flour when kneading.
- Kosher salt - I am very monogamous with my salt. I always use Diamond Crystal kosher salt, whether I am cooking or baking because I know precisely how salty it will make my foods. Since table salt is finer and saltier by volume, reduce the amount slightly, using about 1¼ teaspoons of table salt in place of 1¾ teaspoons kosher salt
See recipe card below for a full list of ingredients and measurements.
My favorite use for this simple white bread? I love to make my strawberry french toast with it! Store-bought white bread can fall apart while soaking, but this bread holds up and toasts amazingly!
Quick Recipe Video
🔥 Hot Tip
Set your oven up as a proofing box. For gas and electric ovens, turn the oven on to 300°F for just 2 minutes, then turn it off. Don't preheat it to 300°F and then turn it off. Maybe one of my children did this and they are now a cautionary tale 😜 Don't be them. Just turn on your oven for two minutes. This creates a warm, draft-free environment perfect for proofing your dough. Alternatively, you can place your bowl of dough on top of a heating pad set to low.
Step-by-Step Instructions
Professional internet people will tell me that I'm providing too many pictures for a sandwich bread recipe. To that I say, too bad. I am here to show you exactly what to do, step-by-step. We're going to make the dough both by hand and in a food processor (in the recipe card I'll tell you how to do it in a stand mixer), let it rise the first time, shape it into a loaf, let it rise a second time, and then bake. Are you here for an easy bread recipe? Let's go 👉
Making the dough and first rise
Hand kneading
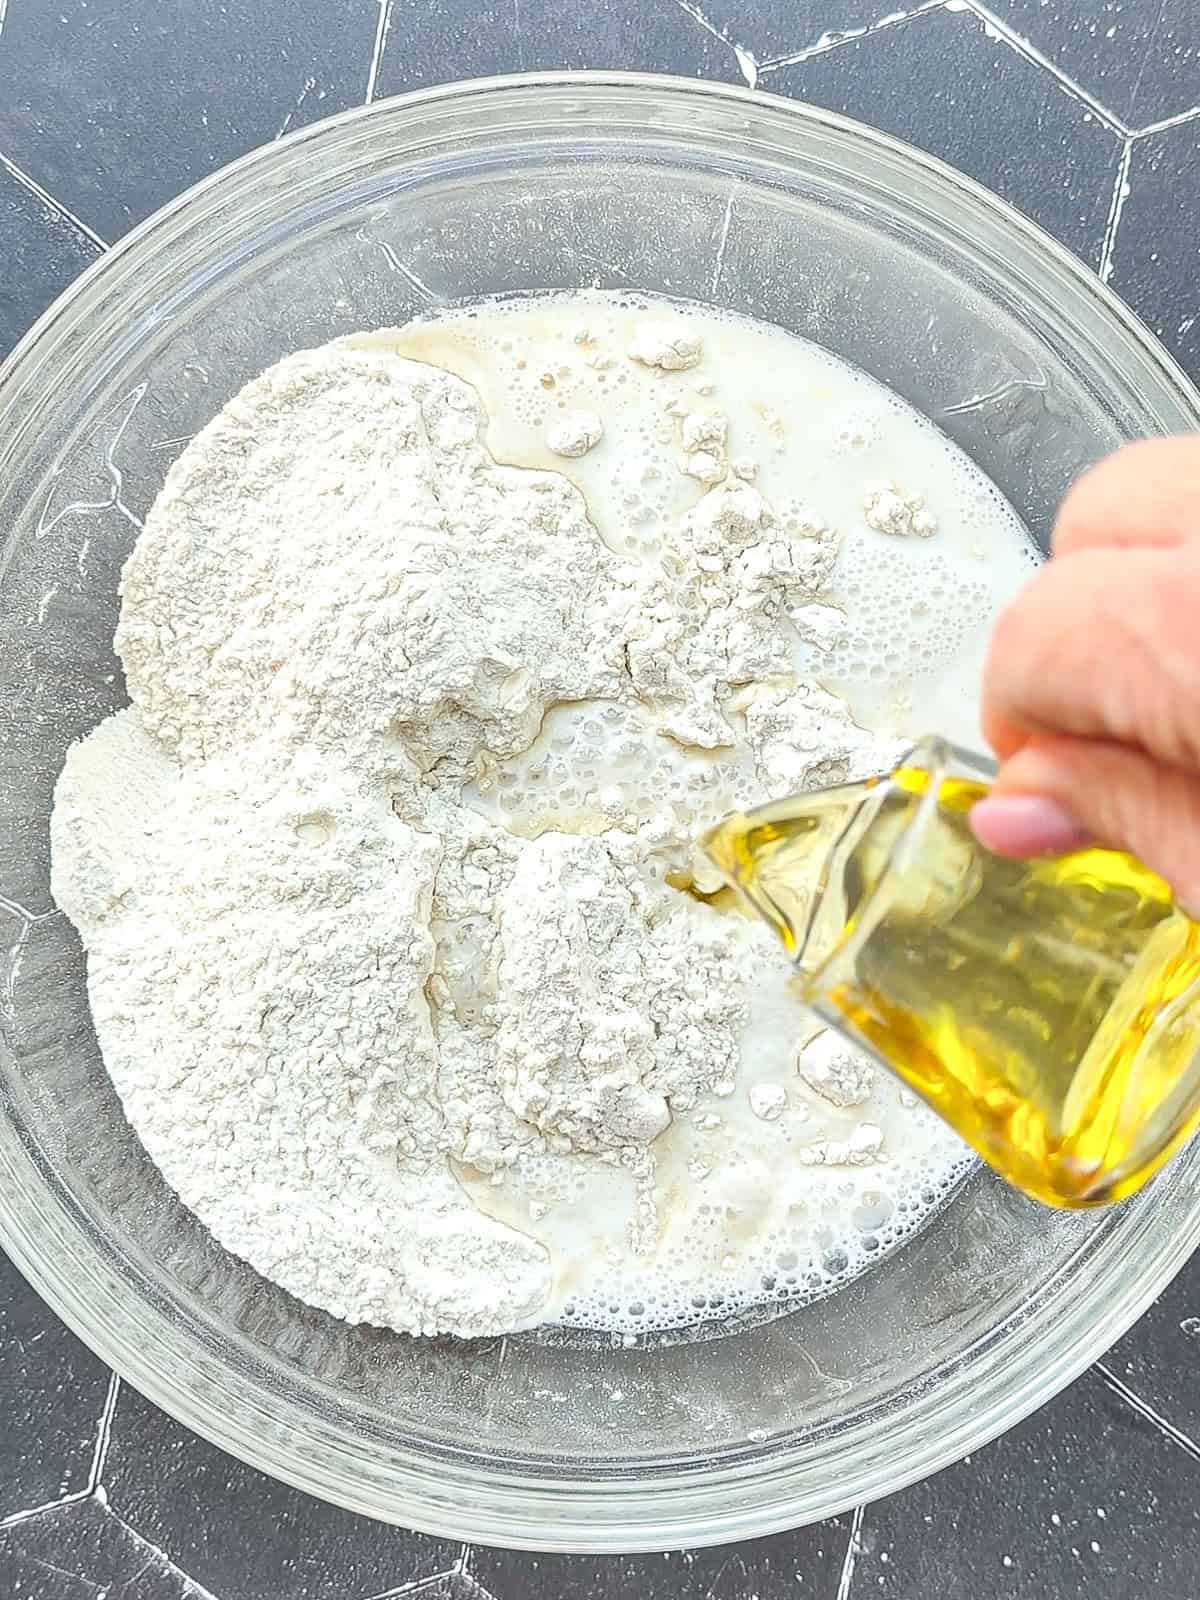
Step 1: Mix the flour, yeast, sugar, and salt in a large mixing bowl. Warm the milk and water to about 100 to 110°F, then add them to the dry ingredients along with the oil.
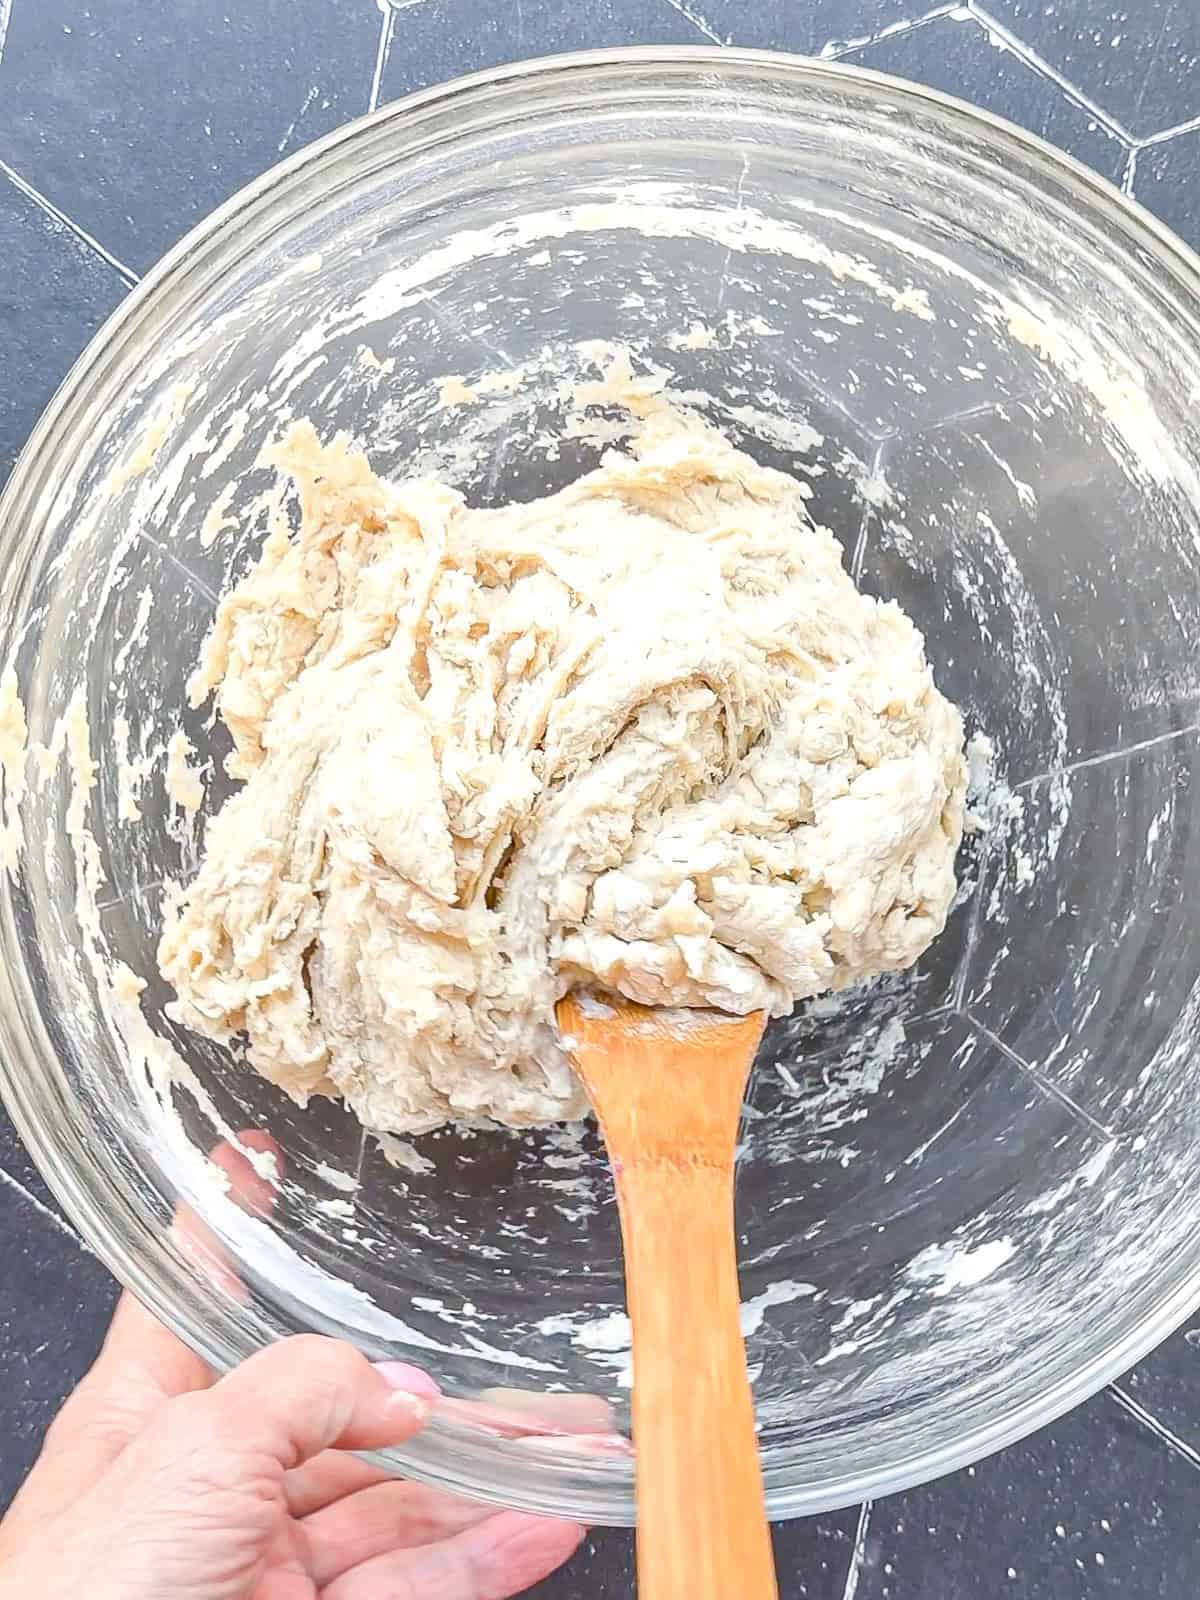
Step 2: Stir with a dough whisk, wooden spoon, or sturdy spatula until a shaggy dough forms and there are no large pockets of dry flour.
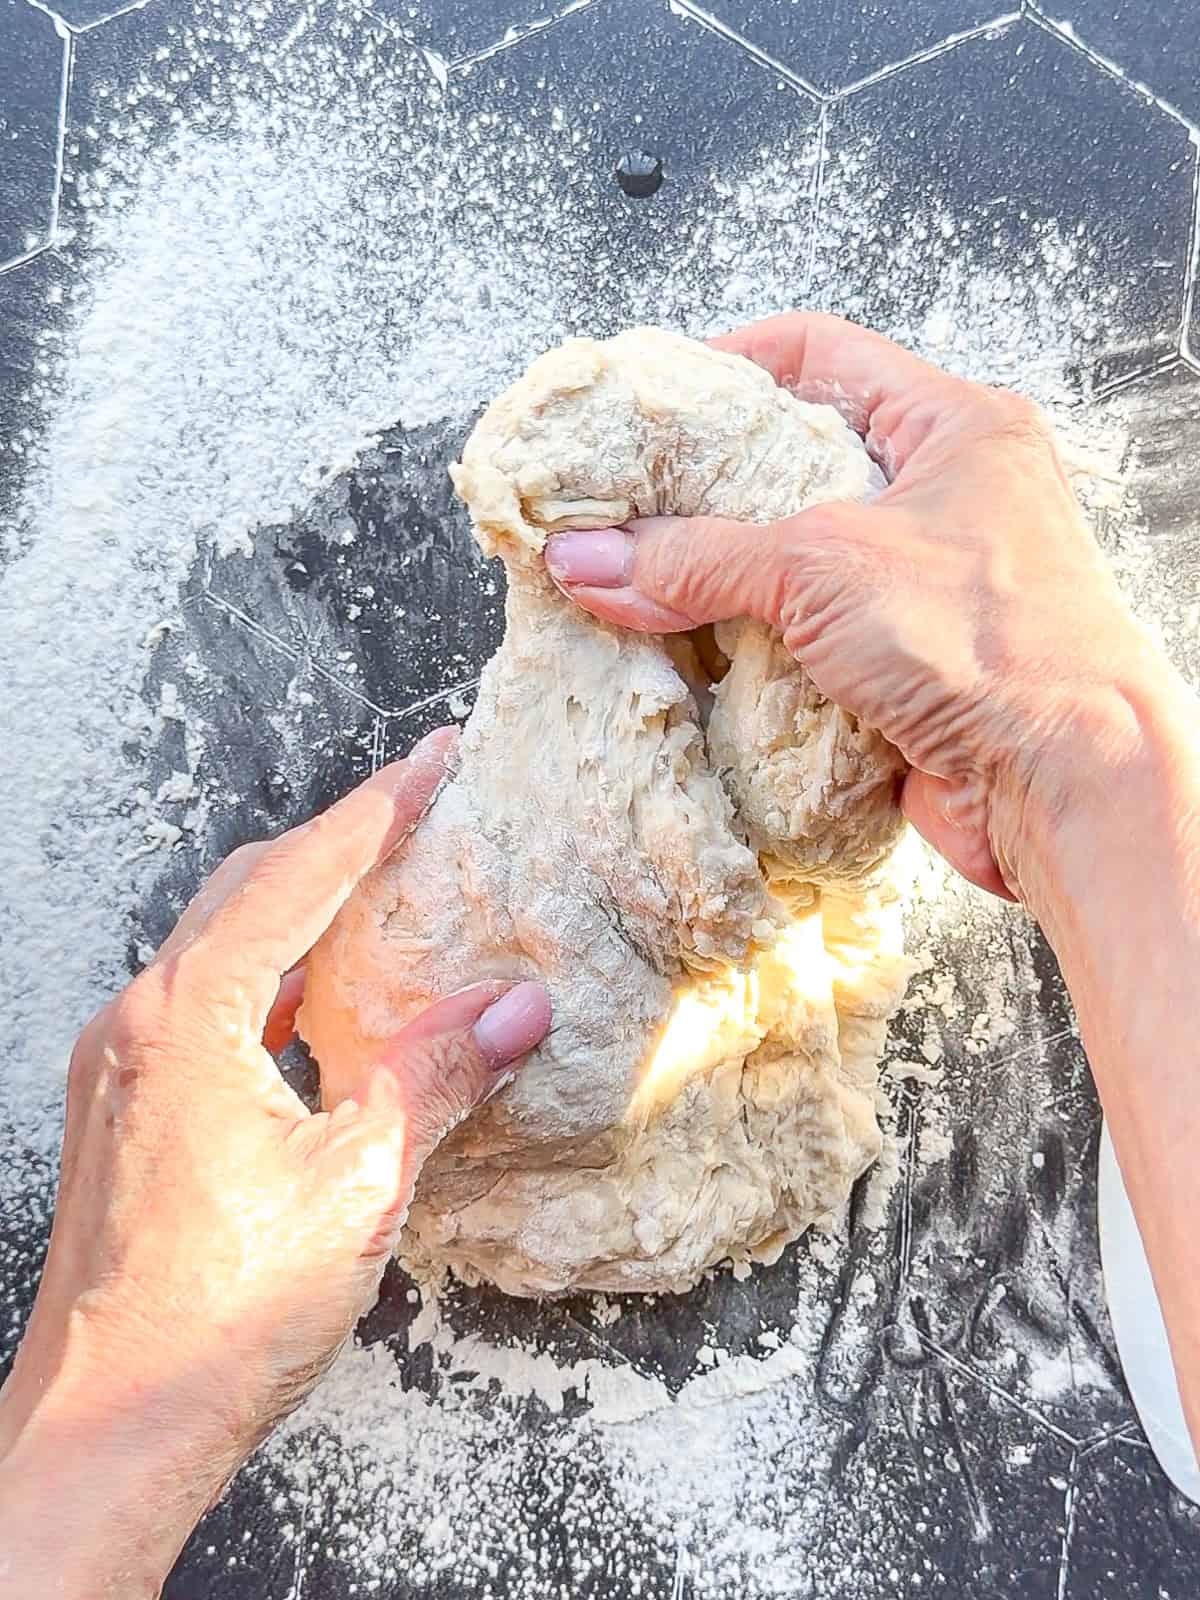
Step 3: Transfer the dough onto a lightly floured surface and knead by pulling the top of the dough back and over the rest of the dough...
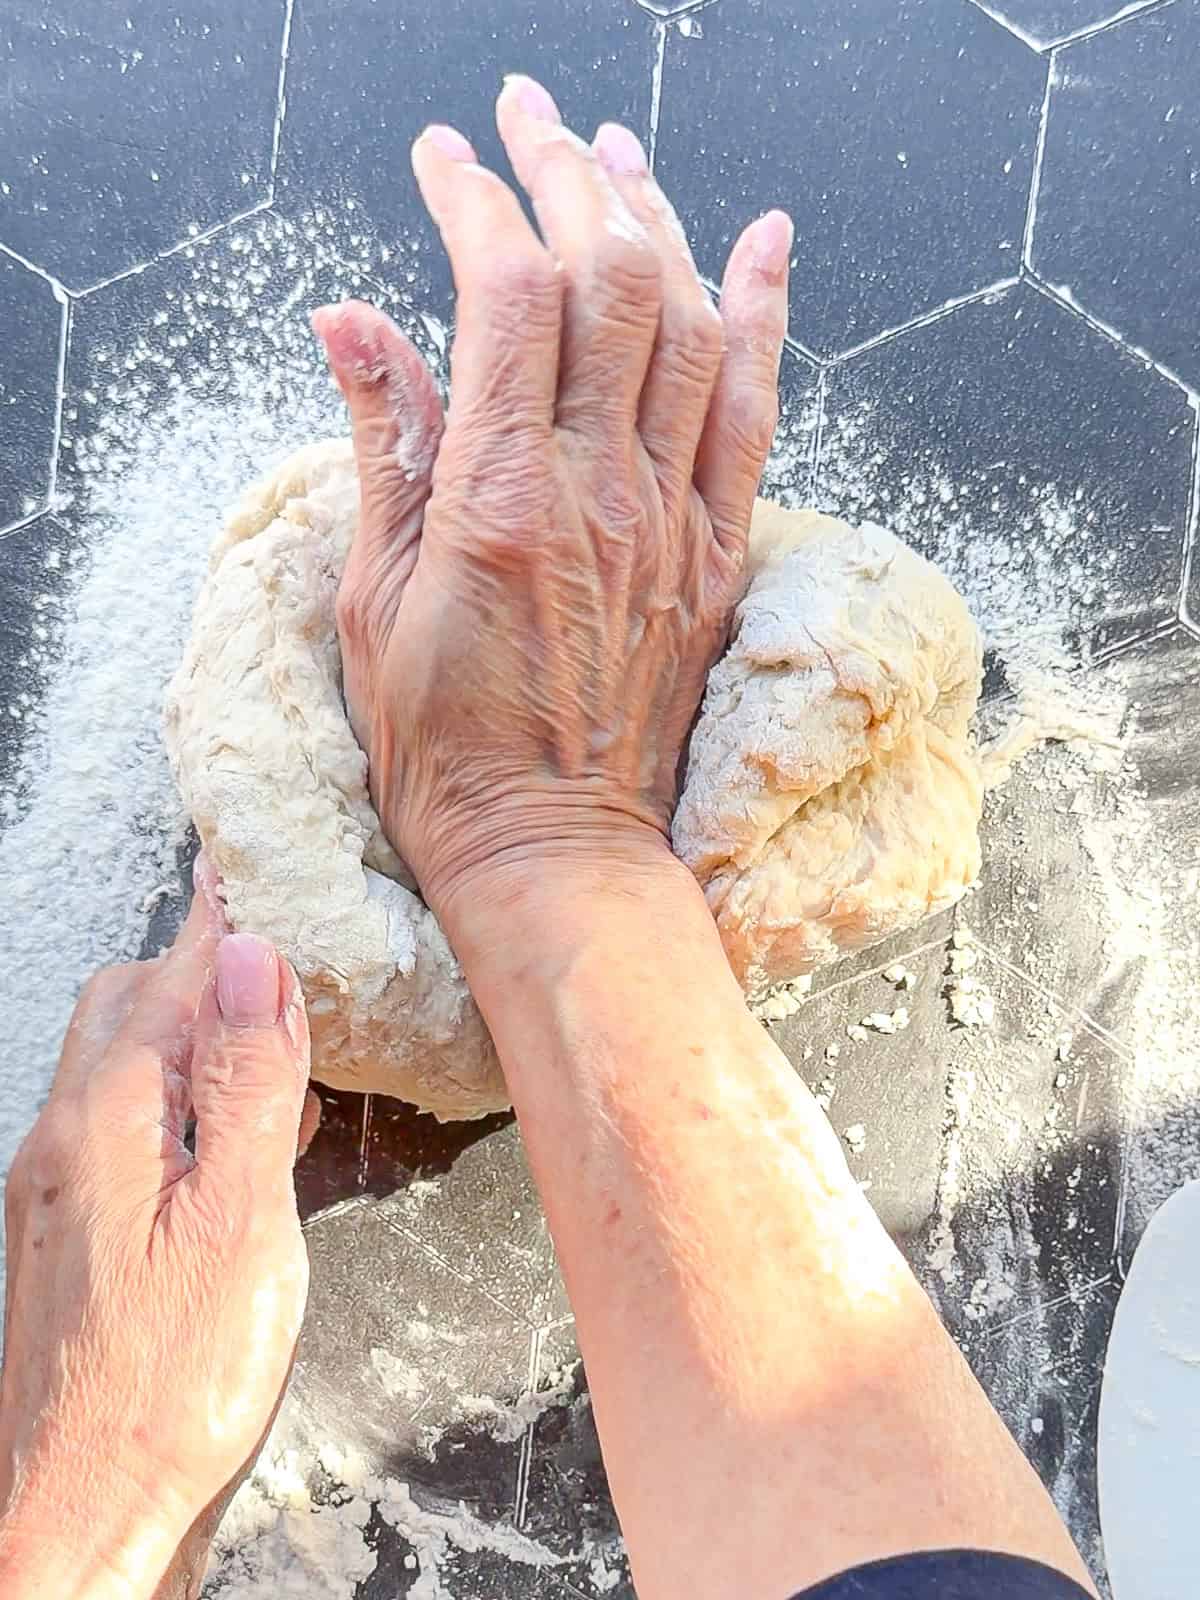
Step 4: ... and using the heel of your hand to push it away from you. Turn a quarter turn and continue doing this until the dough is smooth and no longer sticks to your fingers when pressed, about 5 to 7 minutes.
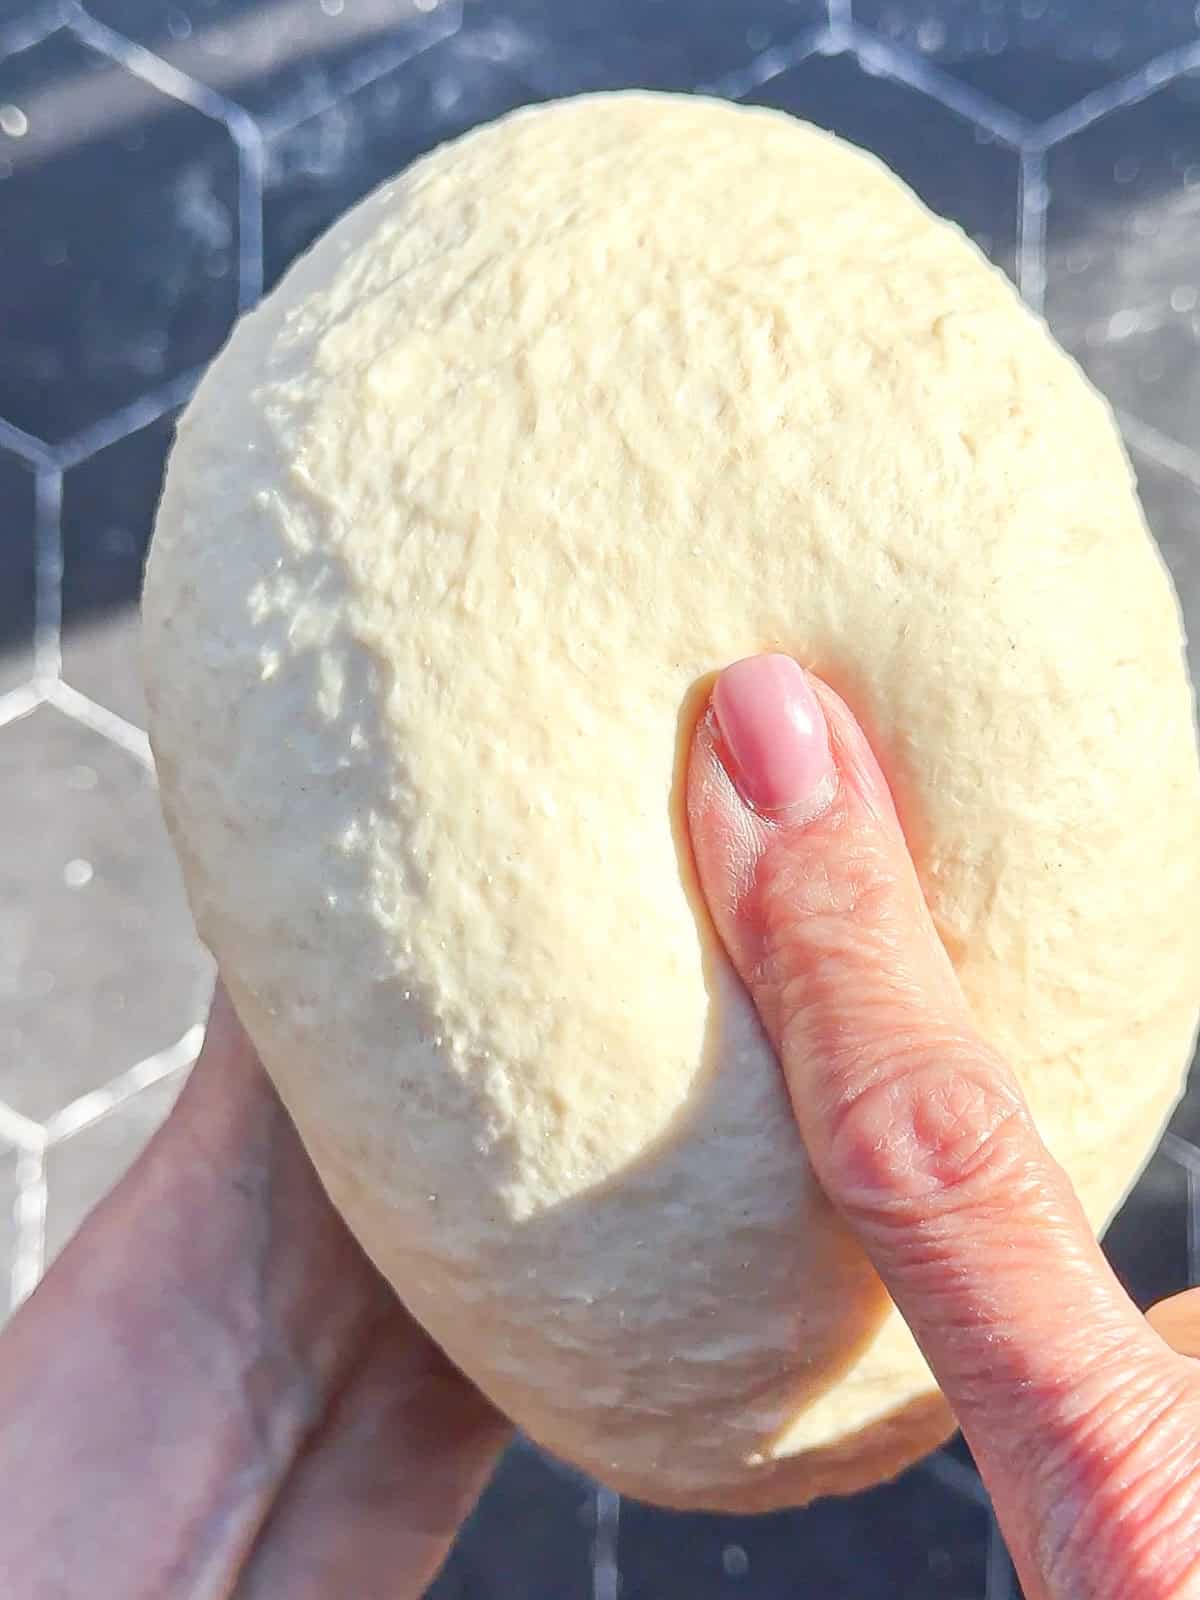
Step 5: Shape into a tight smooth ball. The dough should feel tacky, like the back of a sticky note, but no dough should stick to your finger when you press on the ball. Any indentation should spring back fairly quickly.
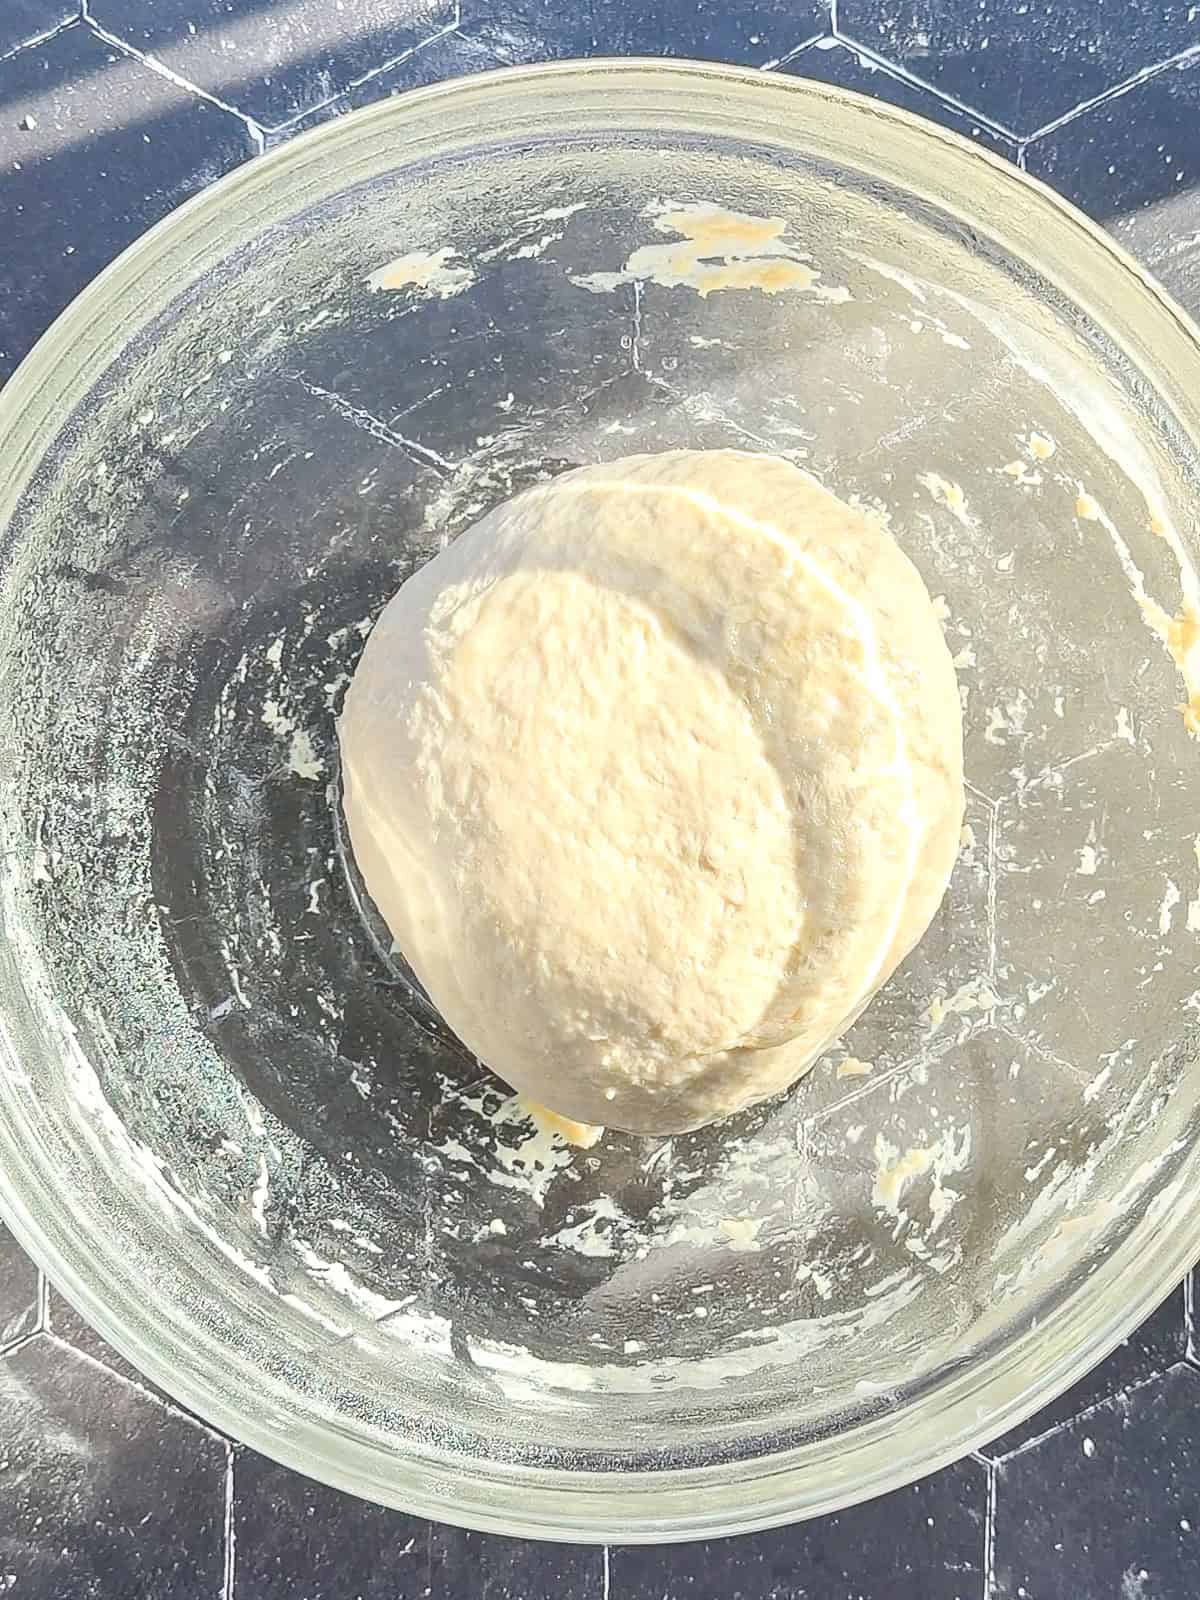
Step 6: Spray your bowl with nonstick spray or a light coating of oil and transfer the ball of dough into the bowl. Cover with plastic wrap (I use an inexpensive shower cap) and put into your proofing oven for 15 minutes.
Dough kneading note: Don't rely on the clock alone to tell you when your dough is properly kneaded. In a stand mixer, it should pull cleanly away from the sides of the bowl, with perhaps a small circle of dough still sticking to the bottom. By hand, the dough should feel soft and supple, and when shaped into a ball and gently poked, it should spring back fairly quickly. It should also feel tacky, like the back of a sticky note, but not so sticky that dough comes away on your finger.
Food processor mixing and kneading
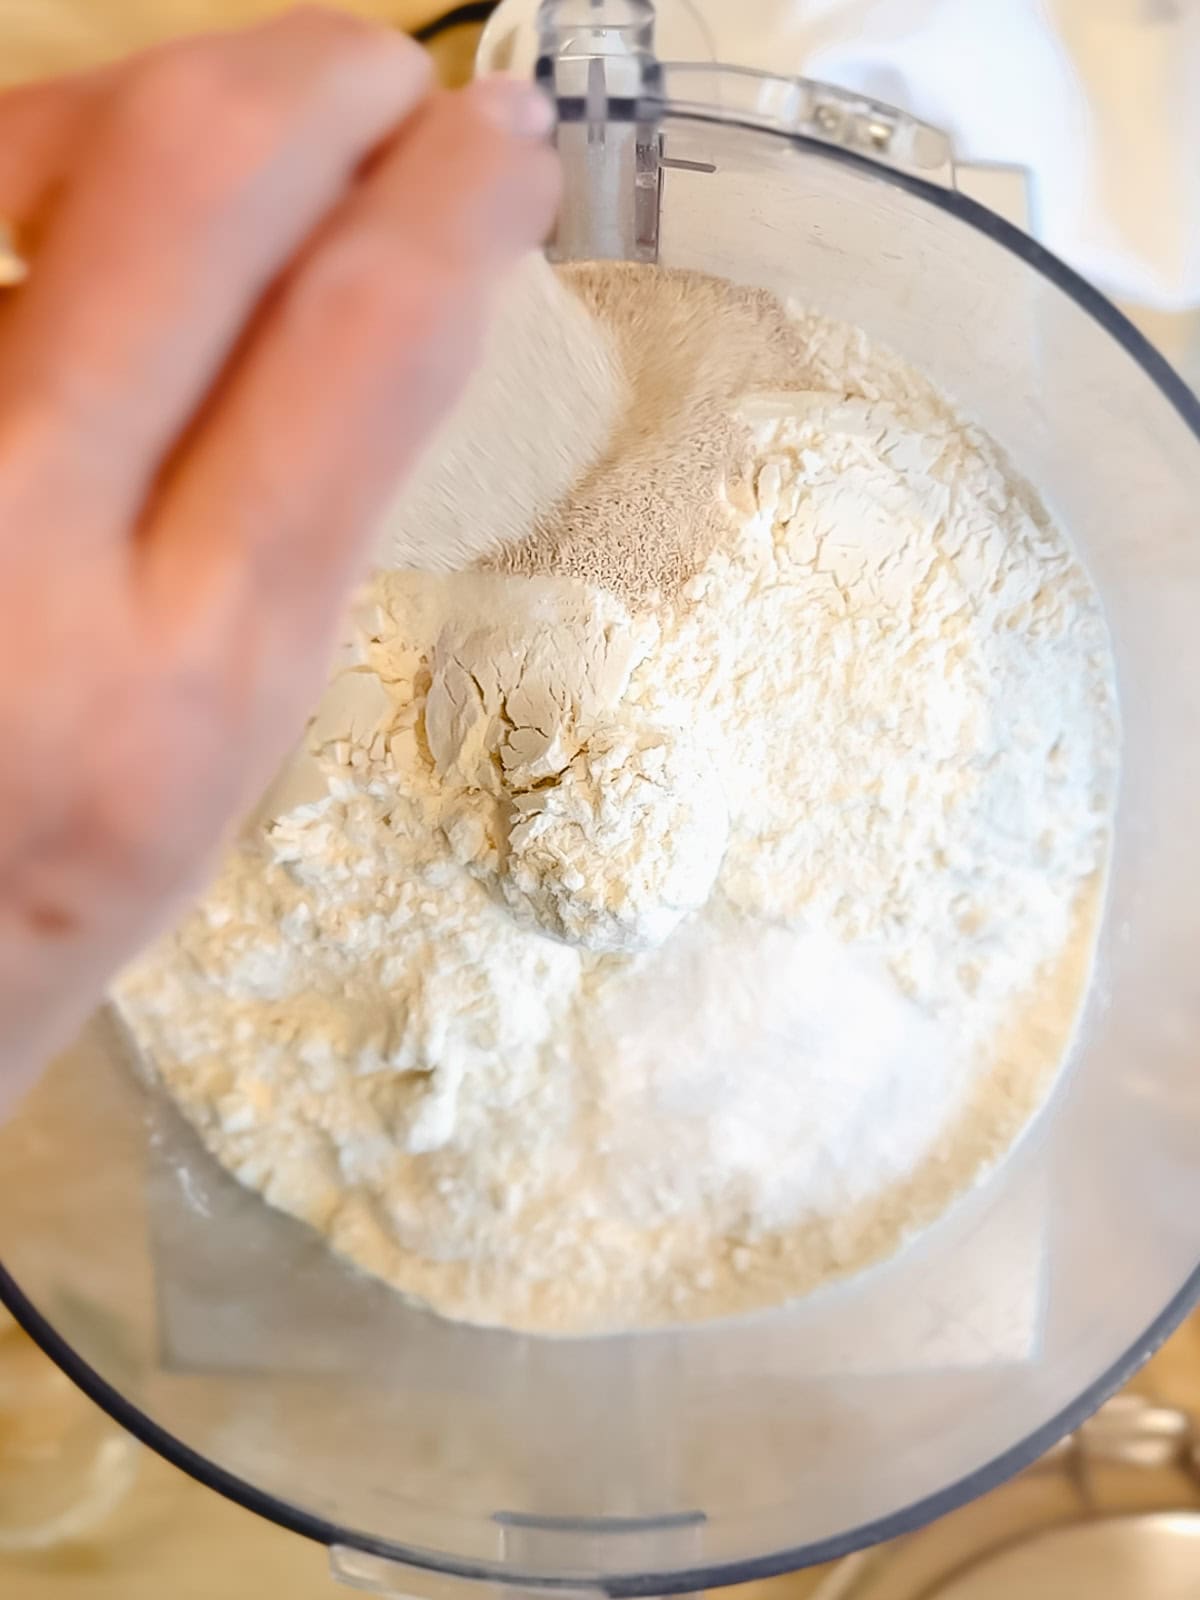
Step 1: Add the flour, sugar, salt, and yeast to the bowl of your food processor and pulse to mix.

Step 2: Warm your milk and water in the microwave for about 30 seconds, to around 110°F. While running the processor, add the oil, and pour into the opening on the top.
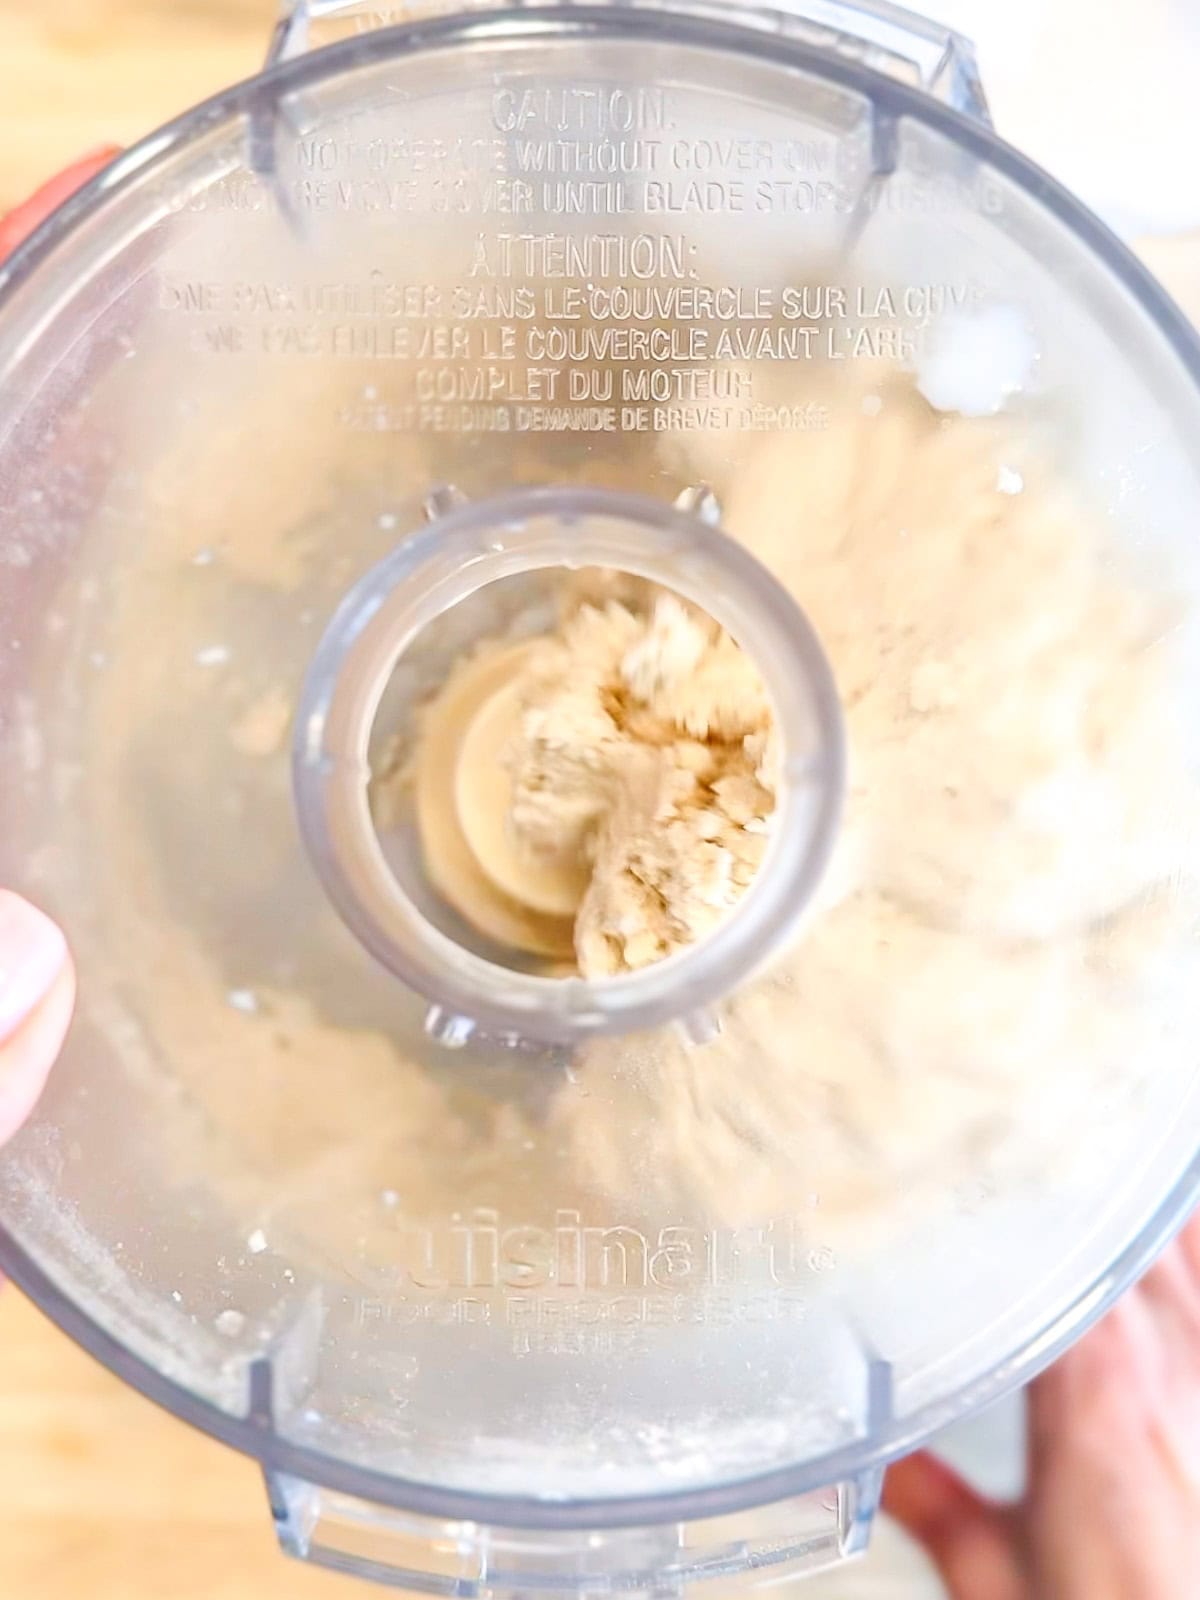
Step 3: Pulse 3 to 4 times to get everything started and then turn the food processor on and process until a dough ball forms, around 20 seconds.

Step 4: Turn the food processor off and remove the ball of dough. Dust with a tiny bit of flour. Flip it over, flour-side-down, back into the food processor, dust the top with a bit of flour, and run for another 20 to 30 seconds.
(if it is still sticking to the sides, etc, add another tablespoon of flour (up to 2 tablespoons) and give it a few more spins)
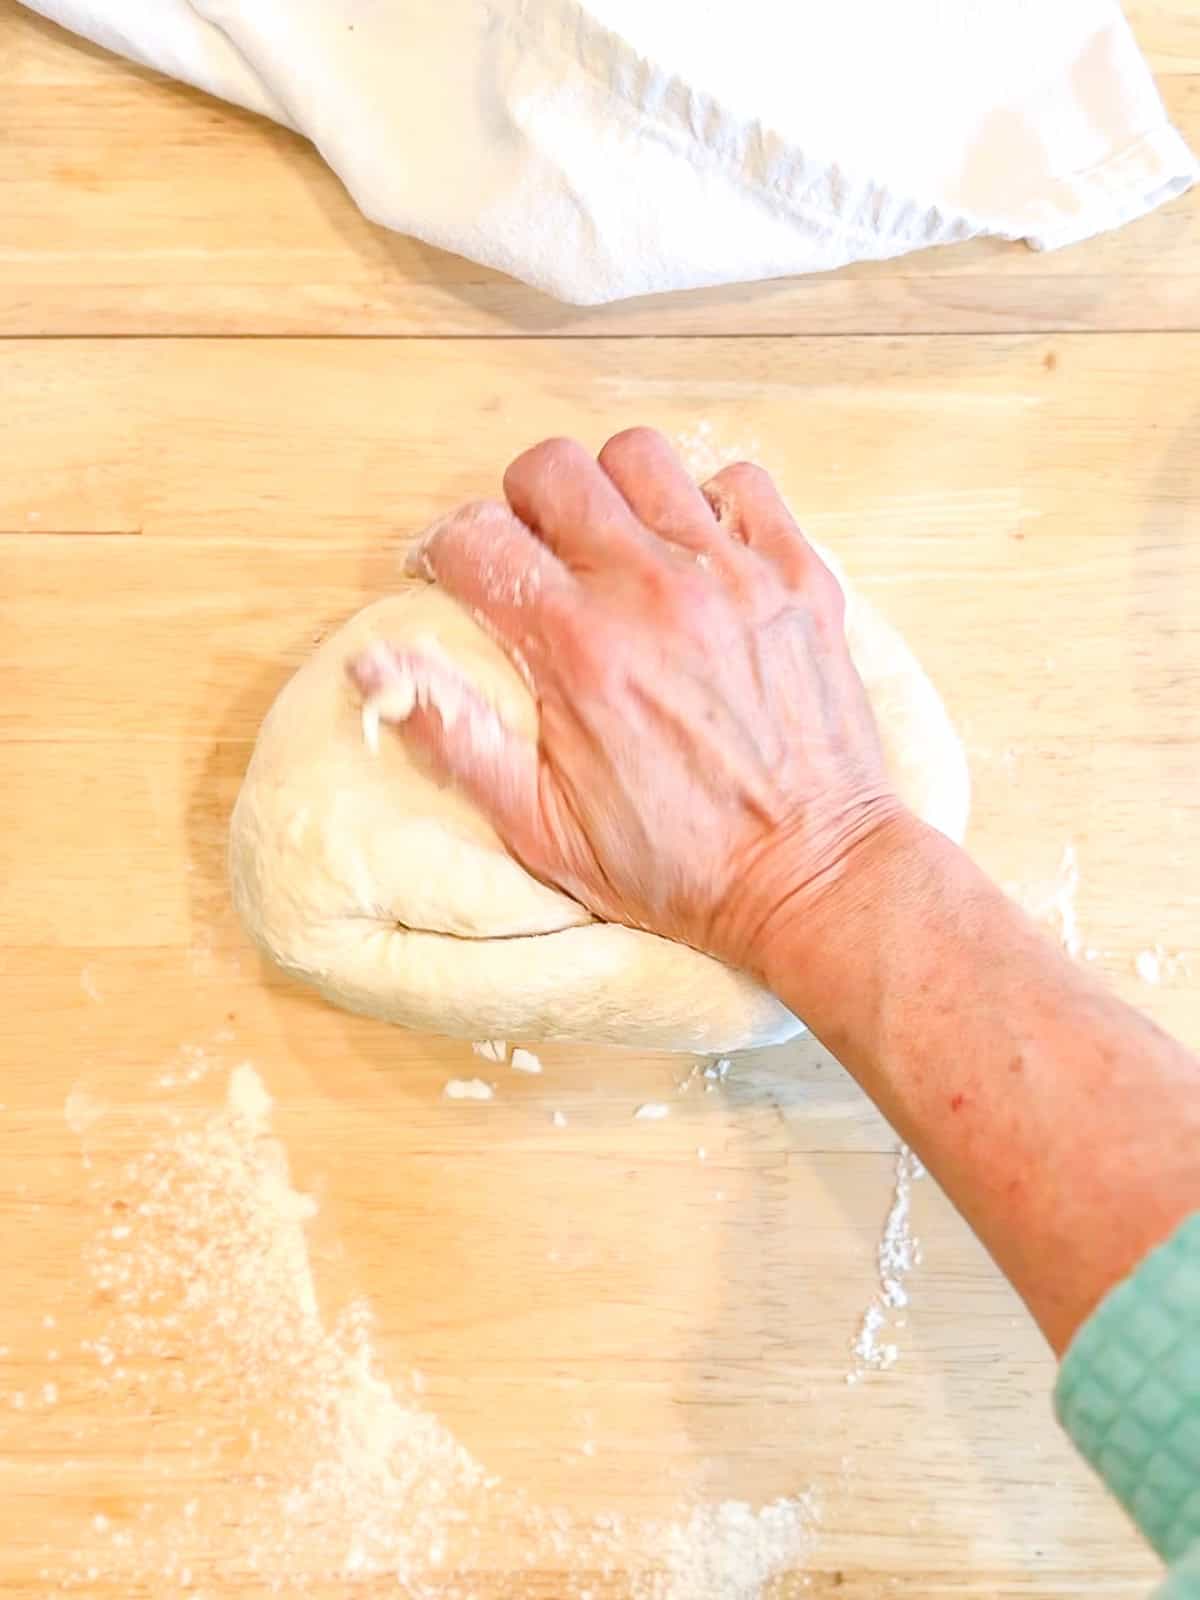
Step 5: Remove the dough and knead on a very lightly floured surface for 30 seconds to 1 minute, and then shape into a smooth ball that springs back when poked with a finger.
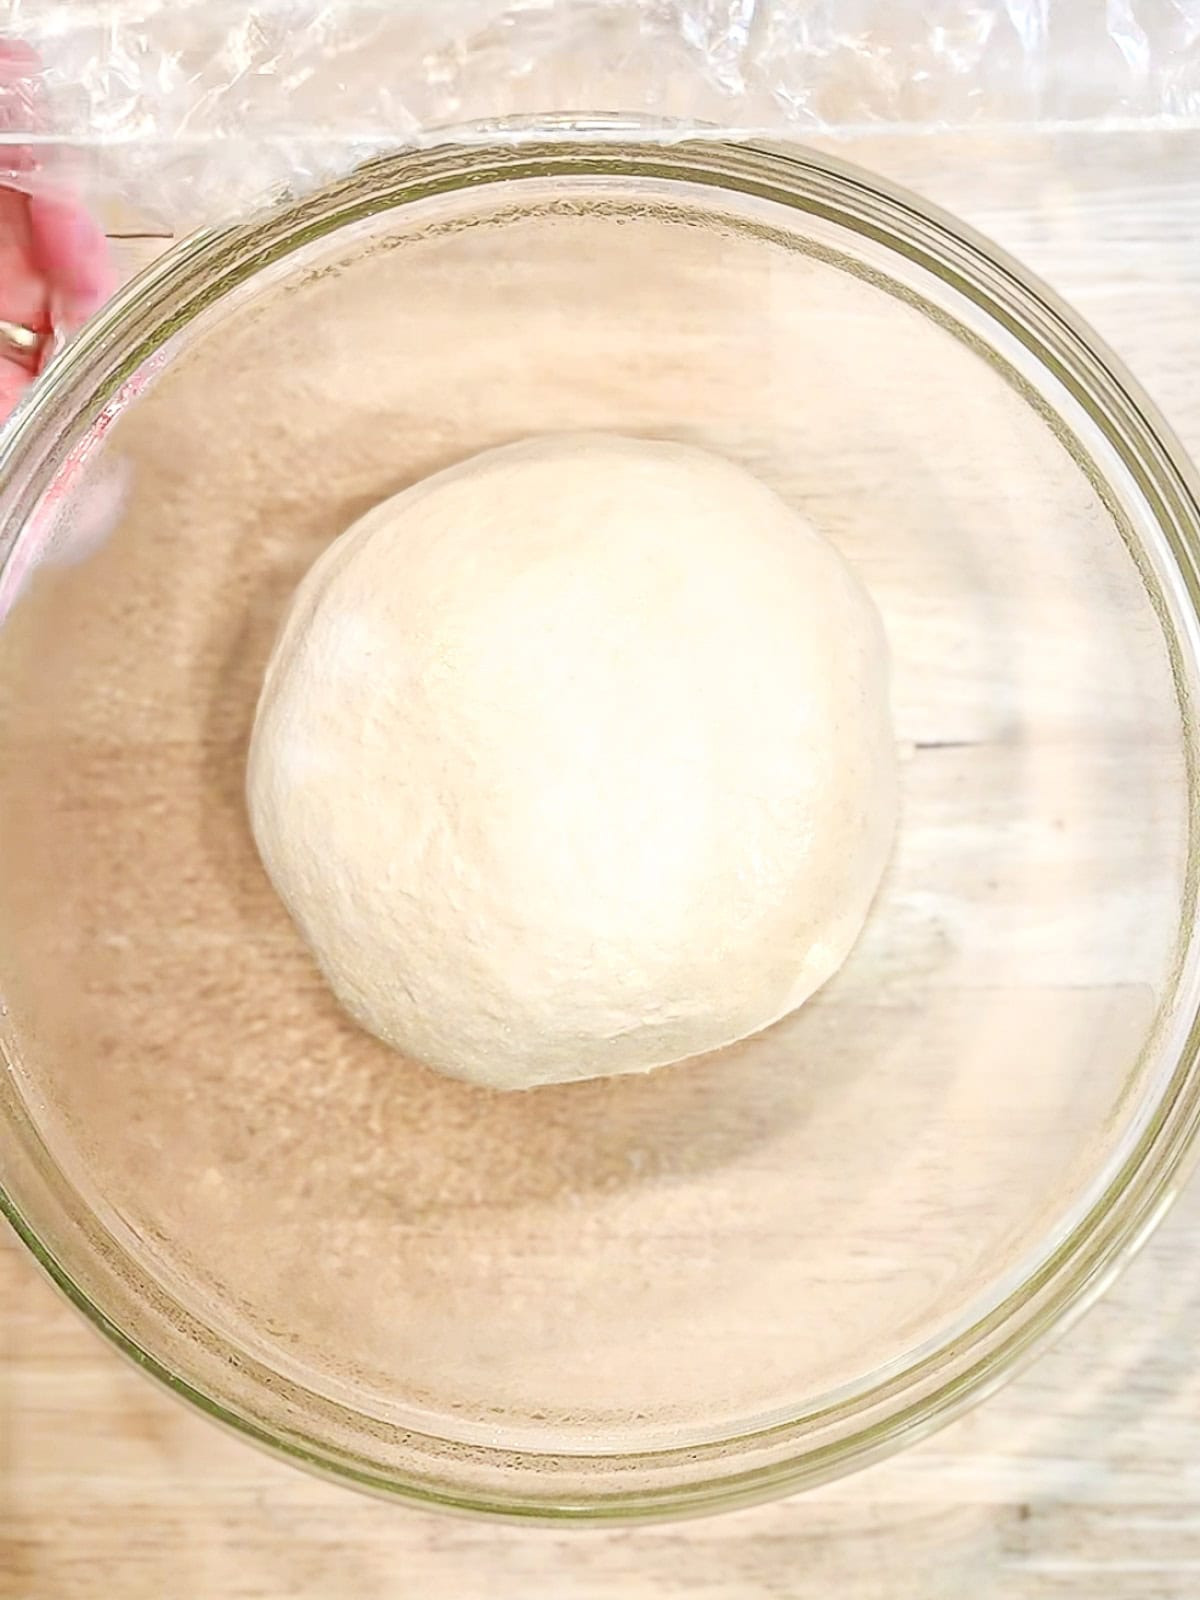
Step 6: Place into a large mixing bowl that has been greased, cover loosely with plastic wrap or an elastic shower cap, and let rise in a warm spot in your kitchen (like your fancy homemade proofing oven) for 15 minutes.
Shaping your loaf
Fun fact: At this point you can take your risen dough and make your own homemade crescent rolls. My recipe shows you how to make them plain or a ham and cheese version. You're gonna wanna make both!
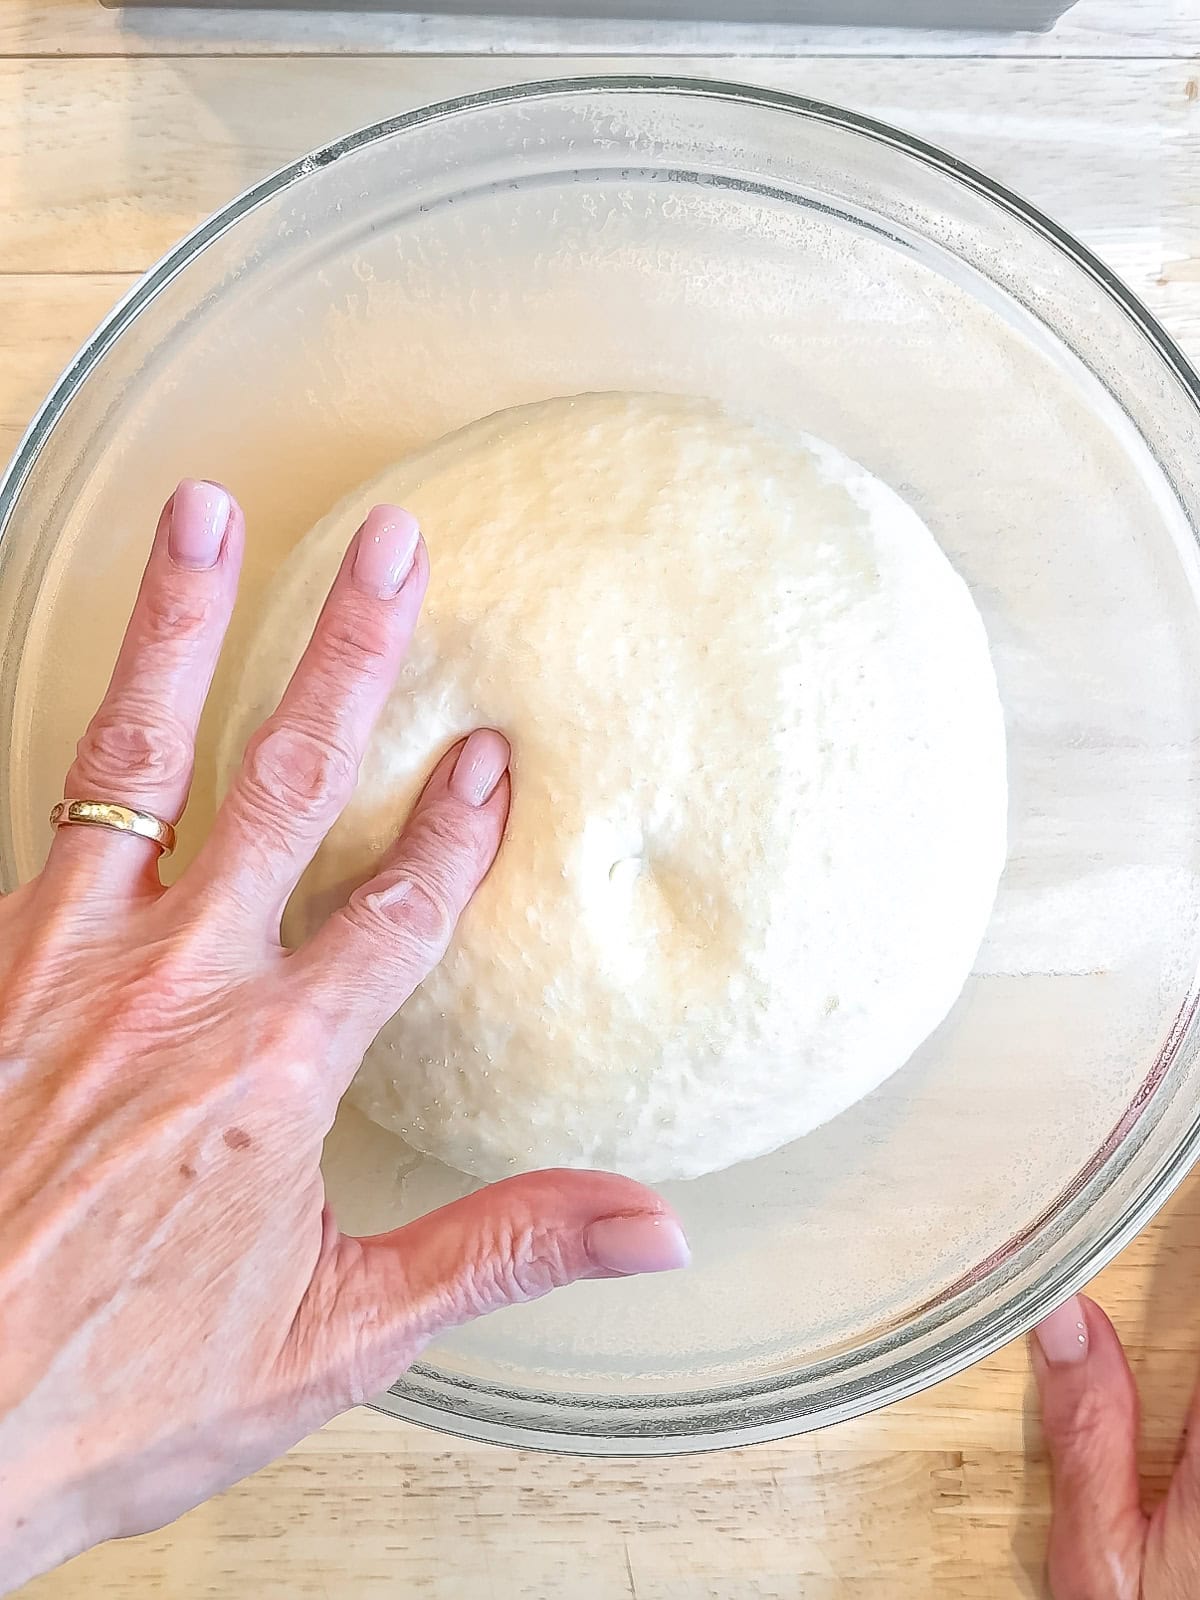
Step 7: Give your dough ball a gentle poke. It should spring back slowly and leave a slight indent. If it snaps back too quickly, it needs more time. Let proof another 5 to 10 minutes.
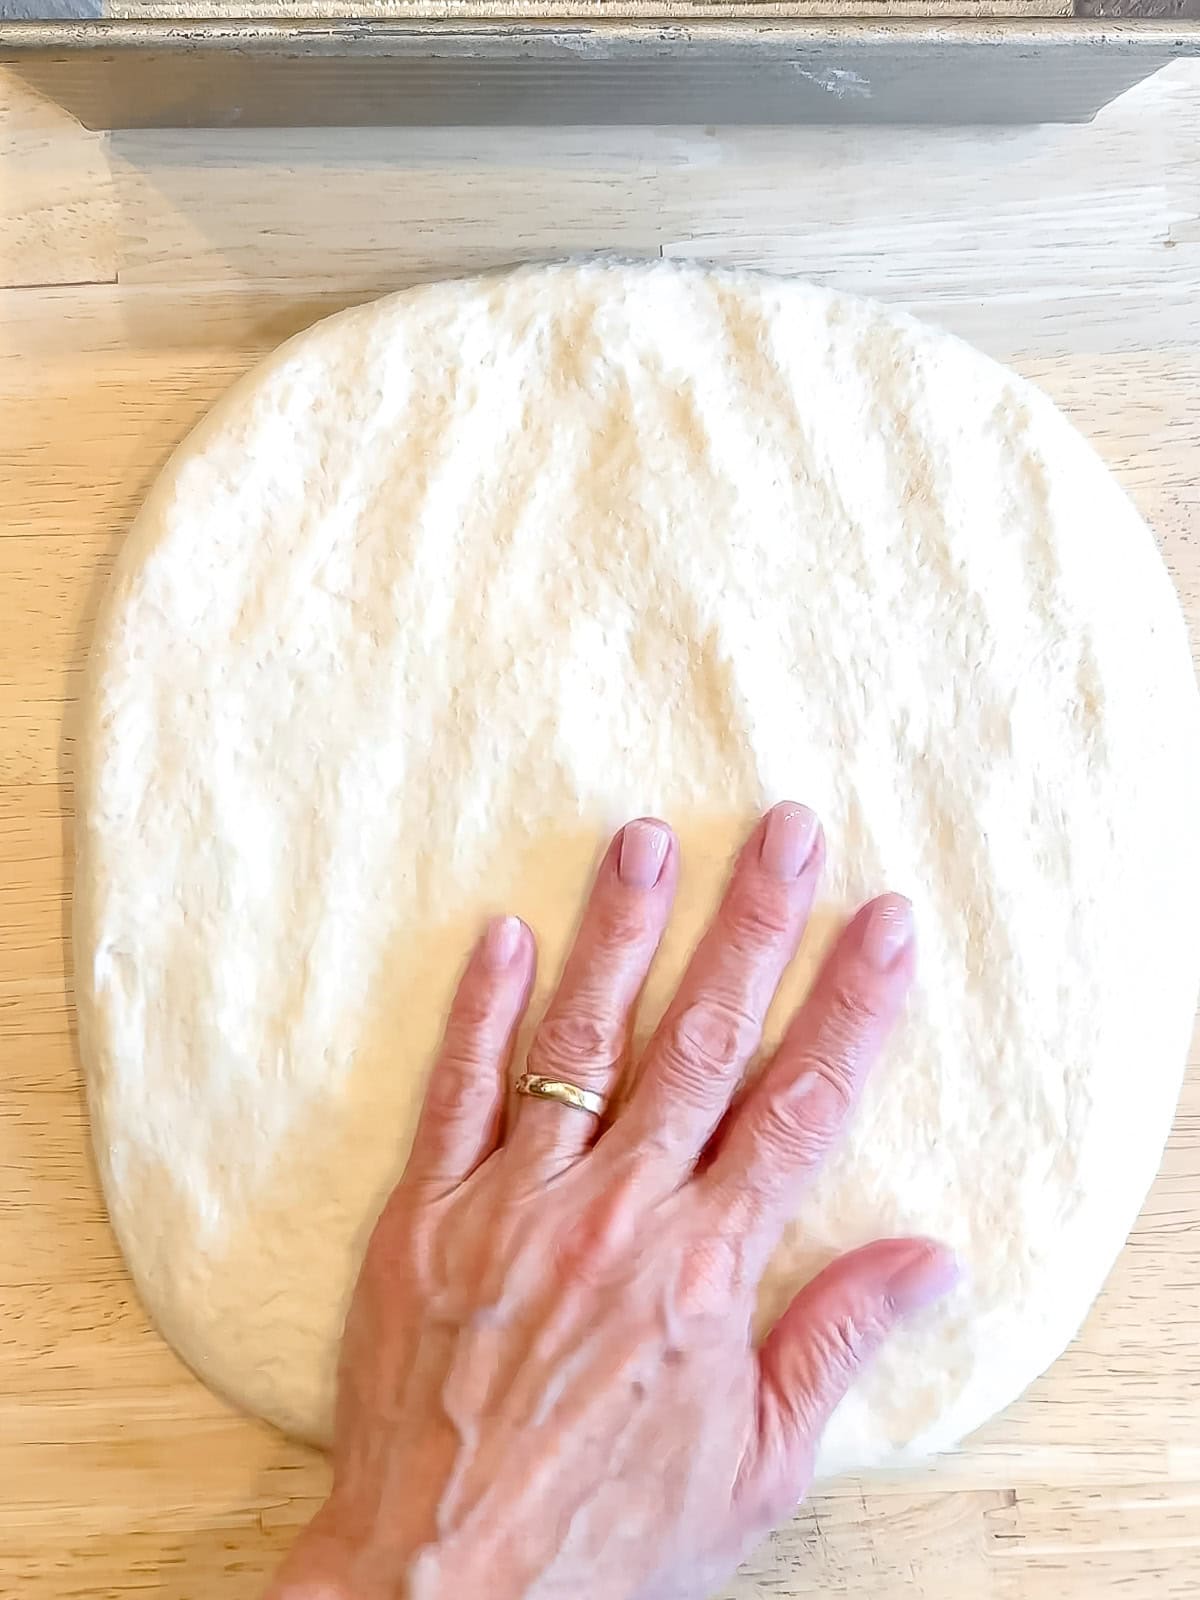
Step 8: Turn your proofed dough out onto the counter, smooth side down. Press into a rectangle where the short side is about the same width as your loaf pan.
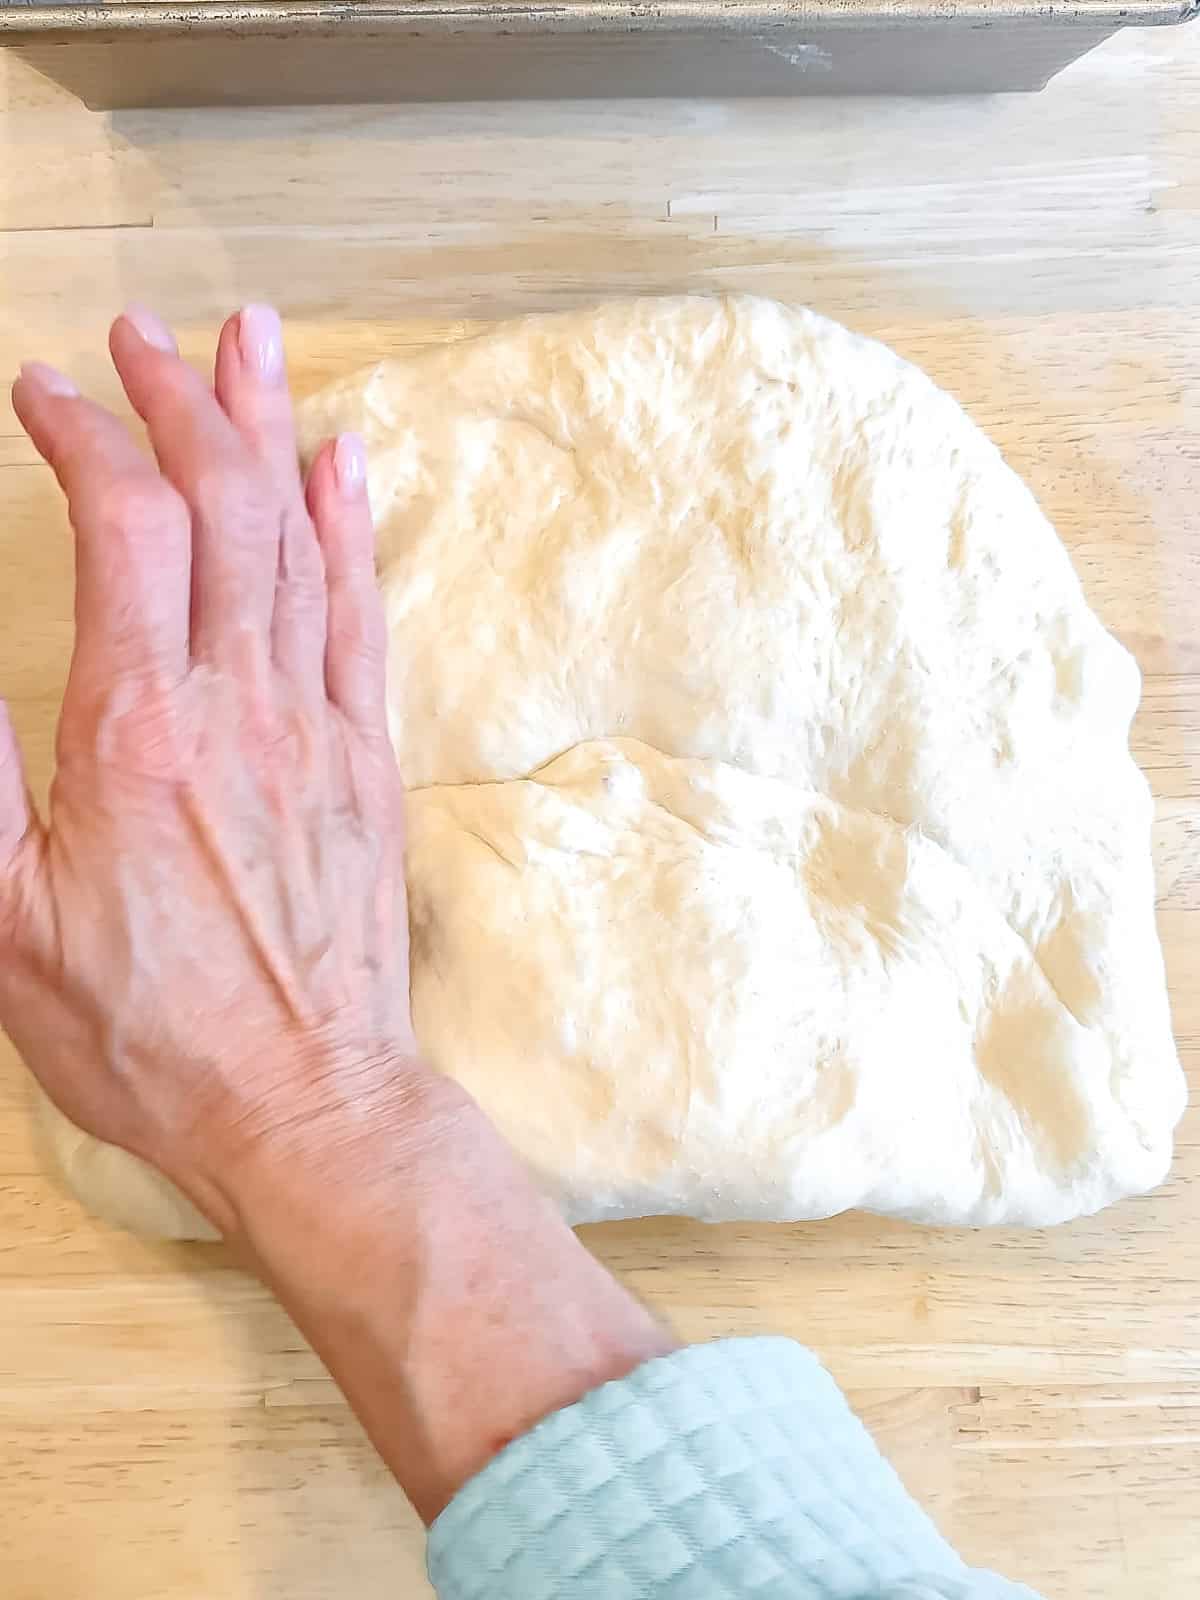
Step 9: Fold the bottom of the dough up towards the middle and use the heel of your hand to press and secure that in place
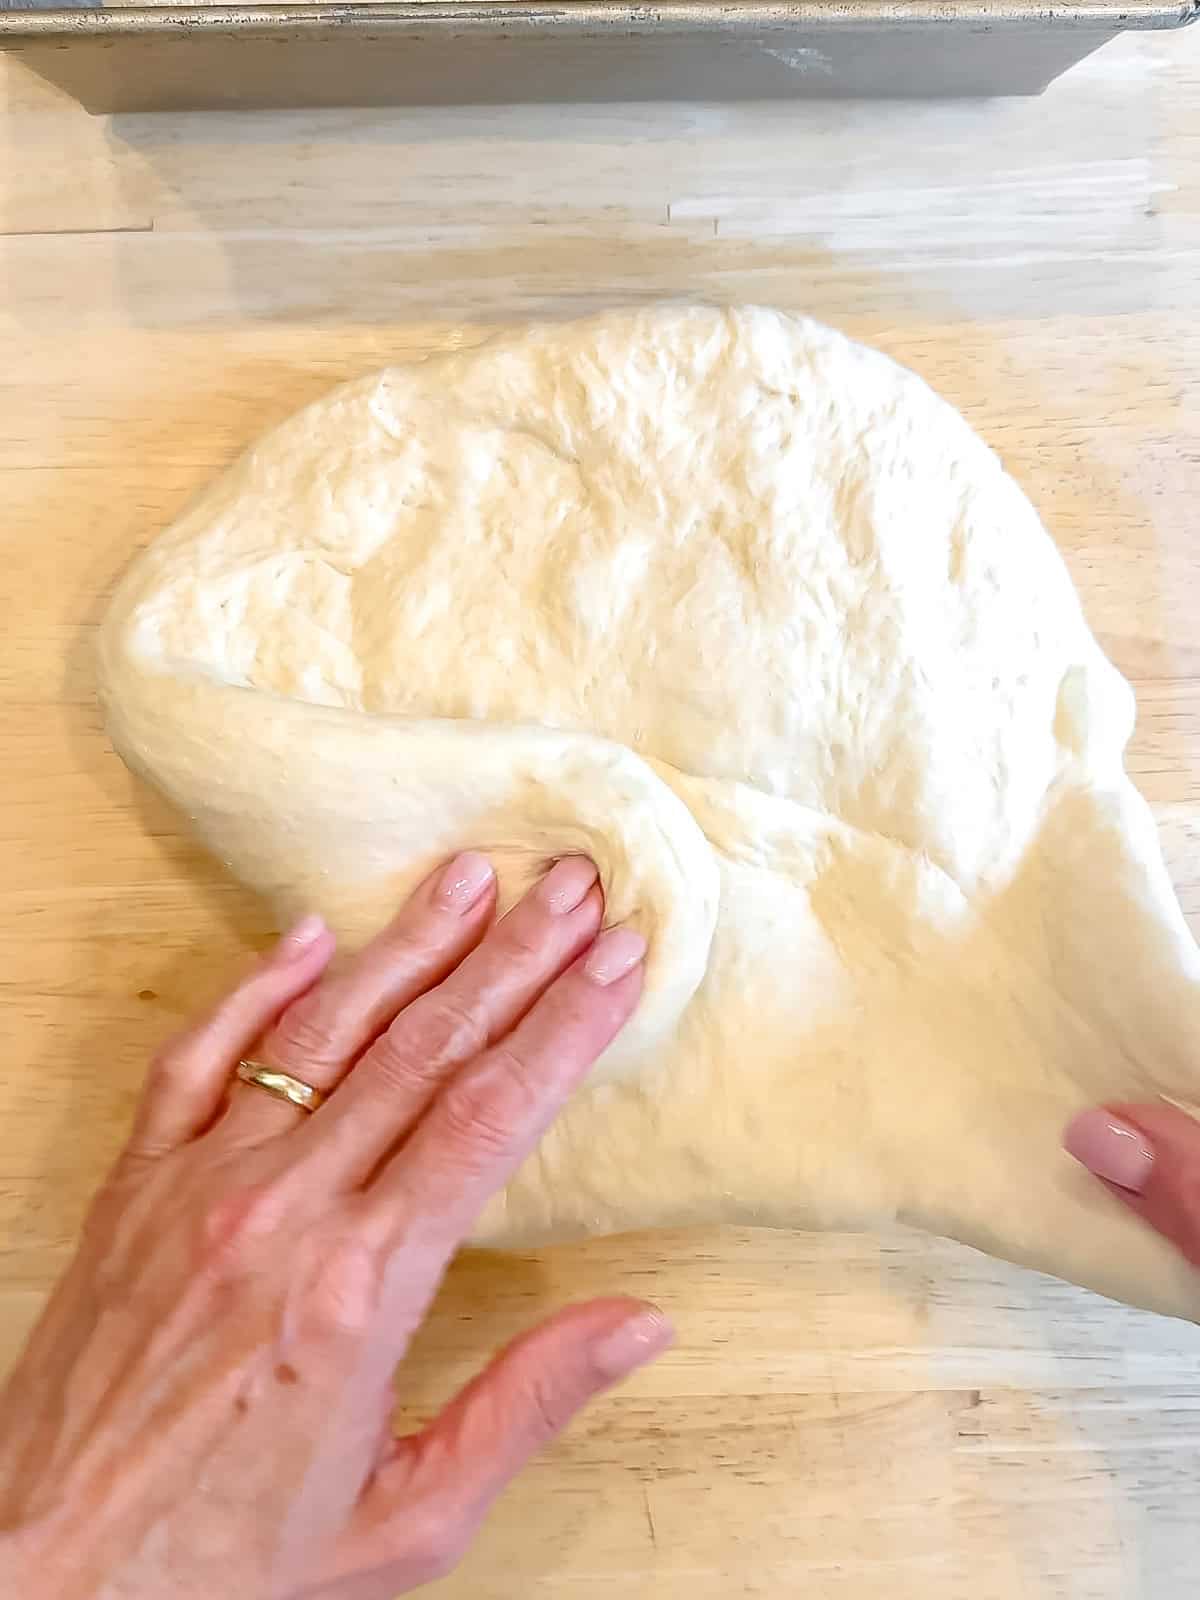
Step 10: You will have formed two "wings". Pull those in towards the center and press with the heel of your hand to secure them as well.

Step 11: Repeat by pulling the top down towards the center...
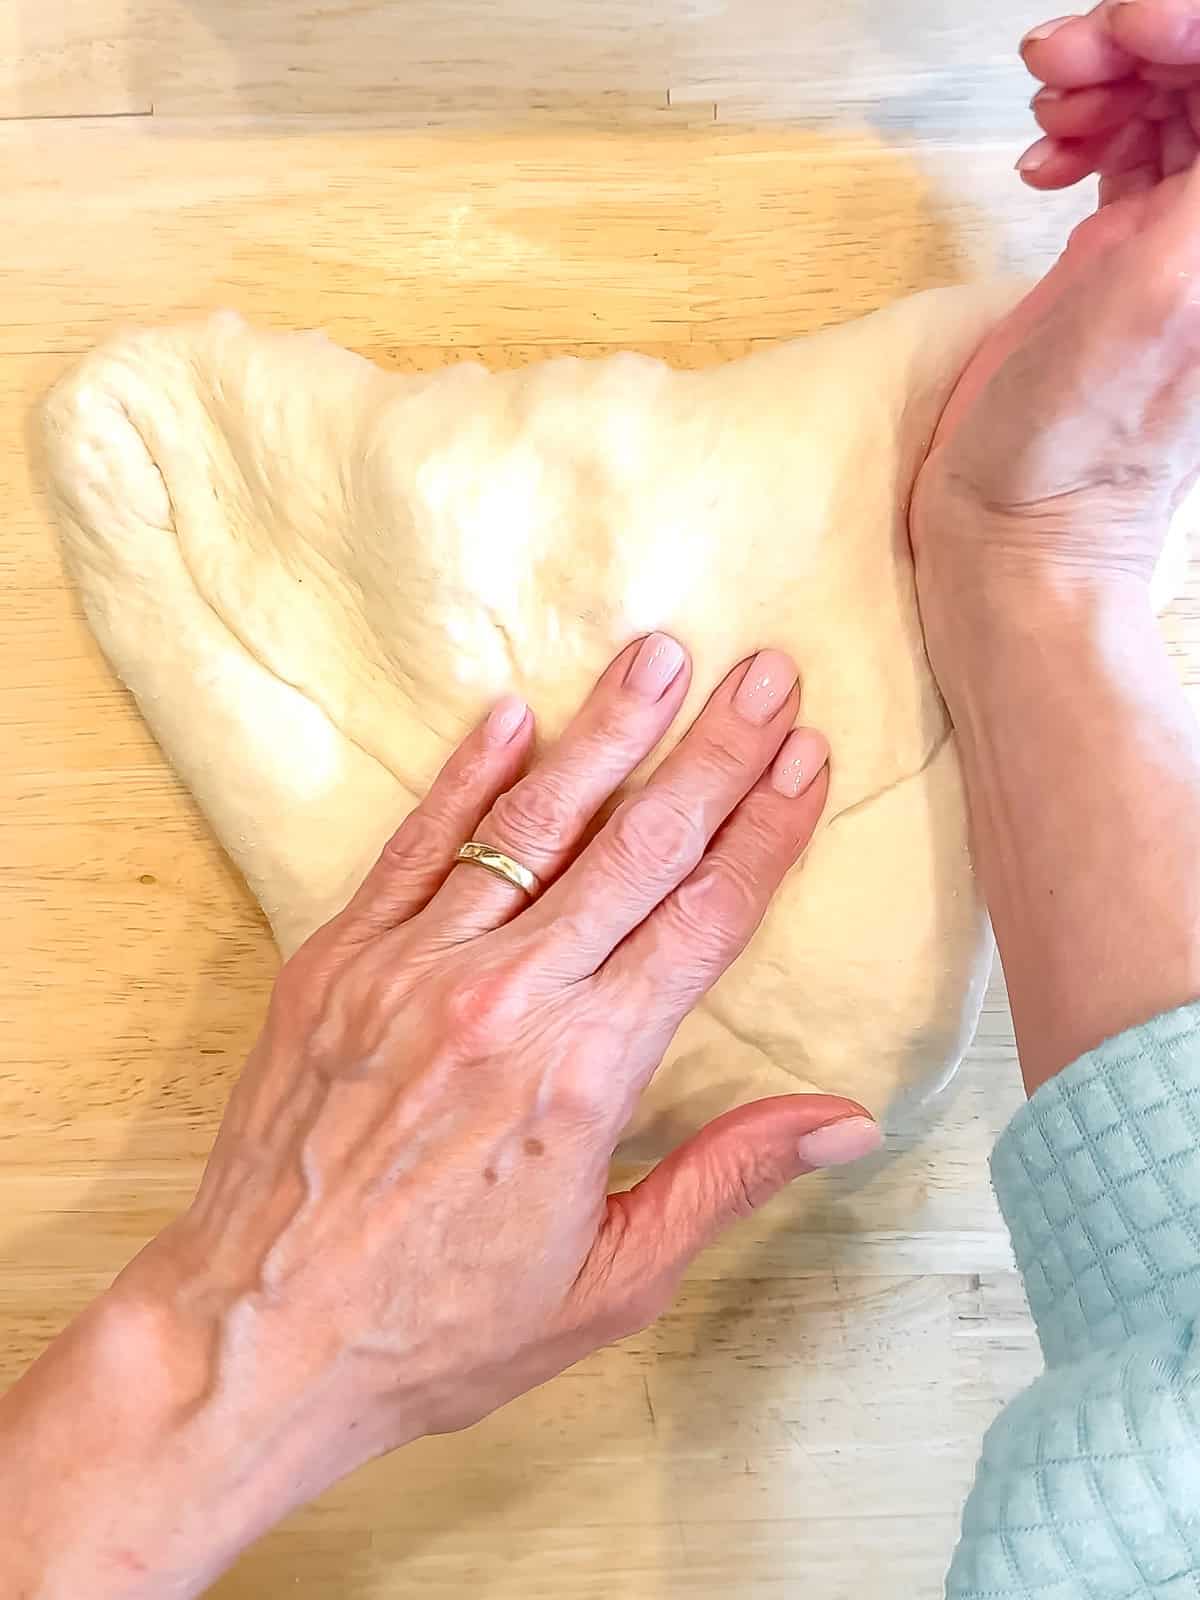
Step 12: ... and using the heel of your hand to secure the flap. Secure your new "wings" as well.
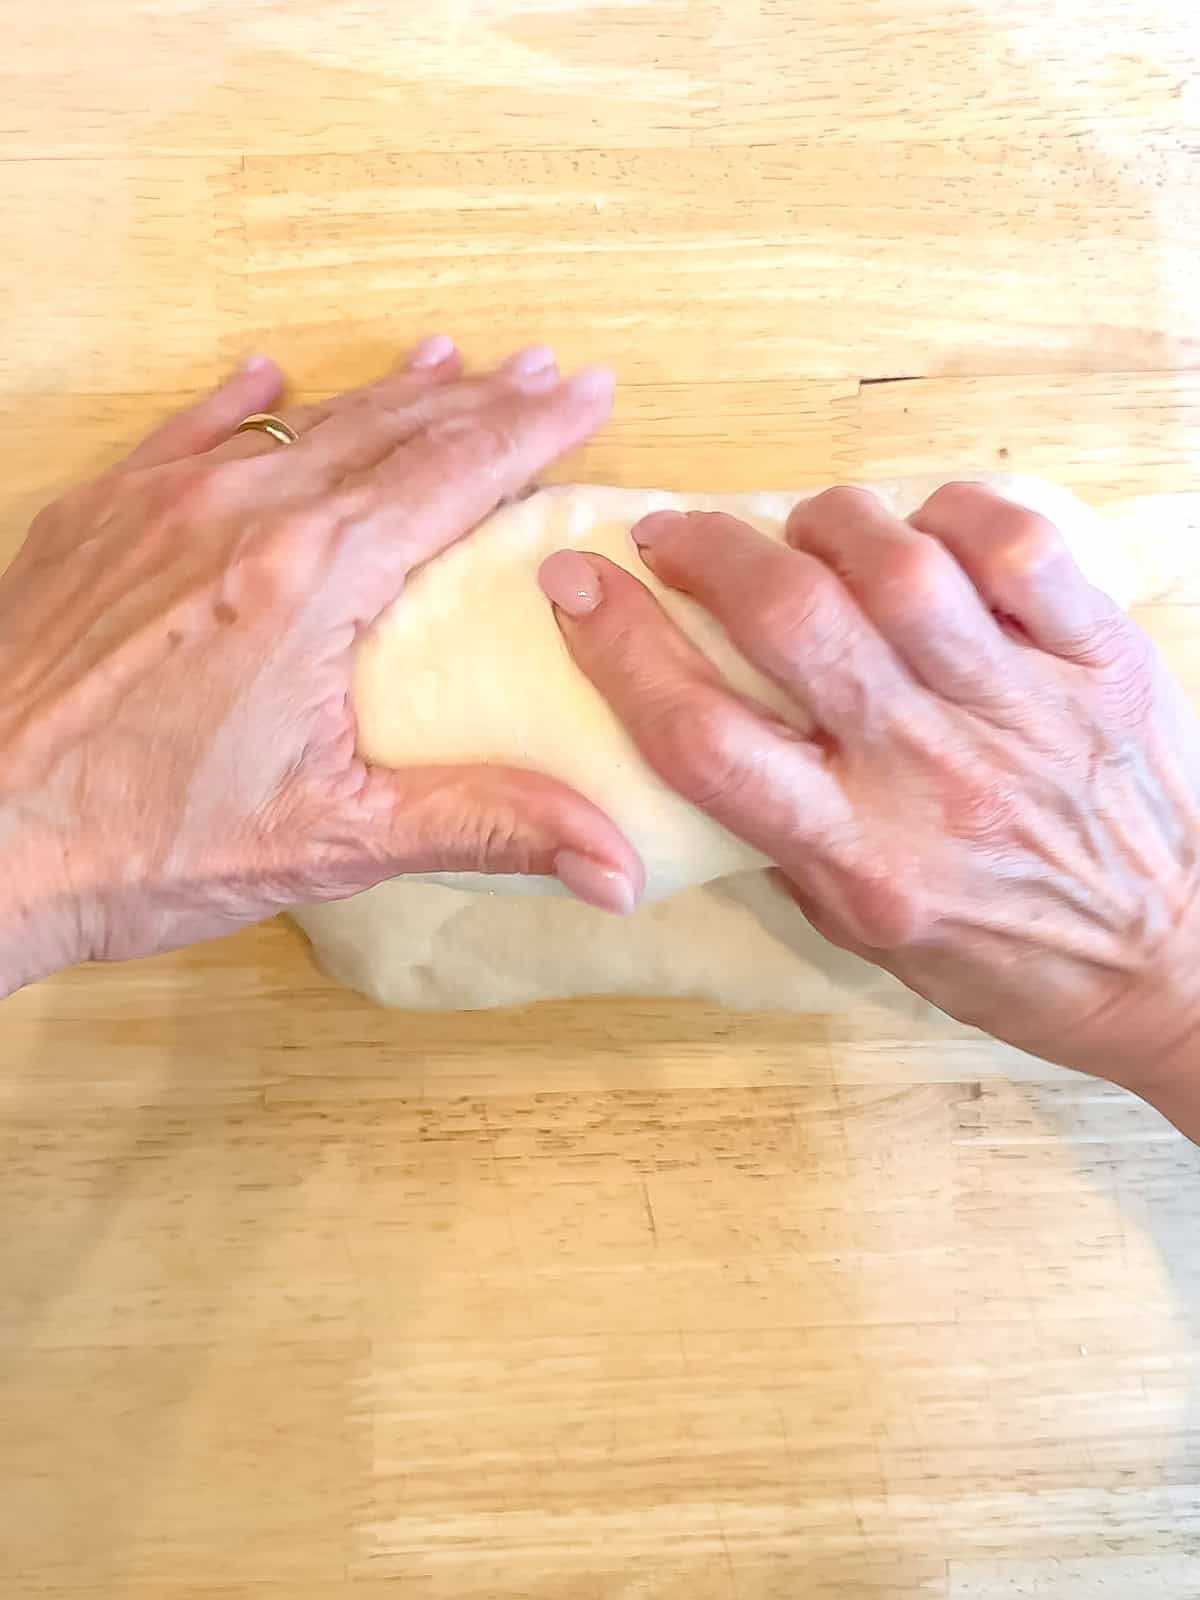
Step 13: Roll the dough into a log shape.
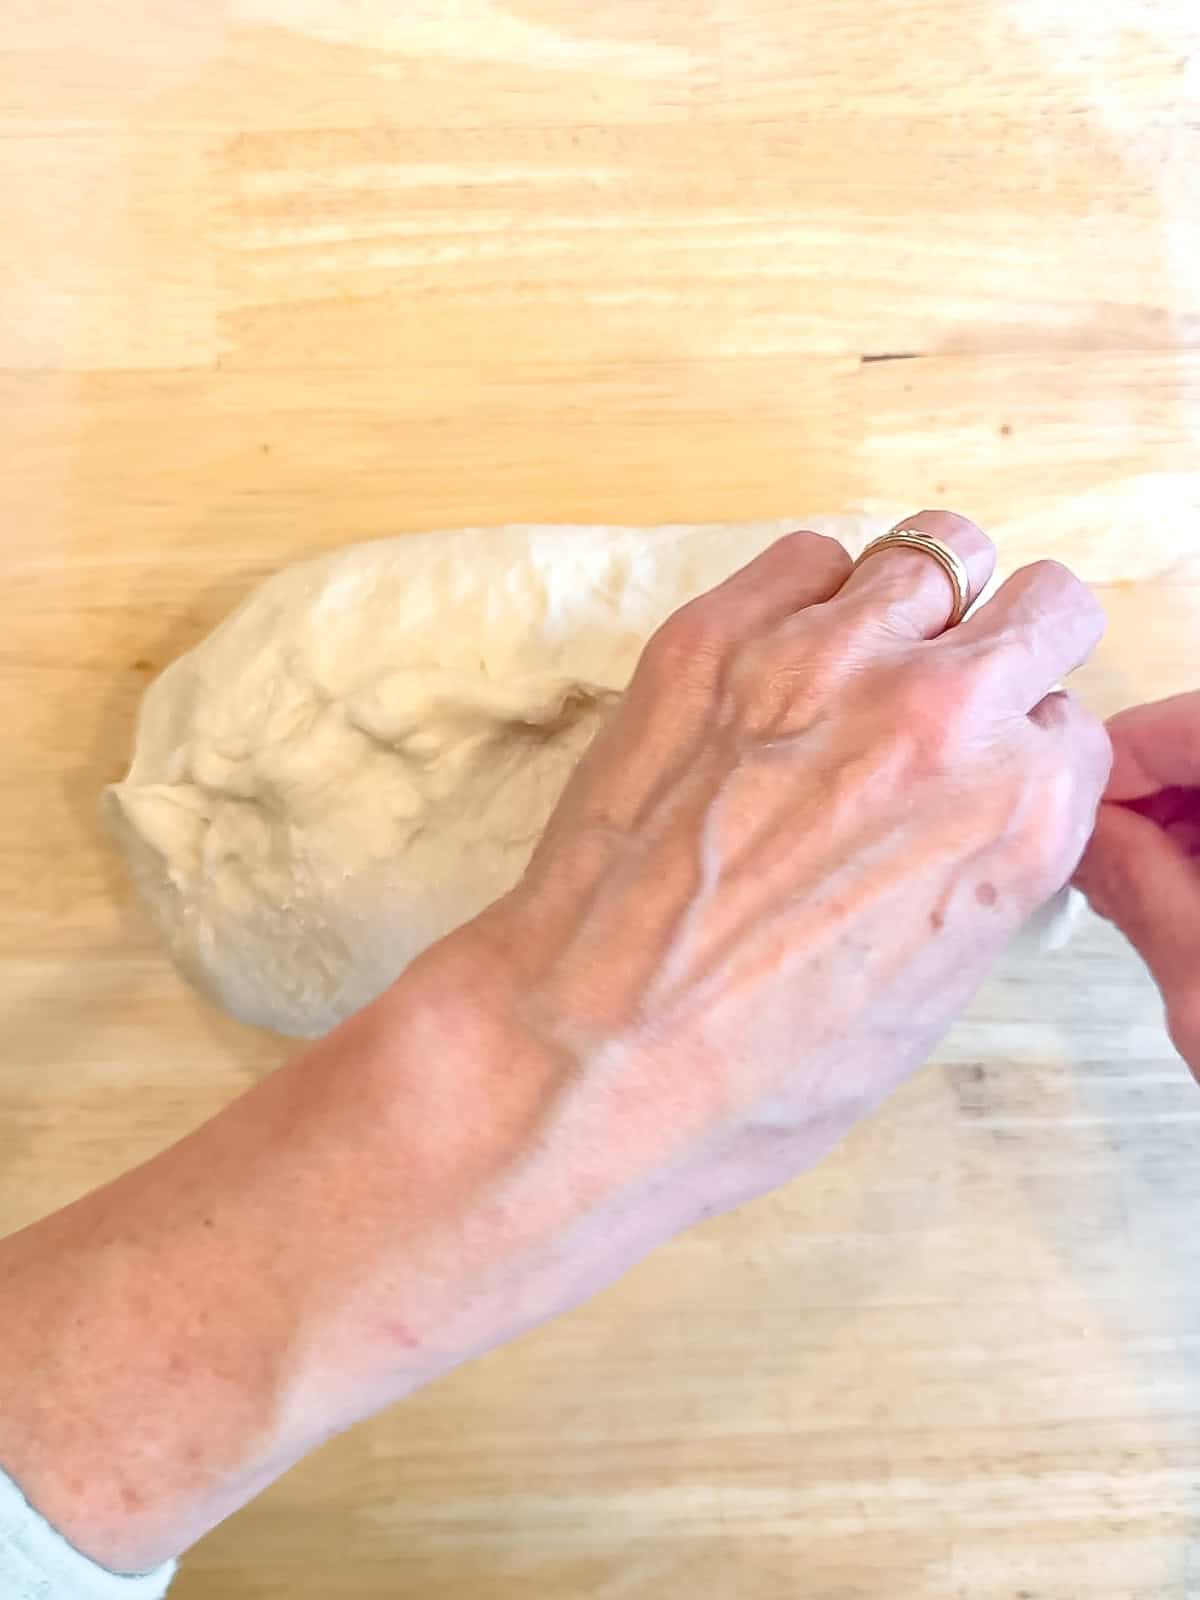
Step 14: Use your fingers to pinch the seam shut all the way across.
Final rise
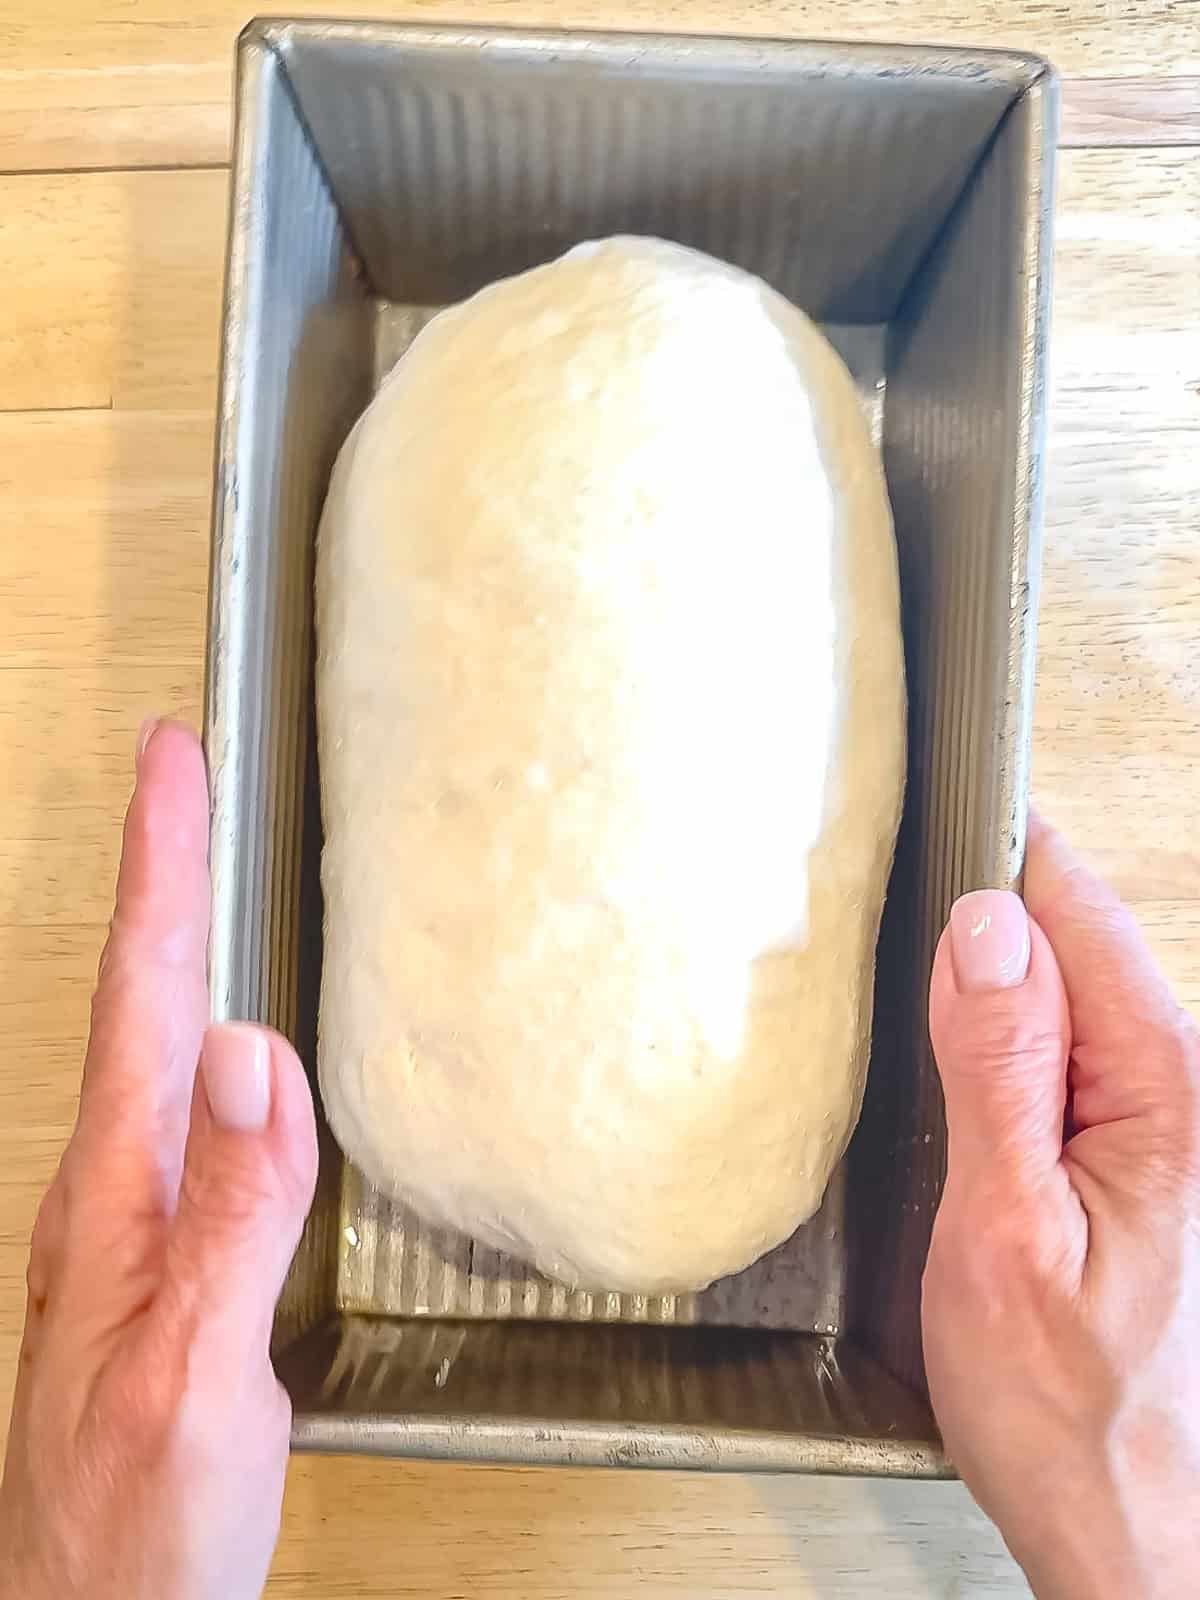
Step 1: Place the log seam-side down into your greased loaf pan. Cover loosely with plastic wrap and place on top of your stove and allow to rise at least another 15 minutes while you preheat your oven to 375°F.
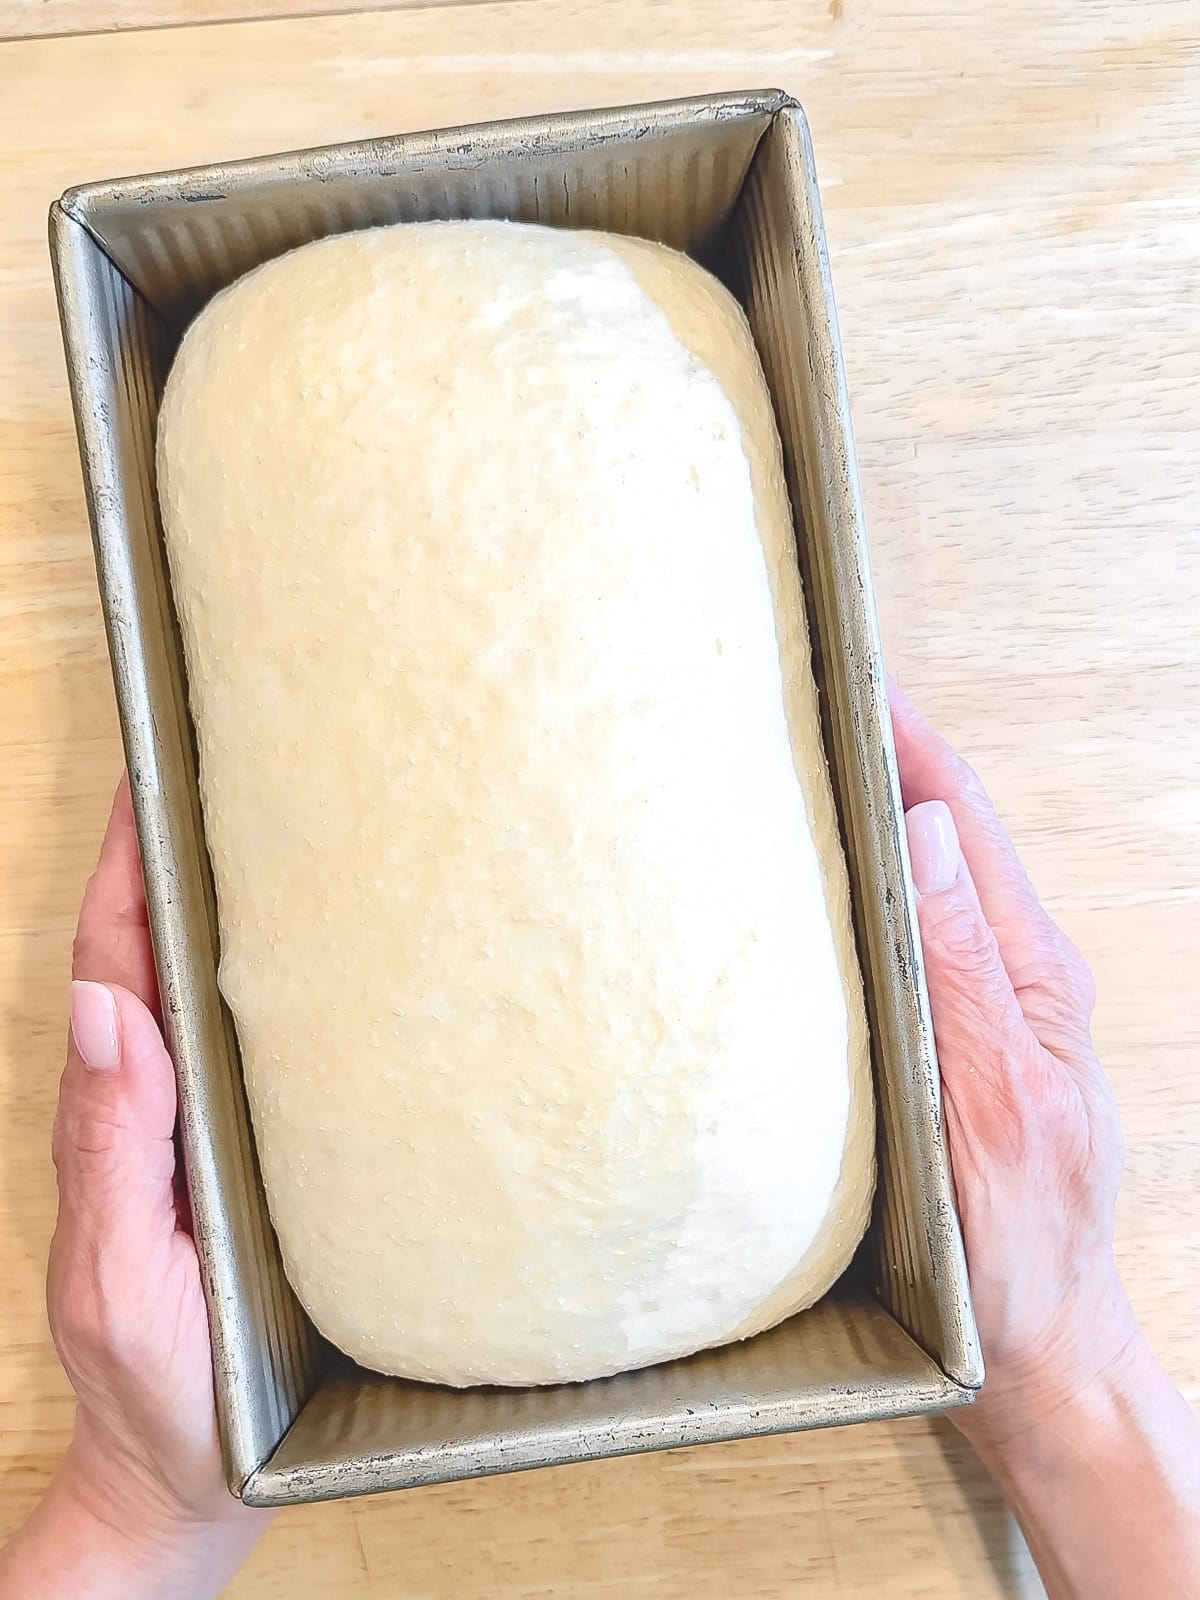
Step 2: When ready to bake, your dough should fill the loaf pan and peek over the top by about ½ inch. If needed, you can allow to proof for another 15 to 20 minutes, but no longer.
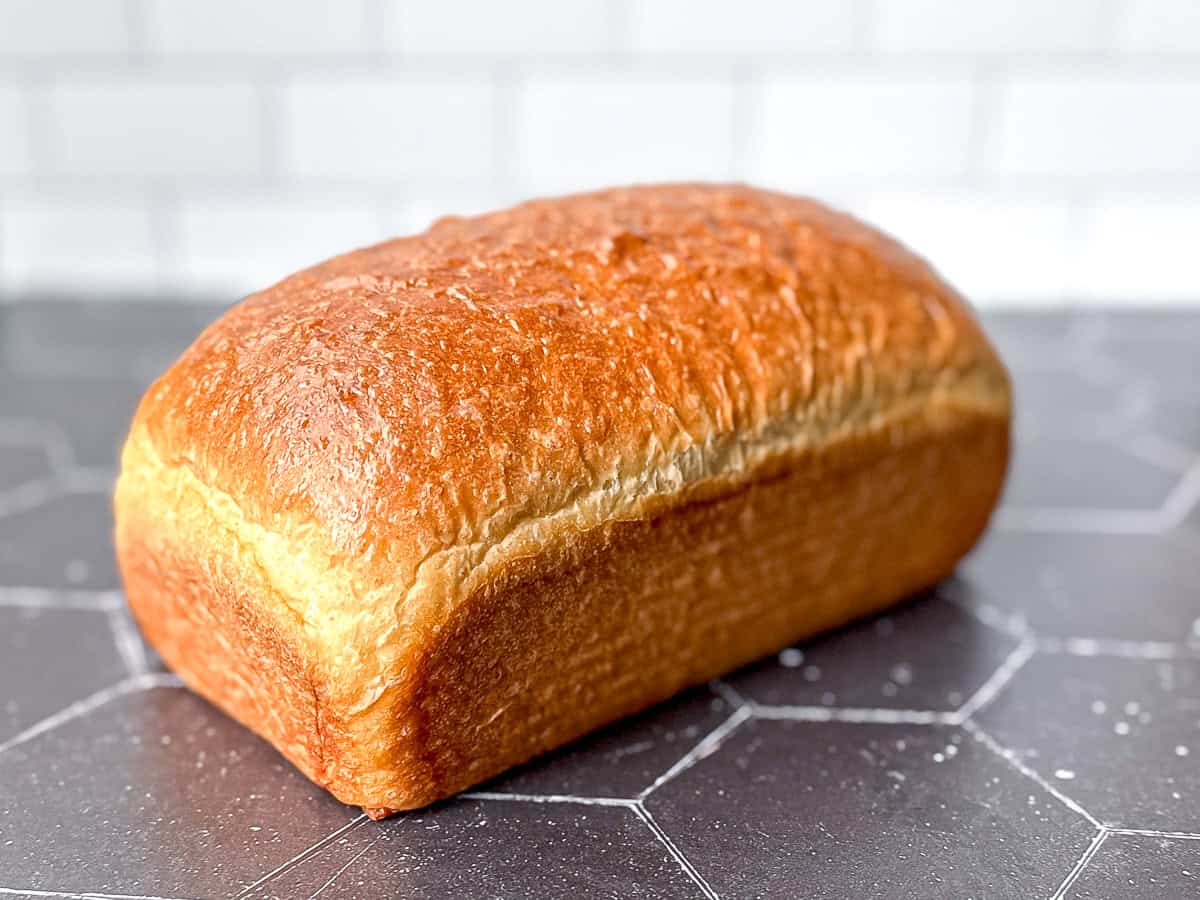
Bake: For a shiny top, I like to lightly brush the top of the loaf with an egg wash made from one egg whisked with 1 tablespoon of water before baking. Bake at 375°F for 30 to 35 minutes, or until it is golden brown and sounds hollow when tapped. If you have a thermometer it should register between 190 to 205°F.
Let your big beautiful sandwich bread cool for five minutes in the pan and then gently tip it out and place it on a cooling rack to cool completely before slicing. I know you want to cut into it when it's warm, but please wait at least 20 minutes (the bread is technically still baking when it first comes out of the oven). I know. Waiting is hard.
🔥 Another Hot Tip
Most ovens have a warm spot where the oven vents hot air and steam. During the second rise, try to place your loaf near (not directly on or under) that spot. The additional heat will help your loaf to rise more quickly.
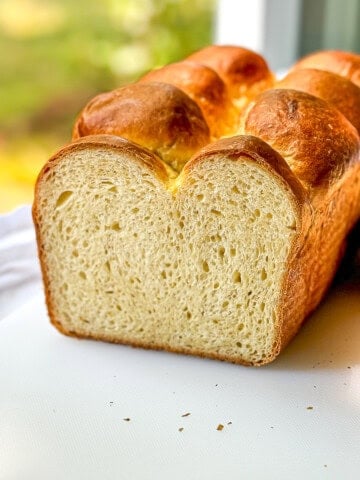
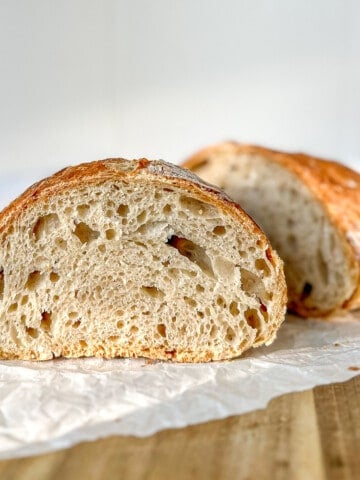
If you want a quick loaf, but want to branch out from white bread, try my honey whole wheat bread, my soft seeded rye bread, or my sun-dried tomato infused pane bianco. All are delicious and come together in about 90 minutes.
Slicing Your Bread
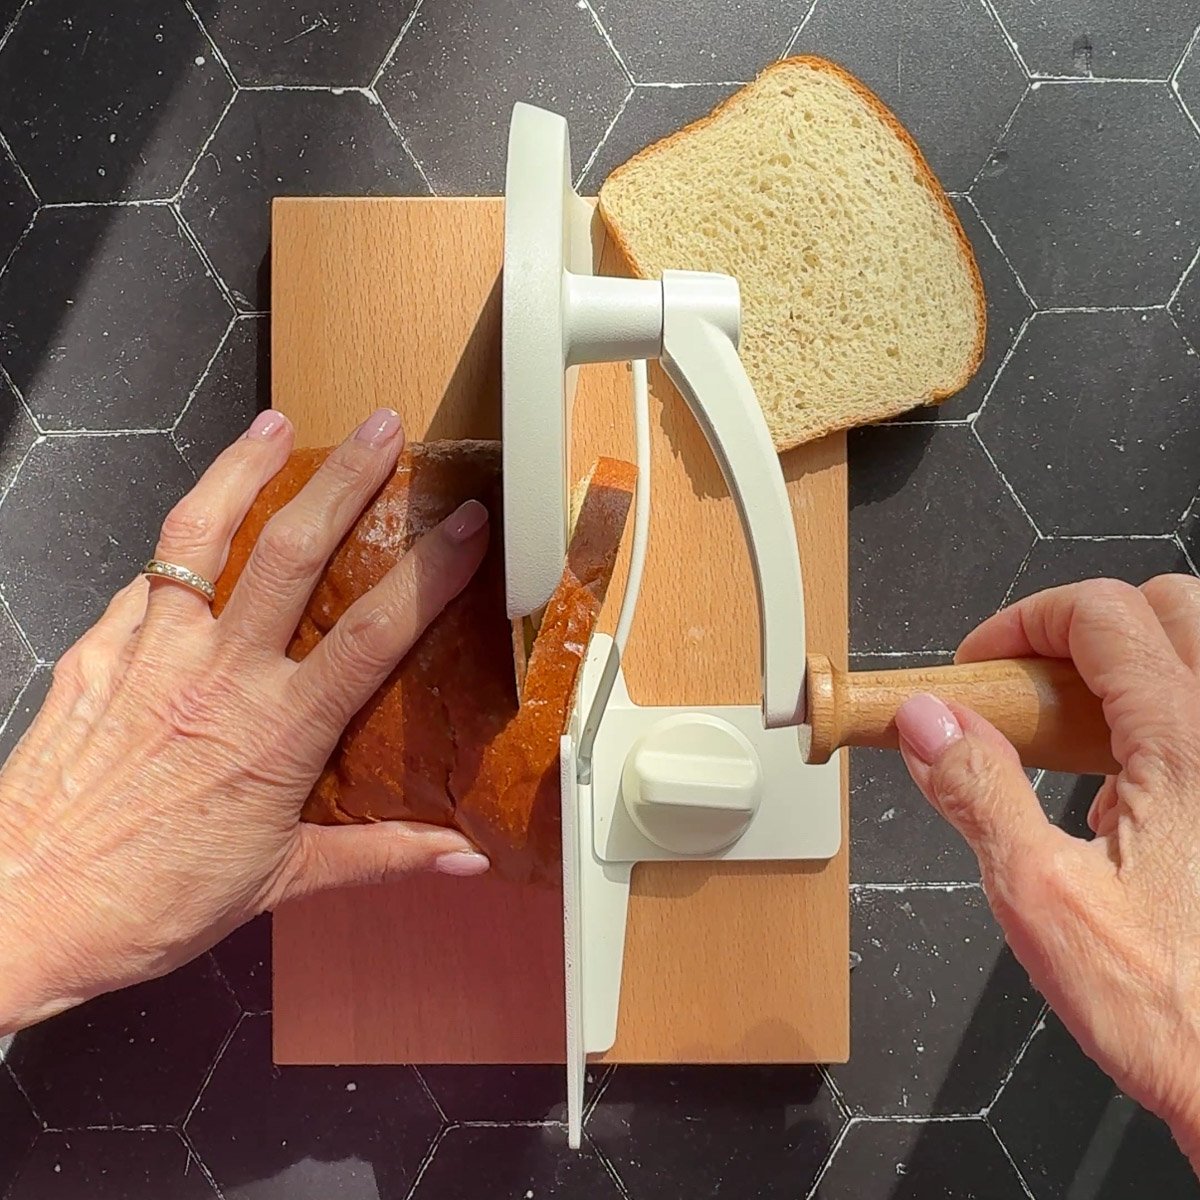
You can use any sharp knife that you prefer, but for beautiful smooth slices, I like to use a long bread knife that is not serrated, but a serrated one will also do the job. My new obsession is for my hand crank bread slicer. It will make clean even slices of everything from soft pretzel bagels, to my crusty no-knead bread, and even this soft sandwich bread.
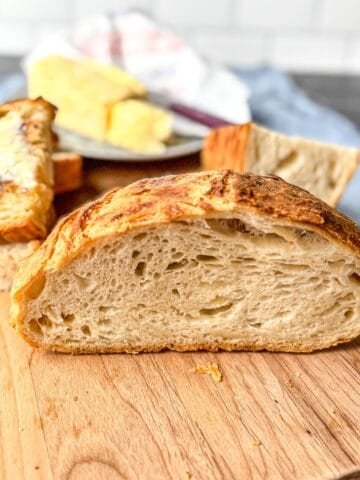
Looking for something a little crustier than sandwich bread? My homemade artisan bread rolls have a chewy, airy interior and crisp golden crust, with a simple no-knead dough you can mix the night before and bake the next day.
Helpful tips
I know the first time I made bread I was scared to death. I just felt like there were so many ways that it could go wrong. First of all, making bread turned out to be a lot easier than I imagined. Second of all, I'm here with some great tips to make sure your first loaf (and every loaf) of quick sandwich bread is amazing:
- Measure flour correctly - I always recommend weighing your ingredients when baking, but being based in America, I know that people are used to using volume measurements (cups, etc.) Unfortunately, scooping directly from the bag can compact the flour and result in getting too much, making your dough dry. Here's how to do it correctly until you finally buy a scale: Fluff up your flour with a spoon. Spoon the flour into your measuring cup and level it off with a flat edge.
- Don't over-knead - Whether you're using a food processor, stand mixer, or your hands, stop kneading once the dough is smooth and elastic. Over-kneading, especially in a food processor, can heat the dough and tighten the gluten too much.
- Be gentle when shaping - When forming your loaf, use firm but gentle pressure when sealing the seams with the heel of your hand. You want to keep some of the air bubbles inside so the bread has a good rise and a light texture.
- Watch the dough, not just the clock - The 15-minute rise times assume your dough is in a warm environment, like the oven proofing box I suggest. If your kitchen is cool, your bread may need a little longer. During the first rise, look for noticeably puffy dough that springs back slowly when gently pressed. Before baking, the loaf should fill the pan and rise about ½ inch over the top.
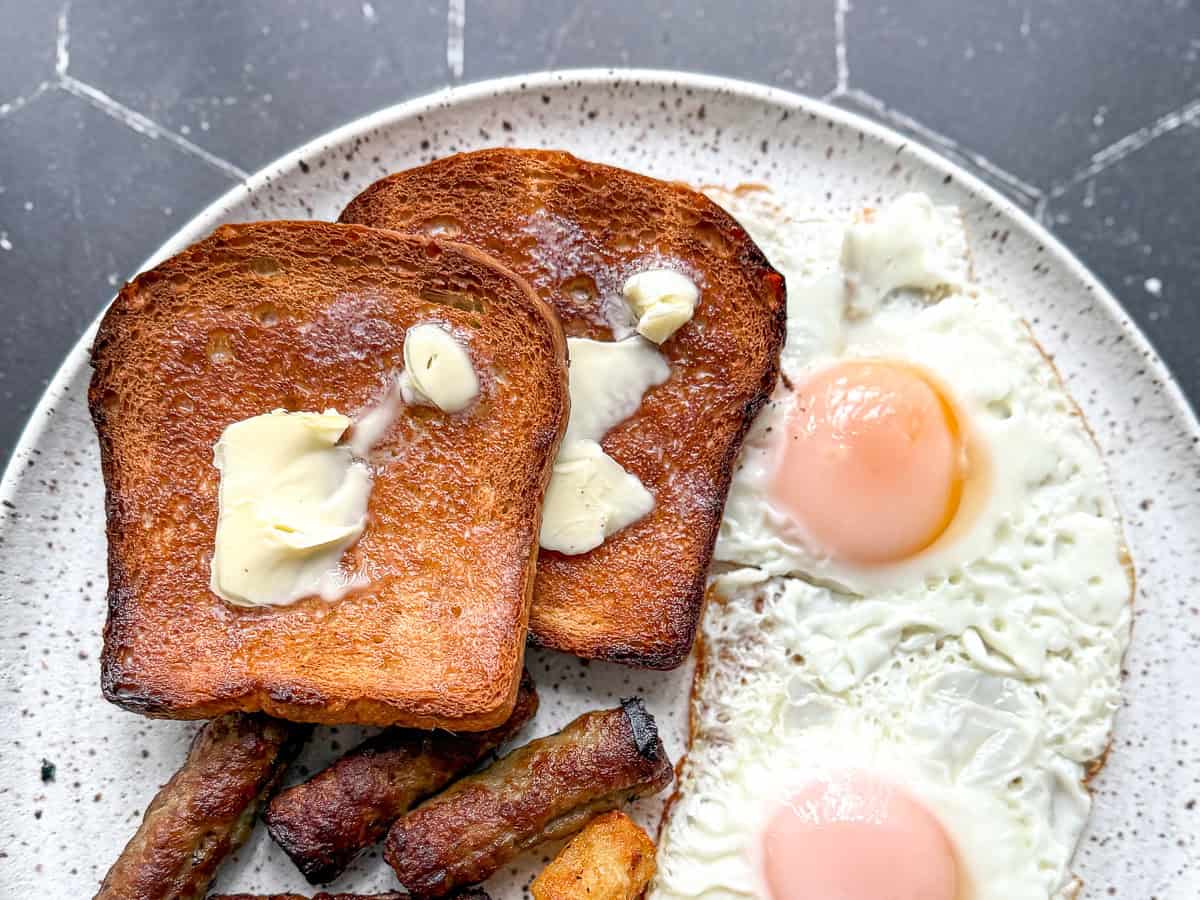
My easy homemade sandwich bread is perfect for thick-cut toast recipes because it stays soft inside while the outside gets crisp. Save a few thick slices to make this crispy cheese toast for an easy breakfast, lunch, or side.
Recipe FAQs
Yes. Bread flour gives this sandwich bread a little more structure and chew, but all-purpose flour works well too. The dough may feel slightly softer, so avoid adding extra flour unless it is actually sticking to your hands or work surface.
Yeast works faster in a warm environment, so a cool kitchen can extend the rising time. Use the times in the recipe as a guide and look at the dough instead. It should be puffy after the first rise and about ½ inch above the loaf pan before baking.
Make sure your yeast is fresh (not expired). Instant yeast is pretty forgiving, but inactive yeast is a common issue. Also make sure your liquids aren't too hot or cold, and your proofing environment is warm enough.
Nope! The egg wash is optional, but it gives the crust a shinier, more golden appearance. You can skip it or brush with milk or melted butter instead.
This specific recipe is optimized for speed, so it's not ideal for freezing before baking. However, you can freeze the baked and cooled loaf. Just slice before freezing so you can pull out a piece at a time.
Once fully cooled, store the bread in a sealed zip-top bag or wrapped tightly in plastic wrap at room temperature for up to 3 days. For longer storage, freeze slices for up to 2 months.


Did you try this recipe?
Please consider leaving a comment with a ⭐️ rating below and tell me all about it! It helps me to continue to improve my content and lets others know what you think!
I appreciate it so much!
-Cynthia
📖 Recipe
One Hour Sandwich Bread
Recommended Equipment
- Food processor or can also use ⤵️
Ingredients
- 3 ½ cups (420 g) bread flour
- 4 teaspoons (16 g) sugar
- 4 teaspoons (12 g) instant yeast
- 1 ¾ teaspoons (5 g) kosher salt
- ½ cup (120 g) water warmed to about 110°F
- ¾ cup (182 g) milk warmed to about 110°F
- 3 tablespoons (45 g) neutral oil
Instructions
Prepare your proofing oven (optional)
- If your kitchen is cold, or you don't have a warm spot to place your dough, turn on oven and set to 300°F for 2 minutes then turn off. Don't heat it to 300°F. We just want the oven on for 2 minutes and then shut off. This creates a warm environment (about 105 to 110°F) that will help your bread complete its first rise more quickly.
Mix dough: Food Processor Instructions
- Add flour, sugar, yeast, and kosher salt to the bowl of your food processor and pulse 3-4 times to mix.
- Combine the water and milk and microwave for about 30 seconds, or until it's about 100 to 110°F. add in the oil and pour the wet ingredients through the food processor food tube to the dry ingredients, already in the bowl.
- Pulse three times to get it started and then turn the food processor on high speed, and process until a dough ball forms, around 20 seconds.
- Turn the food processor off and remove the dough ball. Very lightly dust the ball with flour and turn it over so that what was on the bottom becomes what is on top.
- Pulse for another 20-30 seconds.
- Hand-knead for about 30 seconds to make sure all ingredients are fully incorporated and then form into a smooth ball.
By hand or stand mixer instructions
- Combine flour, sugar, instant yeast, and kosher salt in a bowl. add the wet ingredients into the dry ingredients and mix with a dough whisk or some kind of stiff handled utensil until you have a shaggy dough.
- By hand: Transfer the dough onto a lightly floured surface and knead (push and fold the dough) until the dough is smooth and no longer sticks to your fingers when pressed, about 5 minutes. Shape into a ball with a smooth surface.
- In stand mixer: Make your dough in the bowl of your stand mixer and then use the dough hook to knead the dough for about 5 to 7 minutes, or until smooth and tacky, but not sticky. Remove the ball of dough from the stand mixer and knead on a counter for about one minute just to smooth the surface and shape into a ball.
- Spray your bowl with nonstick spray or a light coating of oil and transfer the ball of dough into the bowl. Cover with plastic wrap and put into your proofing oven for 15 minutes.
Shape loaf (see blog post for photos)
- Turn your dough out onto the counter, smooth side down. Press the dough out to a rectangle with the short side about the same width as your loaf pan.
- Bring the bottom part of the dough up towards the center and press with the heel of your hand to seal it. It will look like you formed two little pointy "wings" on the bottom sides. Pull those wings up towards the seam that you created and use the heel of your hand to seal that down as well.
- Repeat with the top of the dough, bringing it down to the center, pressing with the heel of your hand, bringing the wings in, and pressing them down. Roll to make a loaf shape and pinch the seam shut.
- Place into your loaf pan seam side down. Cover loosely with plastic wrap again and place on top of your stove while you preheat your oven to 375°F.
- Let the dough rise for another 15 to 20 minutes, or until it's just peeking over the top of the edge of the pan.
- Brush with an egg wash if you like, and bake for 30 to 35 minutes, or until it is golden and sounds hollow when tapped. If you have a thermometer it should register between 190 to 205°F.
- Allow to rest in the pan for five minutes. Gently tip out of the pan and let cool on a wire rack. Wait to slice until fully cooled. I know. It's hard.
Save this recipe
We'll email it to you.Video
Notes
- 3 cups bread flour (360 grams)
- 1 tablespoon sugar (12 grams)
- 1 tablespoon instant yeast (9 grams)
- 1 ½ teaspoons kosher salt (4 grams)
- ½ cup water (120 grams)
- ½ cup whole milk (122 grams)
- 2 tablespoons neutral oil (30 grams)



This is my go to need bread in a hurry recipe.
Yay! So happy to hear that!
I just tried this recipe for the first time yesterday. I subbed out 1.5 cups of the bread flour for whole wheat flour, but otherwise followed the recipe as written. My loaf came out of the oven with the most beautiful color, crust, and crumb! The texture and taste was like honey wheat (even though I used no honey). It made fantastic PB&Js. Thank you for compiling a sandwich bread recipe that is truly easy, delicious, and actually takes only an hour to make. I may never go back to buying bread from the store!
Sounds amazing! Thanks for trying my recipe and I'm so glad you love it as much as I do!
This 1 hour loaf is fantastic! It’s quick, soft and delicious. Highly recommend !
My husband loves this bread and it comes together so quickly!
I'm so glad you guys love it!
A great, simple bread recipe if there ever was one. I would say to add a bit more salt next time as it was a little on the bland side. I loved that little hack at the beginning of the recipe to turn the oven on to get the insides warm and then off again so it doesnt bake the bread during the rise time. Definitely using that trick again!
(This review was submitted while participants could receive an entry into our monthly gift card drawing for leaving an honest review. Ratings and opinions were not required to be positive.)
I'm so glad you loved the recipe!
Fantastic recipe! So easy to make. I decided to make it all by hand since I had time and it really came together quickly. Because there weren’t any long rise times, each step took no time at all.
The smell…ahhh, so fragrant. Our house smelled wonderful. We used it to make grilled cheese for dinner. Just perfect and it tasted wonderful. Using the rest for toast tomorrow.
Excellent recipe!
(This review was submitted while participants could receive an entry into our monthly gift card drawing for leaving an honest review. Ratings and opinions were not required to be positive.)
AMAZING! Thank you!
O.M.G. if you told me I could make bread, I would have said you're crazy! This was so easy to follow. I ended up making 2 loaves! And both came out perfect! I can't wait to toast some up for dinner! Thanks for another fantastic monthly recipe!
(This review was submitted while participants could receive an entry into our monthly gift card drawing for leaving an honest review. Ratings and opinions were not required to be positive.)
I'm so excited that you've unlocked your new baking skills!
This is one terrific bread recipe! I have been searching for something I could use to make a quick homemade dinner roll or slider bun--quick being the operative word. I was curious as to whether this one might work. So I decided to give it a go. And sure enough it worked out perfectly. The 9" loaf pan version was just the right amount of dough for 12 nice-sized rolls. Admittedly it took me a few more minutes beyond an hour to weigh, cut & shape the rolls. But so well worth it. No more Rhodes buns for this kid. Thank you Cynthia. You are amazing!
(This review was submitted while participants could receive an entry into our monthly gift card drawing for leaving an honest review. Ratings and opinions were not required to be positive.)
Thank you SO MUCH!
Oh my goodness! The house smells incredible while baking this recipe. It is cooling right now. The loaf looks gorgeous. Hubby is circling the kitchen waiting for me to vibe him the "go ahead" to have a slice or four.
Welcome to the world of the bread obsessed!
The recipe was so easy to follow! The bread turned out better than expected. It was soft and super delicious. Now my husband does not want store bought bread anymore!! Highly recommended to try this easy recipe. Really an hour to make!!!
Amazing! And your husband sounds very smart 😉
My house smelled wonderful while the bread was baking
This recipe was easy to follow I made it in the food processor
The bread tastes fantastic
Highly recommend
It was hard to wait until it cooled to try!
SO happy to hear you loved it!
So delicious and an absolutely easy recipe to follow. I made the loaf yesterday and it’s almost gone already. Will definitely make again soon and will pass the recipe on to friends 😋😊
That's amazing! There's only my husband and myself in our house and a loaf of barely lasts a day in our house too 😆
I used buttermilk. I know why you keep making it. This is delicious. Beyond delicious. It is also not hard.
Thank you so much and I'm so glad you found the recipe to be approachable!
I AM OBSESSED! I have made so many loaves of bread this week because it is so easy and delicious!