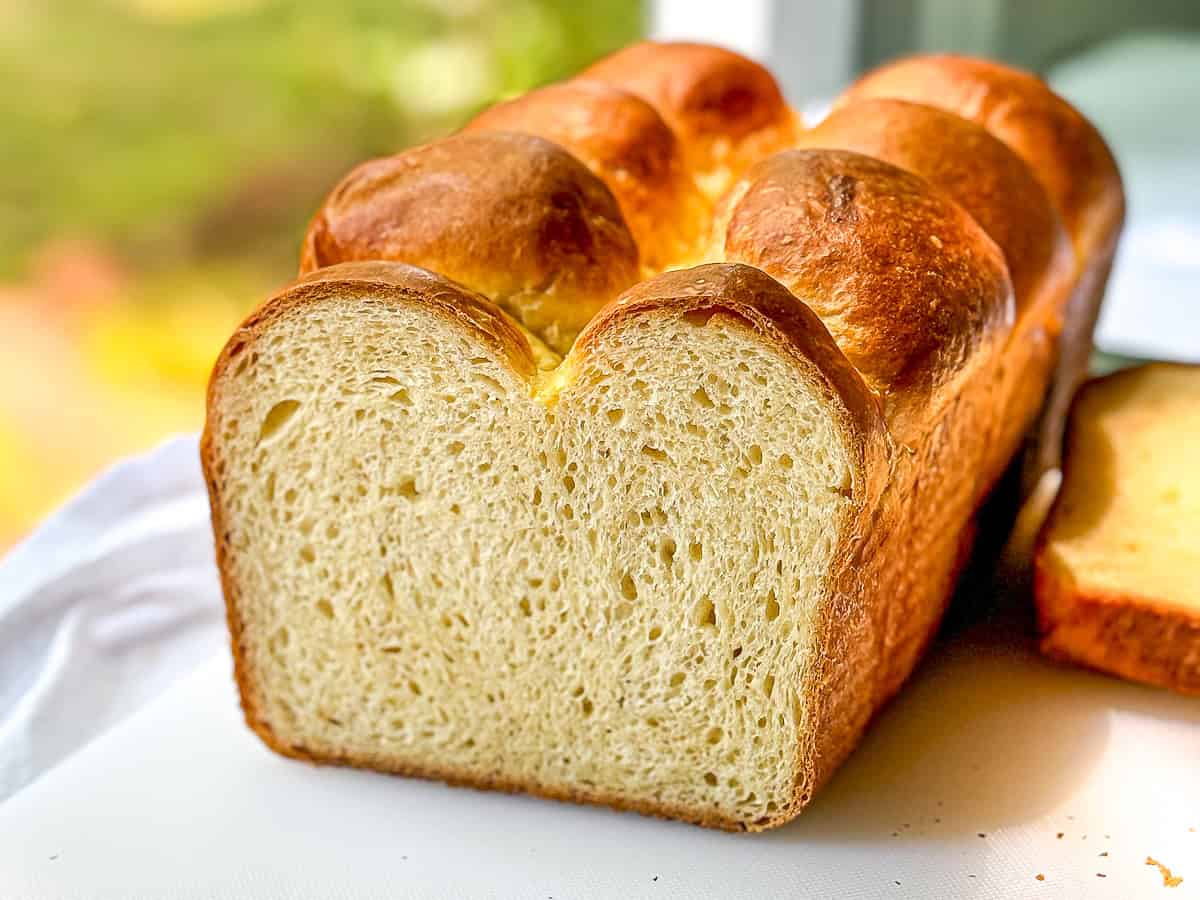
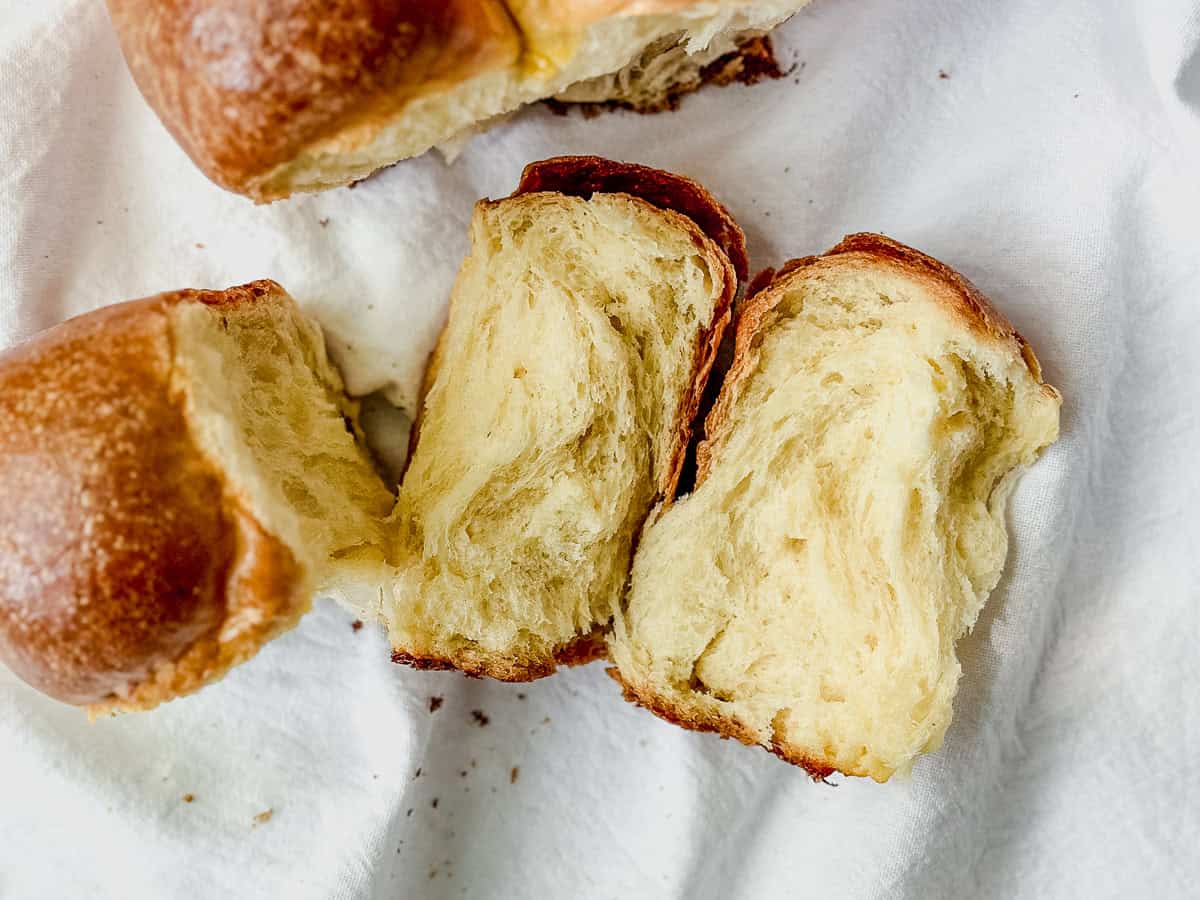
This Easy Brioche Loaf makes one delicious loaf of brioche bread - without having to add in softened butter. With very little hands-on time, and skipping the step professional bakers hate the most, the result is a pillowy soft, buttery loaf of bread that is fantastic simply toasted or for sandwiches and French toast.
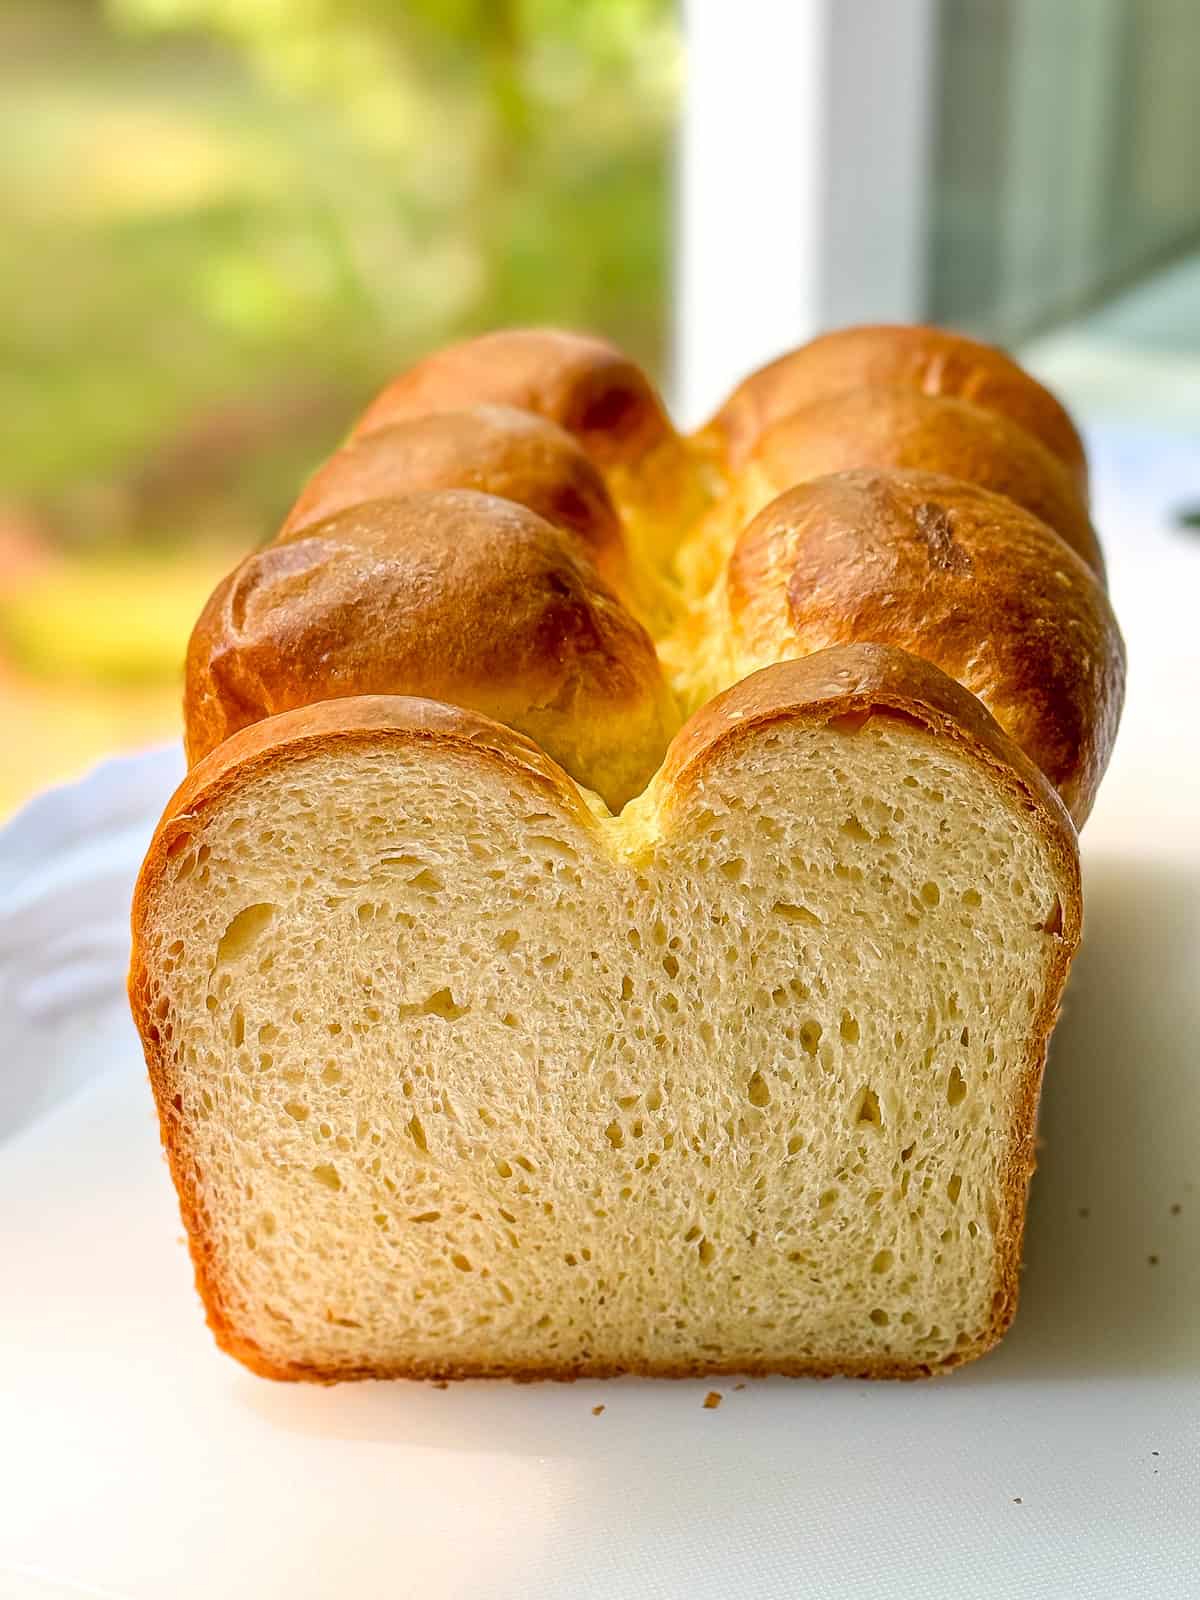
Save This Recipe! 💌
I have worked for months to develop this Easy Brioche Loaf recipe because I love a challenge! In one of the bakeries where I trained and worked, we made enormous amounts of brioche dough in giant Hobart mixers, to be used in sticky buns, cinnamon rolls, crème brioche, and so much more.
Probably, no definitely, my least favorite part of the process was adding in the softened butter. Tossing in hunks of butter, one at a time, waiting for it to be sloppily slapped around the mixer for a good long while, before finally being incorporated into the dough, then adding another hunk, and another, and another... I felt like I was being held hostage to the dough. And I had a commercial mixer to do the work. Making it in a home mixer only added to my torment.
In developing this homemade brioche bread, my goal was to make a soft, delicious loaf of buttery brioche with a tender crumb, while skipping the slow room temperature butter torture. I wanted to be able to add melted butter at the same time as I added milk and eggs, without compromising on taste or texture. Guess what? NAILED IT!
Full disclosure: Would Pierre Hermé or Dominique Ansel be able to tell that you didn't make this brioche using traditional French technique. Probably. Would my bosses at the bakery be able to tell? Maybe not 🤫
Read on to learn how to make a simple and delicious loaf of brioche bread that even a French-style bakery would be proud to sell!
Jump to:
❤️ What you'll love about this brioche bread recipe
- Effortless - All of the ingredients are mixed at one time and your stand mixer does the rest.
- Easy - We start with the simplest shaping process, give the loaf an overnight rest, and bake it anytime the next day, up to 2 days later.
- Time-saving - Almost every recipe I've ever seen has you refrigerate your brioche dough before shaping, then shaping and letting your loaf rise for at least an hour before baking. I am not a patient person. I want to just start baking. So I have you shape your loaf first. Best. Decision. Ever!
- Delicious - Leaving out a frustrating process does not leave out the flavor! This is a soft and fluffy loaf of brioche with amazing buttery flavor!
Any way you slice it One of my favorite ways to use a slice of brioche bread is to make my delicious Egg in-a-Hole, which is a piece of bread toasted in a pan with an egg cracked into a hole in the center. I also love to top it with fresh strawberry sauce and strawberry whipped yogurt and make my strawberry French toast.
Ingredients
Another thing that I absolutely love about this recipe for brioche bread is that none of the ingredients are fancy. You probably have them right now and should probably start making some brioche bread as soon as you finish reading the recipe.
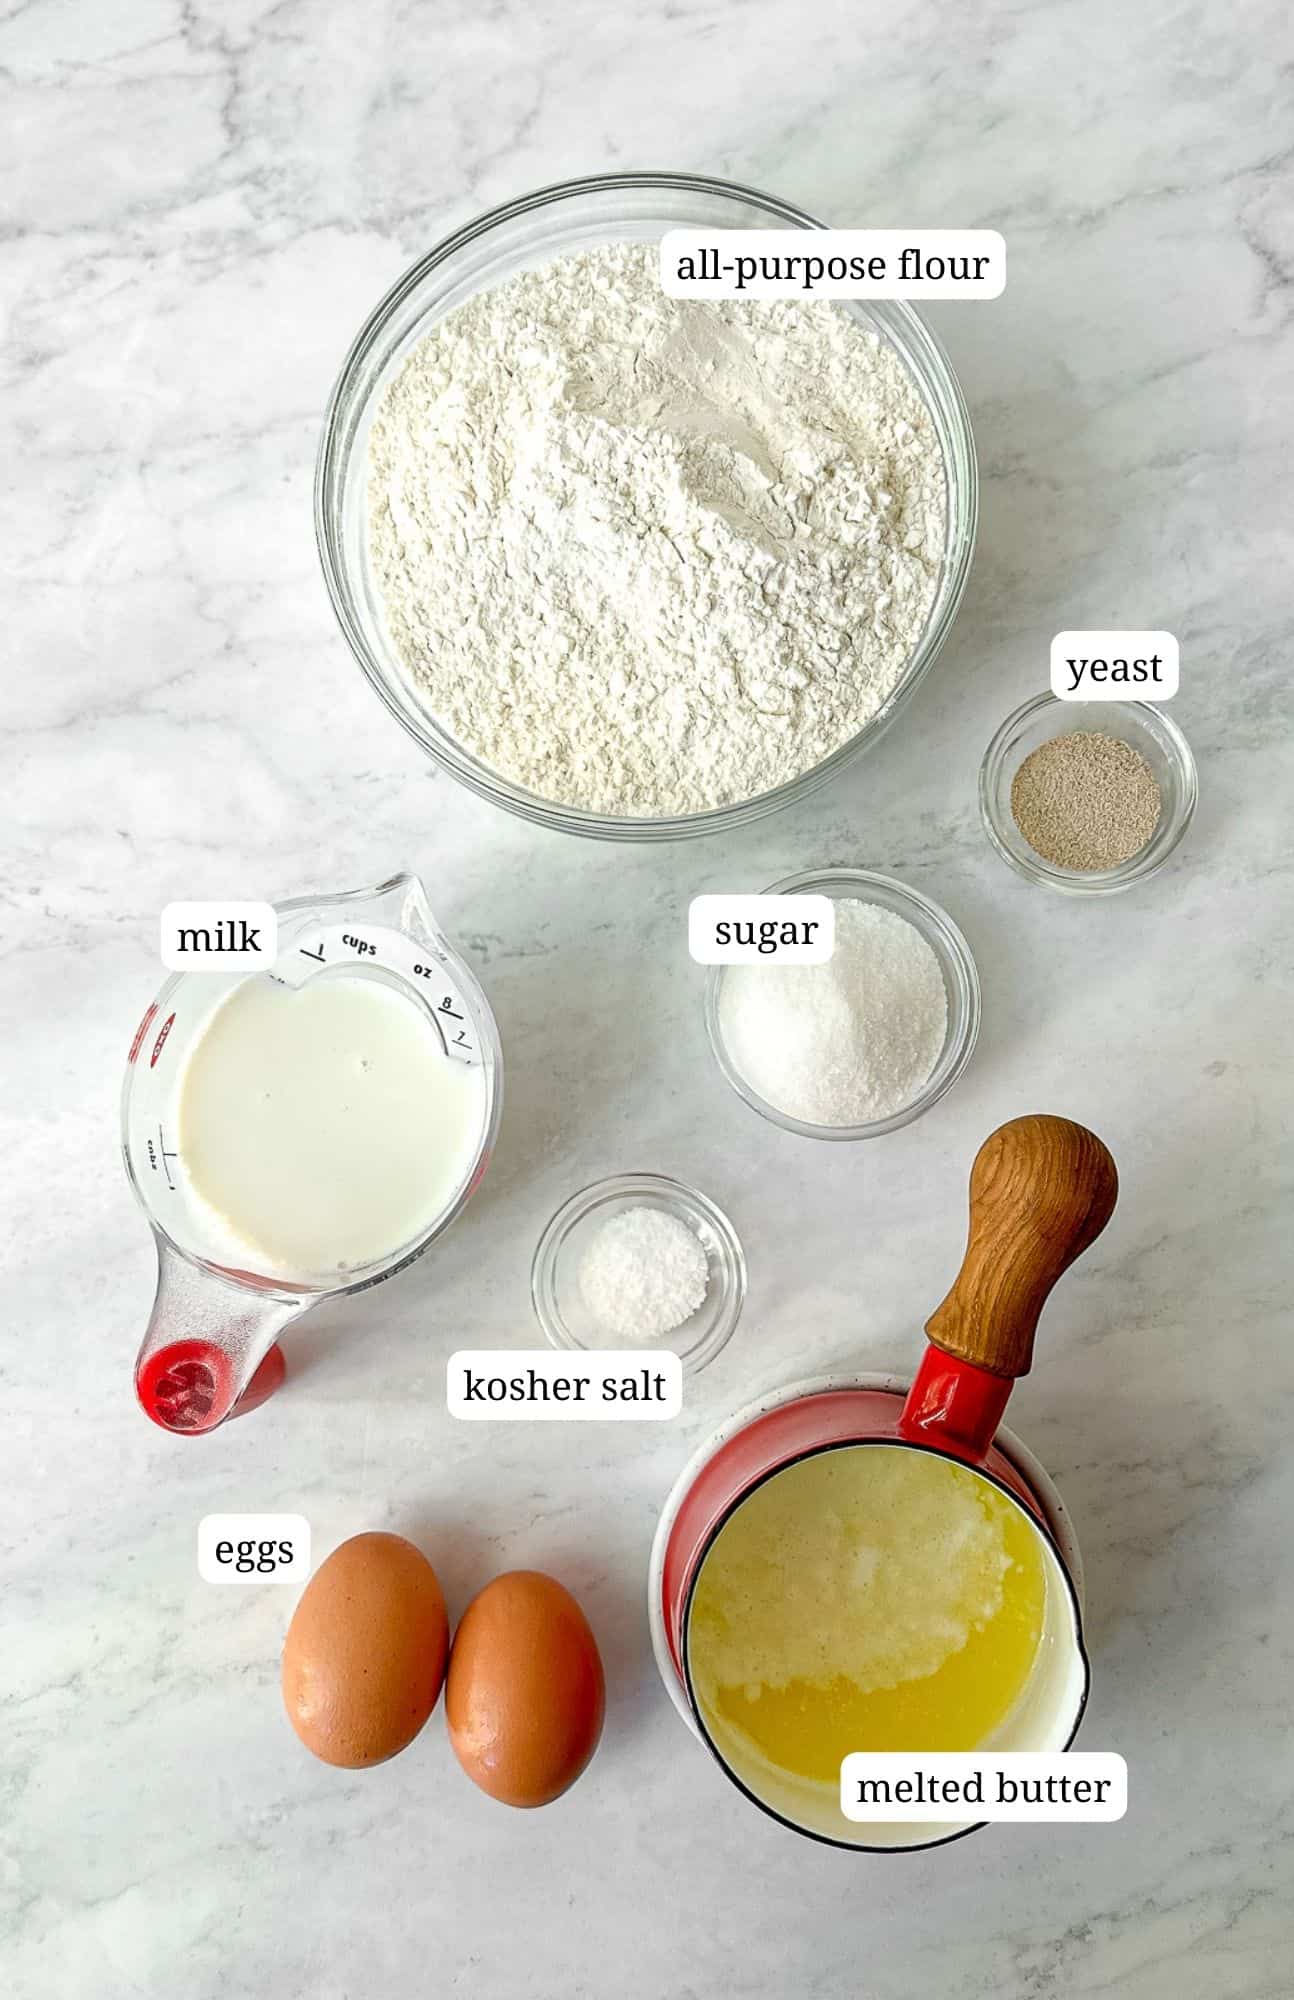
See recipe card below for quantities.
Equipment
I absolutely believe that to make this loaf of brioche bread you must use a Stand mixer. Although you can theoretically make this bread by hand, it is so much easier with a stand mixer. Kneading a standard bread dough by hand can take upwards of 20 minutes to get the same result as you will with a mixer.
I'm not saying it can't be done, and it is easier without having to mix in softened butter, but it will be a long, messy process that may inadvertently lead to you adding too much flour to make it easier to work with.
I didn't have my own stand mixer for years, so I borrowed the KitchenAid that my daughter received as a wedding gift. If you don't have one, you probably know someone who does. If you are sufficiently motivated to make a loaf of brioche, you should hit them up. It's worth it!
Do I have to do the windowpane test?
People use the windowpane test to check if their dough has been kneaded sufficiently, indicating strong gluten development. I rarely, almost never, do the windowpane test, and making this brioche untraditionally, it won't always work. If you still want to try it, here’s how:
Tear off a piece of dough about the size of a ping pong ball. Gently stretch it between your thumbs and forefingers until it forms a thin, translucent membrane that you can see the glow if you hold up to light. If the dough can stretch this thin without tearing, it has developed enough gluten.
If the dough tears, knead the dough for a few more minutes. Remember, this rule isn’t absolute. Even if you skip the windowpane test, you can still bake a good loaf of bread. I do 🤪
Instructions
Getting a loaf of brioche ready to bake takes place in 3 main steps. Making the dough, letting it rise, and then shaping the loaf. Nothing here is hard, if you ever played with Play-Doh, you've already got the moves mastered!
Mixing the dough
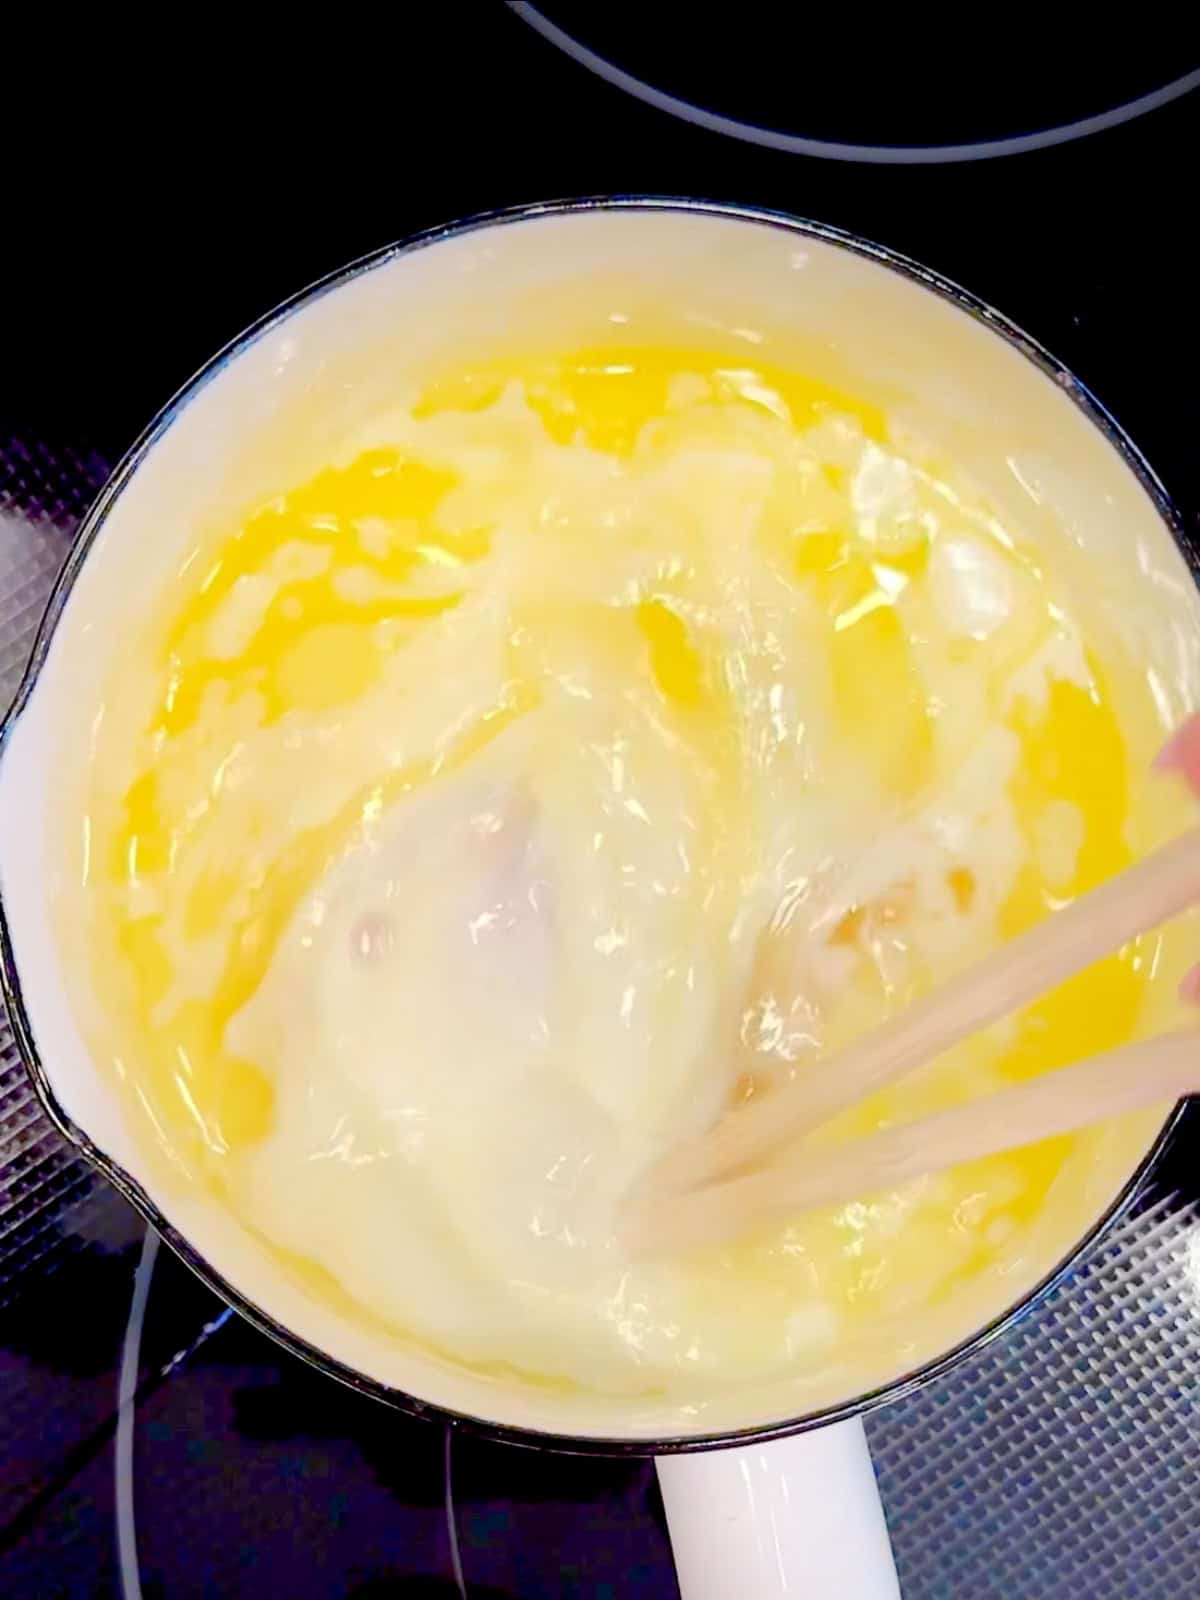
Step 1: In a small pan, melt your unsalted butter. Remove from heat. To the butter, add warm milk and 2 large eggs. Whisk to combine.

Step 2: In the bowl of a stand mixer, combine all-purpose, flour, kosher salt, instant yeast, and granulated sugar. Use paddle attachment to combine the ingredients.
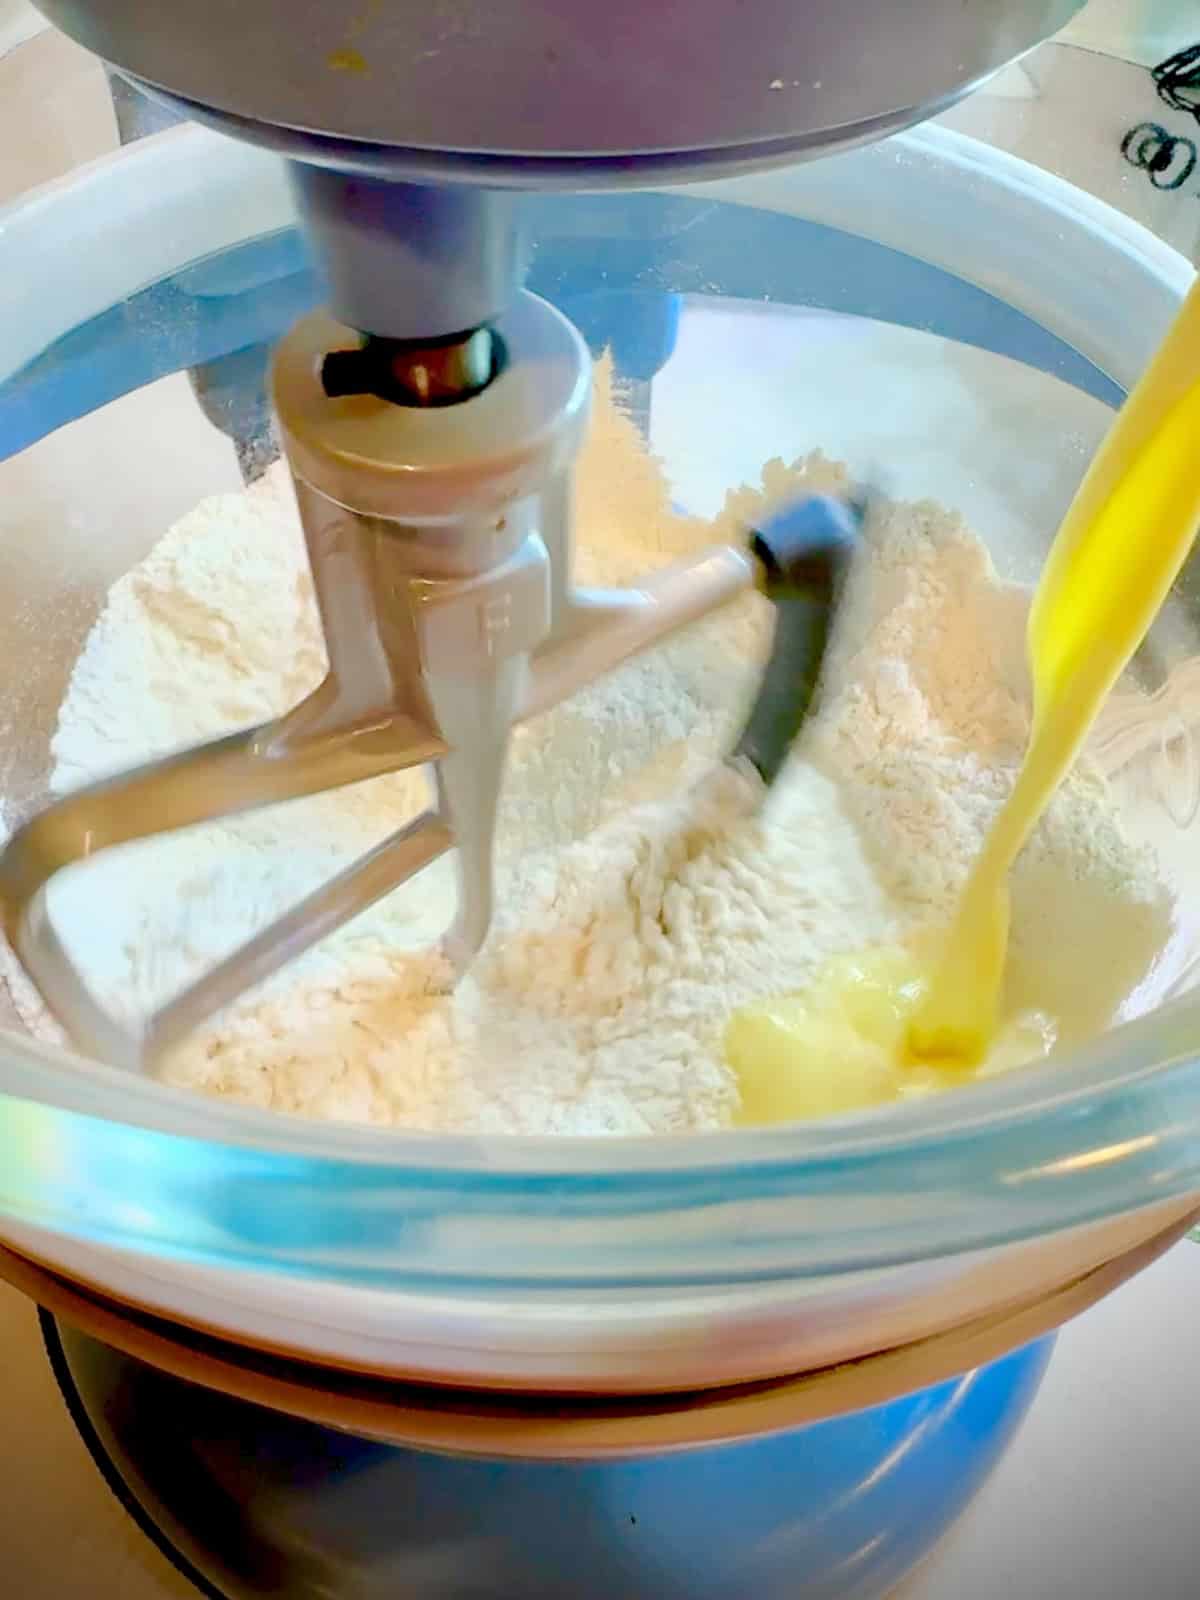
Step 3: With your mixer on low, pour in your wet ingredients and allow to combine with the dry ingredients until you have a sticky dough with no more dry flour.
Remove paddle and replace with dough hook attachment. Scrape the sides of the bowl and turn the mixer on to medium and knead dough for 3 minutes. Turn off and look at the dough.
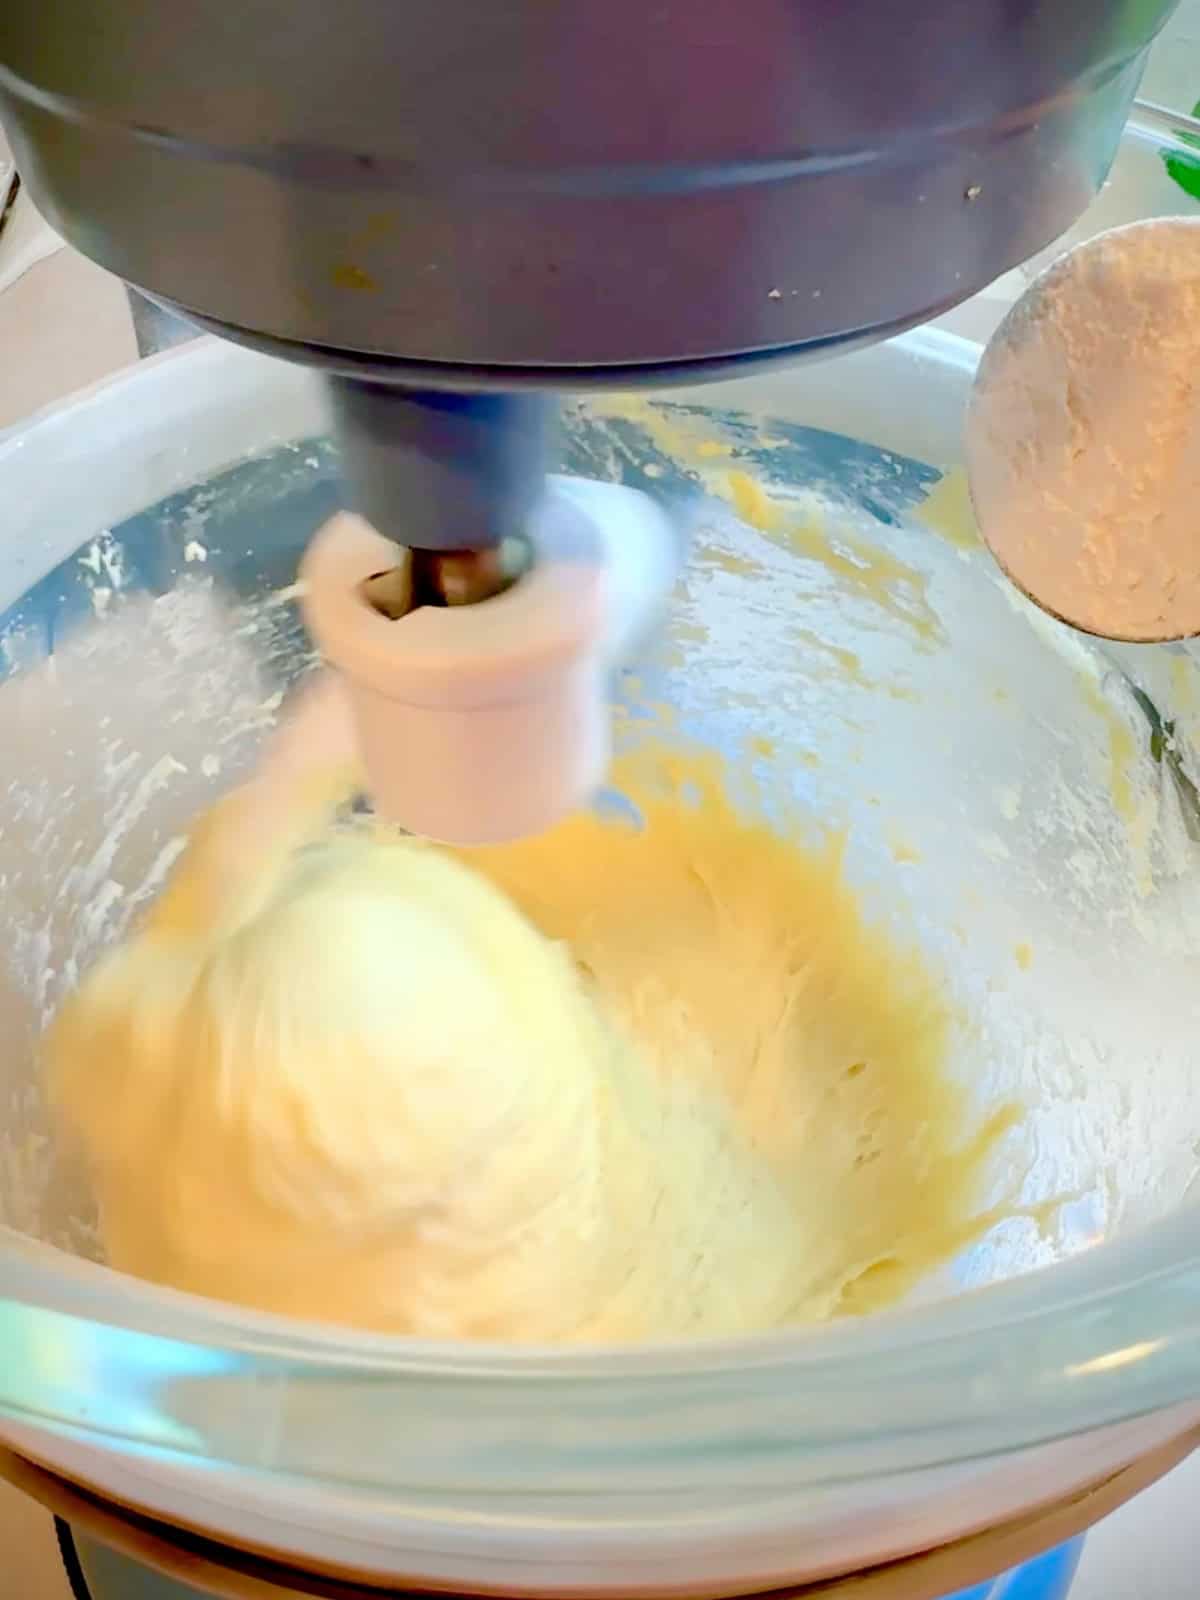
Step 4: If most of the dough is sticking to the bottom and sides of the bowl, turn mixer on low and add 1 tablespoon of flour. Mix one minute and check again. If still sticking, add one more tablespoon of flour and continue kneading.
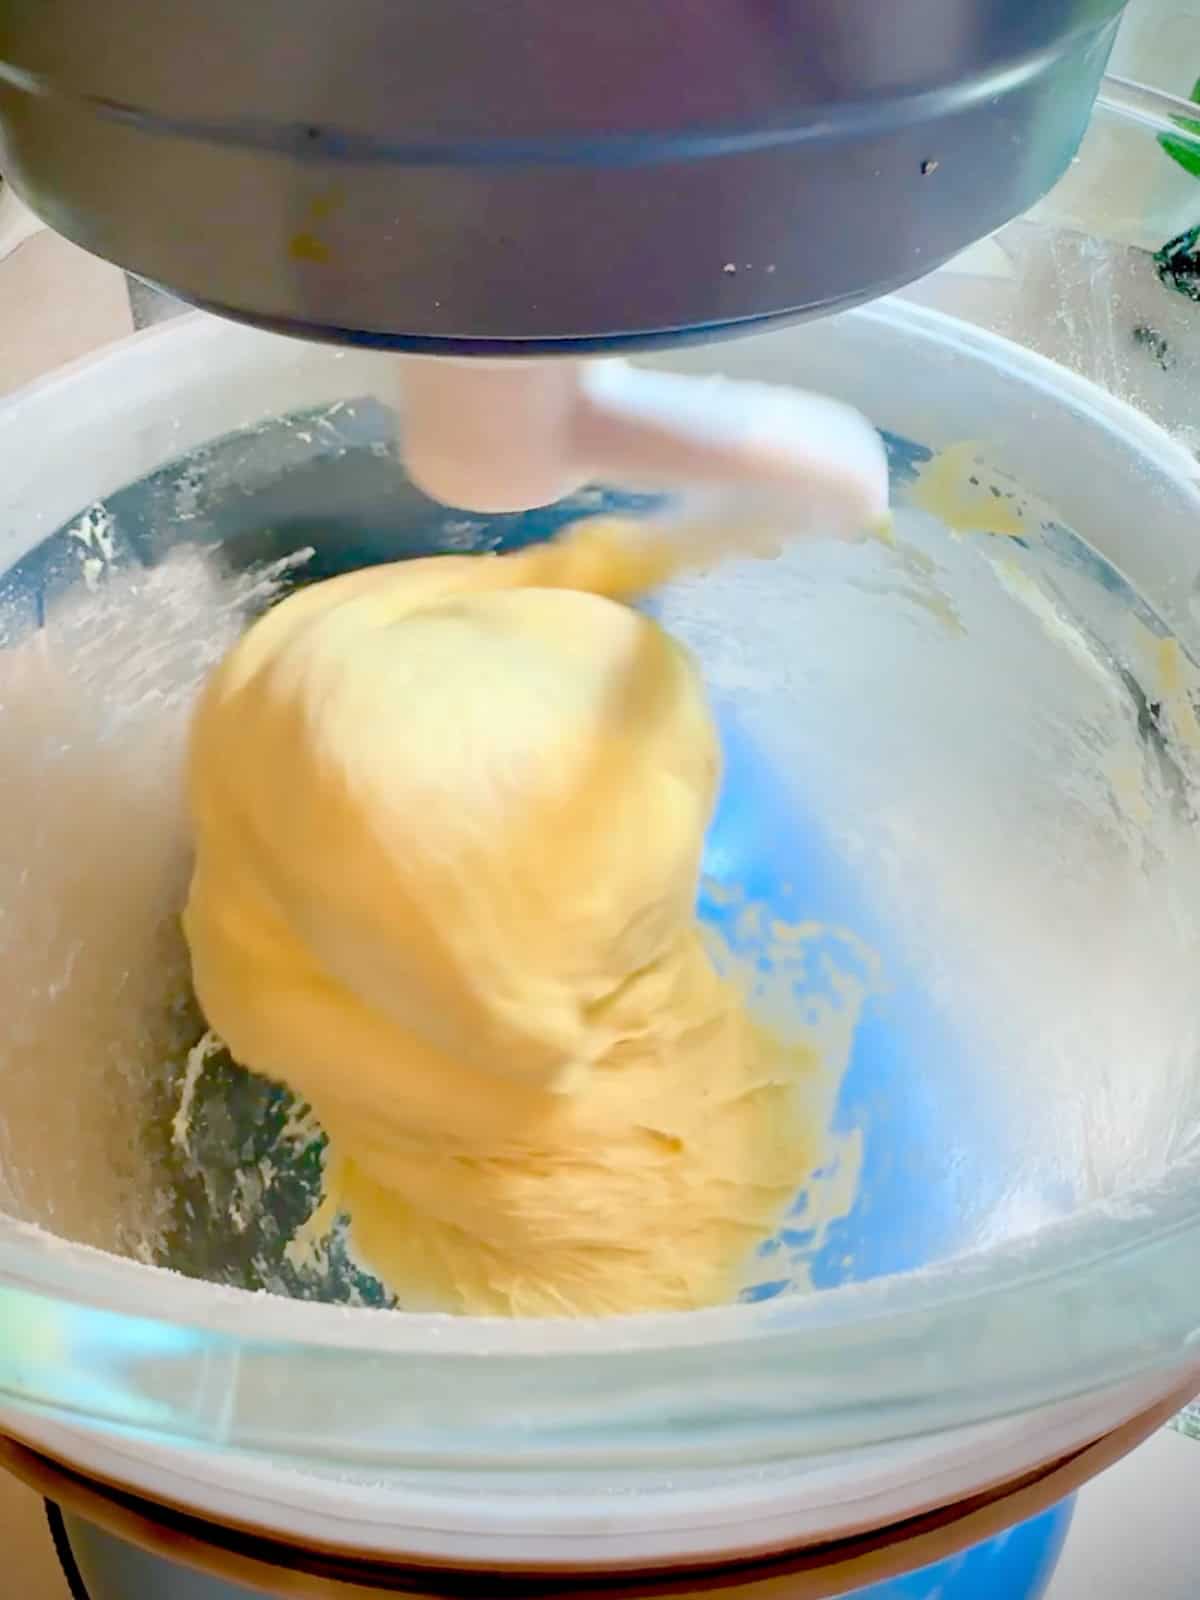
Step 5: Turn mixer back onto medium speed and mix for 4 more minutes, or until dough is smooth and wrapping around the dough hook. Some of the dough will be sticking to the bottom of the bowl, and that's okay.
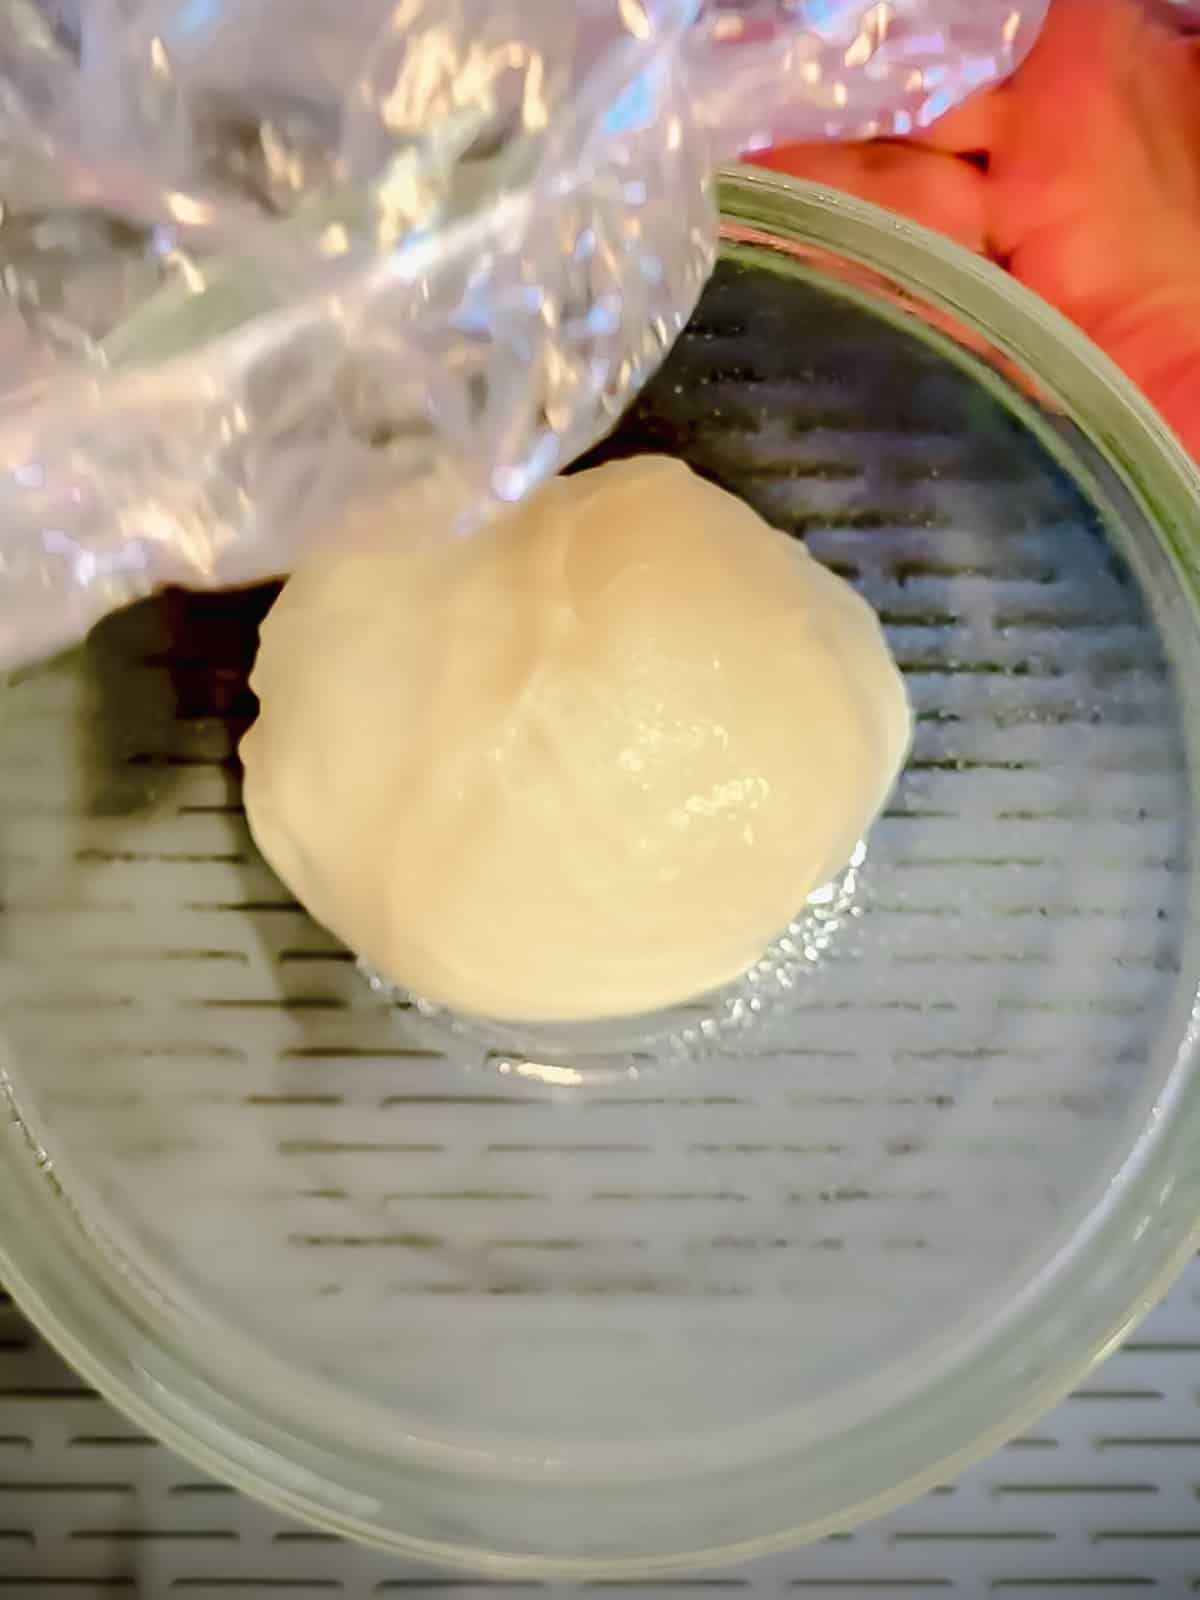
Step 6: Shape dough into a ball and place in a greased mixing bowl. Cover with plastic wrap and place in a warm spot in your kitchen (my oven has a "proof" setting) for 1 to 2 hours to let the dough rise until doubled.
Shaping your loaf
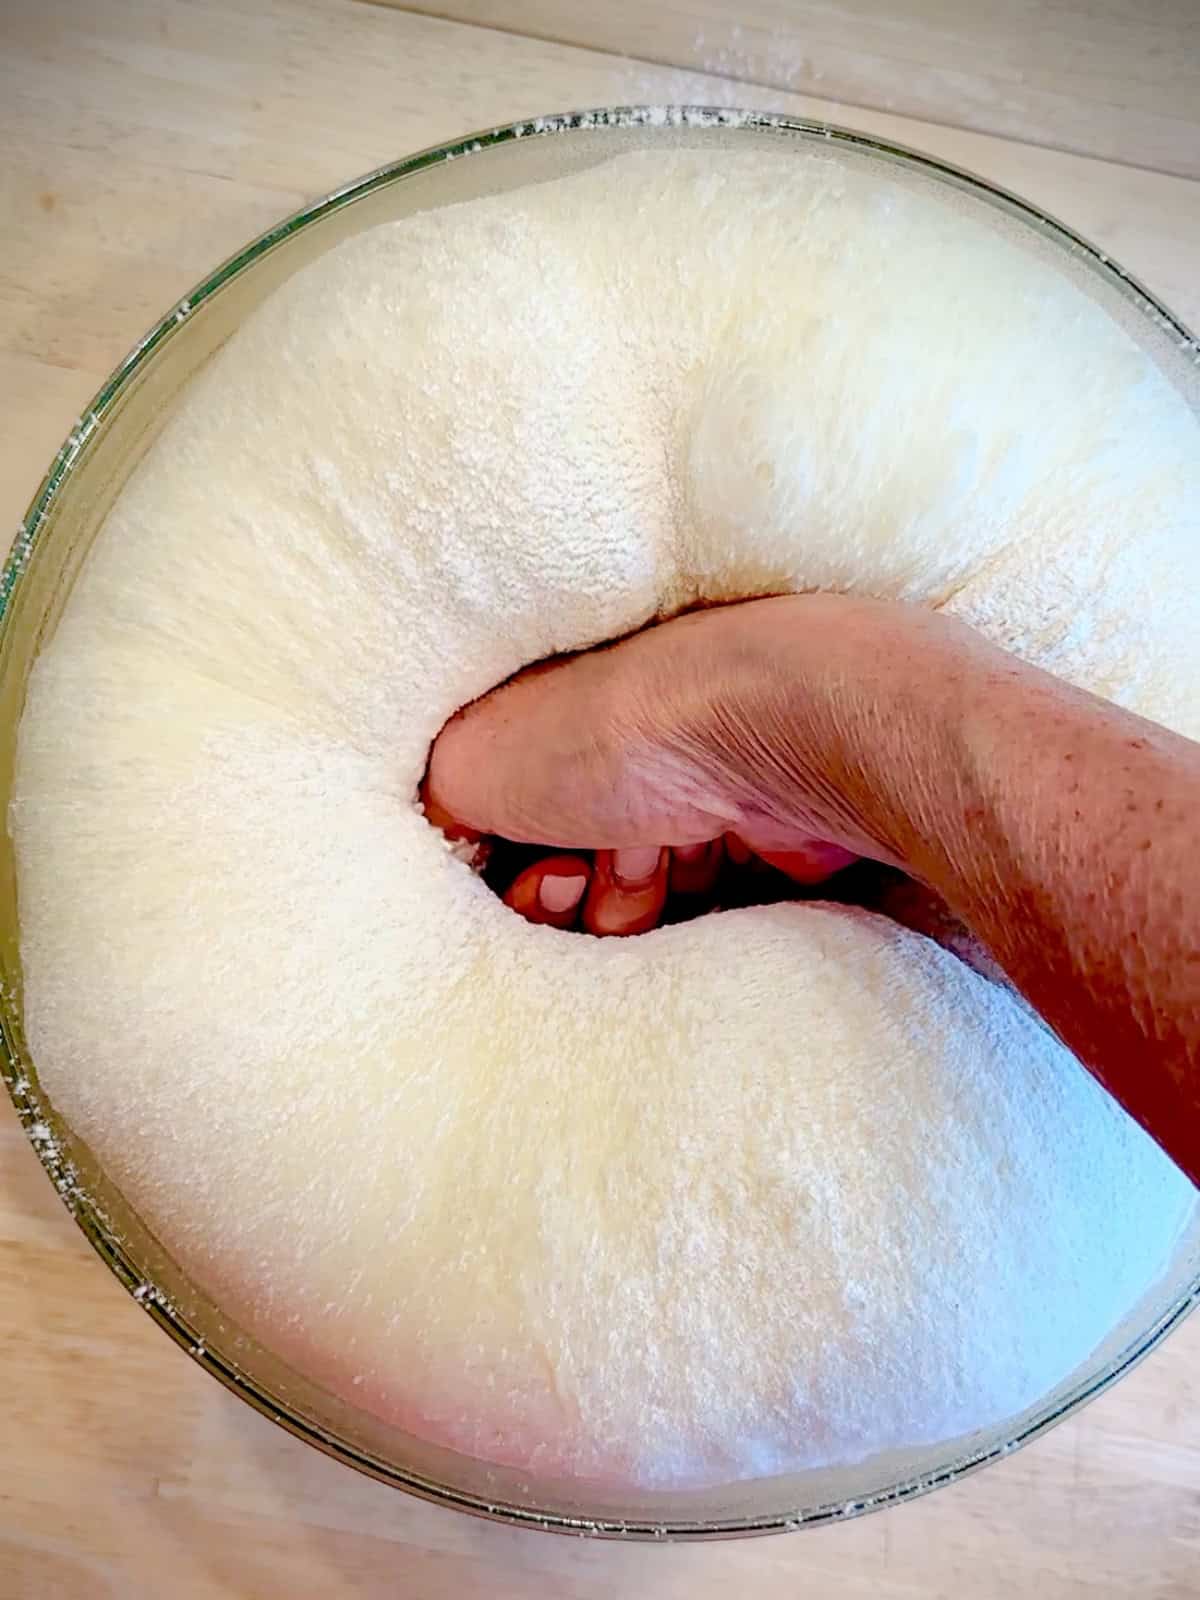
Step 7: Press the air out of the dough (called degassing or punching down the dough) and transferring to a lightly floured surface. Divide into 8 equal pieces, using a scale for the most accurate results.
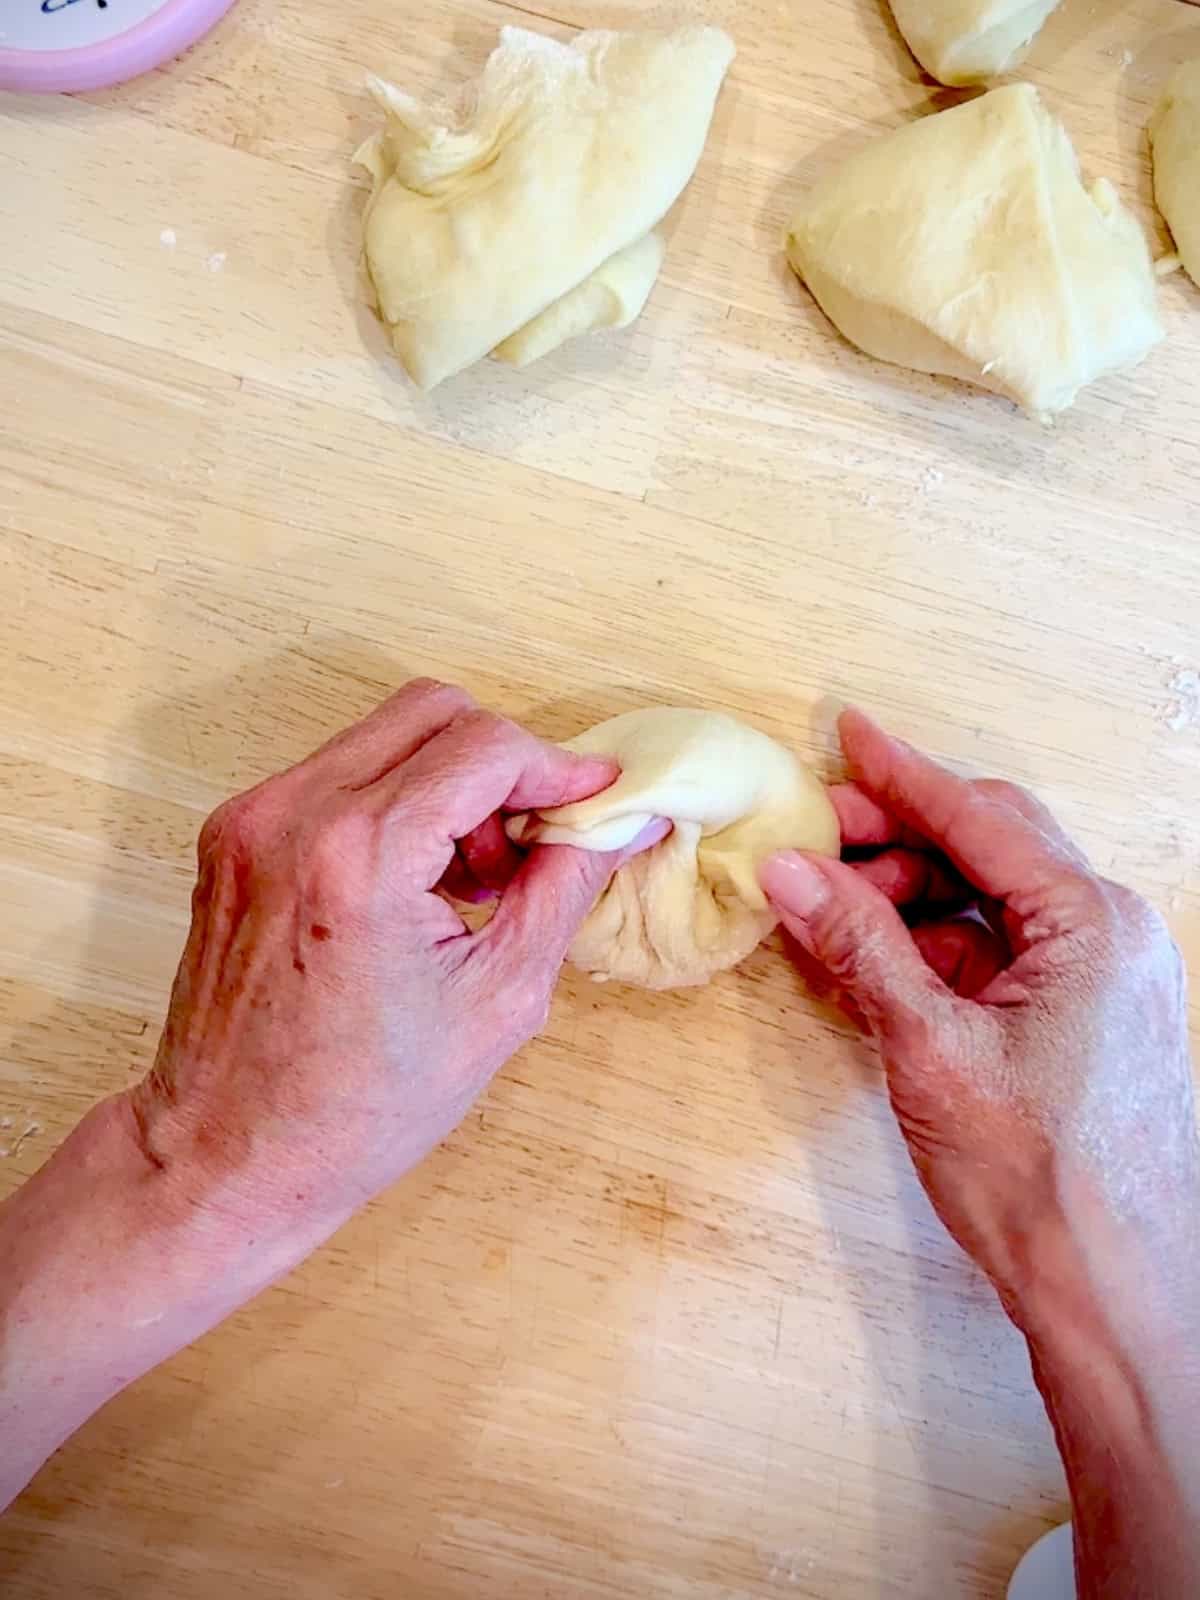
Step 8: Take a piece of dough and bring all of the edges together on the top and twist them together, like closing a drawstring bag.
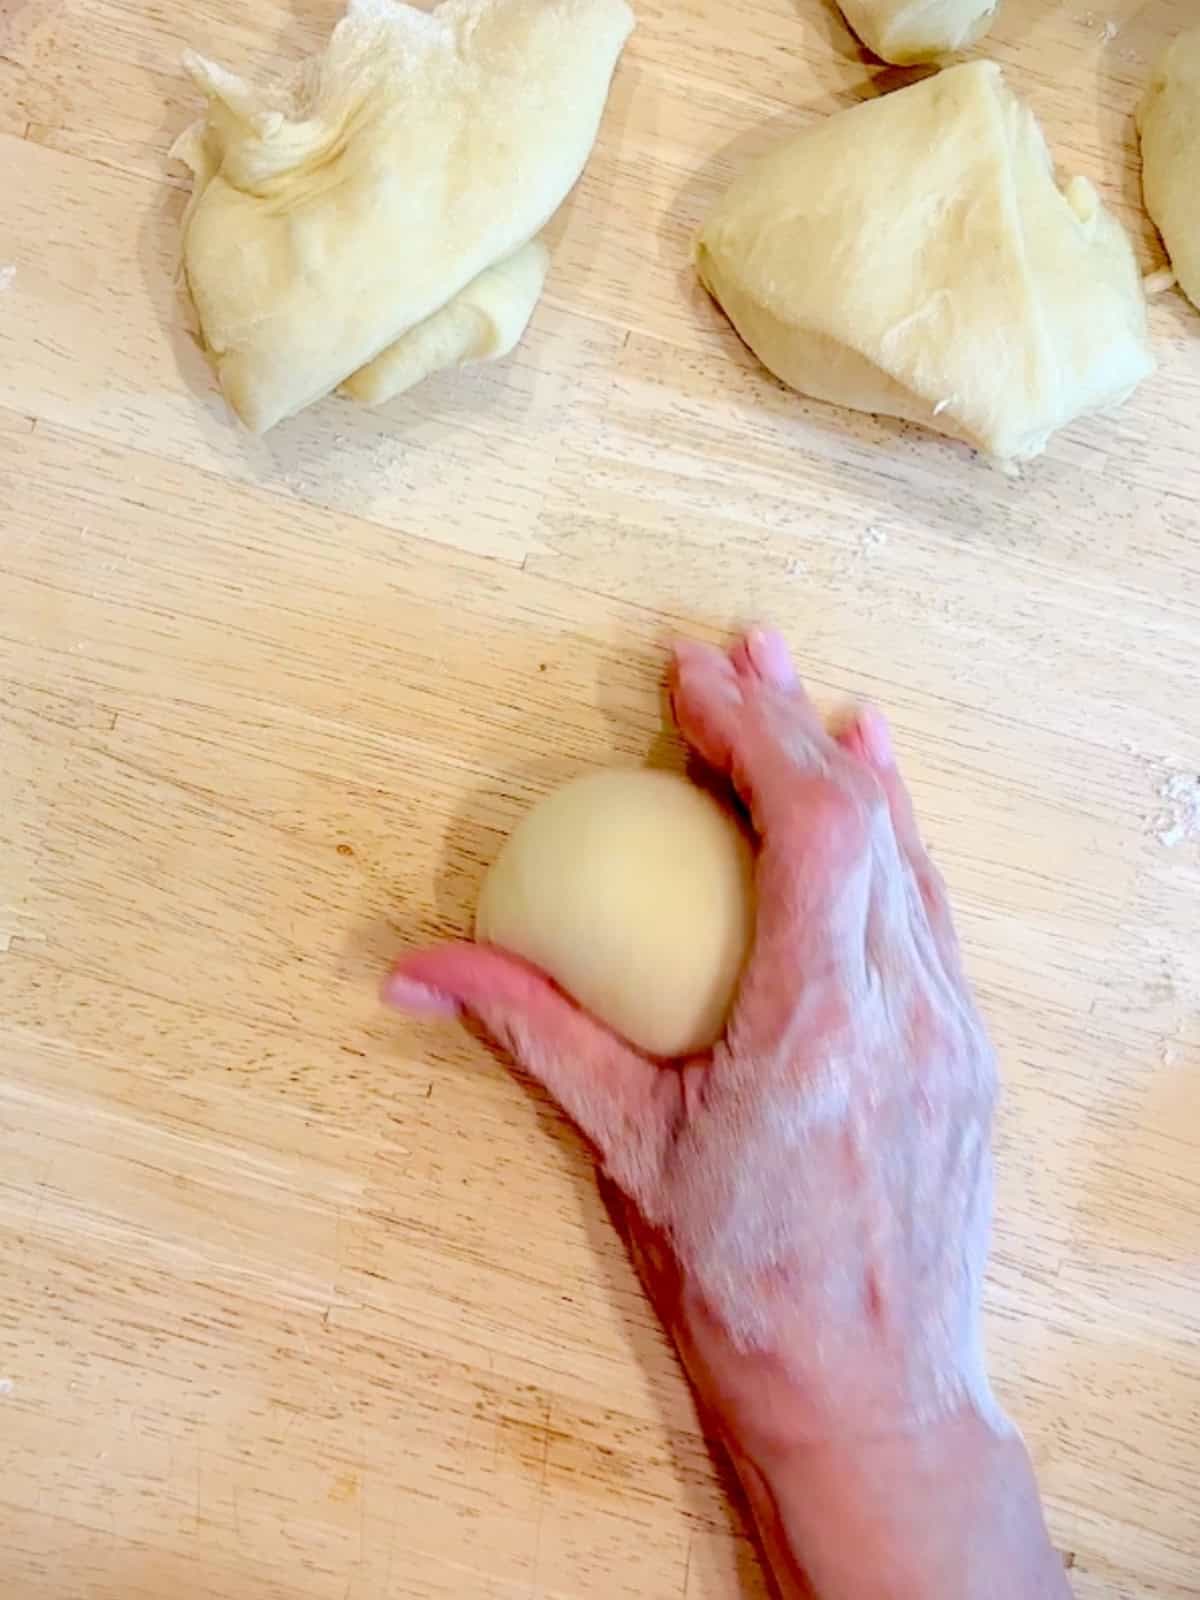
Step 9: Roll the dough ball in your cupped hand, seam side down, against the surface of the counter until a ball is formed. Repeat with all of the dough pieces.

Step 10: Place the dough balls in a 9 by 5 baking pan that has been sprayed with nonstick spray in 2 rows of 4 balls. Cover with plastic wrap and place in the refrigerator overnight, or at least 8 hours.
Baking your brioche loaf
After the overnight rise, remove the pan of dough from the refrigerator and let come to room temperature for 30 minutes to an hour. Preheat your oven to 350°F for at least 30 minutes.
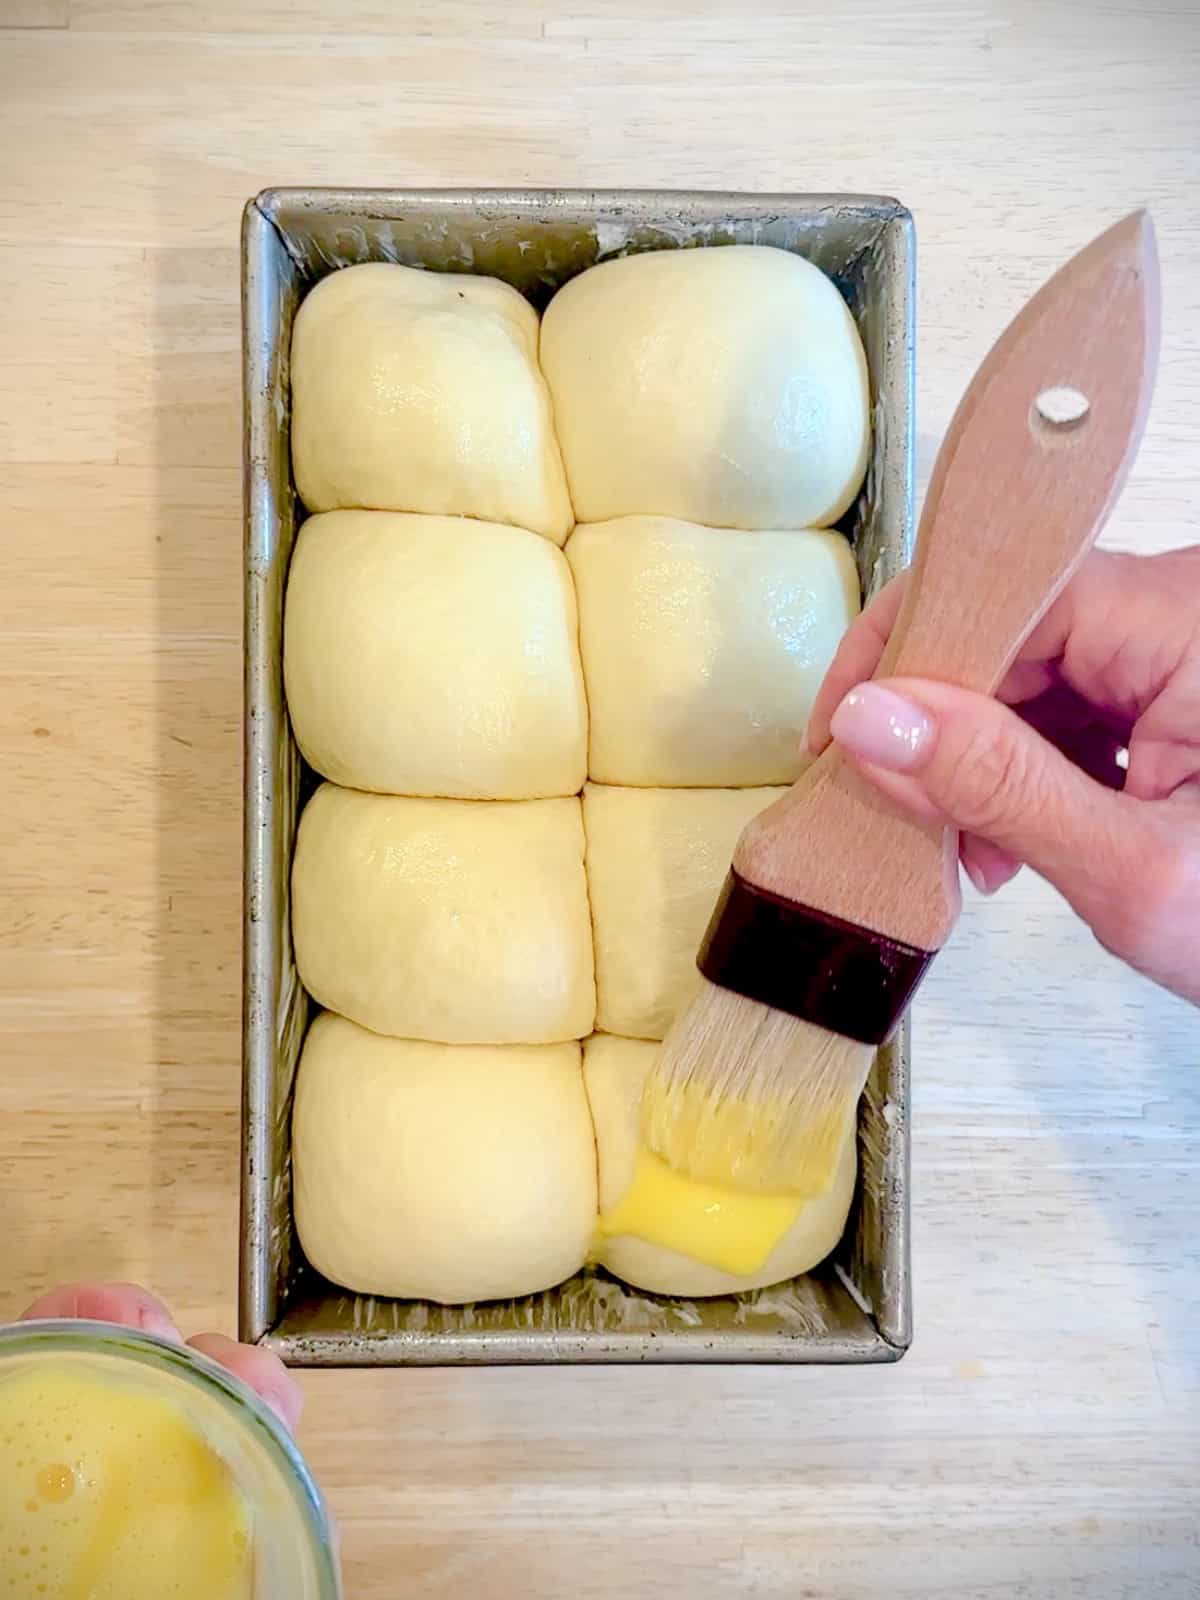
Step 11: Whisk together one egg with one tablespoon of water to make an egg wash. Brush the top of your loaf with the egg wash.
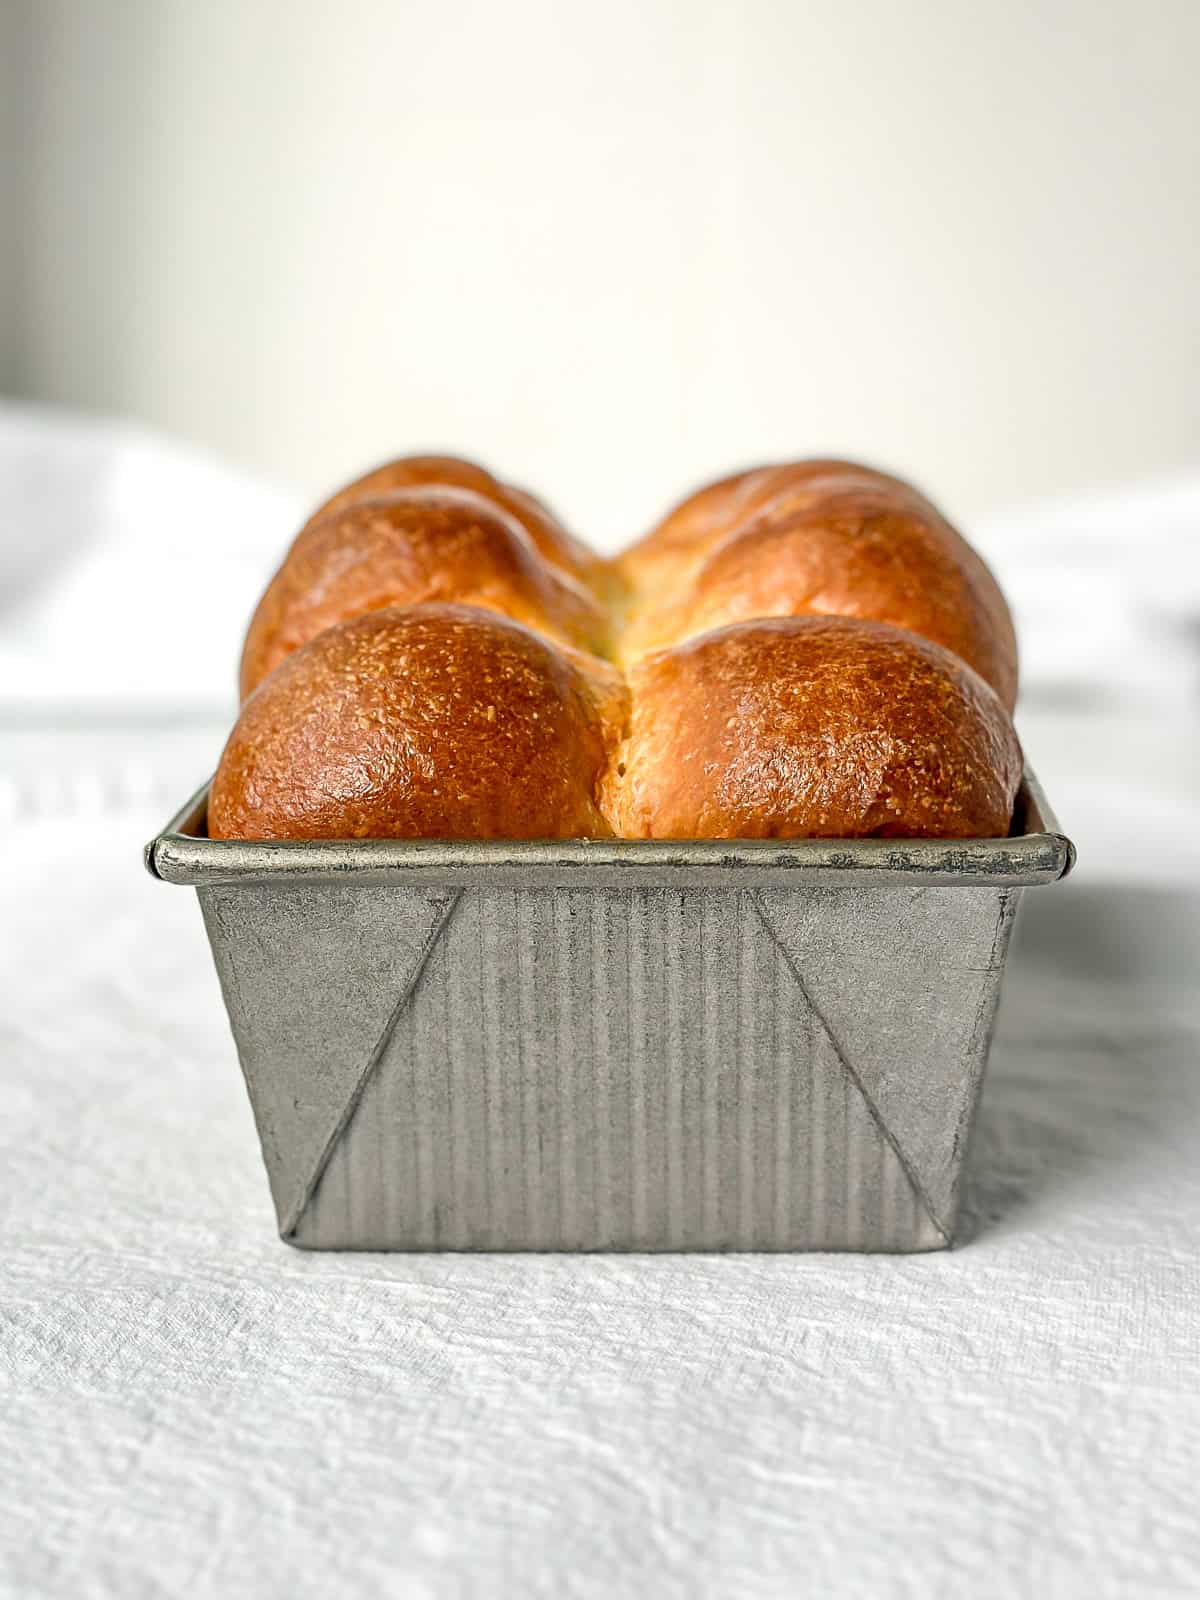
Step 12: Bake at 350°F for 35 to 40 minutes, or until the top of your loaf is golden brown and the internal temperature is at least 190°F when using an instant read thermometer.
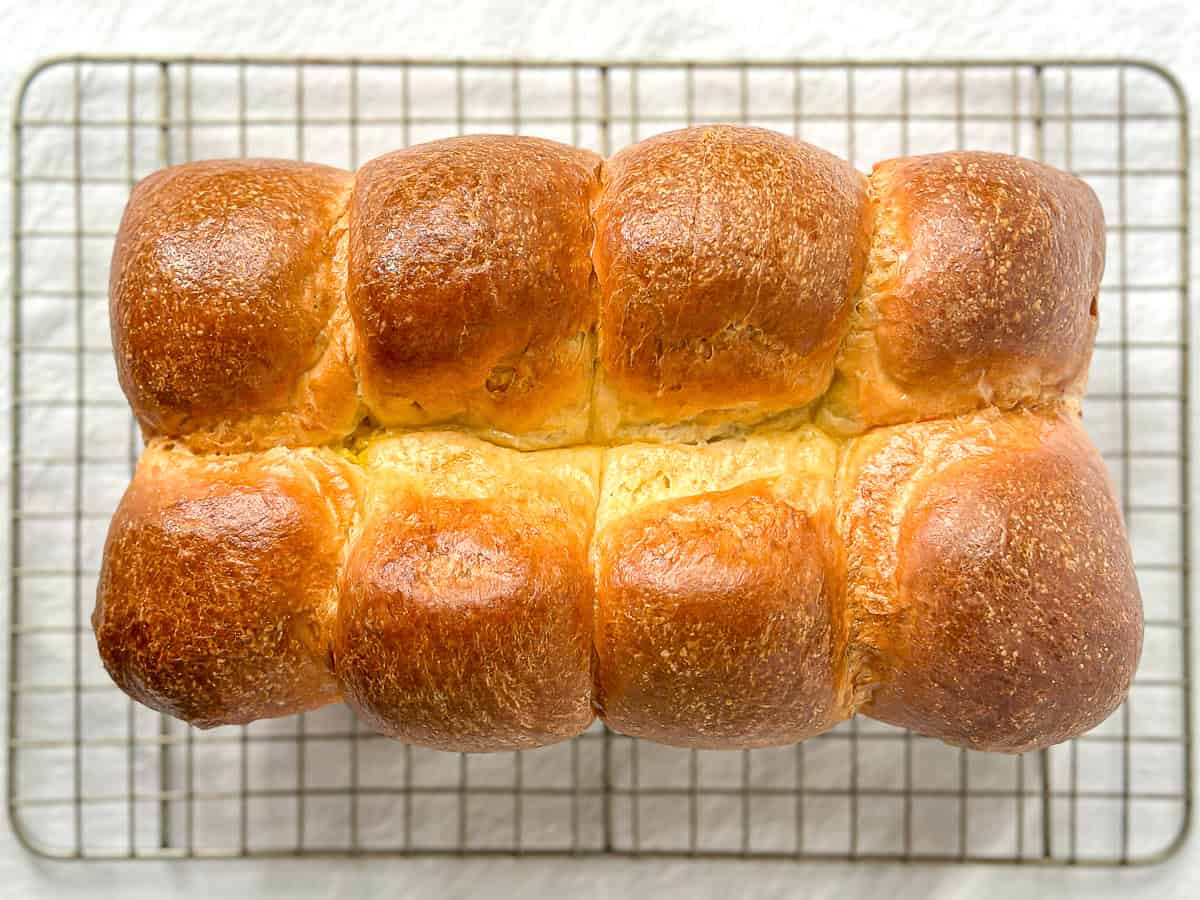
Let cool in the pan for 10 minutes, then tip out onto a wire rack to cool completely before slicing.
Other uses for brioche dough
Brioche dough is super versatile and at the bakery we used it in no less than a dozen different ways. Here are a few of my recipes that either use the same dough or would be delicious using this dough recipe:
Ways to use brioche bread
Rich and delicious brioche bread is almost always my go-to bread for grilled cheese or really all sandwiches, and cinnamon toast, but most of all I use it for French toast! I use it in my classic French toast, my sheet pan French toast, especially for my French toast sticks, and I use it in place of croissants in my blueberry cheesecake baked French toast!
tl; dr: just the highlights
- Melt your butter. Add milk and eggs and whisk.
- Mix your dry ingredients together in the stand mixer.
- Add wet ingredients to dry ingredients and combine.
- Knead for 8 minutes on medium, checking for stickiness and adding 1 to 2 tablespoons of flour, if needed.
- Cover and rise for an hour.
- Divide dough into 8 pieces and roll into balls. Place balls into loaf pan.
- Cover and refrigerate overnight, up to 2 days.
- Bring to room temperature, egg wash, and bake at 350°F for 35 to 40 minutes.
Tips for better brioche
- Although I also give volume measurements (American cups) I ALWAYS use weights to measure when baking. It is infinitely more accurate. Any time someone has a problem with one of my baking recipes, it has been down to how they measured their ingredients. My scale was very affordable, and it my bakes are always consistent.
- Dough is done kneading when you can pick it up and it feels sticky, but doesn't stubbornly stick to your hands. If you can't remove it from the bowl without messing up your hands, add a tablespoon of flour and knead another 3 minutes.
- Dough rising time is dependent on the temperature of your kitchen. If it is hot, it may happen quicker. A cold kitchen will slow your rise. I have a proof setting on my oven, but if you don't, turn your oven ON to its lowest setting. When it reaches 100°F to 110°F turn the oven OFF. Place your dough in the oven to proof. Opening the oven door to put in the dough will bring it down to the ideal 75-80°F temp.
- Your dough should rise above the level of your loaf pan, or a bit beyond. If it hasn't risen that much, remove it from the fridge and let it rise for an hour at room temperature before baking.
- Before baking, check if your dough is ready. Gently press it with your finger to create an indentation. If the indent stays or springs back slightly, the dough is ready. If it bounces back completely, it needs more time.
- If the dough deflates when you poke it, it means it is over-proofed. You'll need to reshape it and let it proof again, otherwise, your brioche bread will collapse during baking.
- When baking check your loaf at 25 minutes. If the top of your loaf is getting very dark, tent your loaf pan with foil and continue baking.
Recipe FAQs
Yes, you can substitute active dry for instant yeast on a one-to-one basis. "Activate" it in the room temperature milk before combining the wet ingredients. Also be aware that active dry yeast is slower to rise, so you may need a little longer to reach the first doubling of the dough before shaping.
Yes, you can, but because of the higher protein content of bread flour, your brioche will have a more dense texture and will be chewier. It will still be a delicious buttery loaf though!
If that's all you have, then yes can, but salted butter may change the taste of your bread and the texture of your loaf may be different because the extra salt inhibits yeast activity. I would decrease the amount of salt in the recipe to ½ teaspoon to try and balance everything out.
Bread is best kept in a bread box or other airtight container. Wait for the bread to cool completely so it won't become soggy. I like to save bread bags or the plastic veggie bags from the market, to store my bread. It will keep up to 5 days.
For longer term storage, freezing a full loaf is an excellent choice. Wrap your fully cooled loaf in plastic wrap and then place in a large freezer bag with all the air removed, or wrap in aluminum foil. Freeze for up to a month. When you want a fresh loaf, let it come to room temperature, unwrap, and refresh for a about 5 minutes in a 350°F oven.

Did you try this recipe?
Leave a comment with a ⭐️ rating below to tell me all about it, and don't forget to tag me on Instagram!
I appreciate you!
-Cynthia
📖 Recipe
Easy Brioche Loaf
Equipment
Ingredients
- 3 ¾ cups (450 g) all-purpose flour plus 1 to 2 tablespoons more if needed
- ¾ teaspoon (4.5 g) kosher salt
- 1 ½ teaspoon (5 g) instant yeast or active dry yeast
- ¼ cup (50 g) granulated sugar
- 6 tablespoons (84 g) unsalted butter melted
- ¾ cup (183 g) milk room temperature
- 3 large eggs room temperature (one will be used for egg wash)
Instructions
Mixing and kneading the dough
- In a small pan on the stovetop, melt your butter. Remove from heat. To the butter, add milk and eggs. Whisk to combine.
- In the bowl of your stand mixer, place all-purpose flour, kosher salt, instant yeast, and granulated sugar. Use paddle attachment to combine them.
- With your mixer on low, pour in your wet ingredients and allow to combine with the dry ingredients until you have a sticky dough with no more dry flour visible.
- Remove paddle attachment and replace with dough hook. Scrape the sides of the bowl and turn mixer on to medium. Knead dough for 3 minutes. Turn off mixer to check consistency.
- If the dough is wrapping around the dough hook and pulling away from the sides of the bowl, with only a circle of dough attaching itself to the bottom, you're good. Keep mixing for another 5 minutes.
- If most of the dough is sticking to the bottom and sides of the bowl, turn mixer on low and add 1 tablespoon of flour. Mix one minute and check again. If still sticking, add one more tablespoon of flour.
- Turn mixer back onto medium and mix for 4 more minutes, or until dough is smooth and wrapping around the dough hook. When you touch the dough it will feel sticky, but it will not stick to your fingers. Some of the dough will be sticking to the bottom of the bowl, and that's okay.
Shaping your loaf
- Remove the dough from the mixer and shape into a ball with your hands, Place in a greased bowl and cover with plastic wrap. Place in a warm spot in your house for 1 to 2 hours, or until at least doubled in size.
- Use your hand to press the air out of the dough (called degassing or punching down the dough) and place it on a very lightly floured counter. Divide into 8 even pieces, using a scale for the most accurate results.
- Take a piece of dough and gather all of the edges on the top and twist them together. Roll the dough in your cupped hand, seam side down, against the surface of the counter until a ball is formed. Repeat with all of the dough pieces.
- Place the dough balls in 2 rows of 4 in a 9 inch by 5 inch baking pan that has been sprayed with nonstick spray. Cover with plastic wrap and place in the refrigerator overnight.
Baking your loaf
- In the morning, remove the pan of dough from the refrigerator and let come to room temperature for 30 minutes to an hour. Preheat your oven to 350°F for at least 30 minutes.
- Whisk together one egg with one tablespoon of water to make an egg wash. Brush the top of your loaf lightly with the egg wash.
- Bake at 350°F for 35 to 40 minutes, or until the top of your loaf is golden brown and the internal temperature is at least 190°F when using an instant read thermometer.
- Let cool in the pan for 10 minutes, then tip out onto a wire rack to cool completely before slicing.





Miguel says
Can you clarify... do three eggs go into the recipe and a fourth is used for egg wash, or do two go into the recipe and the third your recipe calls for is for the egg wash?
Cynthia Christensen says
As it states in the ingredient list, two eggs go into the bread and one egg is used for the egg wash that goes on top to give you a shiny loaf. I hope that helps!