

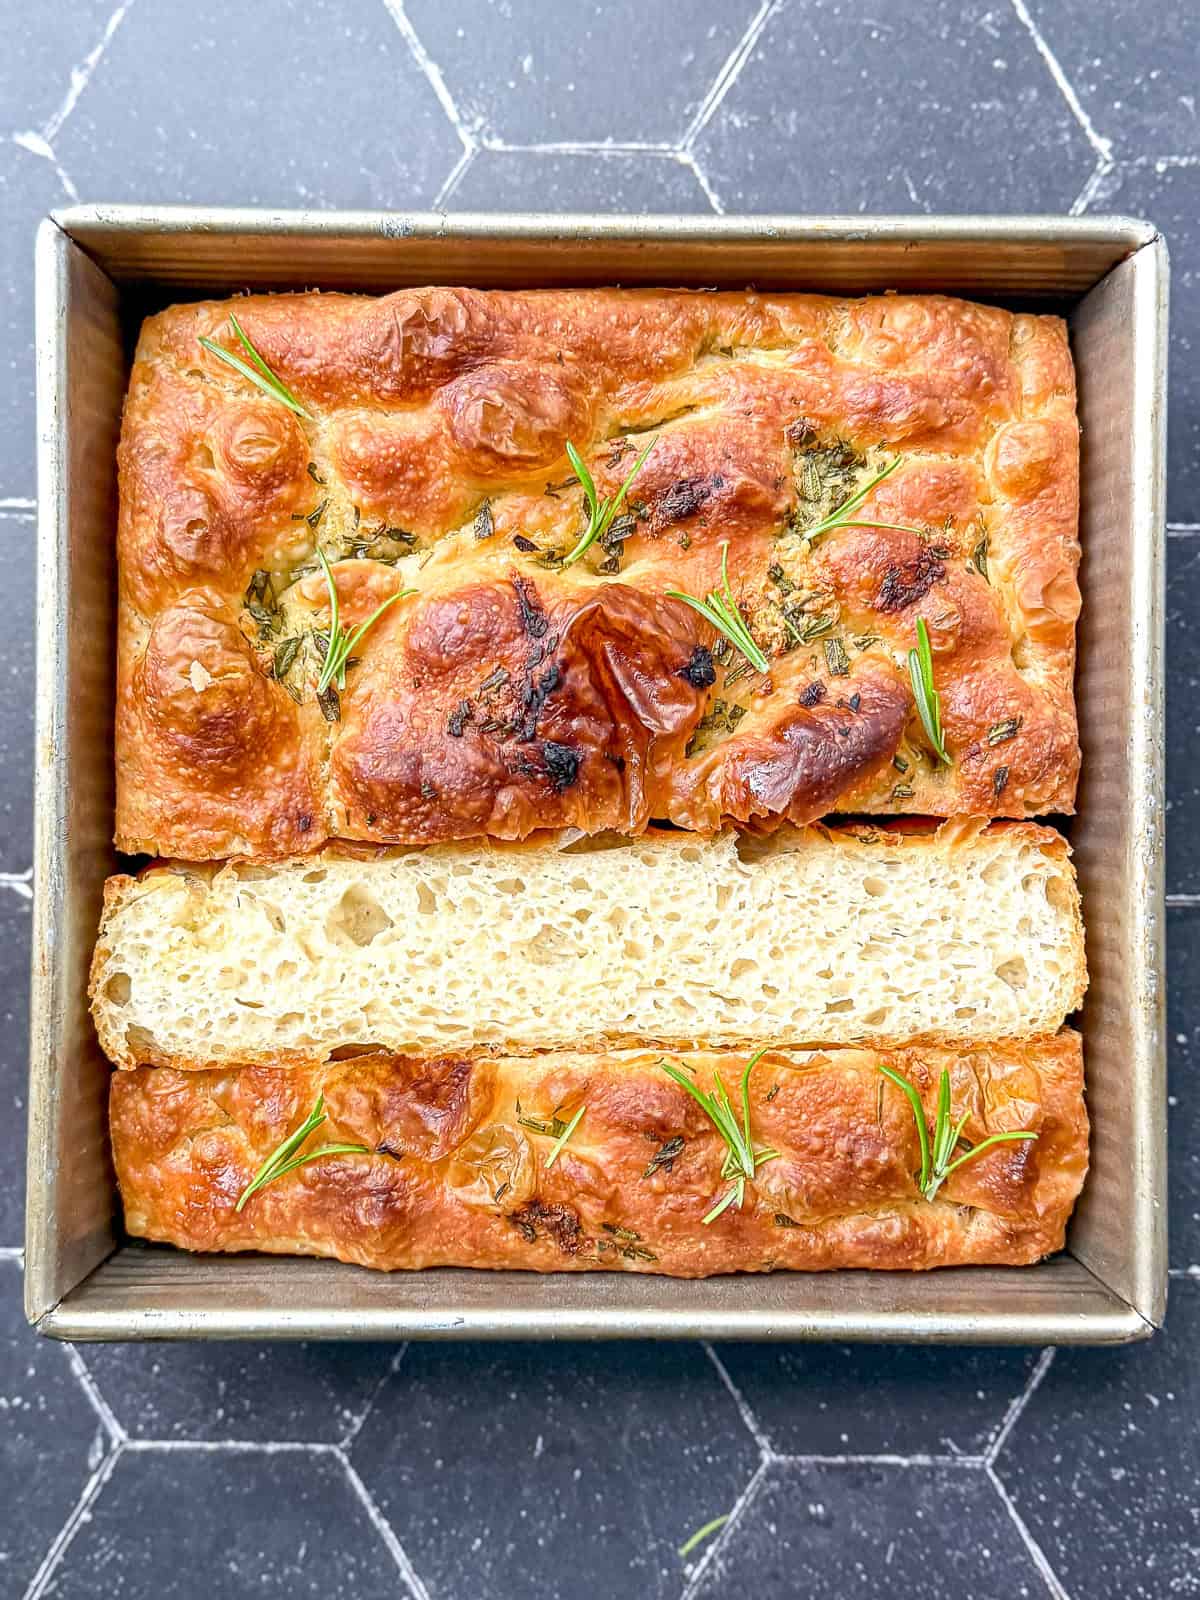
My Overnight No Knead Focaccia is soft and airy inside with crisp, golden edges and plenty of olive oil flavor. Mix and fold the dough the night before, refrigerate it right in the baking pan, then dimple and bake it in the morning. Easily doubled or halved so you can make as much focaccia as you need!
Save this recipe for later
Enter your email and I'll send this recipe straight to your inbox.
Making bread can seem like a daunting task. I know, I've been there. But I've been working on this Overnight Focaccia Bread for a looong time and I've updated it to make it as easy and foolproof as bread can be.
Focaccia is a really high hydration dough, which means that it is wetter and looser than most bread doughs. That is normal and just what you want! The high ratio of water to flour, along with the fat from olive oil, gives you a lighter, more tender bread with an airy interior. Exactly what you came for!
This is an easy focaccia recipe for anyone who wants homemade bread without a stand mixer, kneading, or complicated shaping. Two quick sets of folds give the wet dough strength and structure, then an overnight rest in the refrigerator gives the yeast time to do the rest of the work.
Jump to:
Why you'll love this recipe
- No kneading - Two quick sets of folds build structure without kneading on the counter or hauling out a mixer.
- Make it overnight - Do the hands-on work the night before, refrigerate the dough, and bake fresh focaccia in the morning.
- Beginner friendly - The dough is supposed to be loose and sticky, and there is almost no shaping involved.
- Flexible pan sizes - Make the full recipe in a square pan or quarter sheet pan, halve it for a loaf pan, or double it for a 9 x 13-inch cake pan.
- Keep it simple or add toppings -Olive oil and flaky salt are all you need, but rosemary and garlic are there when you want them.
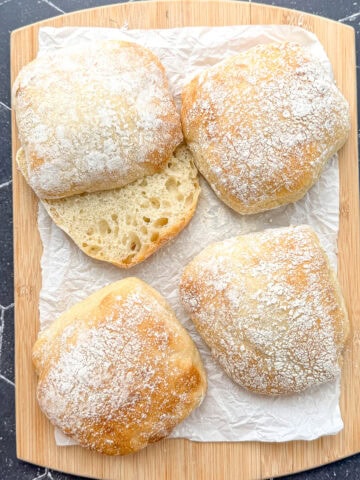
Once you're comfortable making an overnight no-knead dough, my easy artisan rolls are a great recipe to try next. They use the same hands-off approach, but the dough is shaped into individual rolls and baked with steam for a crisp, bakery-style crust.
Ingredients & Substitutions
This no knead focaccia bread uses a short list of basic ingredients. Let's chat about them before you start.
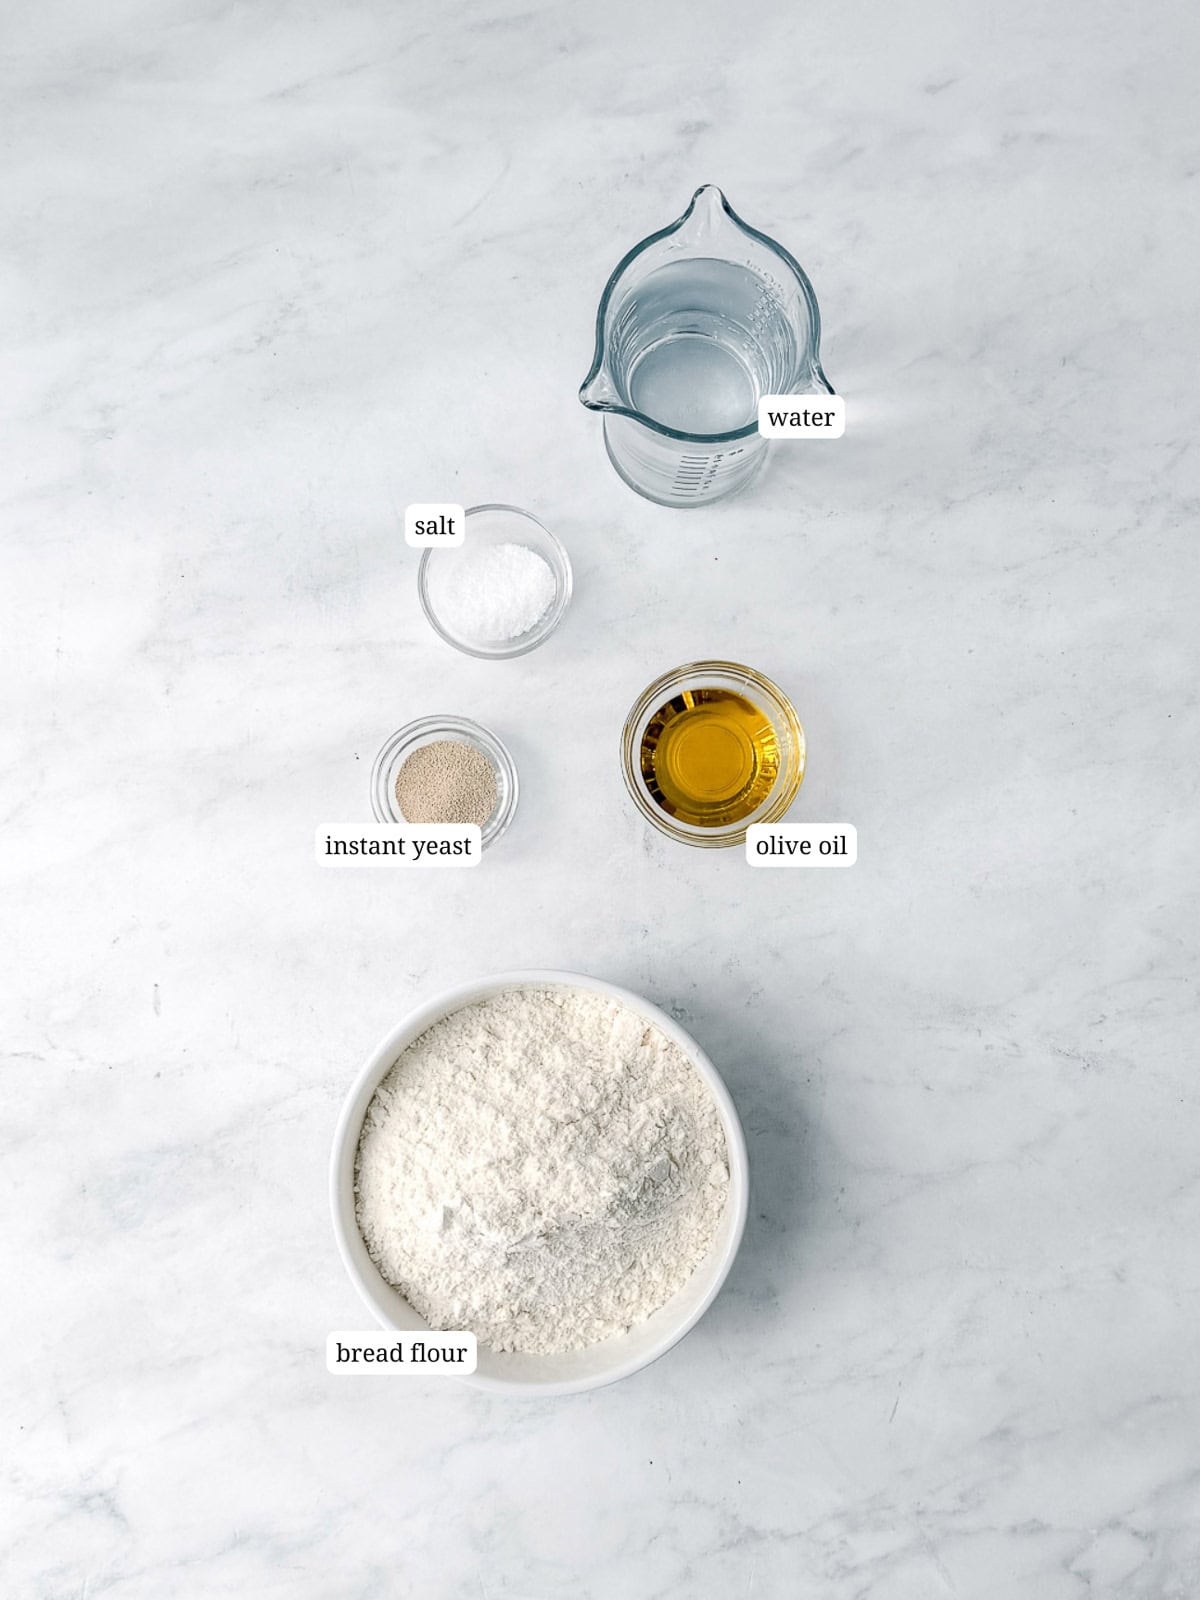
- Bread flour - Bread flour has a higher protein content than all-purpose flour, which helps build more gluten structure in this wet dough. That gives the focaccia a slightly chewier texture with a more open, airy crumb. You can use the same amount of all-purpose flour, but the focaccia will be a little softer and more tender, with slightly less chew and structure. Still delicious though!
- Instant yeast - I prefer instant yeast because you can whisk it directly into the flour. You can substitute an equal amount of active dry yeast, but proof it first. Stir the yeast into a few tablespoons of the warm water with a small pinch of sugar and let it sit for 5 to 10 minutes, until it looks foamy and active. Add it with the remaining water and continue with the recipe.
- Kosher salt - Salt adds flavor to the dough. If you use table salt instead, use a little less since the finer crystals pack more tightly into a measuring spoon.
- Warm water - Aim for lukewarm water, about 105 to 110 degrees F. If you don't have a thermometer, it should feel warm, not hot.
- Olive oil - Some goes into the dough, more goes into the baking pan, and another drizzle before baking helps give focaccia its crisp edges and classic olive oil flavor.
- Flaky sea salt - A little sprinkled over the dimpled dough before baking gives you salty bites across the top.
See recipe card below for a full list of ingredients and measurements.
What Pan Should I Use for Focaccia?
You definitely have options. The buttons on the recipe card make it easy to scale the recipe for different pans.
- For a half batch, click the .5X button on the recipe card and bake the focaccia in a loaf pan.
- For the regular 1X recipe, use a 9 x 9-inch square baking pan for a thick and fluffy focaccia or a 9 x 13-inch quarter sheet pan, sometimes called a small sheet pan for a thinner focaccia with more crispy edges.
- For a larger, thick focaccia, click the 2X button and bake the doubled recipe in a standard 9 x 13-inch cake pan.
Cynthia's Recipe Review
This focaccia is the recipe I make when I want homemade bread without turning it into a whole project. The overnight rise does most of the work, and the two quick sets of folds give the dough enough structure to bake up light and airy with a crisp, olive oil-rich crust. But honestly? Sometimes I'm lazy and skip the folds and I still have a delicious focaccia.

Quick Recipe Video
Step-by-Step Instructions
Use this section for process shots, alternating between the step and image showing the step. Users don't like seeing process shots cluttering up the recipe card, so include your process shots here. Use 1a.,1b.../2a.,2b..., etc if numerous steps. Otherwise number them individually 1.,2.,3....
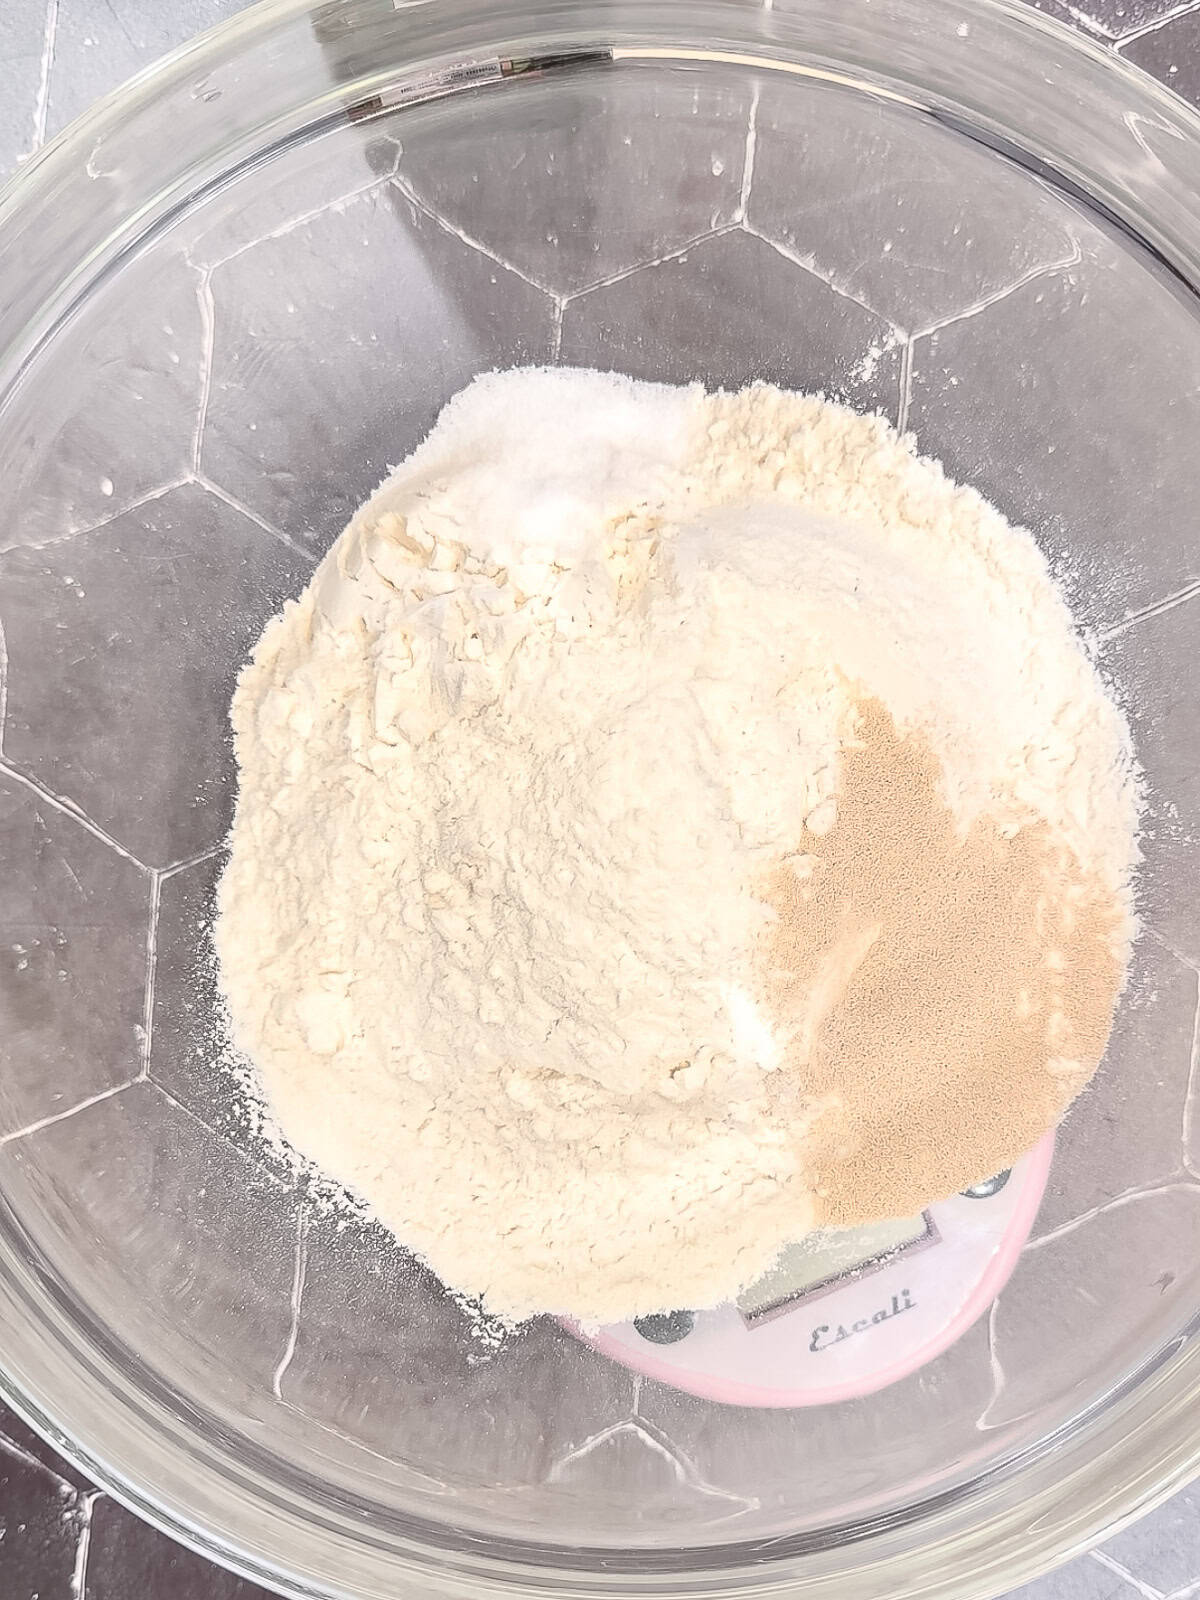
Step 1: Add the flour, instant yeast, and kosher salt to a large mixing bowl and whisk very well to evenly distribute the yeast and salt.
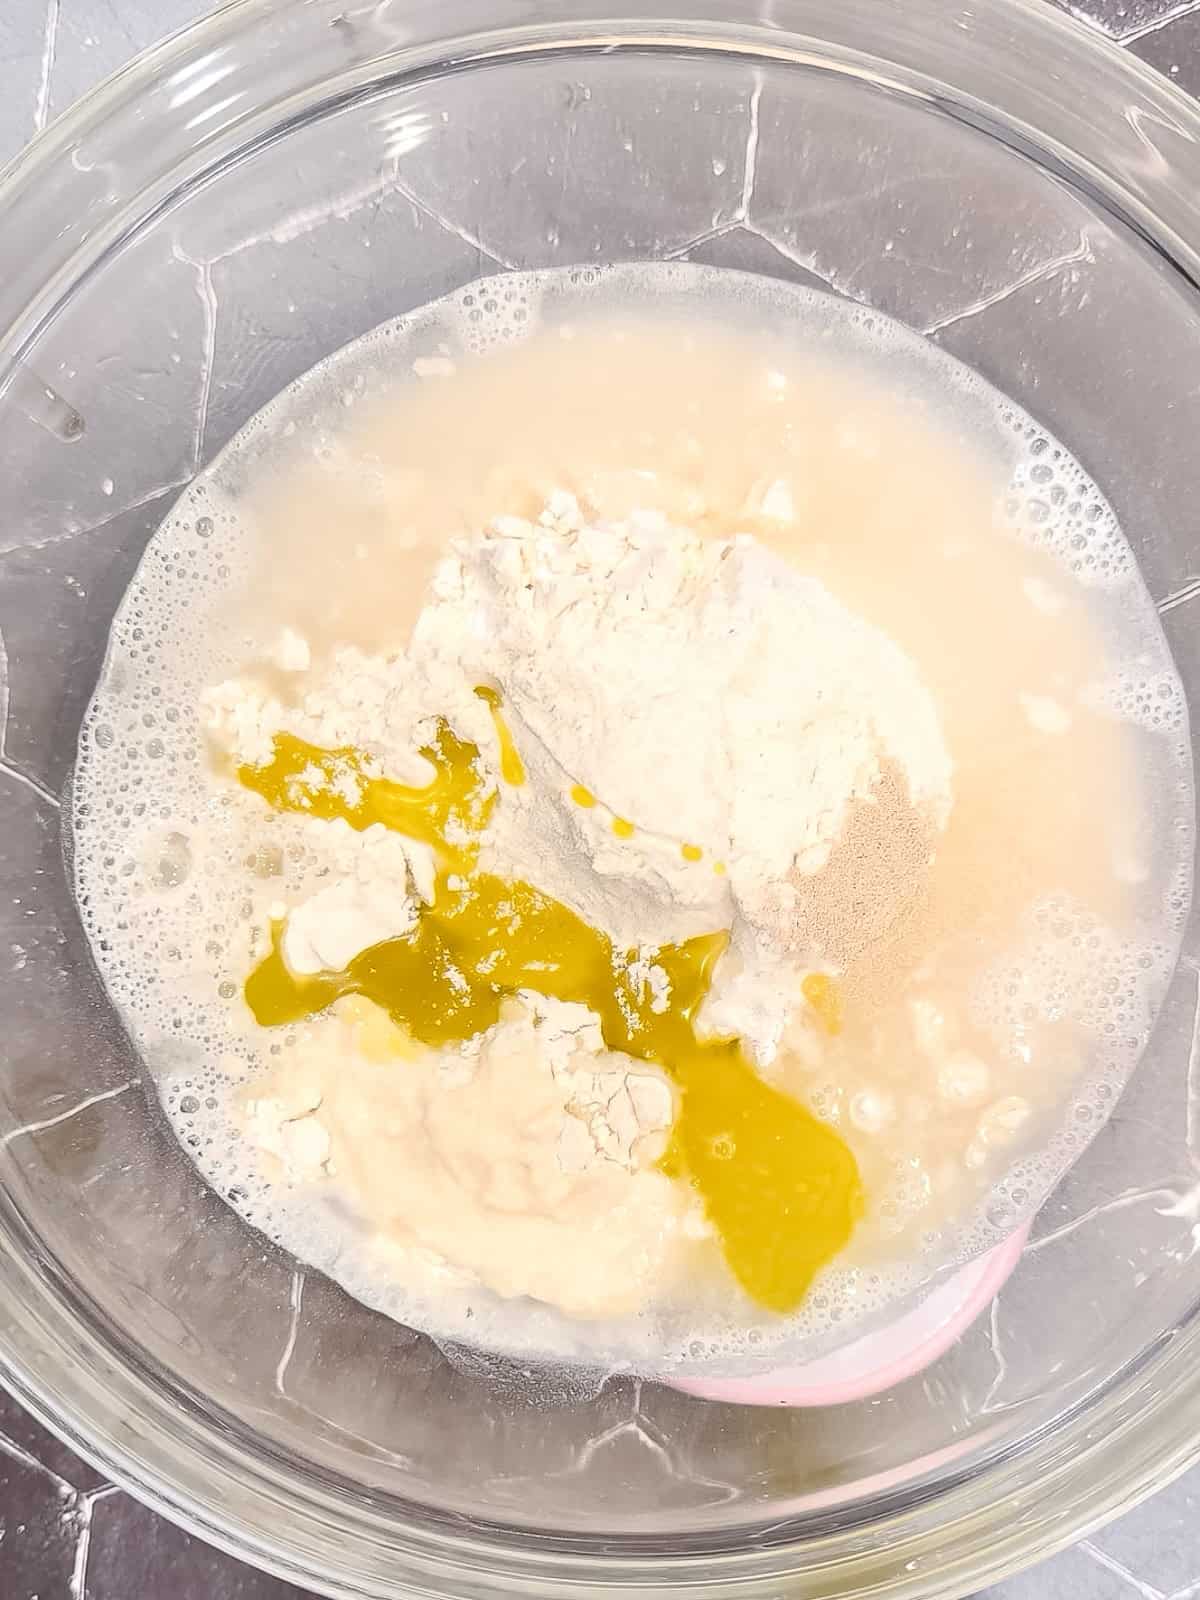
Step 2: Add the warm water and 2 tablespoons of olive oil to the dry ingredients.
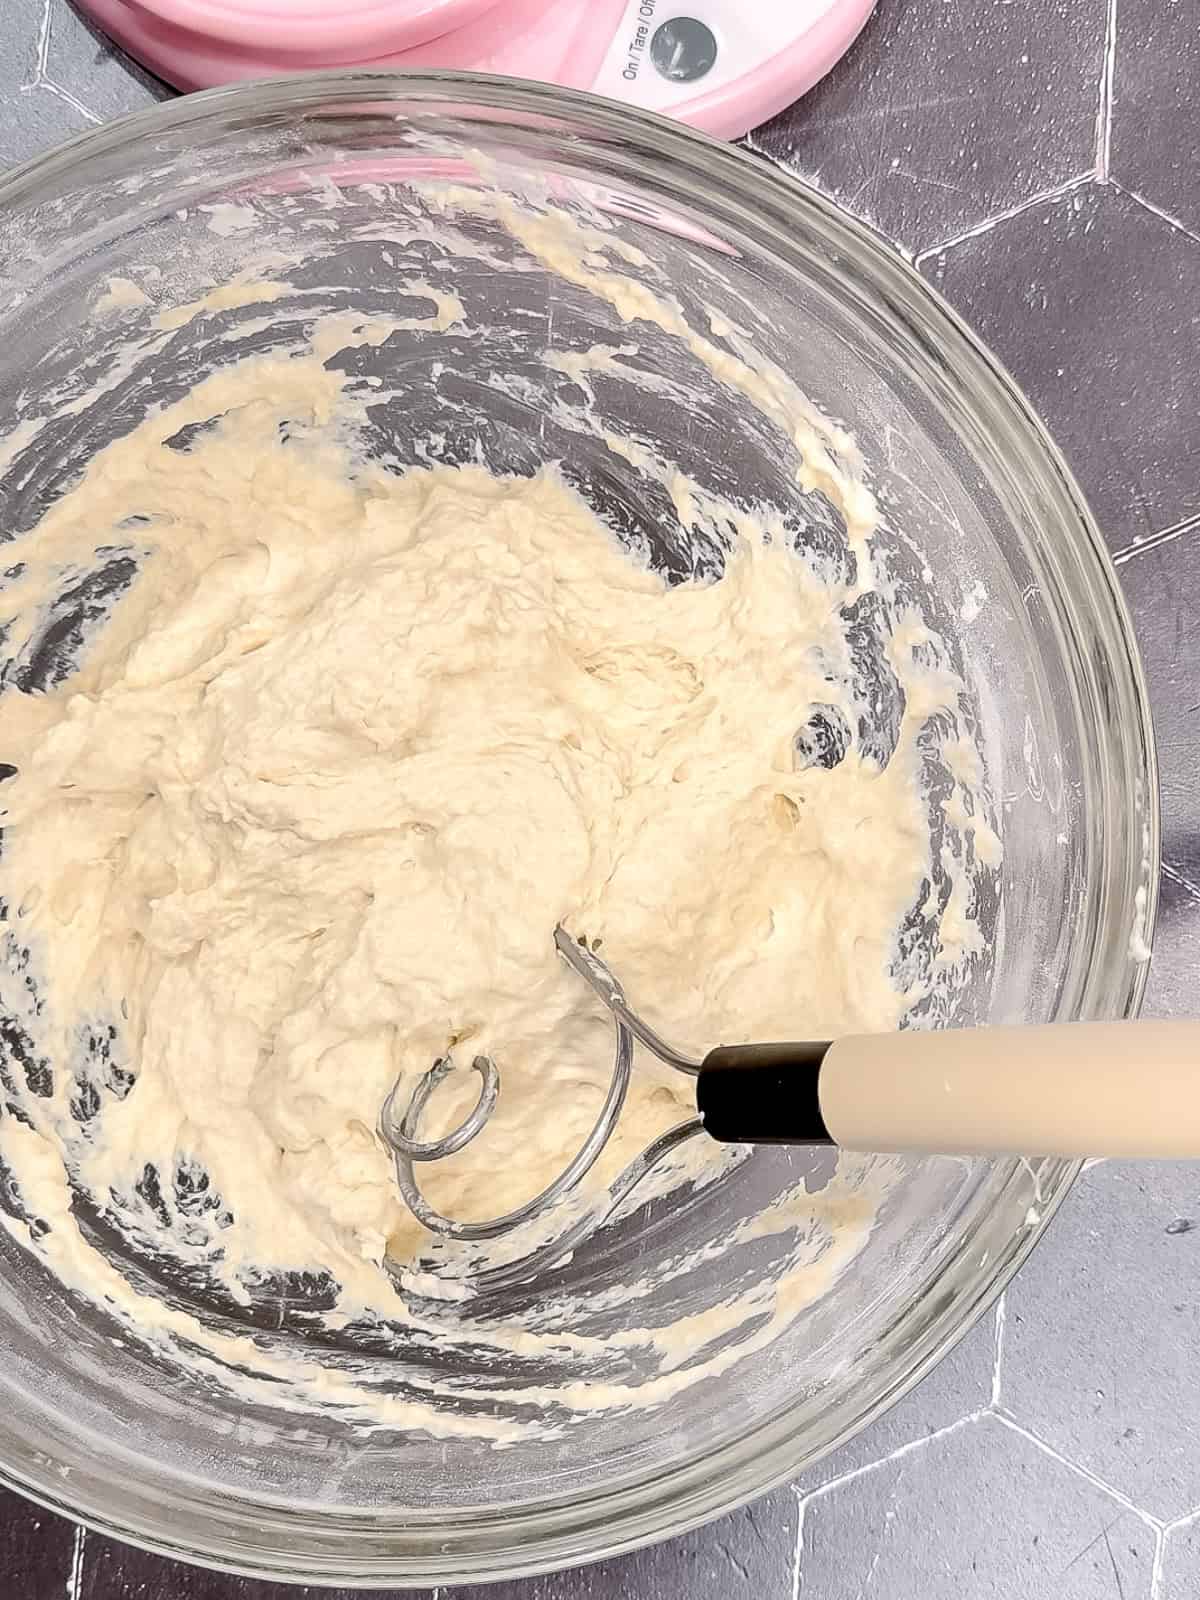
Step 3: Mix very well until everything is completely combined and you have a uniform, loose dough with no pockets of dry flour. Cover the bowl and place it in a warm spot in your kitchen for 15 minutes.
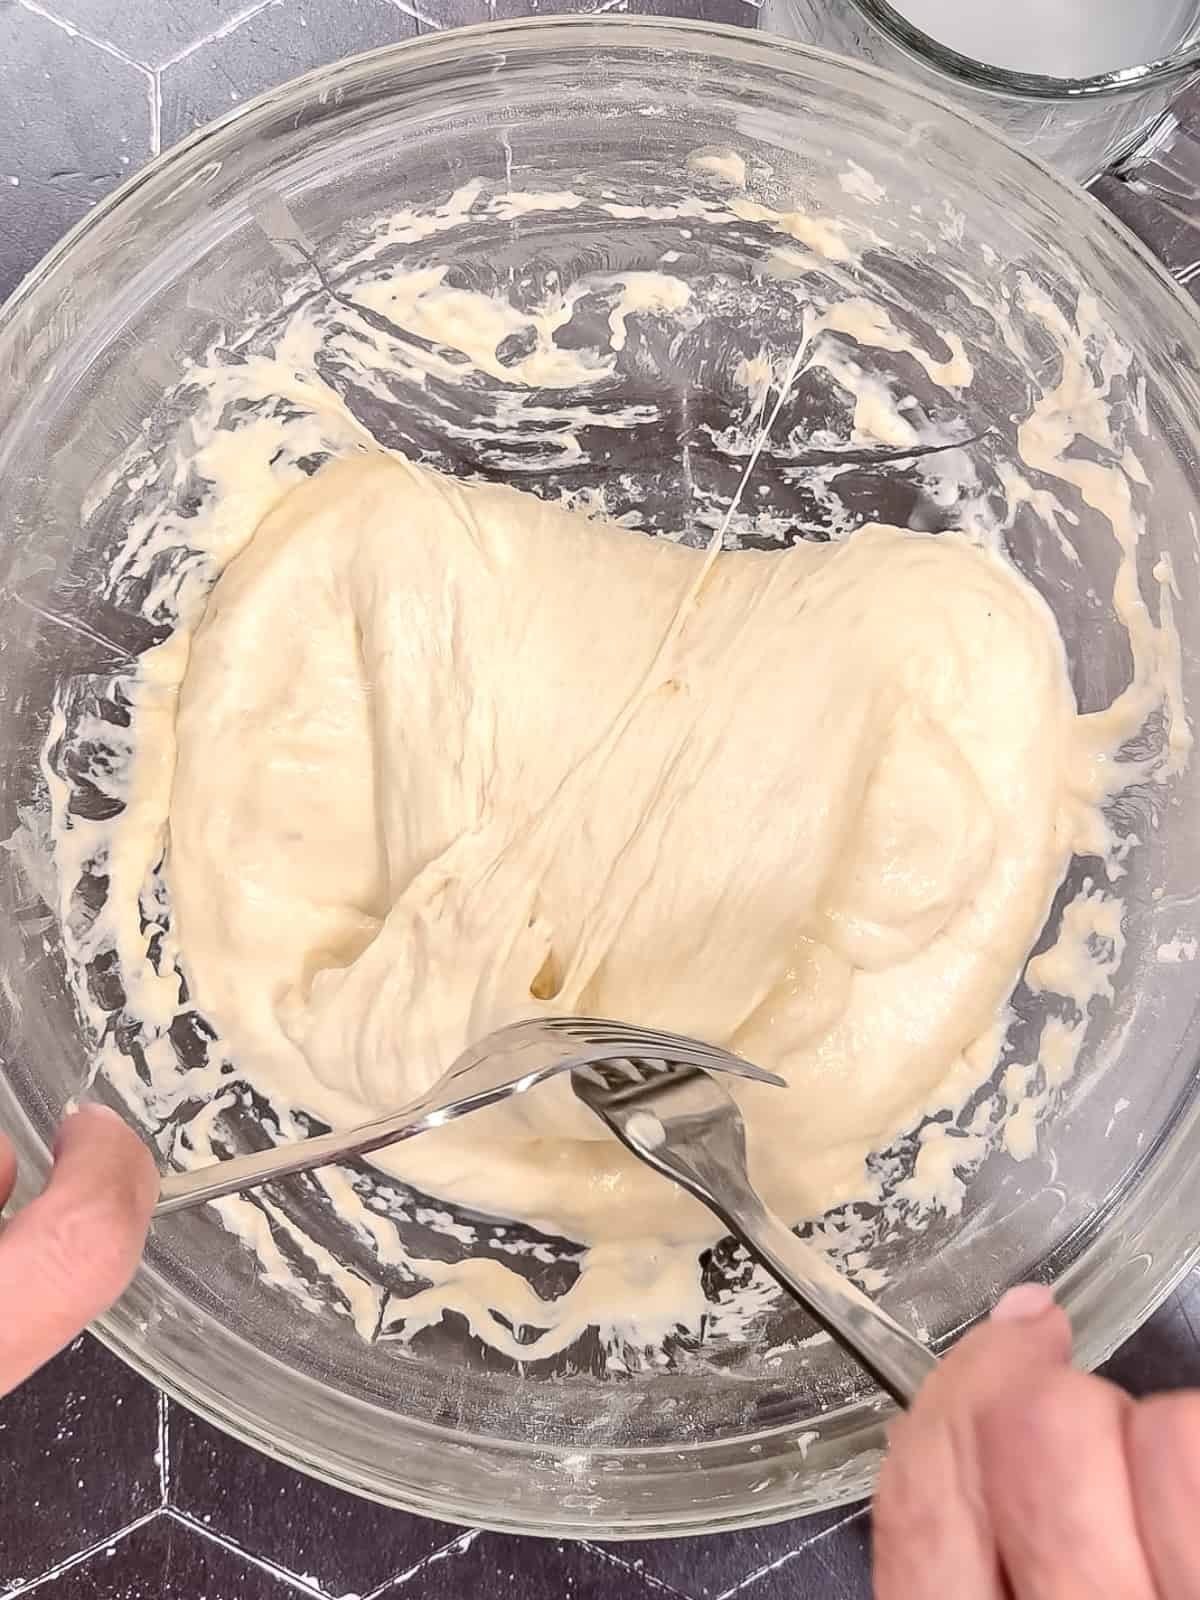
Step 4: Uncover the dough and perform the first set of folds. Using a moistened hand, a bowl scraper, or two forks, grab the dough at one edge, pull it up, and fold it over to the opposite side. Turn the bowl 90 degrees and repeat until you have gone all the way around the bowl for a total of four folds. Cover the bowl and let the dough rest for another 15 minutes.
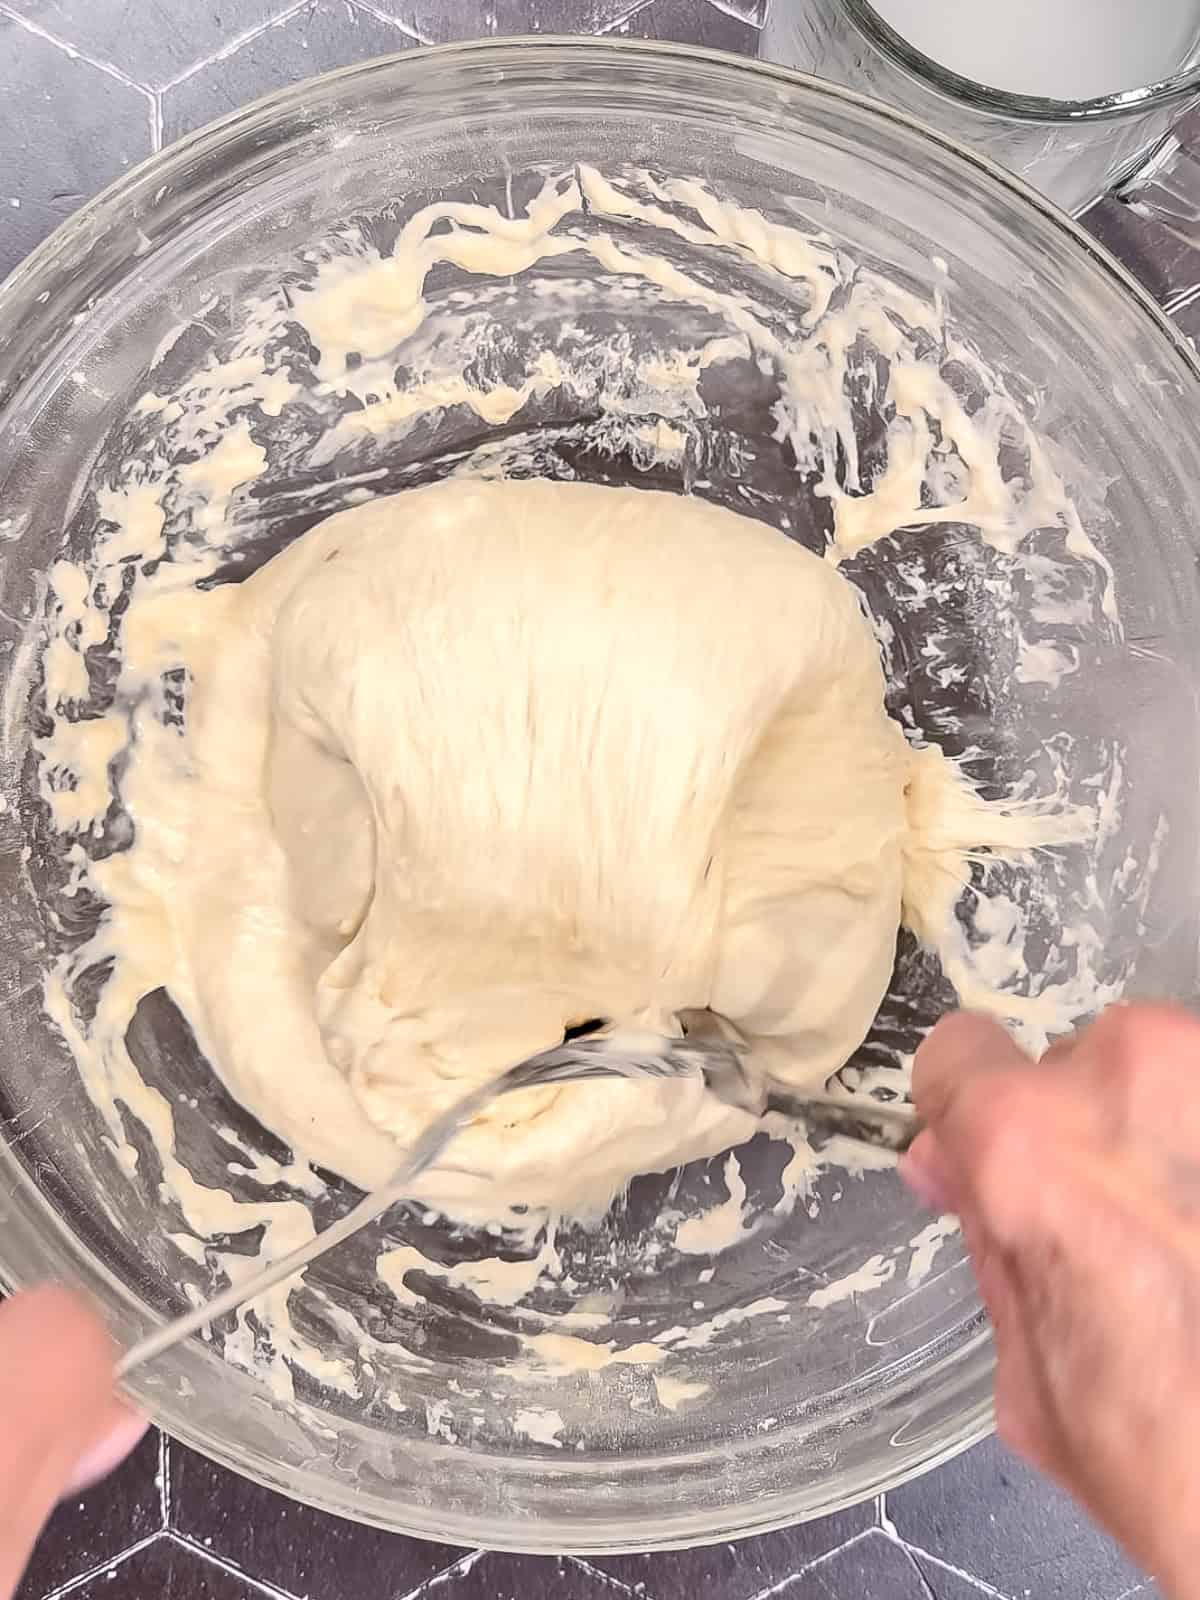
Step 5: Repeat the same set of four folds. Cover the bowl again and let the dough rest for a final 15 minutes.
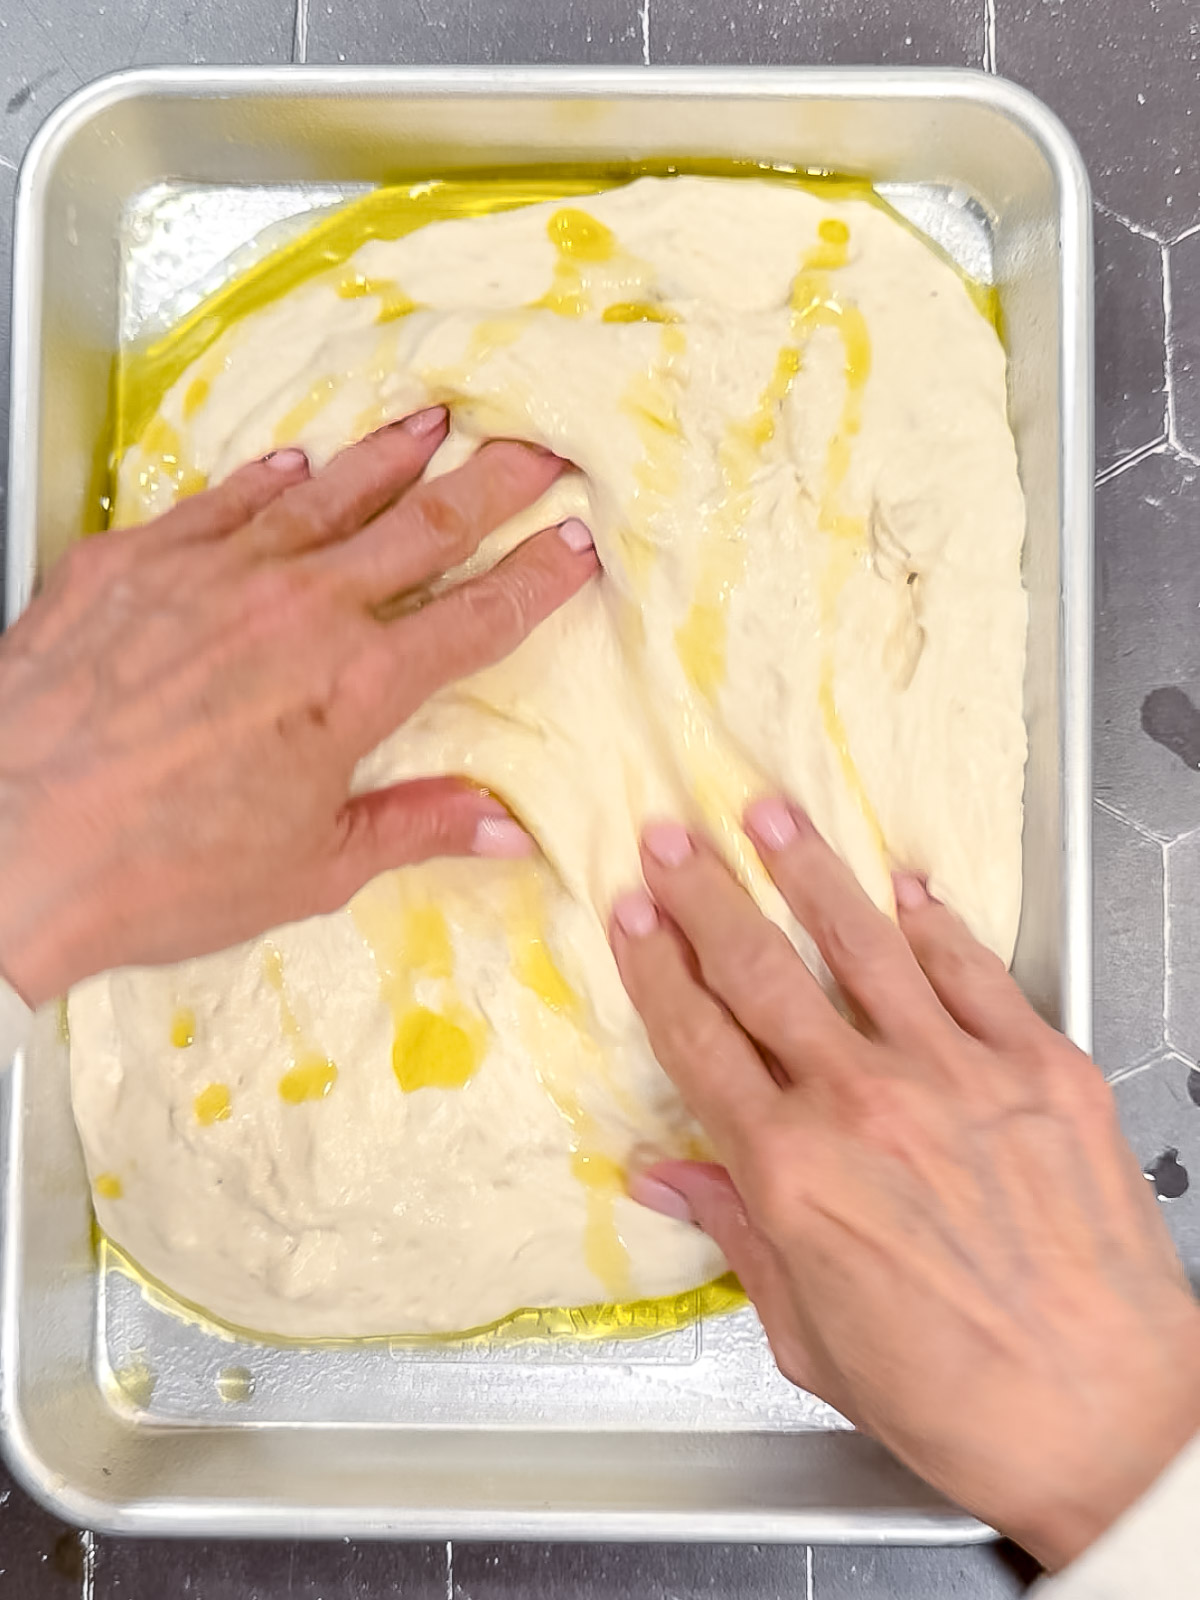
Step 6: Add the remaining 2 tablespoons of olive oil to your baking pan and scrape the dough into the pan. Drizzle the top with a little more olive oil and use your fingertips to gently coax the dough toward the corners. It does not need to reach all the way. Cover the pan with plastic wrap and refrigerate overnight, up to 12 hours.
Why Fold Focaccia Dough?
Because this is a no knead focaccia recipe, the folds do the work that kneading normally would. Stretching the dough up and over itself helps strengthen the gluten so it can hold on to the gas produced by the yeast and bake up lighter and airier.
You only need two sets of four folds, with a 15-minute rest between each one. Keep your hand, forks, or bowl scraper damp instead of adding more flour. This dough is supposed to be sticky, and adding extra flour can make your finished focaccia heavier.
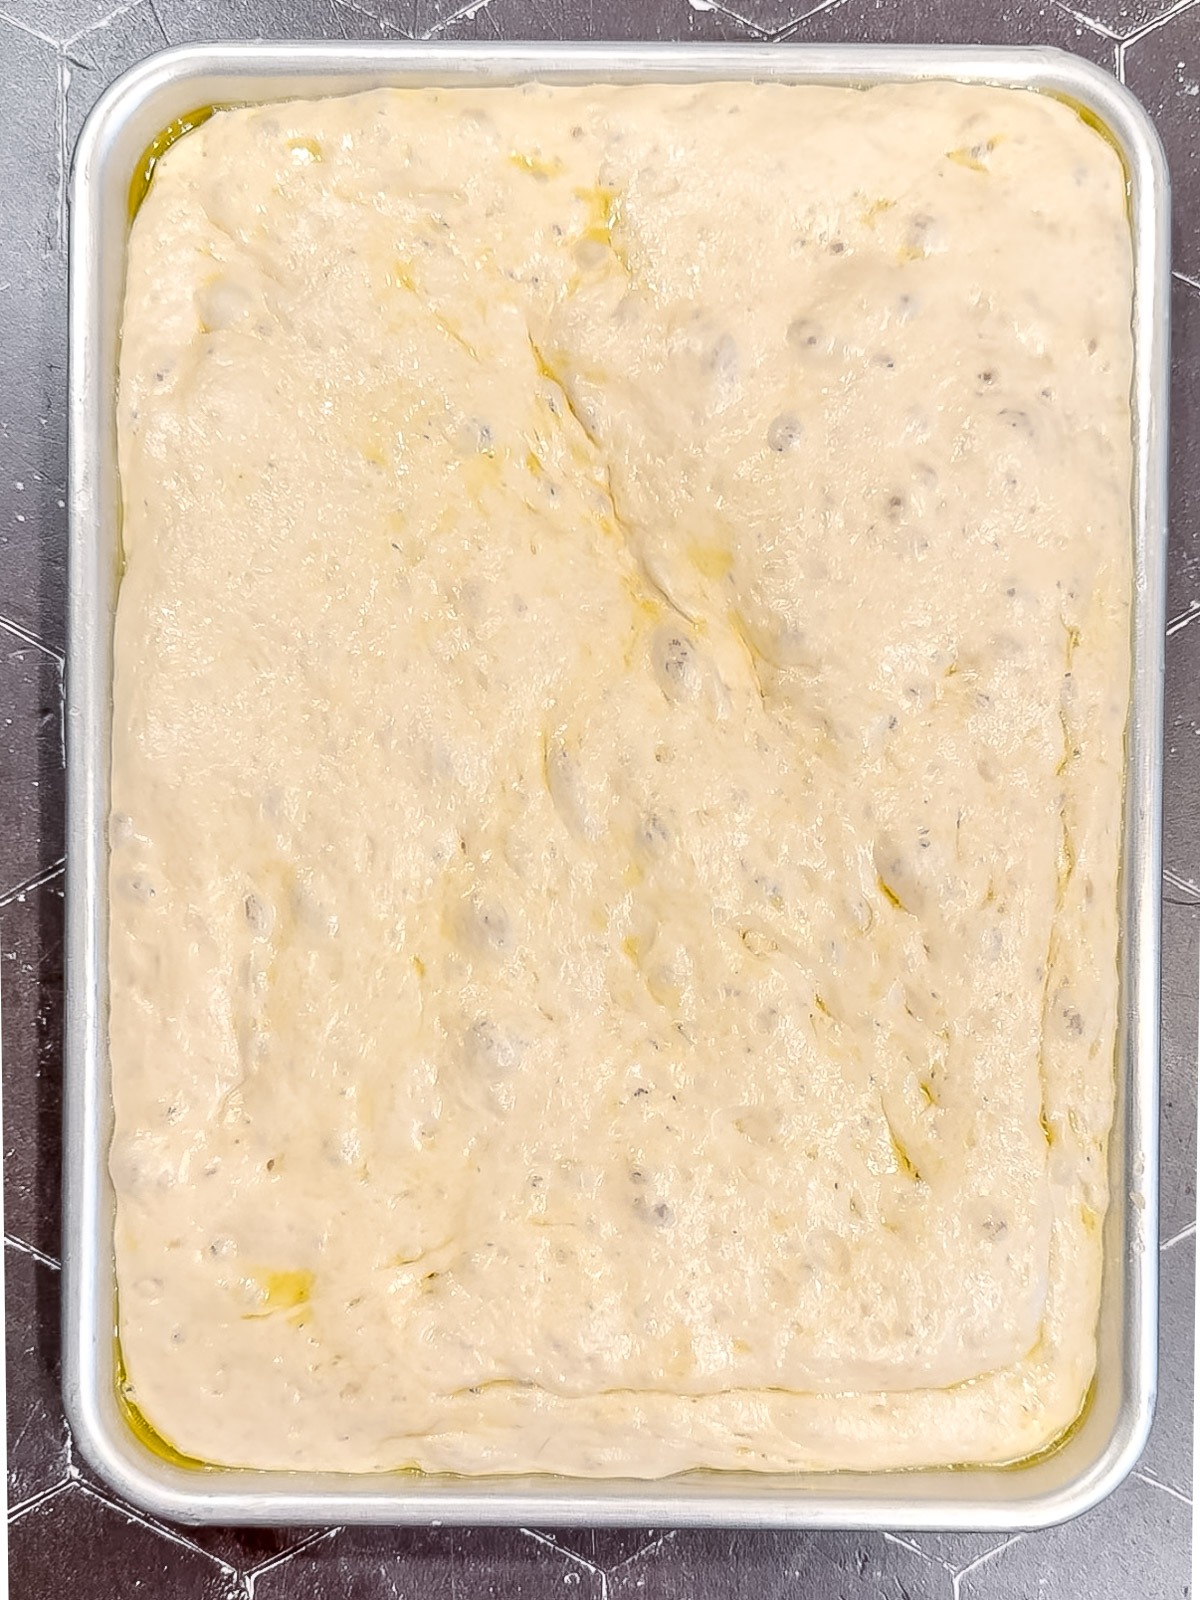
Step 7: In the morning, preheat the oven to 450°F. Remove the focaccia dough from the refrigerator, uncover it, and let it sit at room temperature for about 45 minutes.
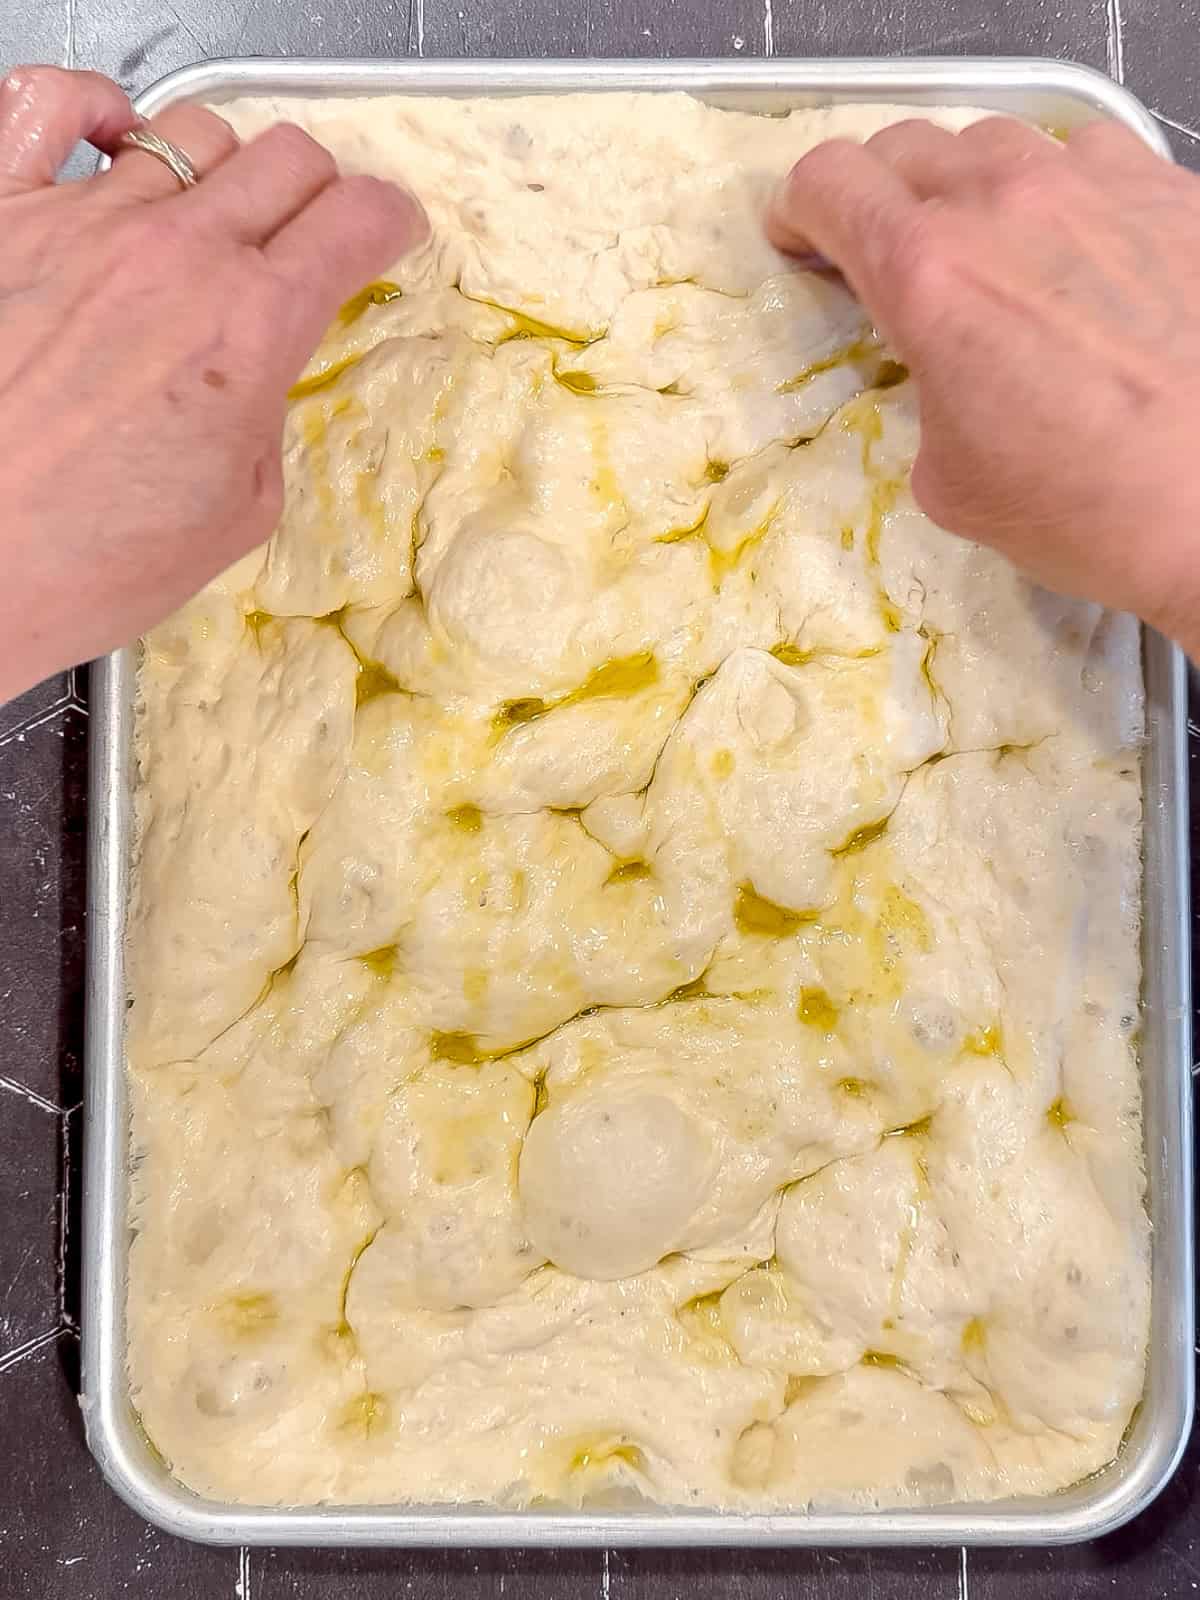
Step 8: Drizzle the dough with a little more olive oil, then press your fingertips deeply into the dough, almost to the bottom of the pan, to create the characteristic focaccia dimples. Sprinkle with flaky sea salt and bake for 25 to 30 minutes, or until deeply golden brown.
Optional Topping Instructions
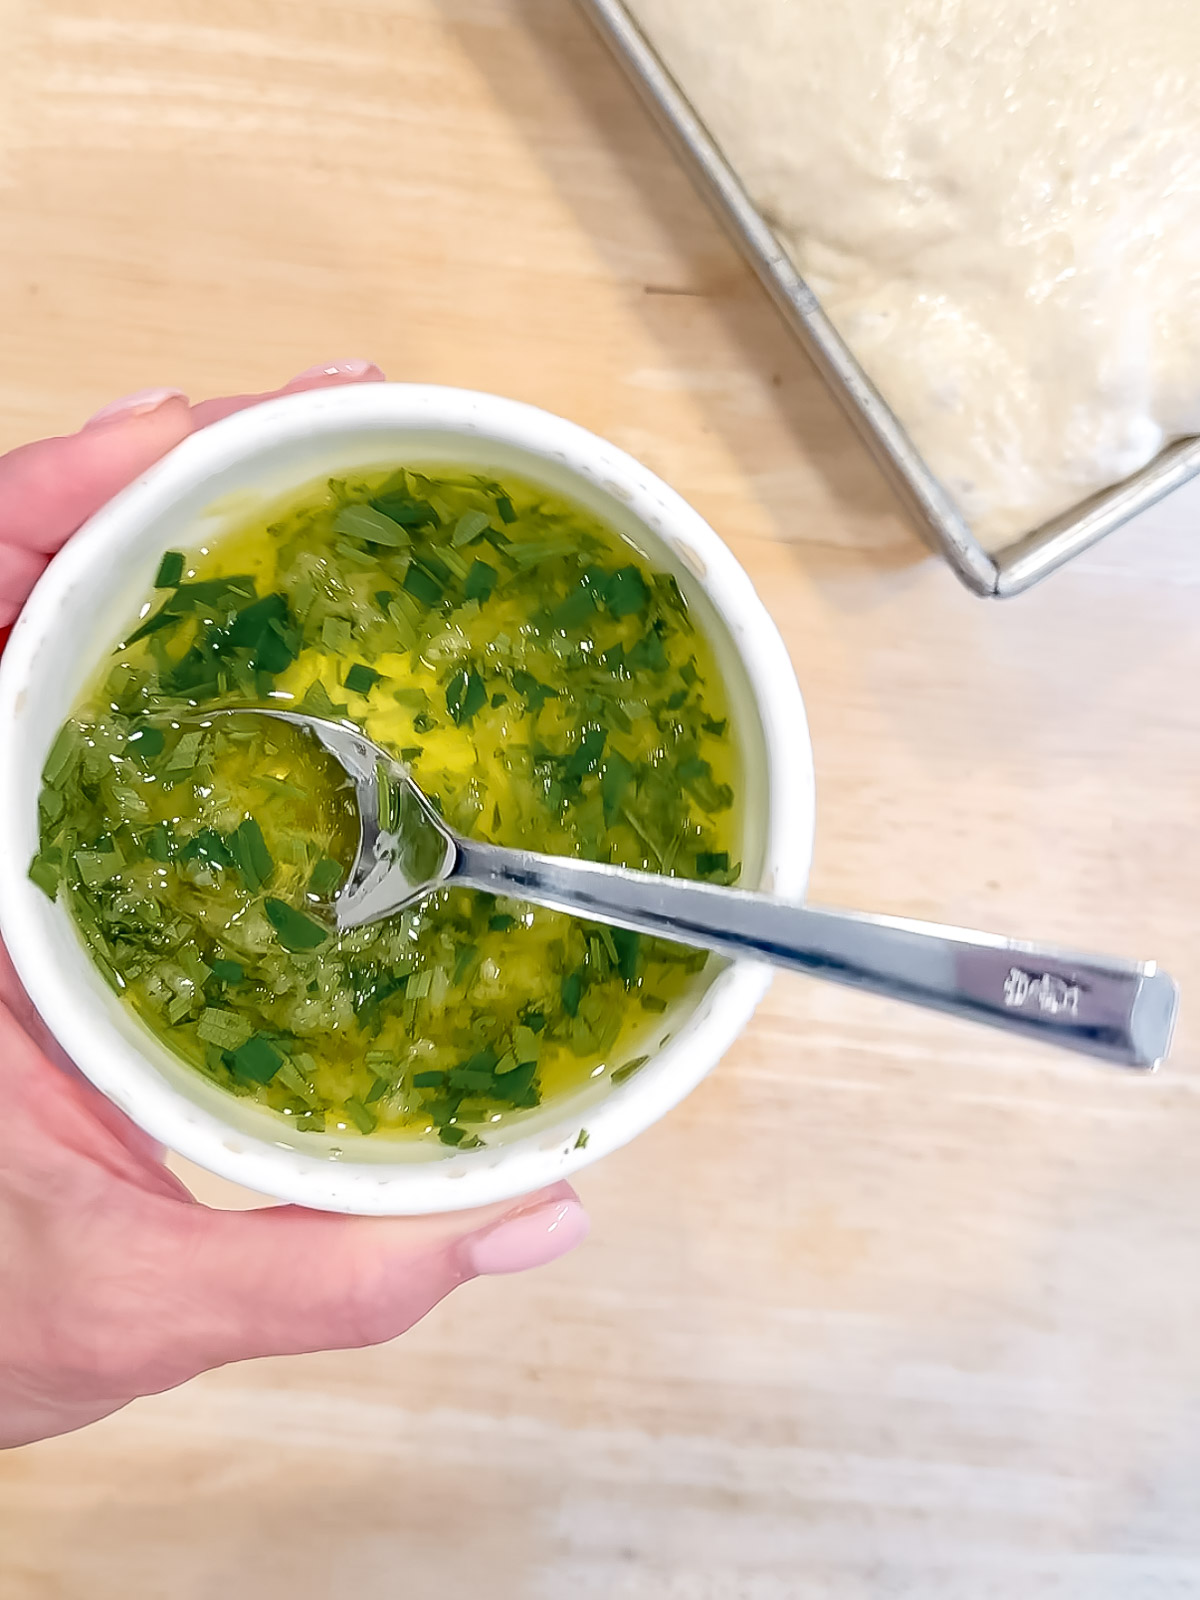
Step 1: Combine 2 tablespoons of olive oil with the finely chopped leaves from one sprig of fresh rosemary, one grated garlic clove, and ½ teaspoon kosher salt.
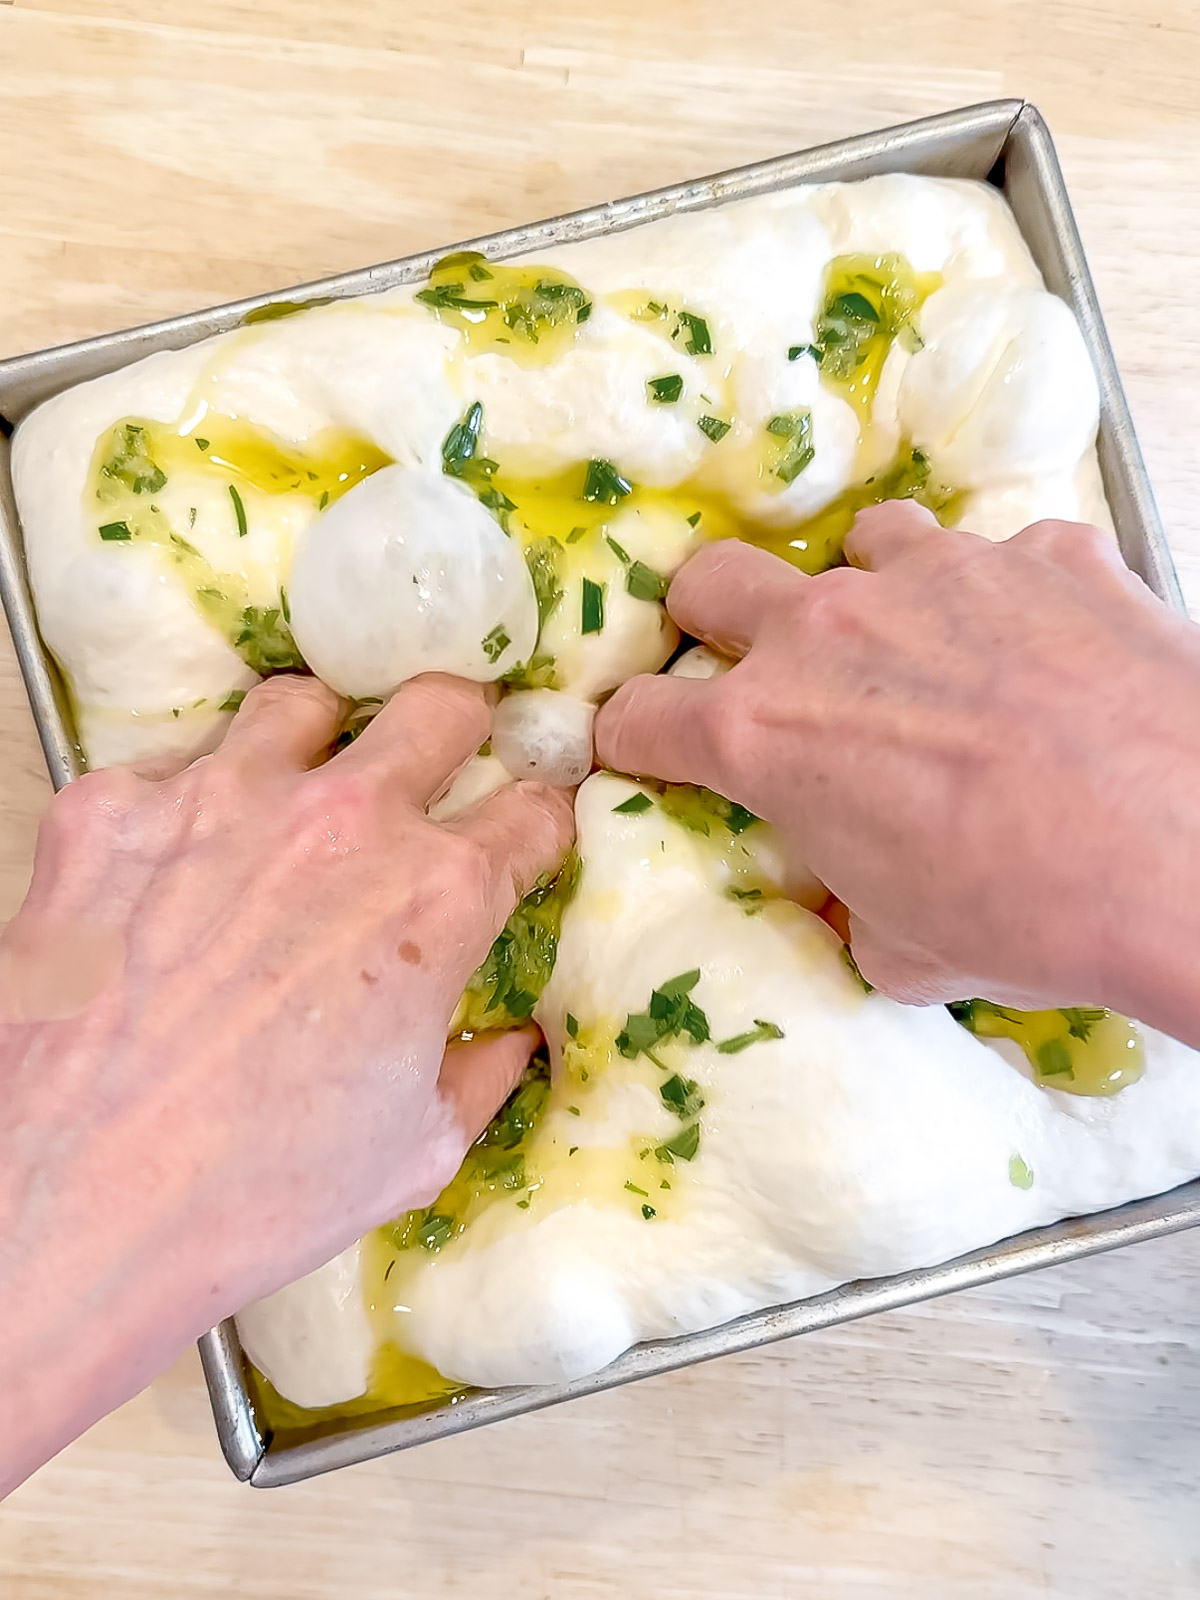
Step 2: Drizzle the rosemary garlic oil over the room-temperature dough instead of using plain olive oil. Use your fingertips to dimple the dough deeply, pressing some of the rosemary and garlic down into the dimples as you go. Bake exactly as directed for the plain focaccia.
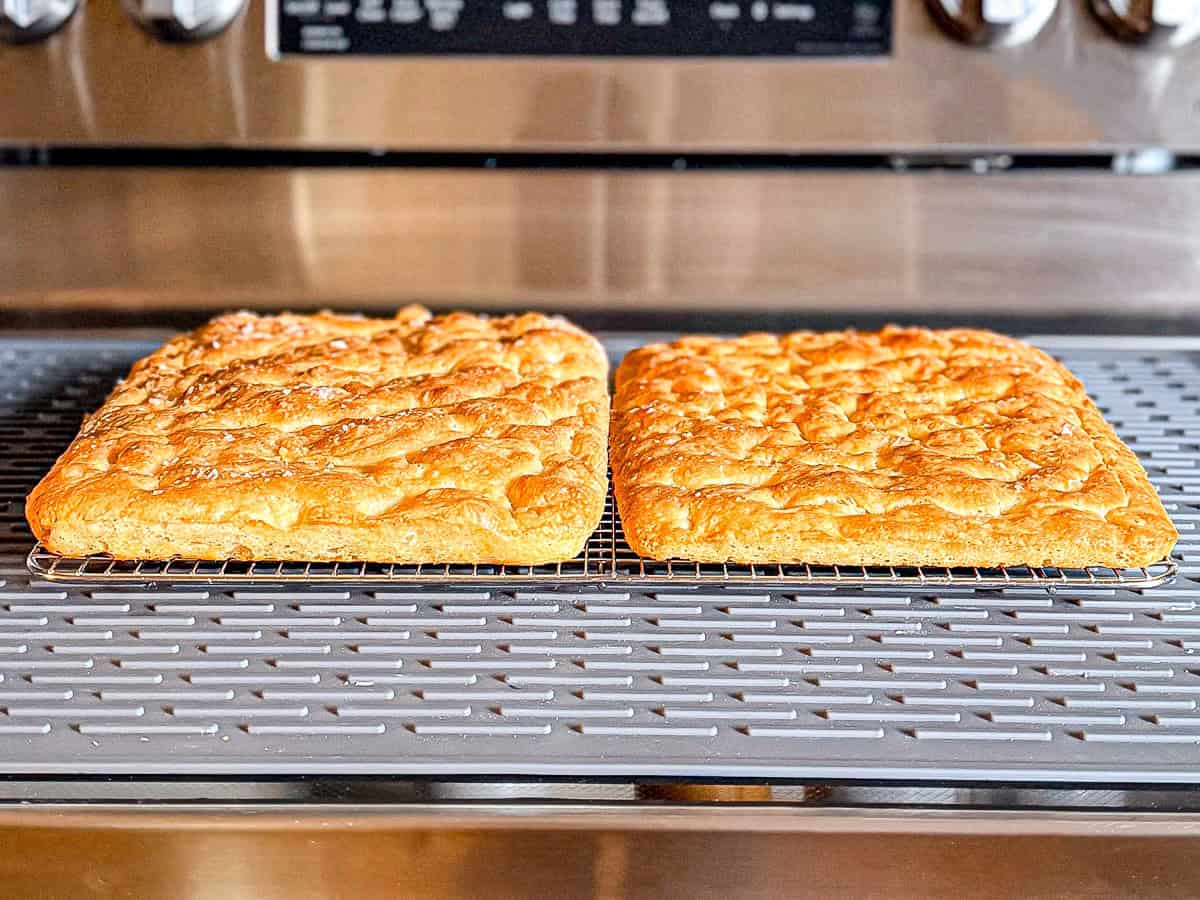
Finish: Let the focaccia rest in the pan for 5 minutes, then transfer it to a wire rack to cool completely. Pictured above: on the left is the focaccia made by doing two sets of folds, and on the right is a focaccia that I just mixed and just let it be. Two different textures, both delicious!
Cynthia's Helpful Tips
- Expect a wet dough - This is not a dough you should be able to knead on the counter. Loose and sticky is right.
- Wet your tools - A damp hand, bowl scraper, or two forks will move through the sticky dough much more easily than dry tools.
- Don't force the dough into the pan - Gently coax it toward the corners before refrigerating. If it starts pulling back, leave it alone. It will relax and spread as it rests overnight.
- Dimple deeply - Press your fingers almost to the bottom of the pan. Those deep indentations help hold the olive oil and give focaccia its characteristic surface.
- Don't be stingy with the olive oil - It helps create the crisp bottom, golden edges, and flavor that make focaccia focaccia.
- Cool it on a rack - After 5 minutes in the pan, transfer the focaccia to a wire rack so the bottom stays crisp as it cools.
Recipe FAQs
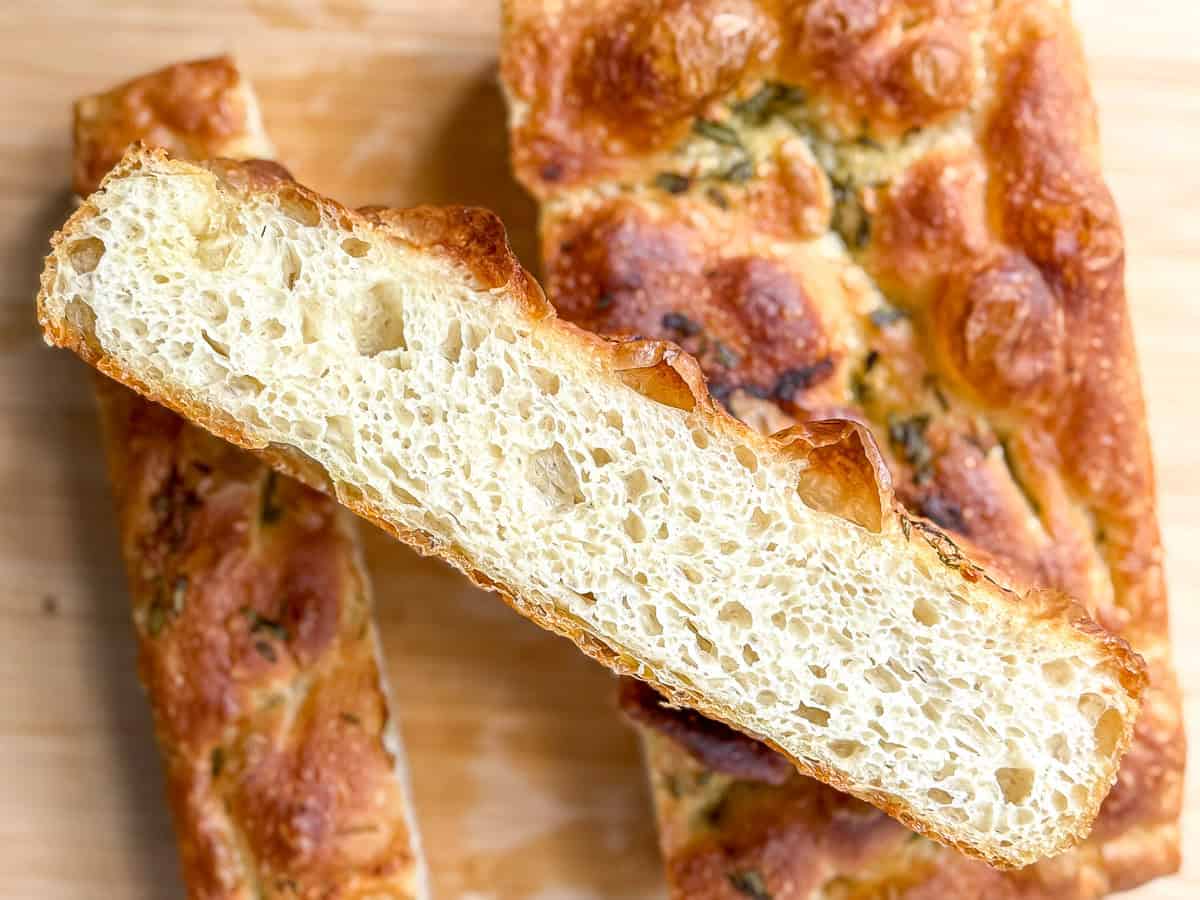
It is supposed to be. Focaccia is a high hydration bread dough, and that extra water helps create a soft, airy interior with plenty of bubbles. Resist the urge to add extra flour because the dough feels sticky.
Yes. Use the same amount of active dry yeast, but proof it before making the dough. Stir it into a few tablespoons of the warm water with a small pinch of sugar and let it sit for 5 to 10 minutes, until foamy. Add it with the remaining water and continue with the recipe.
Don't fight it. Gluten can tighten when dough is handled, so gently press the dough toward the corners and stop when it starts pulling back. It will relax and spread more as it rests overnight.
Store leftover focaccia in an airtight container or tightly wrapped at room temperature for up to 2 days. For longer storage, refrigerate it for up to 5 days or freeze it, tightly wrapped, for up to 3 months. Thaw frozen focaccia at room temperature before reheating.
For the best texture, reheat focaccia in a 350 degrees F oven for 5 to 10 minutes, until warmed through and crisp around the edges. Individual pieces can also be reheated in a toaster oven or air fryer for a few minutes. I don't recommend the microwave because it can make the focaccia soft and chewy instead of crisp.

Did you try this recipe?
Please consider leaving a comment with a ⭐️ rating below and tell me all about it! It helps me to continue to improve my content and lets others know what you think!
I appreciate it so much!
-Cynthia
📖 Recipe

Overnight No Knead Focaccia
Recommended Equipment
- 9-inch baking pan OR
Ingredients
- 2 ¾ cups (330 g) bread flour or all purpose flour
- 1 ½ teaspoons (4 g) instant yeast
- 1 teaspoon (3 g) kosher salt
- 1 ¼ cups (300 g) warm water, about 105 to 110 degrees F
- 4 tablespoons (54 g) olive oil divided
- Additional olive oil for drizzling
- Flaky sea salt for finishing
Optional Rosemary-Garlic Topping
- 2 tablespoons (27) olive oil
- 1 sprig fresh rosemary leaves only, finely chopped
- 1 clove garlic grated
- ½ teaspoon kosher salt
Instructions
- Add the bread flour, instant yeast, and kosher salt to a large mixing bowl and whisk very well to evenly distribute the yeast and salt.
- Add the warm water and 2 tablespoons of olive oil to the dry ingredients.
- Mix very well until everything is completely combined and you have a uniform, loose dough with no pockets of dry flour. Cover the bowl and place it in a warm spot in your kitchen for 15 minutes.
- Uncover the dough and perform the first set of folds. Using a moistened hand, a bowl scraper, or two forks, grab the dough at one edge, pull it up, and fold it over to the opposite side.
- Turn the bowl 90 degrees and repeat until you have gone all the way around the bowl for a total of four folds. Cover the bowl and let the dough rest for another 15 minutes.
- Repeat the same set of four folds. Cover the bowl again and let the dough rest for a final 15 minutes.
- Add the remaining 2 tablespoons of olive oil to a 9 x 9-inch baking pan and scrape the dough into the pan. Drizzle the top with a little more olive oil and use your fingertips to gently coax the dough toward the corners.
- It does not need to reach all the way. Cover the pan with plastic wrap and refrigerate overnight, up to 12 hours.
- In the morning, preheat the oven to 450 degrees F. Remove the focaccia dough from the refrigerator, uncover it, and let it sit at room temperature for about 45 minutes.
- Drizzle the dough with a little more olive oil. Press your fingertips deeply into the dough, almost to the bottom of the pan, creating dimples across the surface.
- Sprinkle with flaky sea salt and bake for 25 to 30 minutes, or until deeply golden brown. Let the focaccia rest in the pan for 5 minutes, then transfer it to a wire rack to cool completely.
- OPTIONAL ROSEMARY GARLIC FOCACCIA
- Combine the olive oil, chopped rosemary, grated garlic, and kosher salt. After the dough has rested at room temperature, drizzle the rosemary garlic oil over the top instead of using plain olive oil.
- Use your fingertips to dimple the dough deeply, pressing some of the rosemary and garlic into the dimples as you go. Bake as directed.
This is such a versatile and easy recipe. You offer the best videos and instruction and I appreciate your efforts so much! Love this!
(This review was submitted while participants could receive an entry into our monthly gift card drawing for leaving an honest review. Ratings and opinions were not required to be positive.)
Thank you!
This is so good and so easy
(This review was submitted while participants could receive an entry into our monthly gift card drawing for leaving an honest review. Ratings and opinions were not required to be positive.)
Thank you!
Can't wait to try this. Can I bake it the same day?
Absolutely! Although the overnight fermentation allows the bread to develop a deeper flavor, you can make this on the same day by just leaving it out on the counter for one and a half to two hours before dumpling and baking.
Perfect! Thank you so much. Your recipes are the best!
🥰
I have read and reread this post and recipe and have to ask...what size pan did you use for the original recipe???
This is one of my oldest recipes and I guess that slipped through. As you can see in the main photo, it is in a square pan. 8 or 9 inches is fine or you can use a 10 inch cast iron pan.
Thank you! Did NOT want to "assume" because you know what that does!!
This was delicious! Thanks for the recipe.
You’re welcome! I’m glad you liked it!