


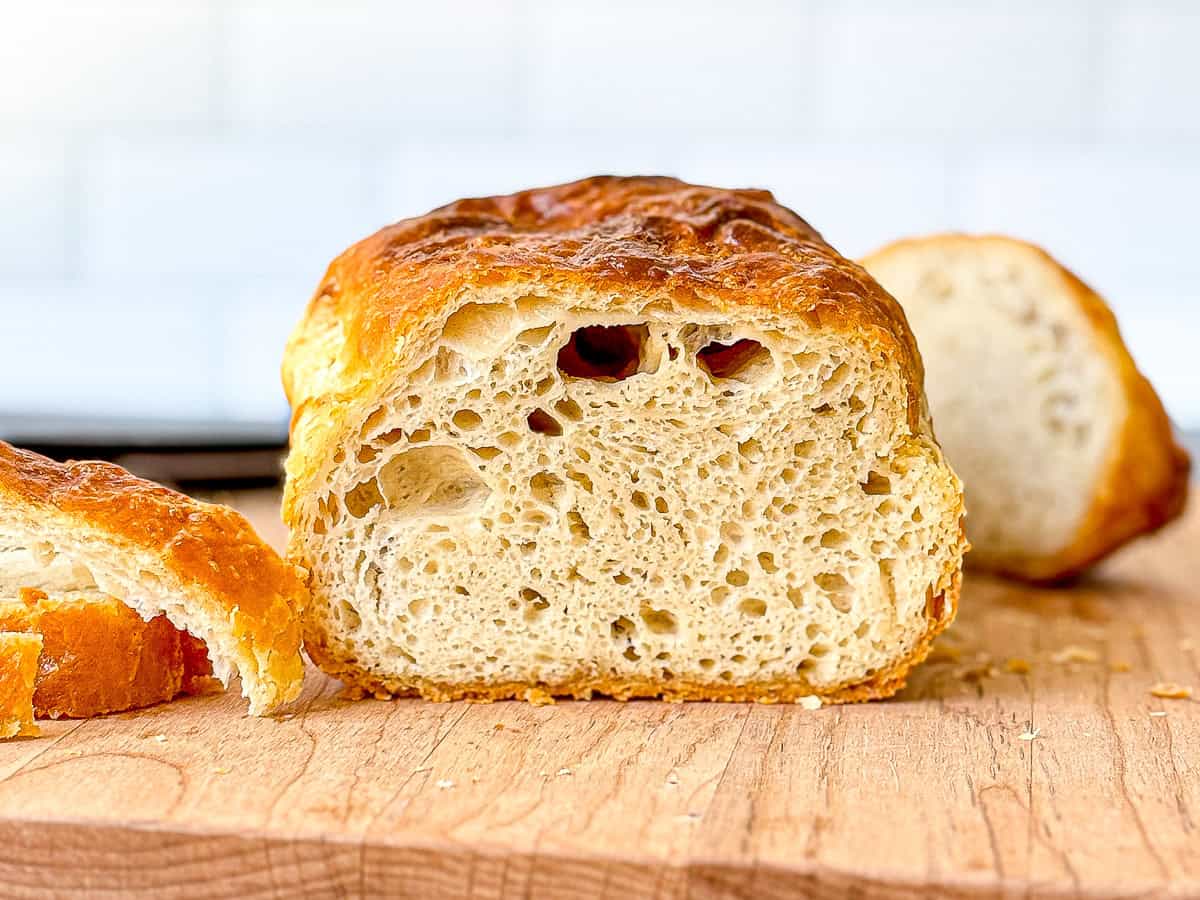
Impress your friends and family with this delicious and Easy Homemade Croissant Bread recipe. No kneading required! Follow my step-by-step instructions for buttery bread perfection - without sourdough!

Save This Recipe! 💌
If you've been scrolling through BreadTok or watching those hypnotizing baking reels, chances are you've seen the viral sourdough "croissant" bread-flaky, golden crust, and impossibly layered. Inspired by that trend, I created this No Knead Croissant Bread: all the buttery, pull-apart magic of laminated dough, but without the sourdough starter or complicated technique.
This version uses an overnight rise for flavor development, followed by two inclusions of grated cold butter that get folded into the dough, creating gorgeous layers with minimal effort. It's the perfect mashup of ease and elegance-and yes, it tastes as amazing as it looks.
Now, is it a traditional croissant dough? Definitely not. But who says we can't have a little fun (and a lot of butter) playing with layers and flaky textures-no pastry school required? Let's be completely unserious about labels, and get serious about flavor! Make this croissant bread and make epic grilled cheese sandwiches, a croissant breakfast sandwich, or just toast it and spread on some apple butter! Let's just do it all.
Jump to:
Ingredients & Substitutions
There are very few ingredients, so very few places to make changes, but let's take a quick look, shall we?
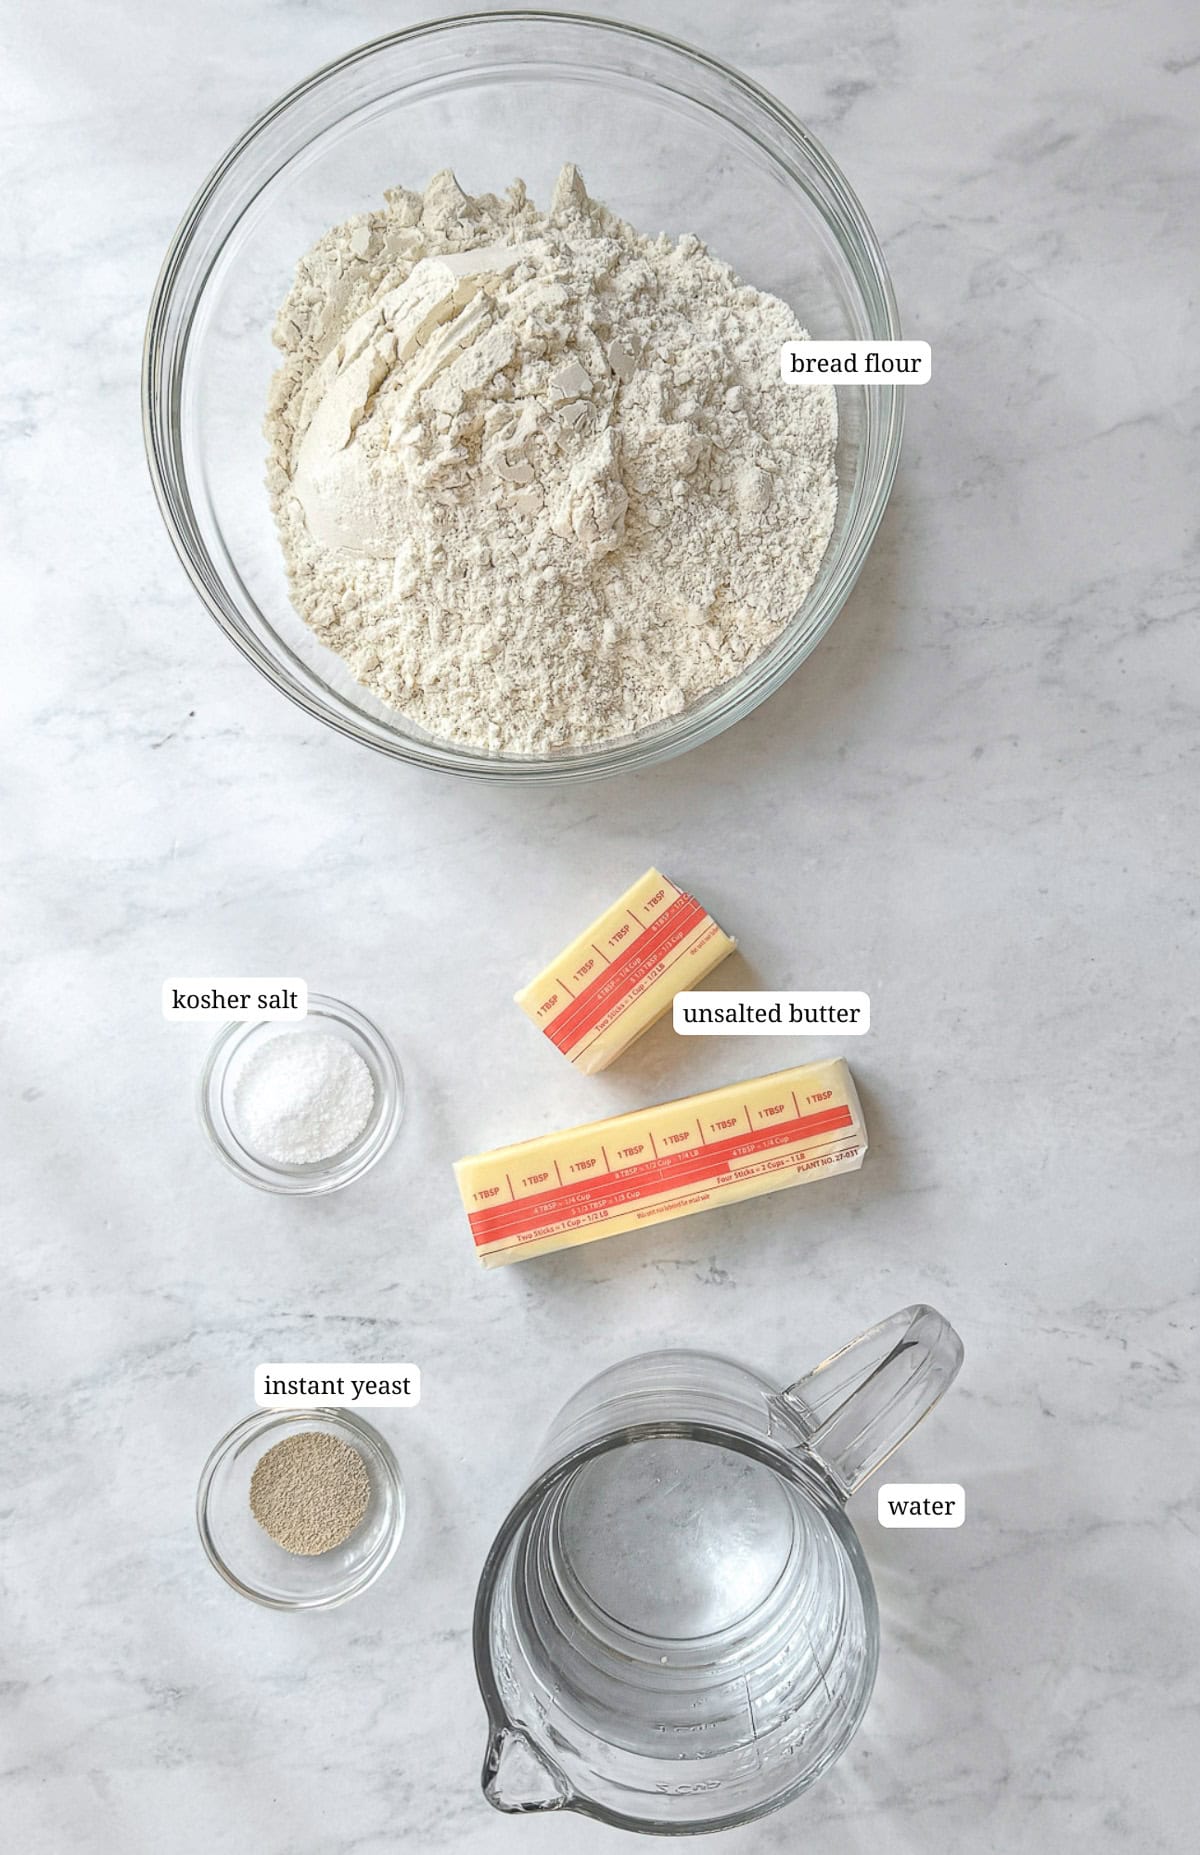
- Bread flour - I don't stress the use of bread flour very often, but when making artisan bread I find that it brings the best texture. All-purpose flour won't produce the same rise or give the same structure to your bread. For a soft enriched bread, like my brioche loaf or a sandwich bread I will often use all-purpose flour because I'm looking for a soft texture. For something like my simple no-knead bread or this croissant bread, I feel like bread flour, with it's higher protein content will produce a loaf with a chewier texture and more structure. That being said - if all you have is all purpose flour you're still going to make a delicious loaf.
- Unsalted butter - Because there is no standard amount of added salt between brands of salted butter, I always use unsalted butter in my cooking and baking. If you are using salted butter, I would cut the additional salt inclusion in half.
- Kosher salt - More salt science, common table salt, like the one in the dark blue container with the little umbrella girl, tastes saltier than other types of salt. If you only have table salt, use half as much as the recipe calls for.
- Instant yeast - Instant yeast has finer granules and can be mixed directly into dry ingredients, while active dry yeast needs to be dissolved in warm water first to activate. To substitute active dry yeast for instant yeast, use the same amount by weight, but dissolve it in warm water (about 100-110°F) and let it sit for 5-10 minutes until foamy before adding it to the dough.
See recipe card below for a full list of ingredients and measurements.
Knead more bread? If you have about an hour and you don't mind kneading for a few minutes, you have got to try my One Hour Sandwich Bread. I cannot stop making it!!
Quick Recipe Video
Step-by-Step Instructions
I know that bread baking can sound, and look, intimidating. There are a lot of pictures here, and a lot of words, but I just want to make sure that I cover everything so that making this croissant loaf will be easy and approachable. As always read through everything, look at all of the pictures for reference, and then gather your (very few) ingredients and let's get started!
Making Dough and Bulk Fermentation
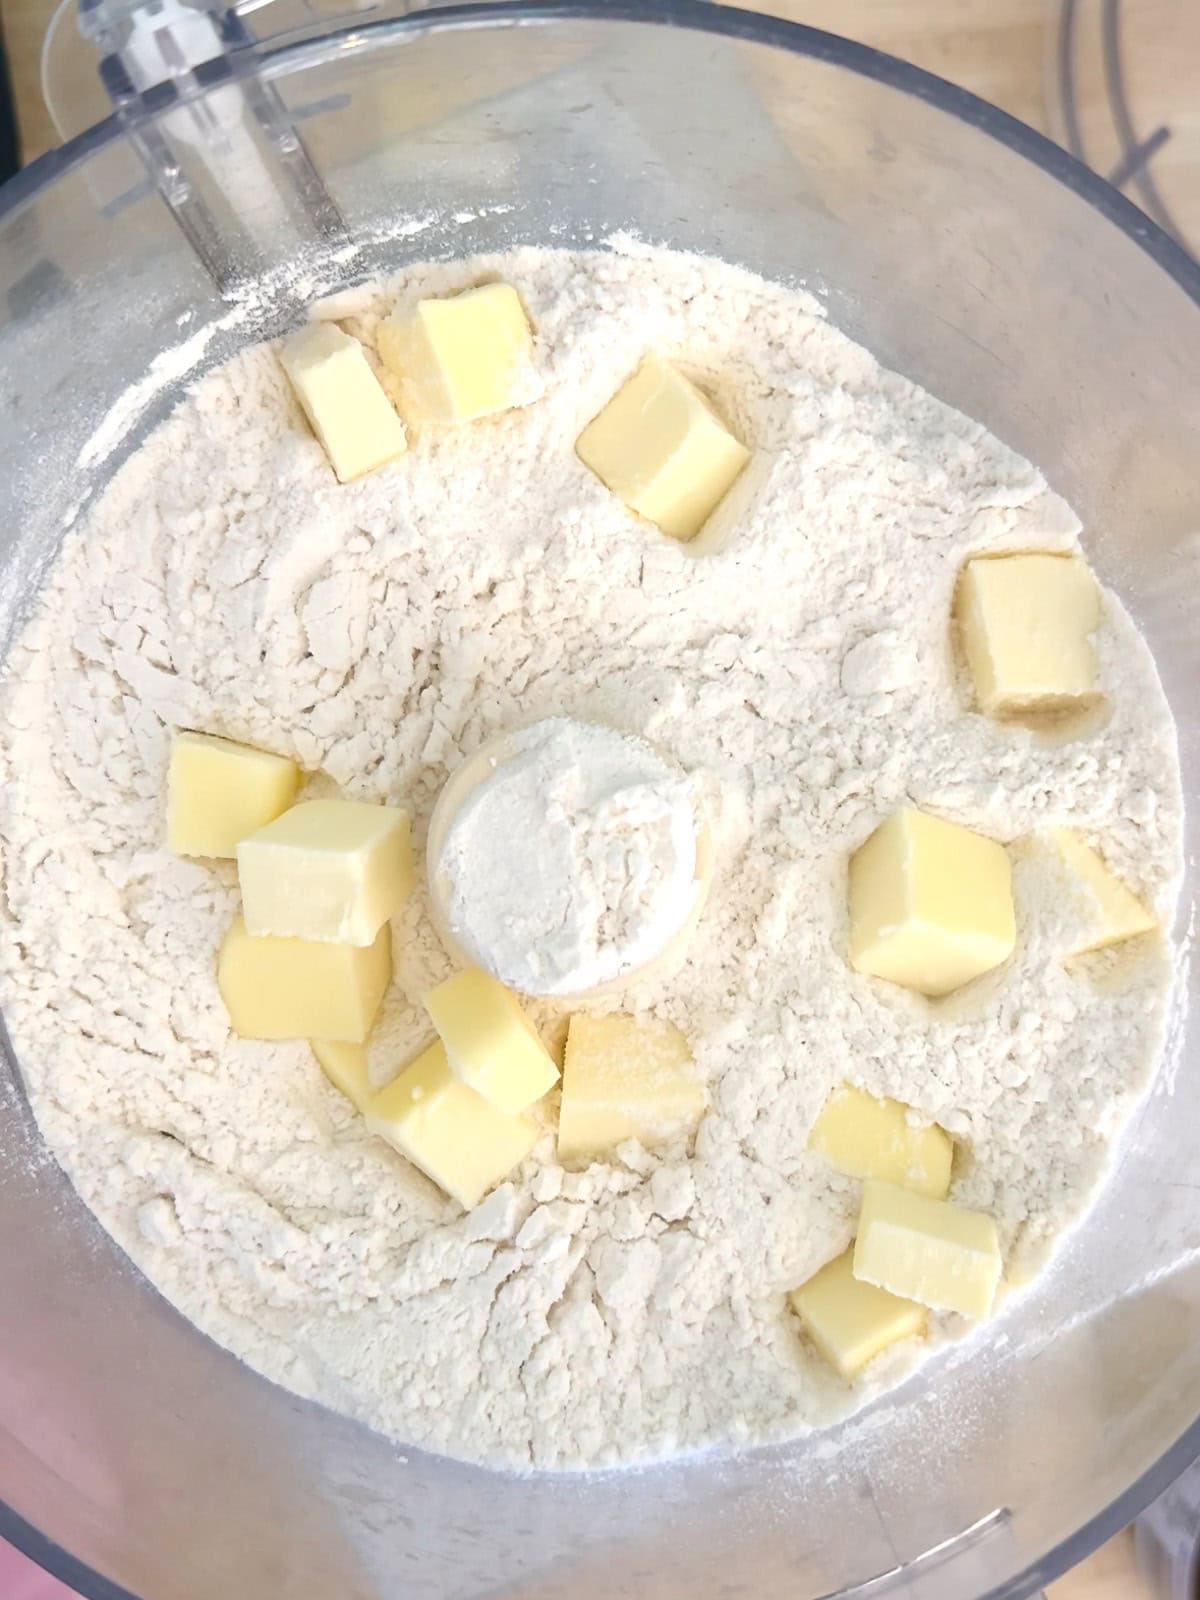
Step 1: Add all purpose flour, salt, and the first inclusion of cold cubed butter to your food processor and run until the butter is completely incorporated into the flour mixture. This will make your dough softer and easier to work with later. (this can be done by hand, using your fingers or a pastry blender)
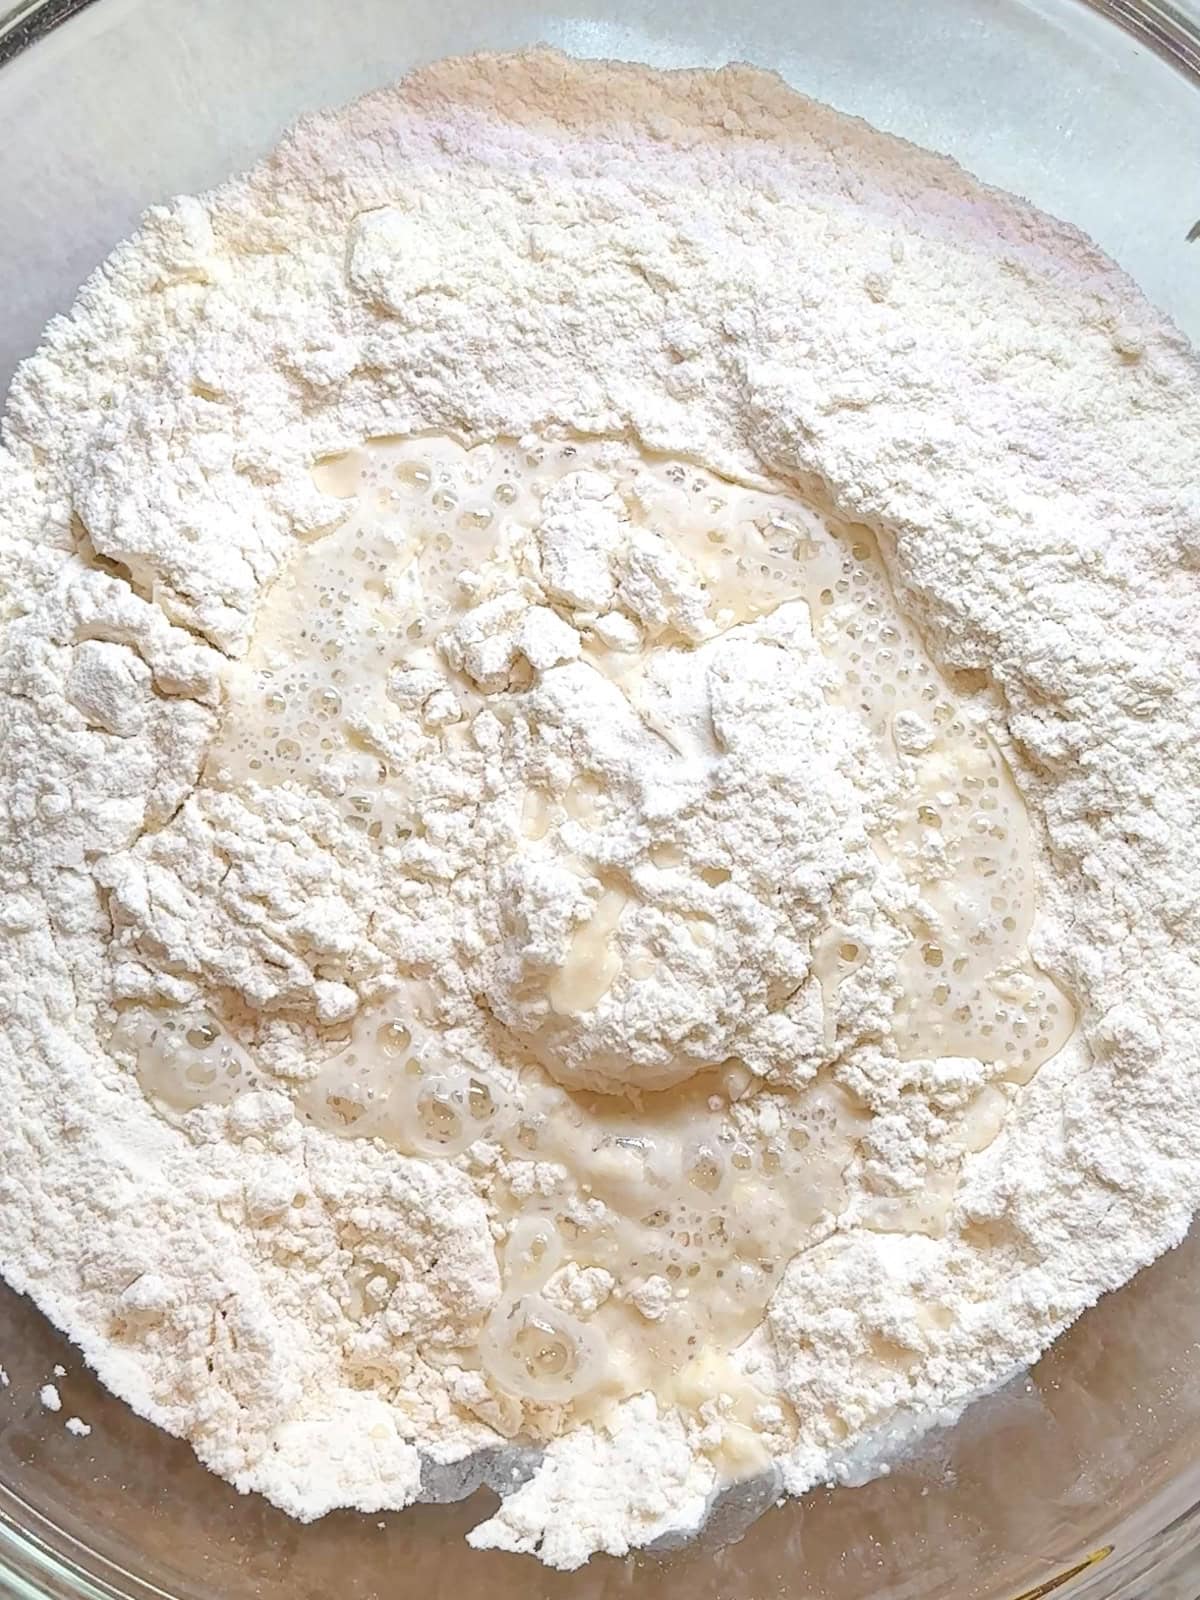
Step 2: Add in room temperature tap water and your instant yeast. If using active dry yeast, dissolve in some warm water to activate it before adding to the butter-flour mixture.
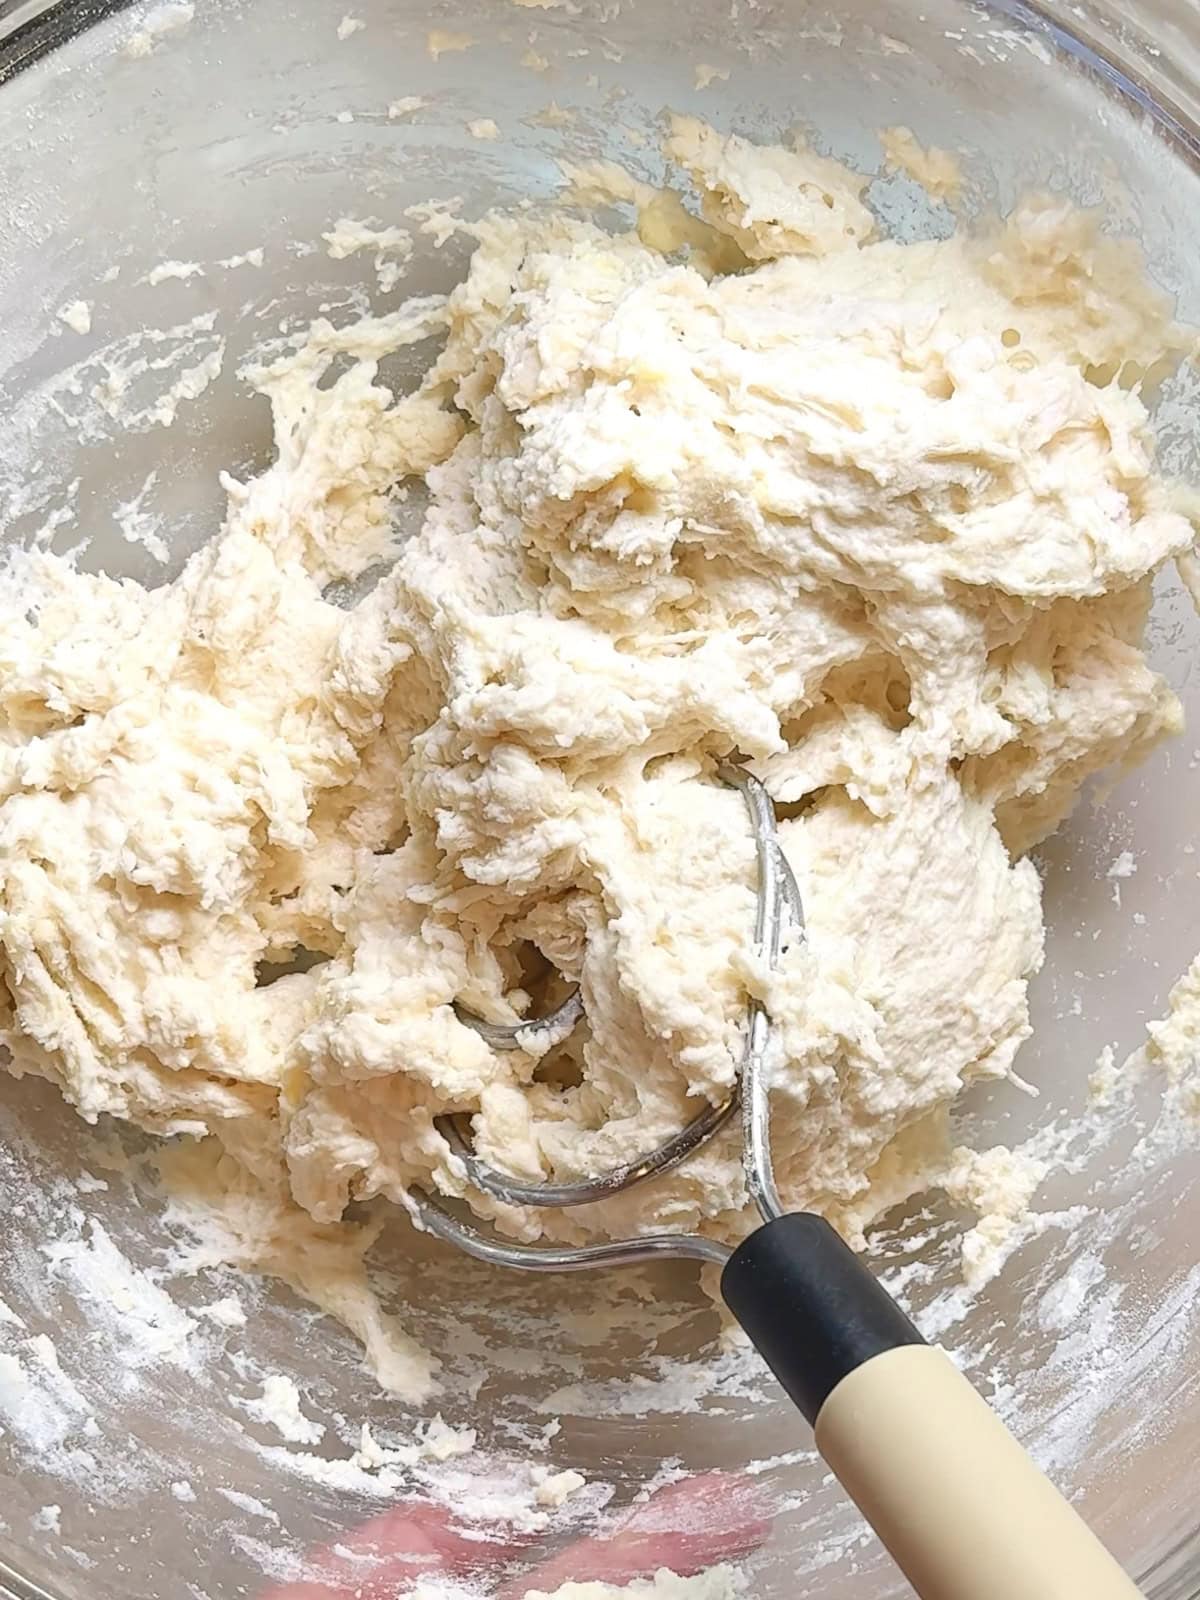
Step 3: Use a Danish dough whisk, or a sturdy spoon, to mix everything together until all of the dry flour mixture has been incorporated and you have a shaggy dough. Cover with plastic wrap, or a disposable shower cap, and let the dough rise and ferment at room temperature on the counter overnight, or at least 12 hours.
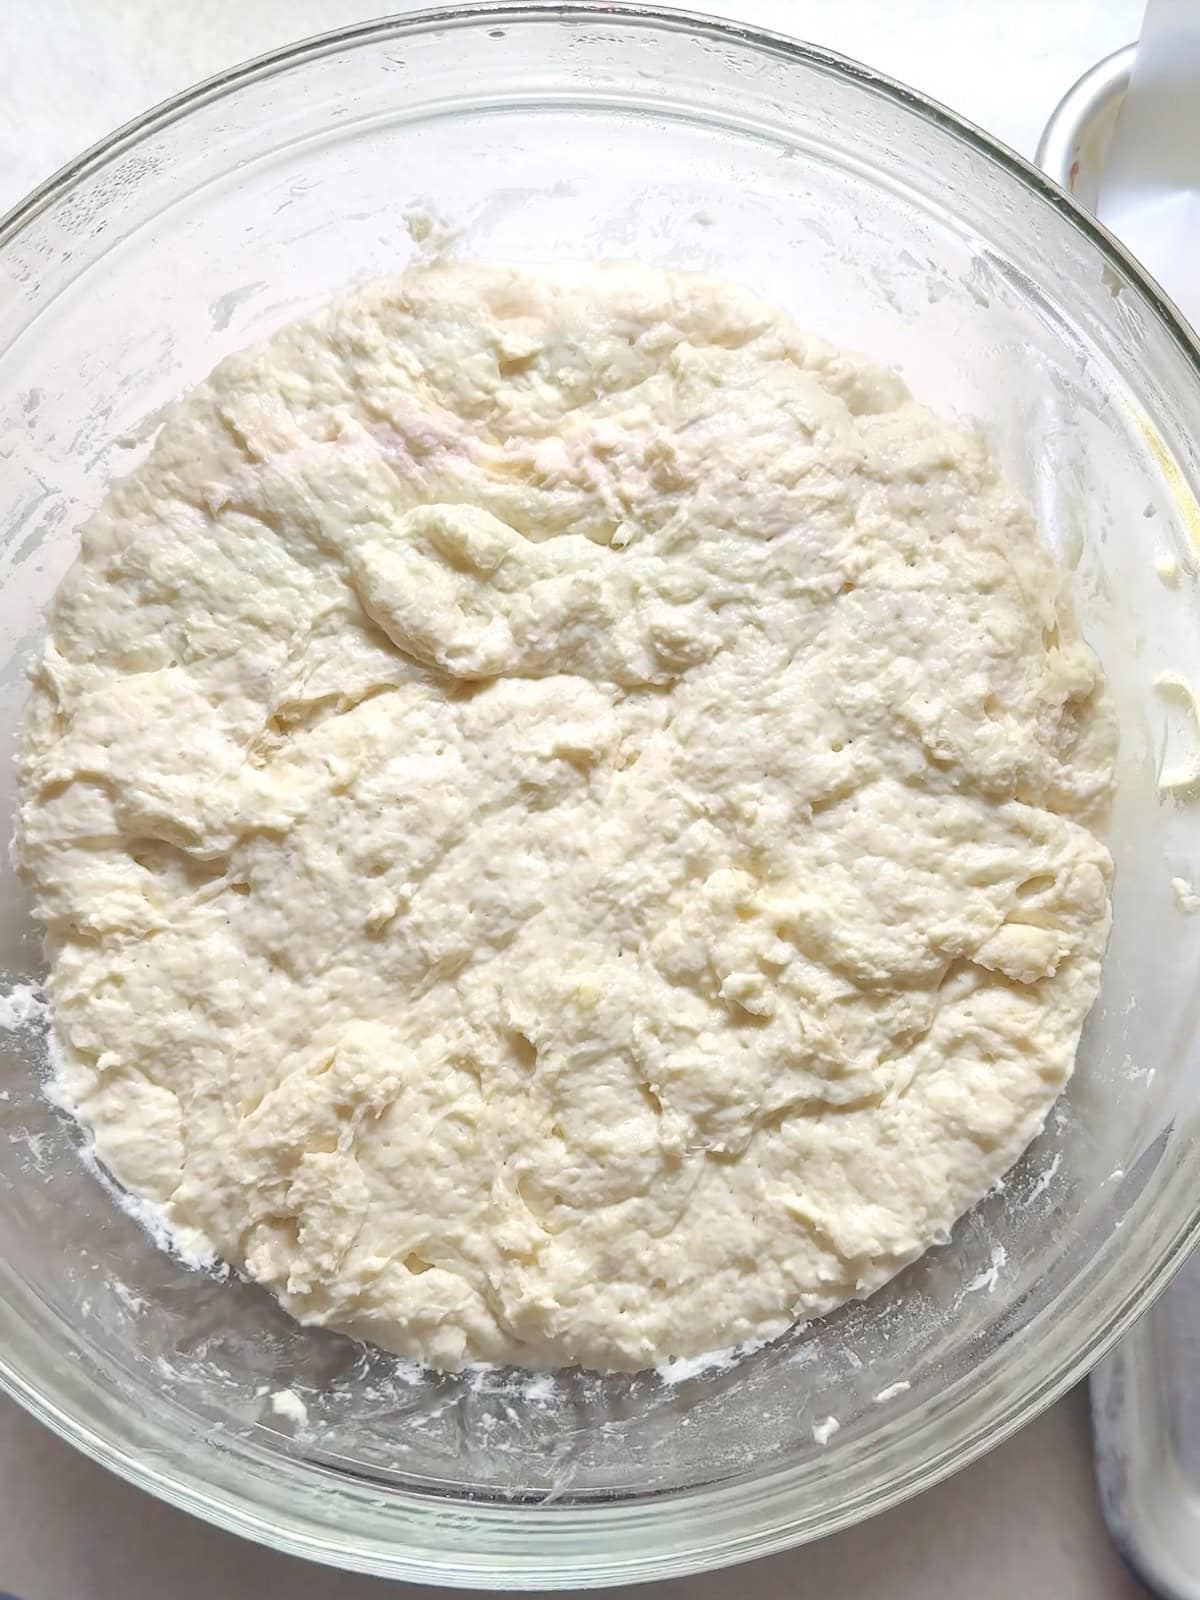
Step 4: In the morning, your no-knead dough should look bubbly on top, with a flat or slightly rounded surface that stretches all the way across the bowl.
Incorporating Butter: First Set of Stretch and Folds

To fully understand the entire "folding" or lamination process, please watch the video above.
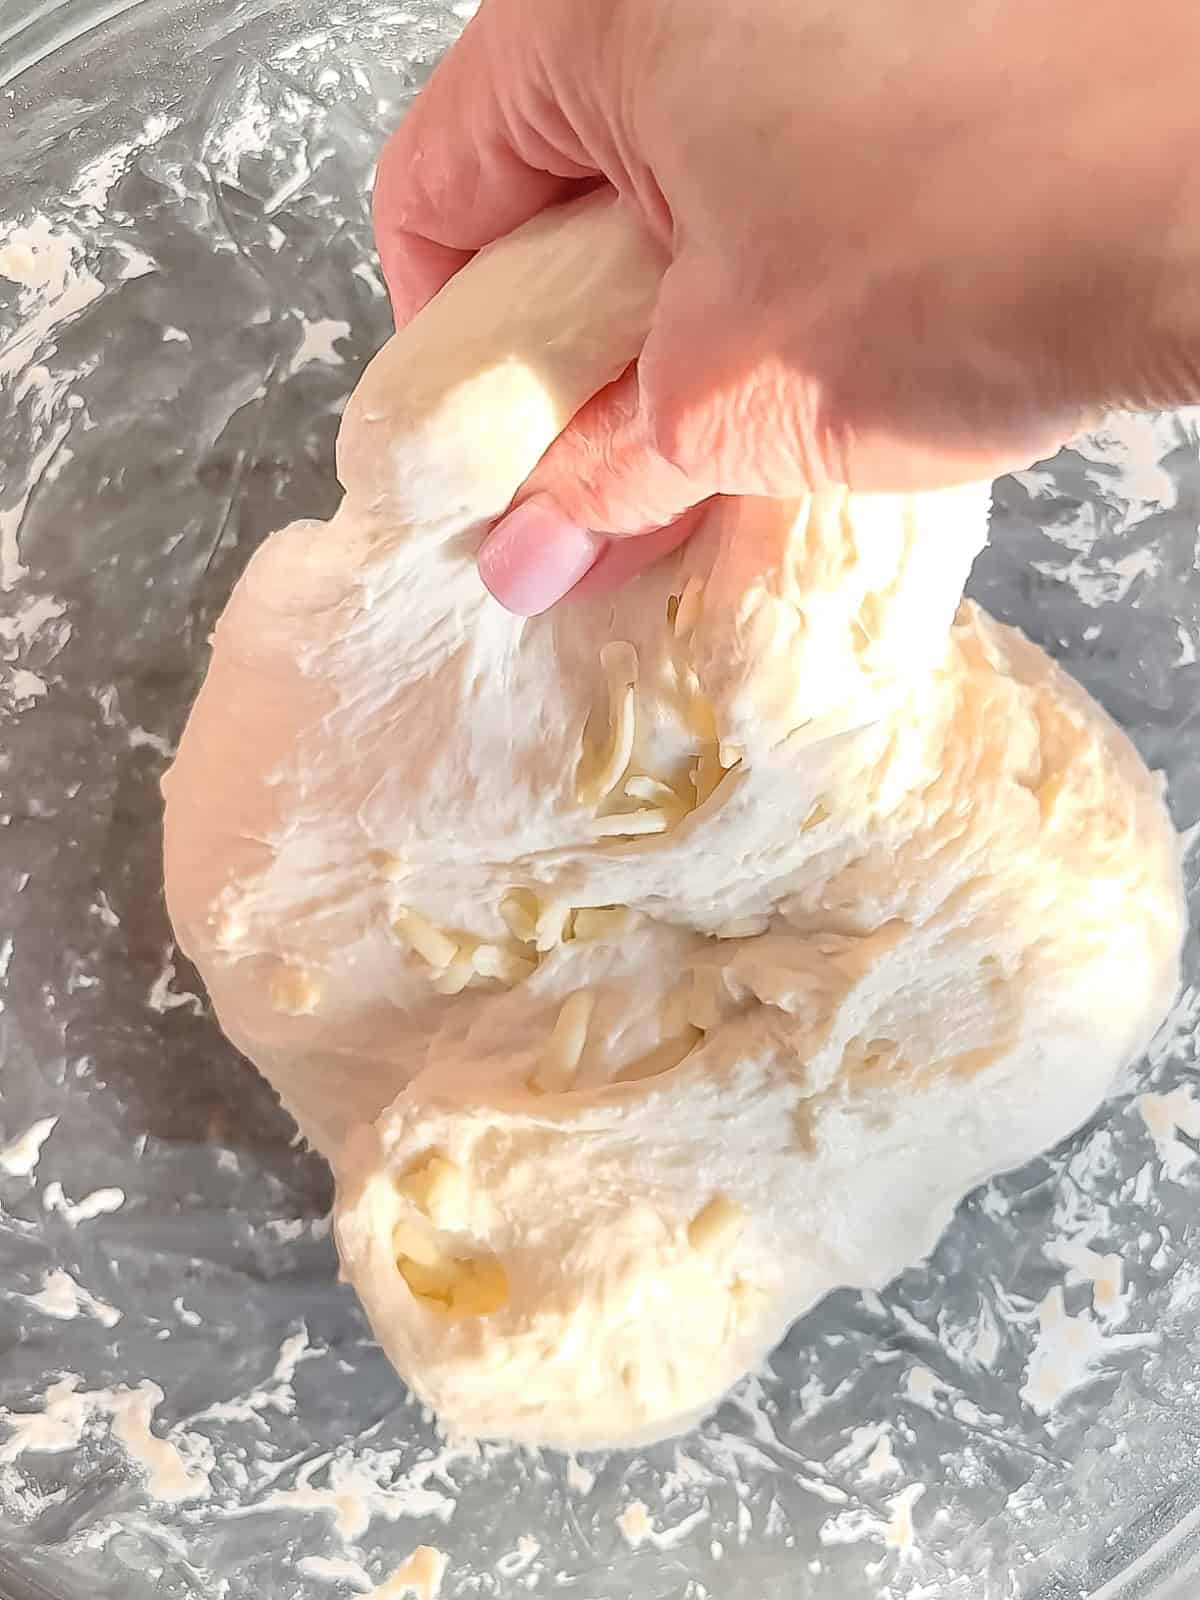
Step 1: Add your second inclusion of butter, this time cold grated butter, to the top of your dough.
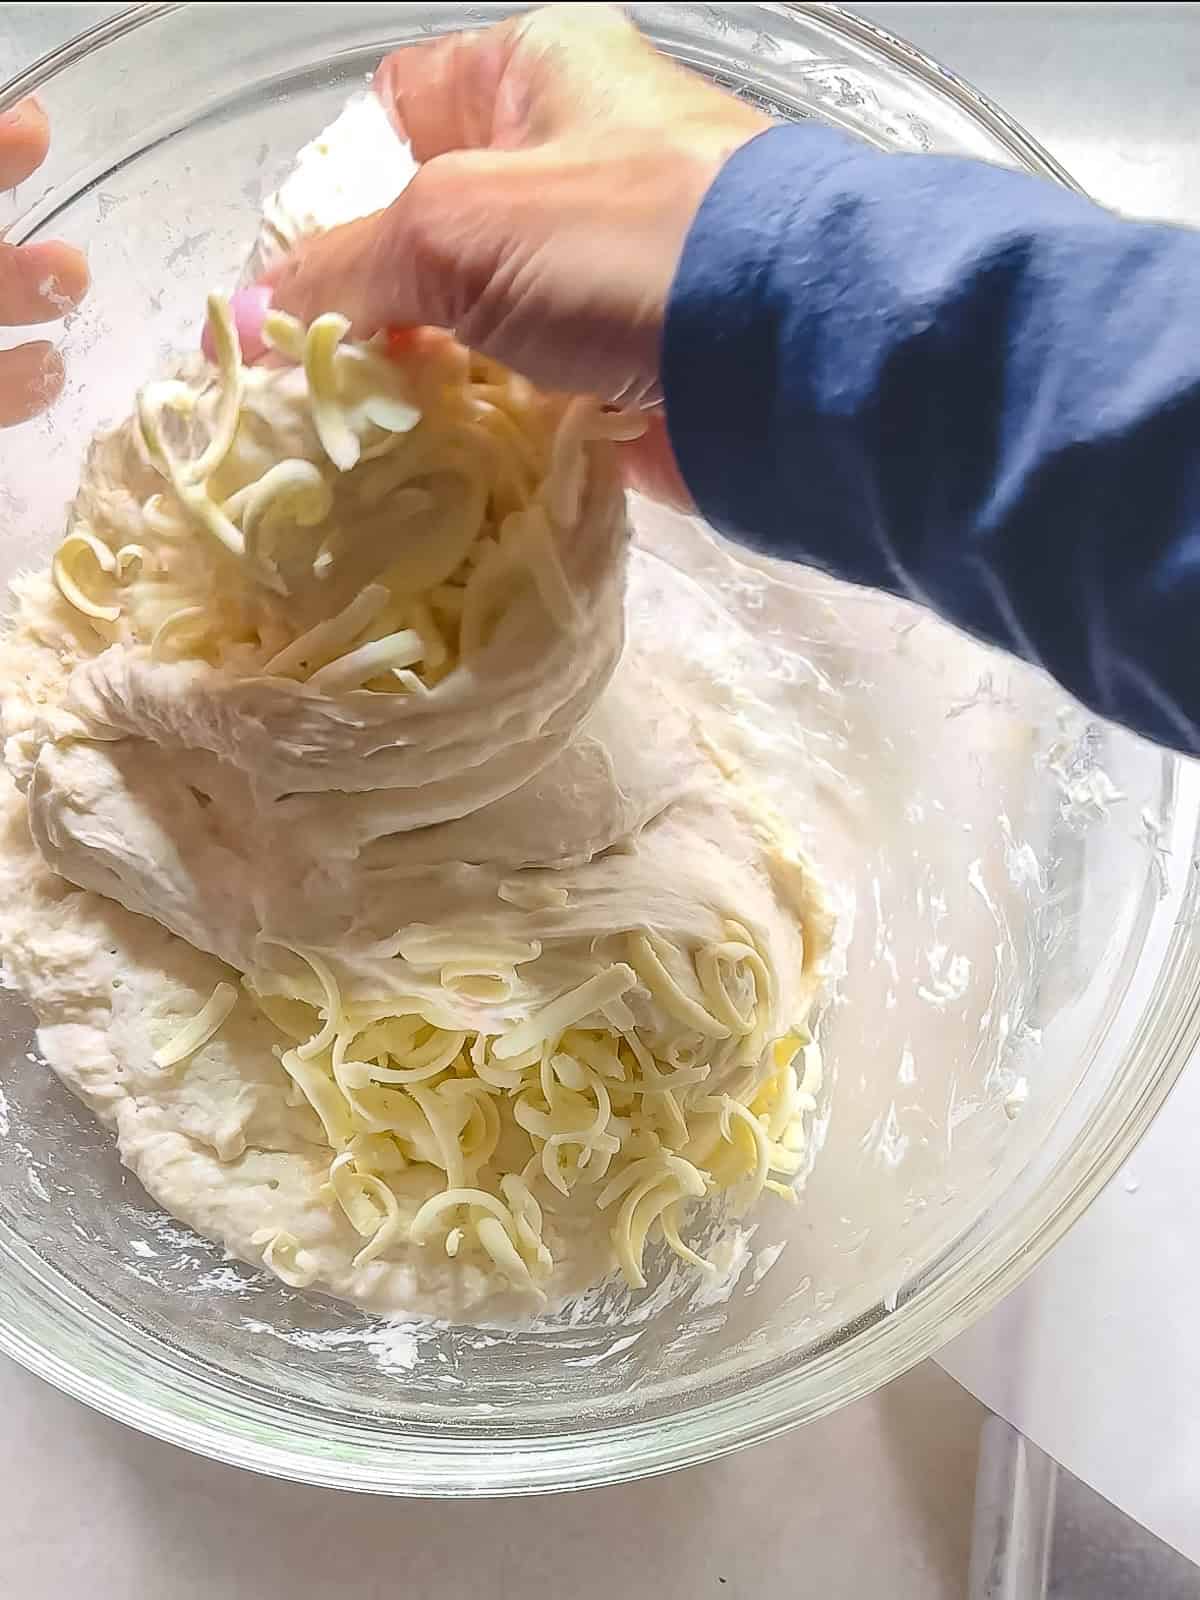
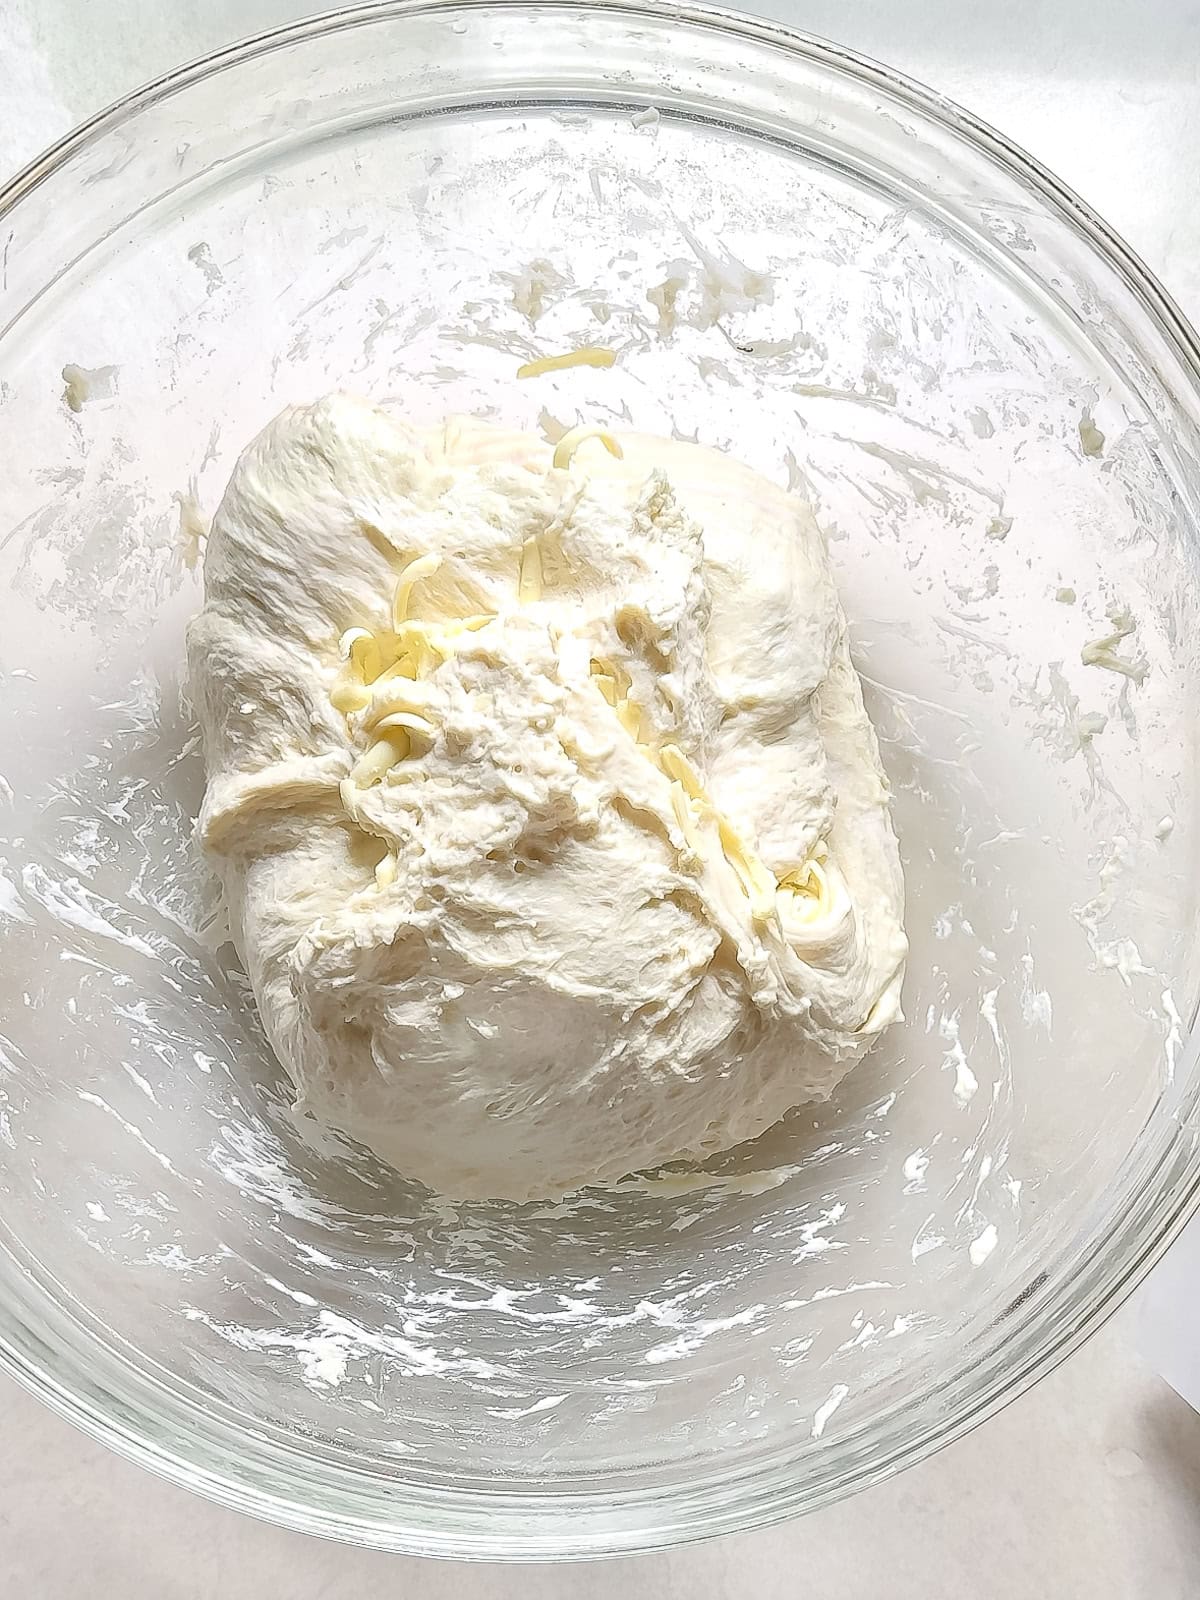
Step 2: Start your folds by gently grabbing one side of the dough, stretching it up and over the butter, and folding it over to the opposite side.
Turn the bowl a quarter turn and repeat-stretch up and fold over. Do this two more times, turning the bowl each time, until you've folded all four "sides" of the dough. That's one full set of folds. Cover and let the dough rest for 30 minutes in a warm spot of your kitchen.
Incorporating Butter: Second Set of Stretch and Folds
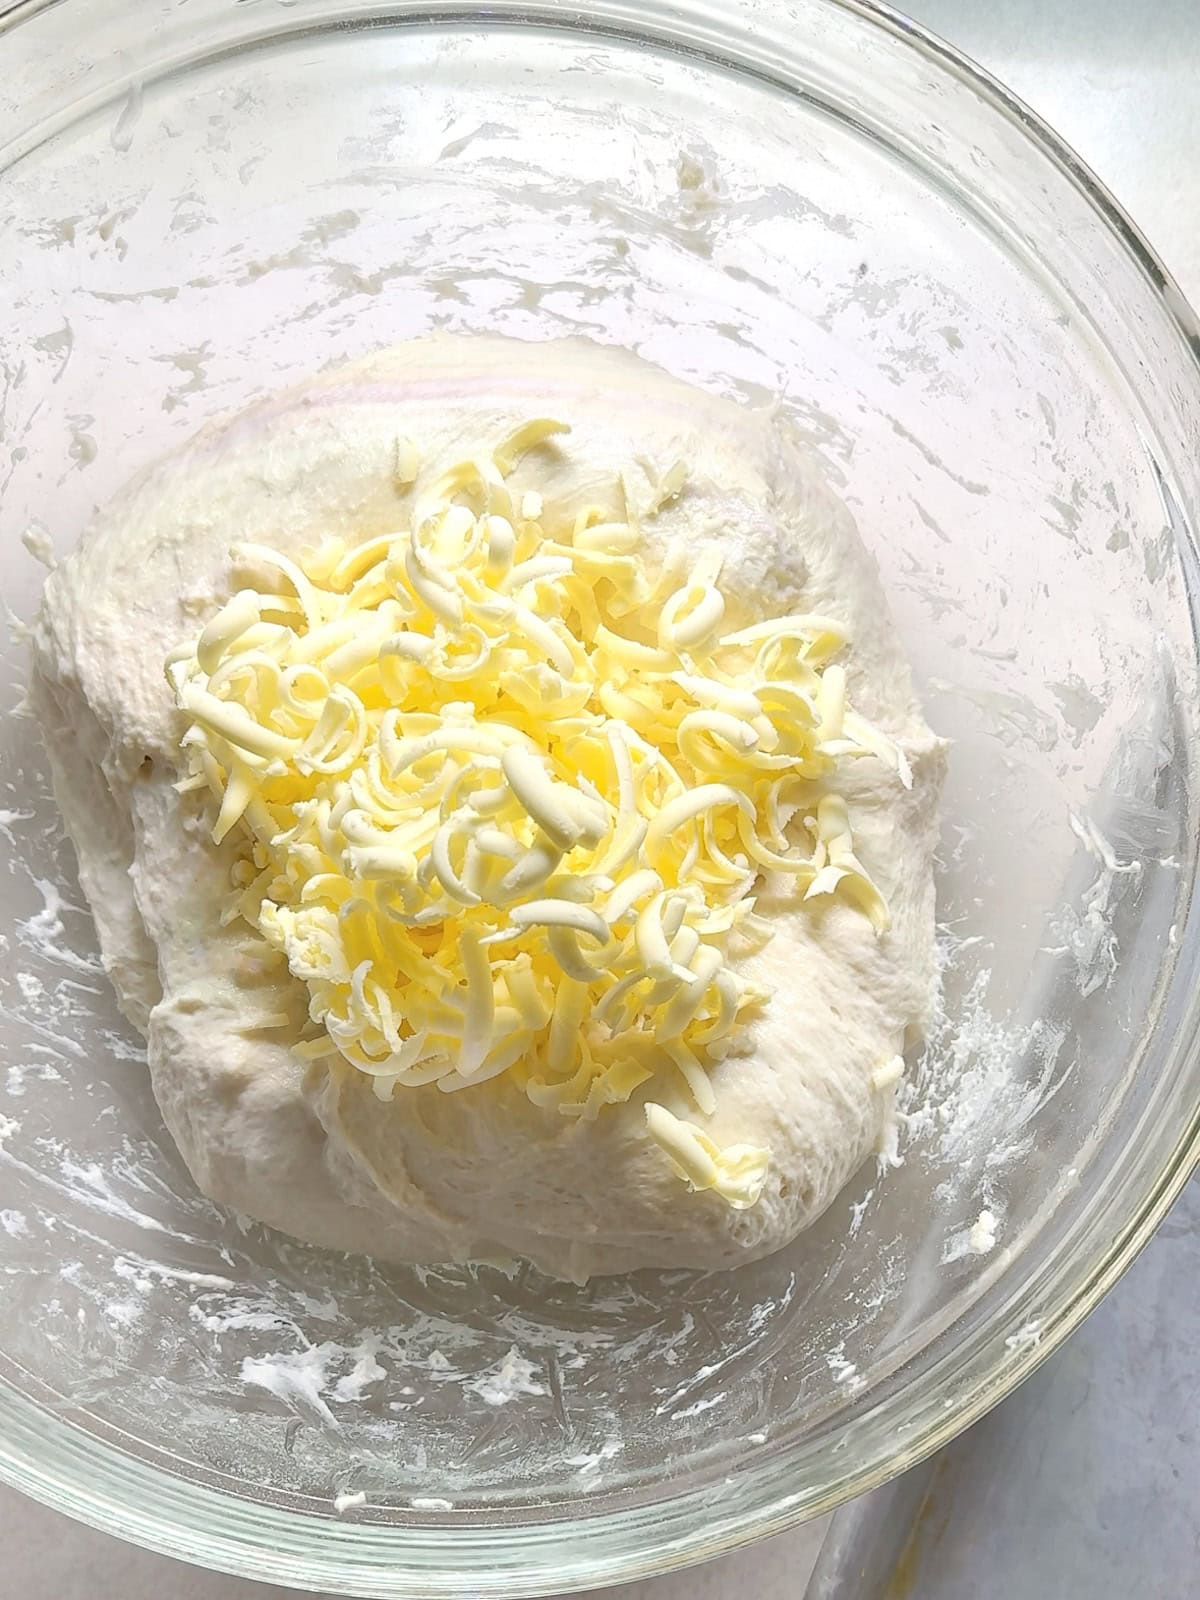
Step 1: Add the final inclusion of butter on top of your risen dough.
Step 2: Perform another full set of four folds, enclosing as much of the butter as possible. Some of the butter may peek out, but don't get crazy about it. There are two more sets of folds coming. Cover the bowl and let the dough rest another 30 minutes.
Third and Fourth Folds: No Butter Added
Step 1: Perform two more more sets of folds, with a 30 minute rest between them. As the dough gets stronger, it may become more resistant to stretching, but that's a good sign-it means the gluten is developing.
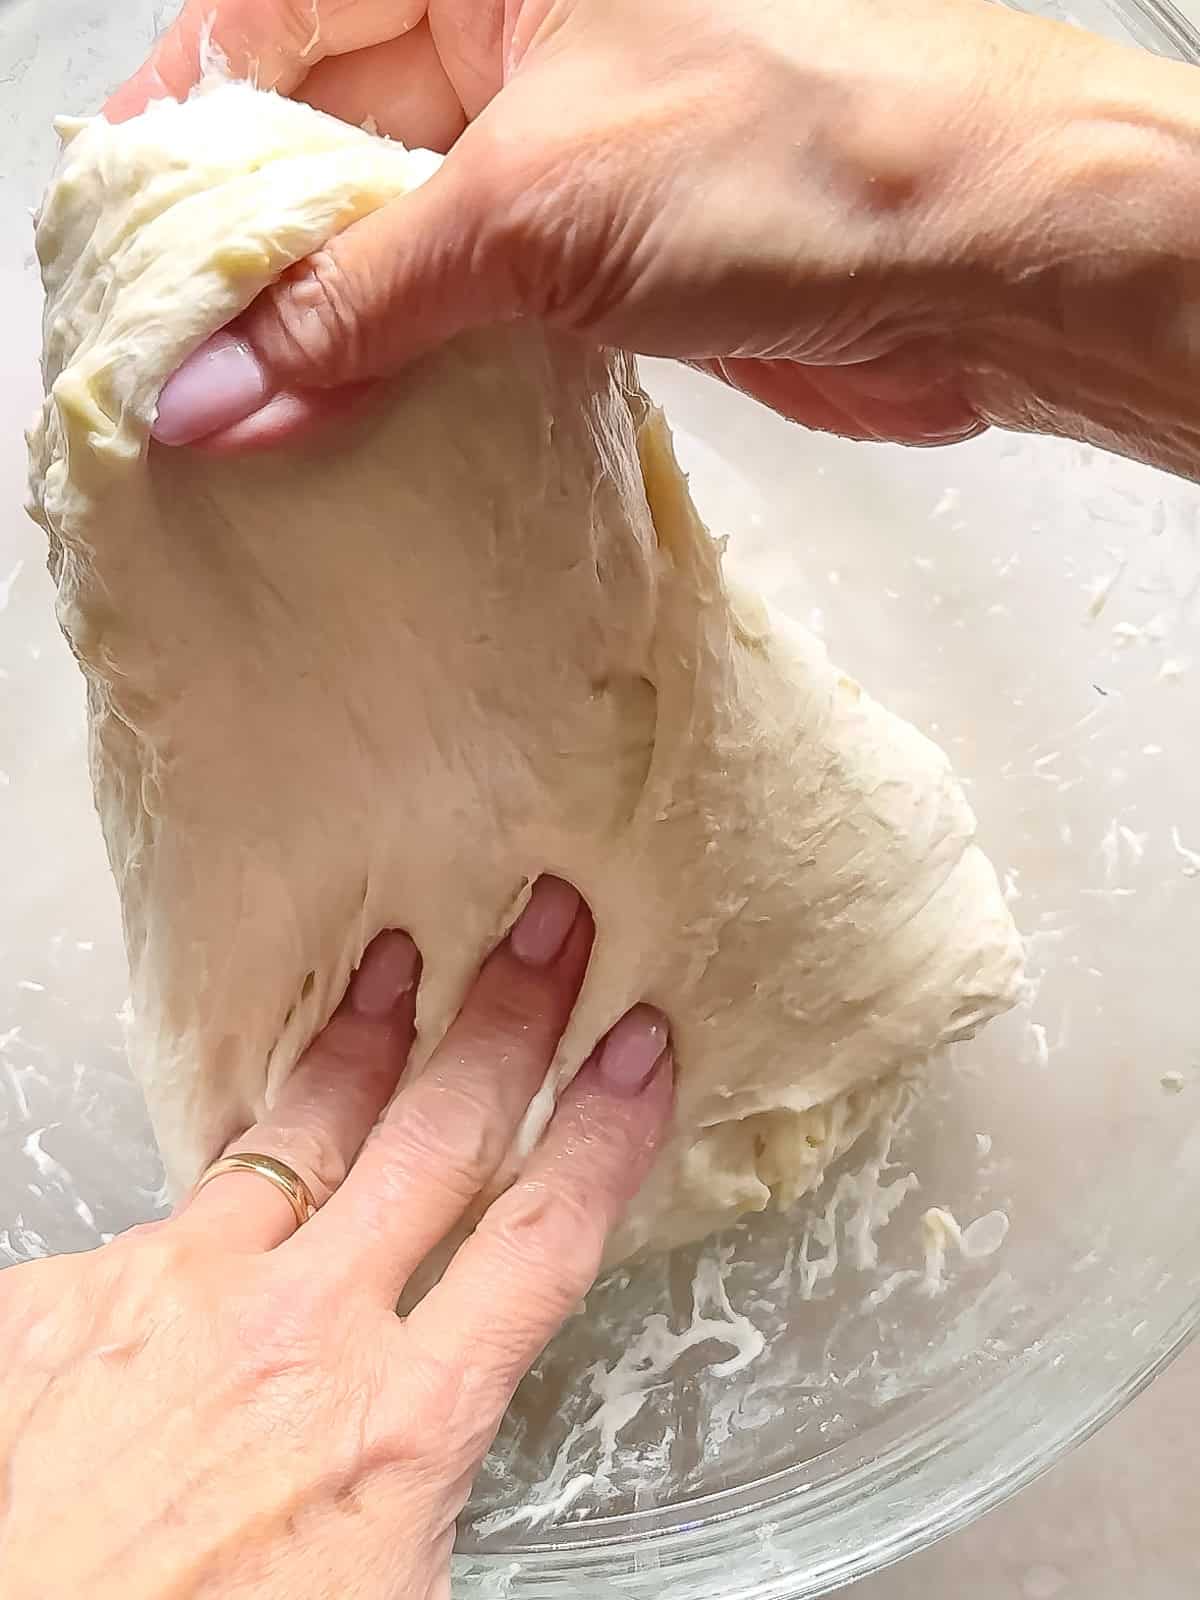
Step 2: If you find it tough to stretch the dough, try using one hand to gently hold the dough down while you stretch and fold with the other. This will help you maintain control and prevent the dough from pulling away. Cover and let rest another 30 minutes.
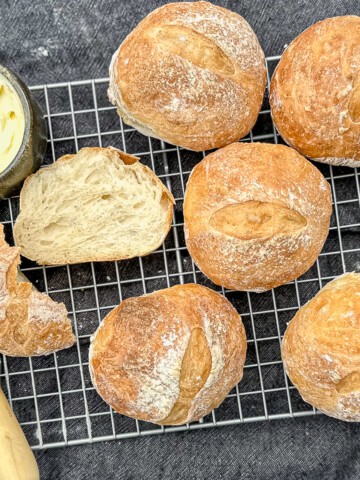
Shaping Your Boule (Round Bread Shape)
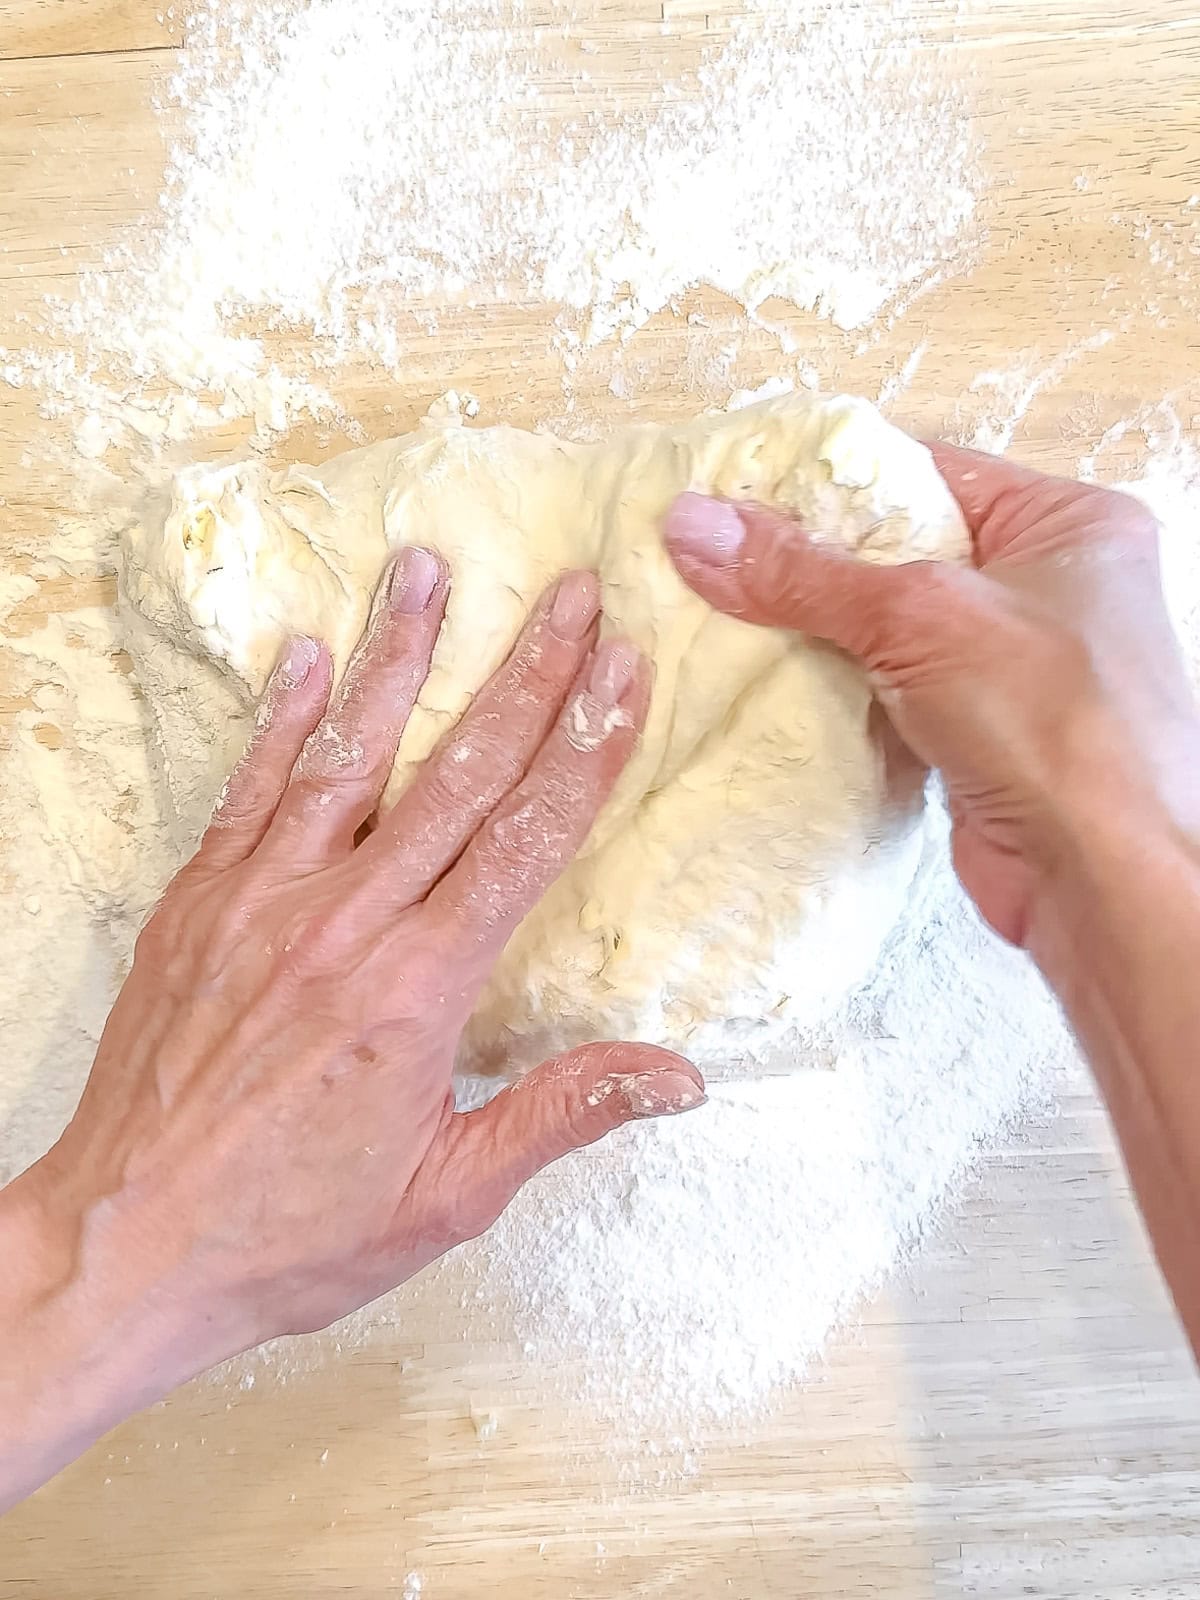
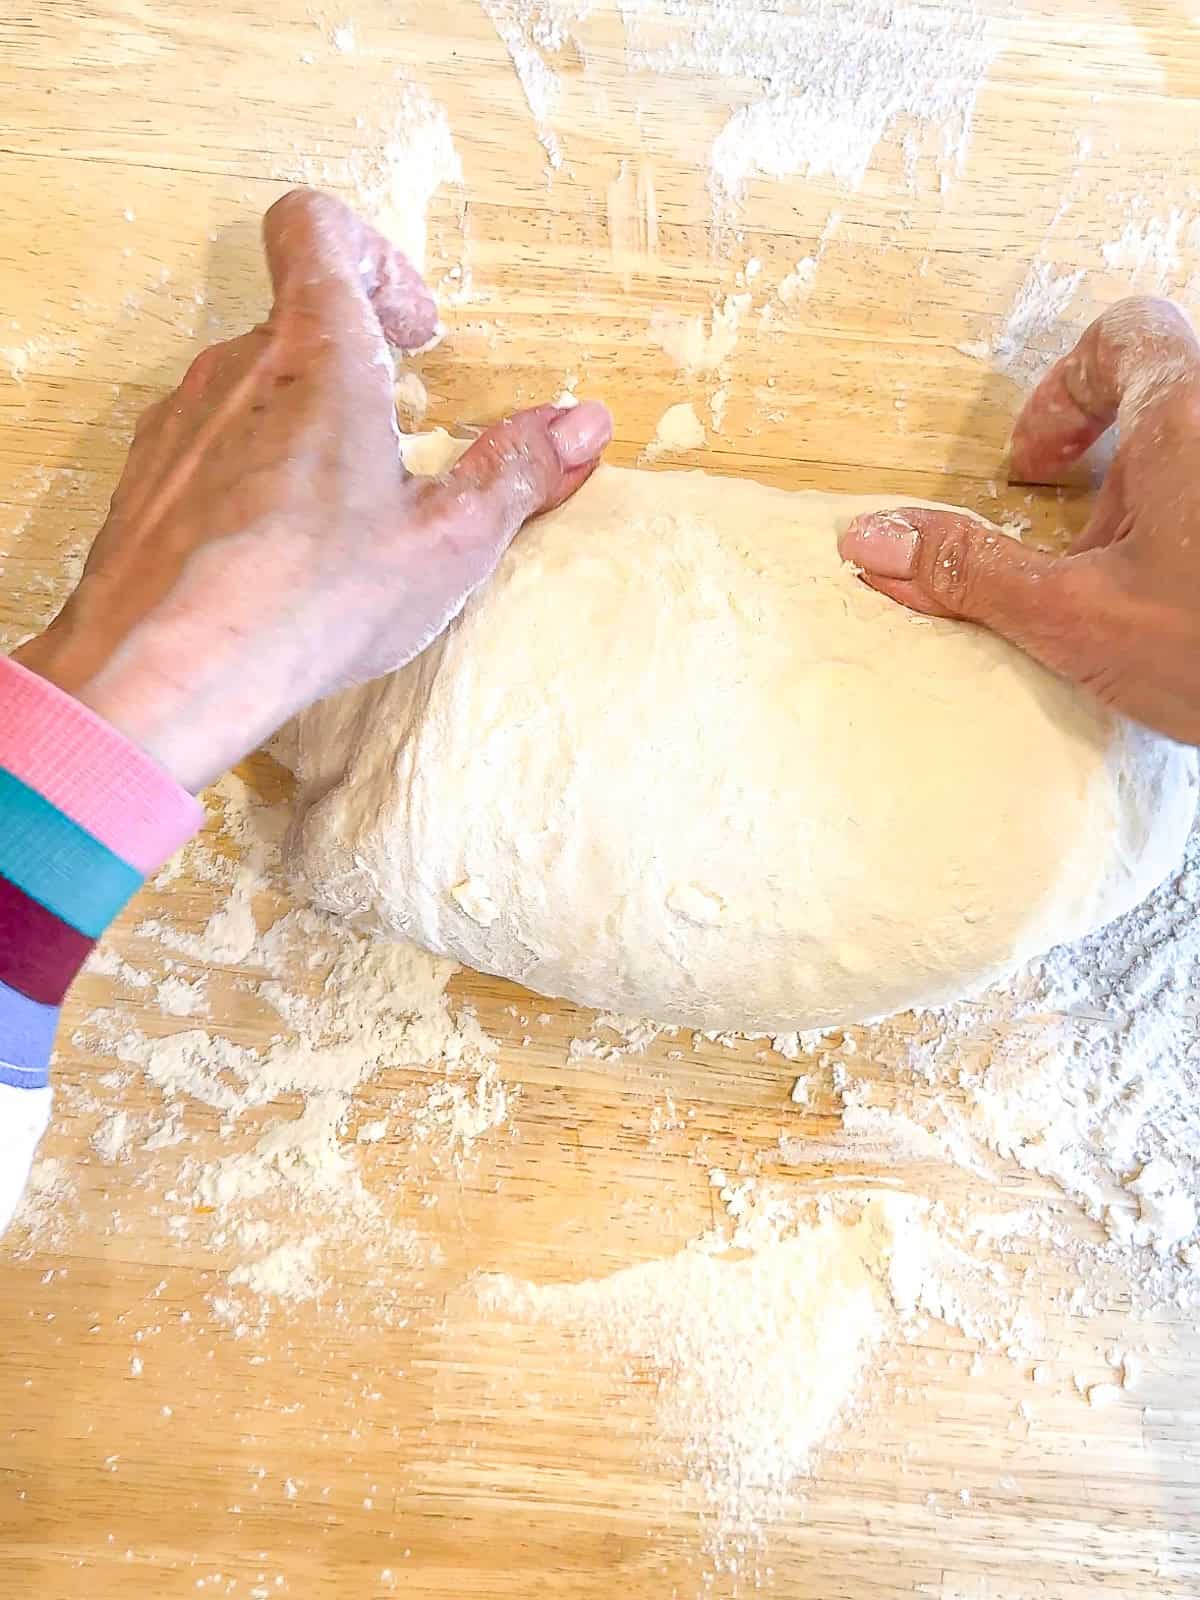
Step 1: Gently turn the dough out onto a lightly floured counter and use your hands to stretch and fold the edges of the dough inward, starting by folding the top half over.
Step 2: Then pull the two top "corners" or "wings" in towards the center.
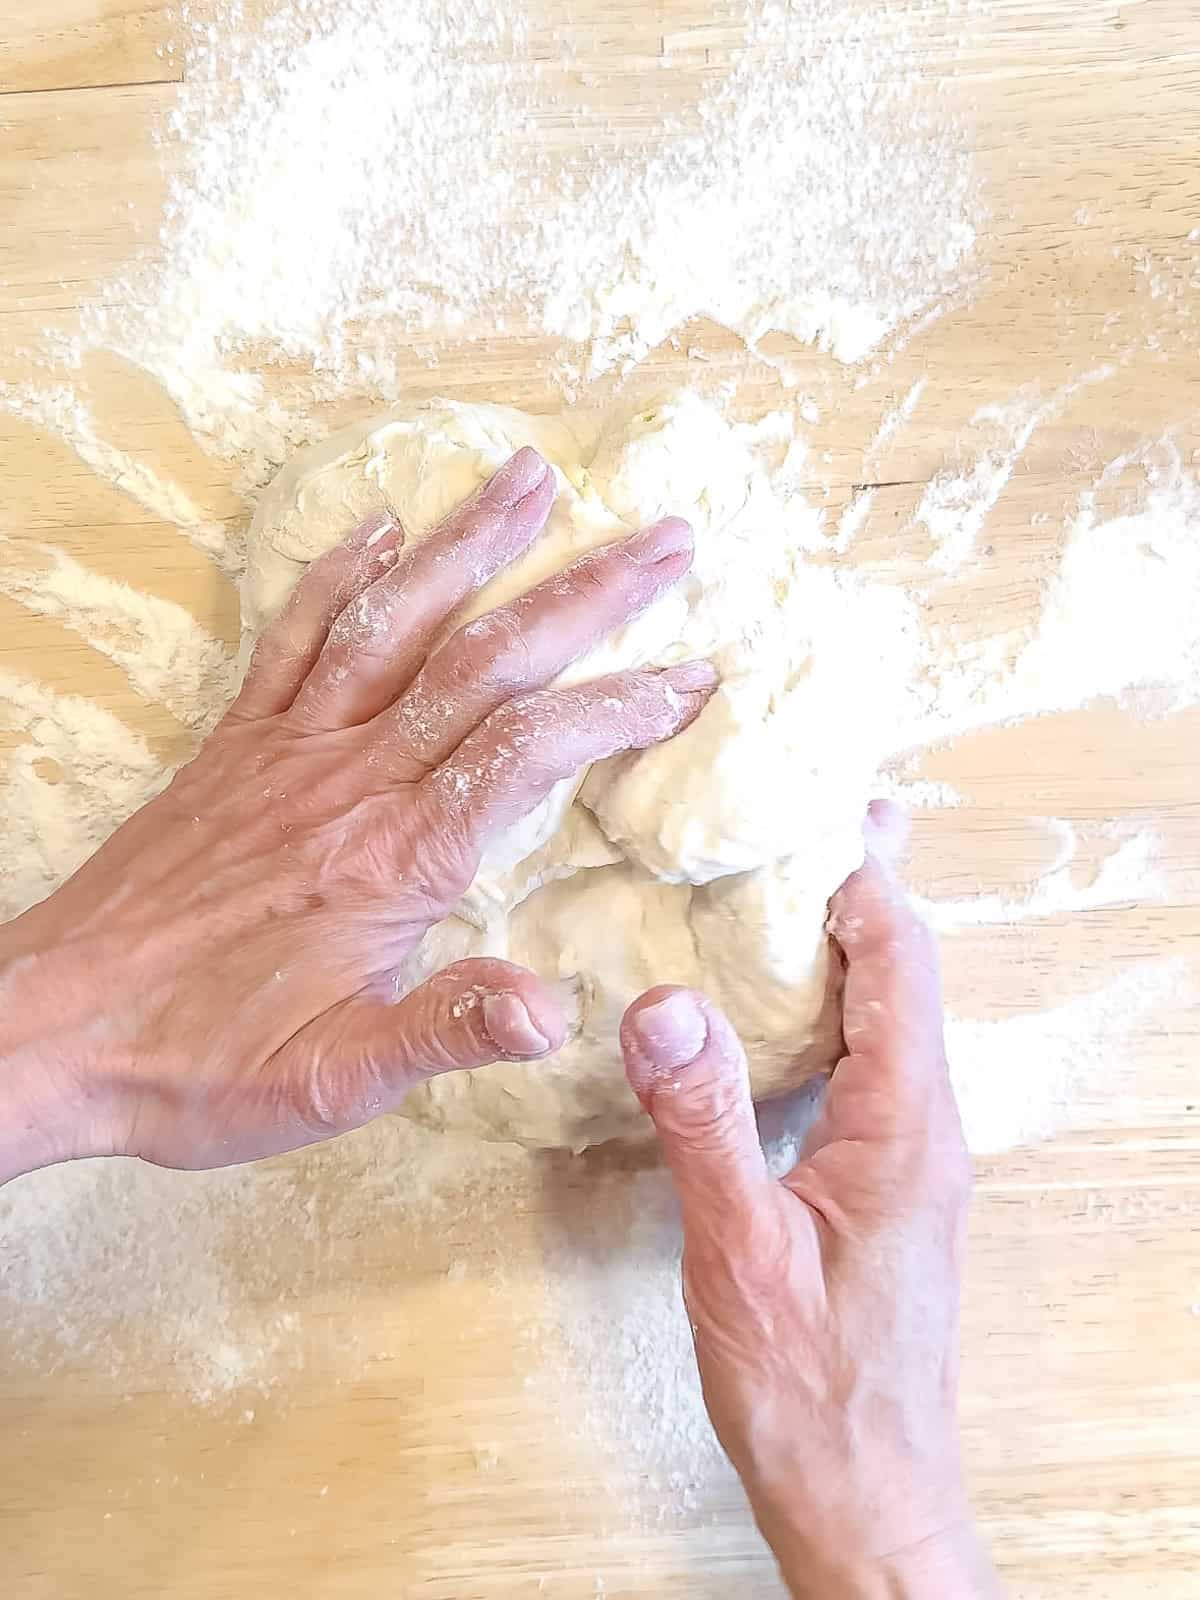
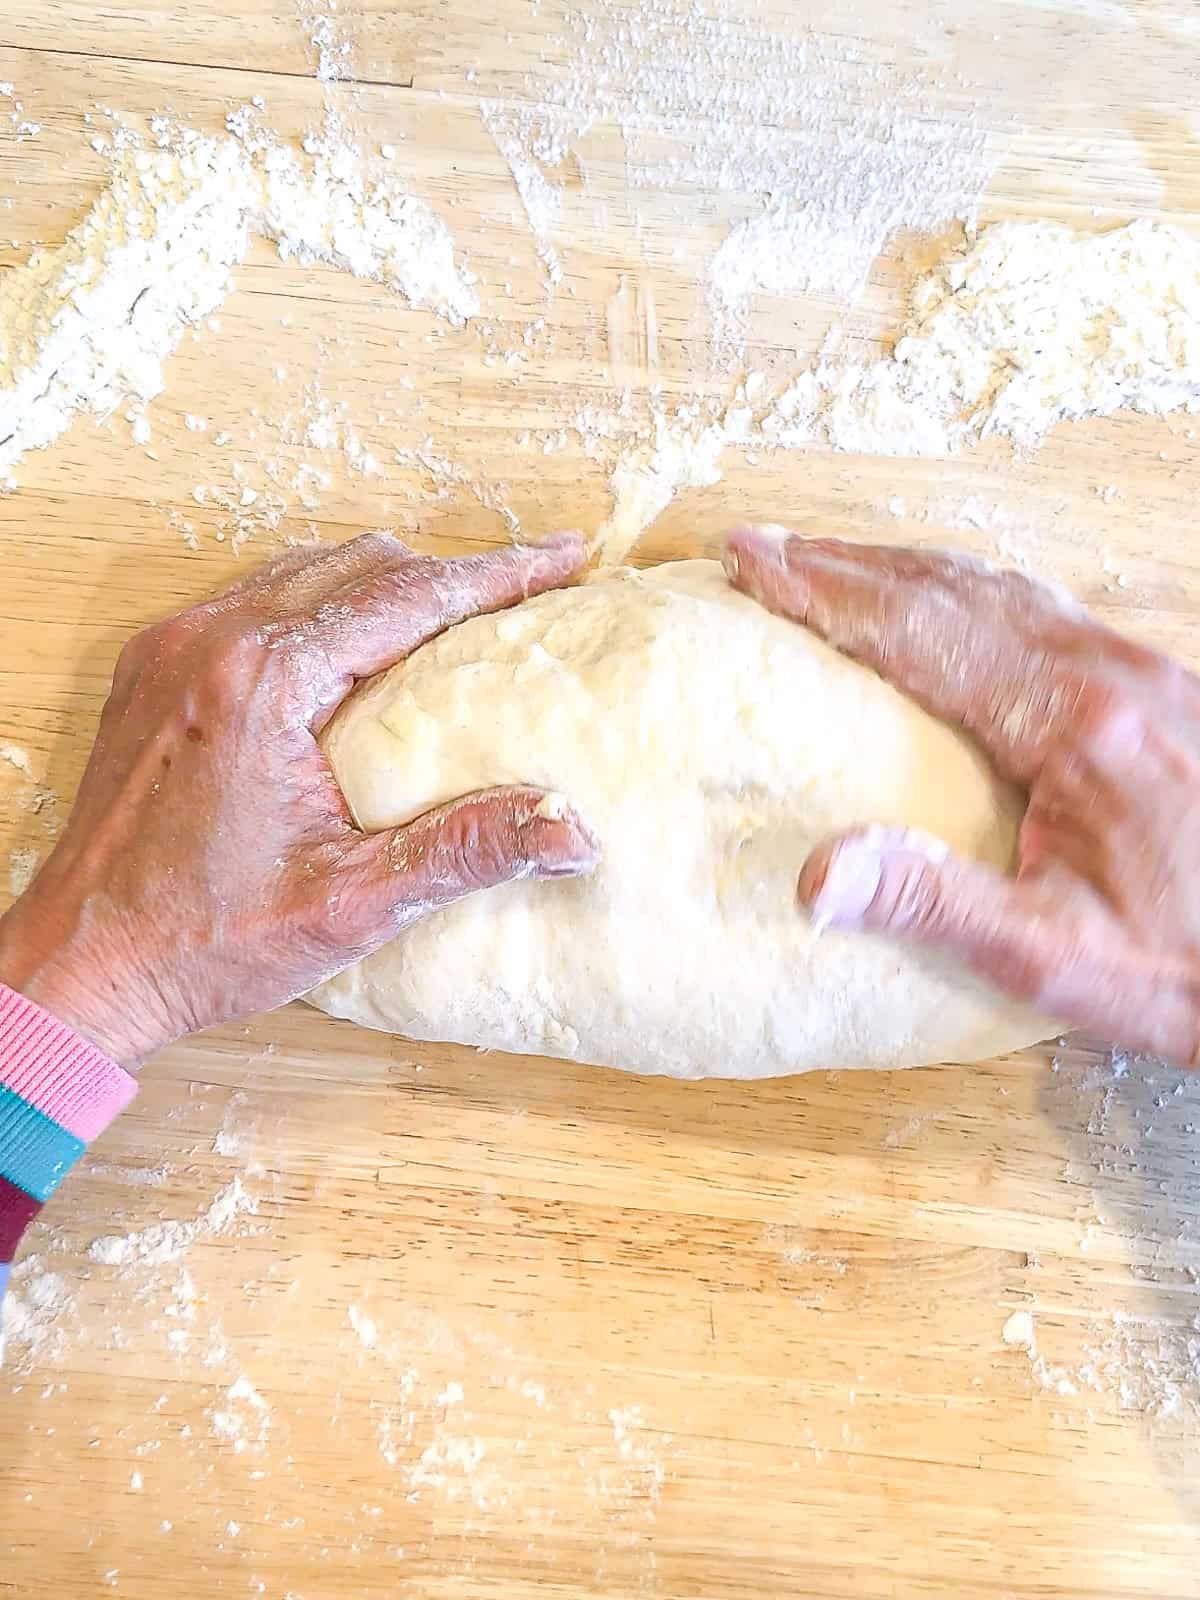
Step 3: Then bring up the bottom two wings and fold up the bottom half, forming a ball shape.
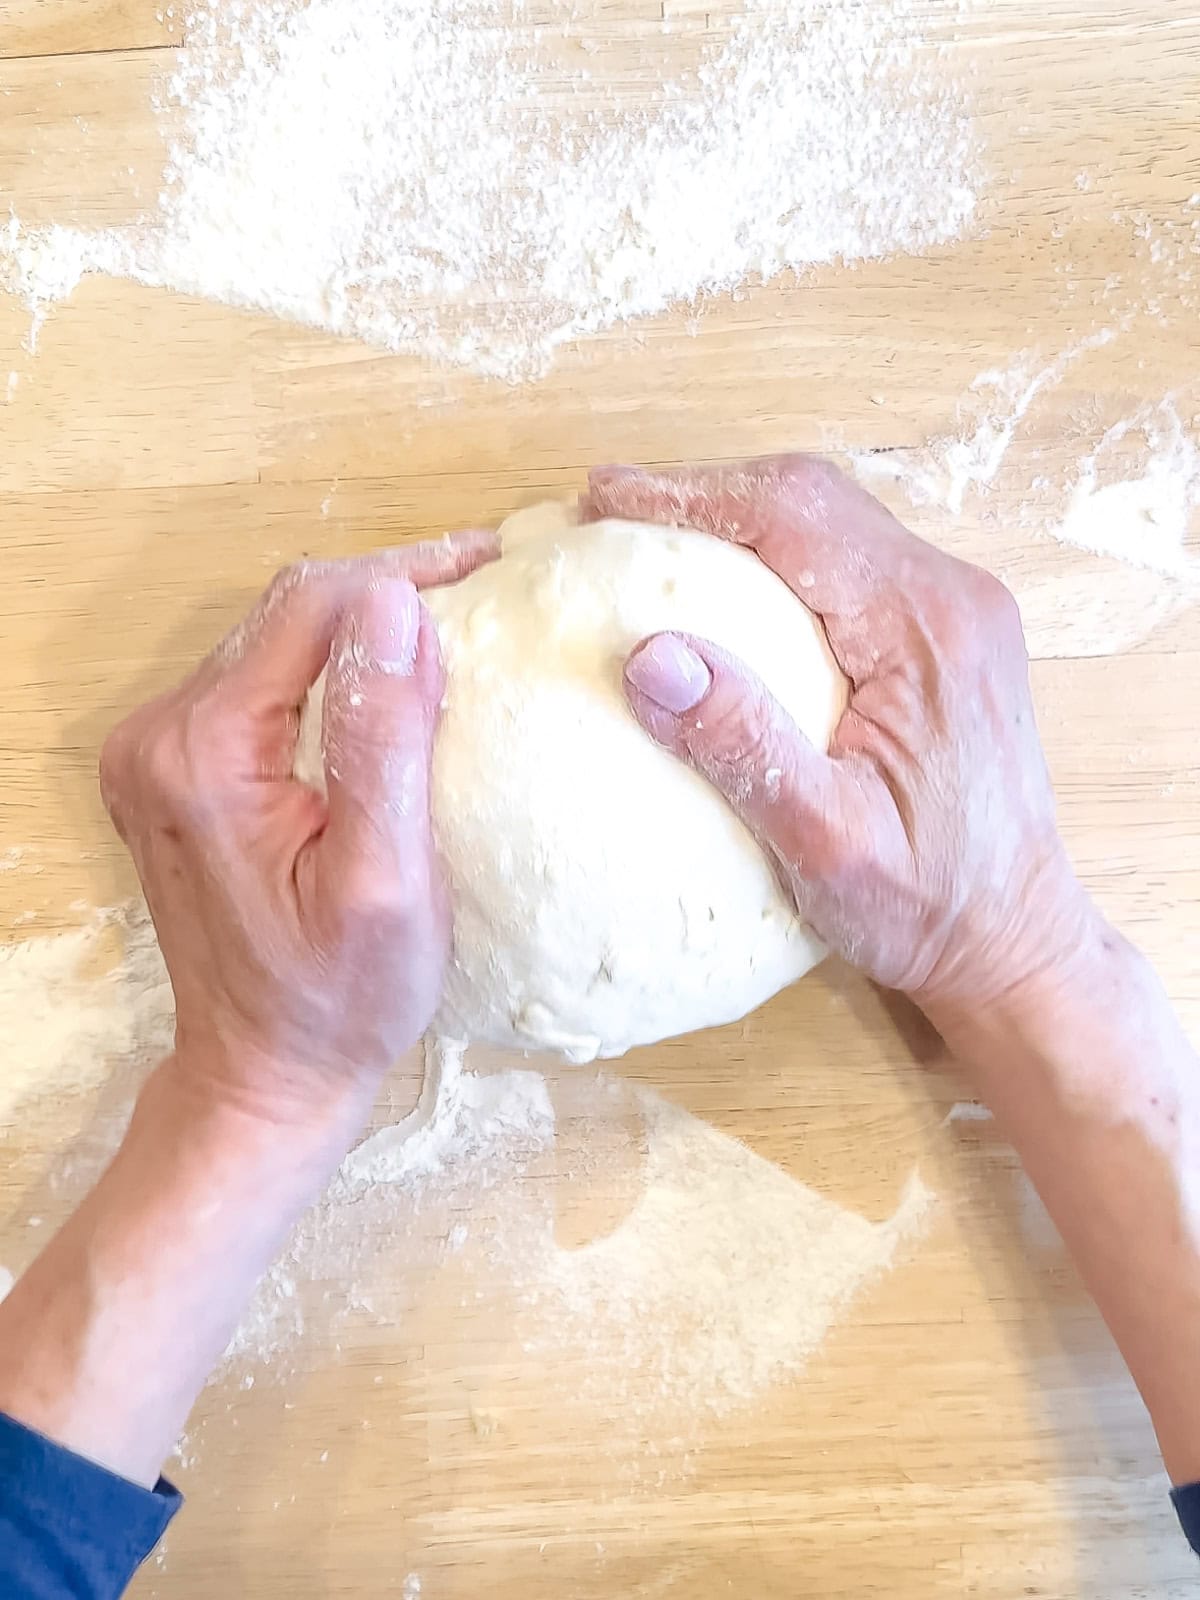
Step 4: Then, flip the dough over so the smooth side is facing up. Using your hands, carefully tuck the edges underneath as you rotate the dough, pulling it toward the center to create tension on the top. This will help form a round, tight shape.
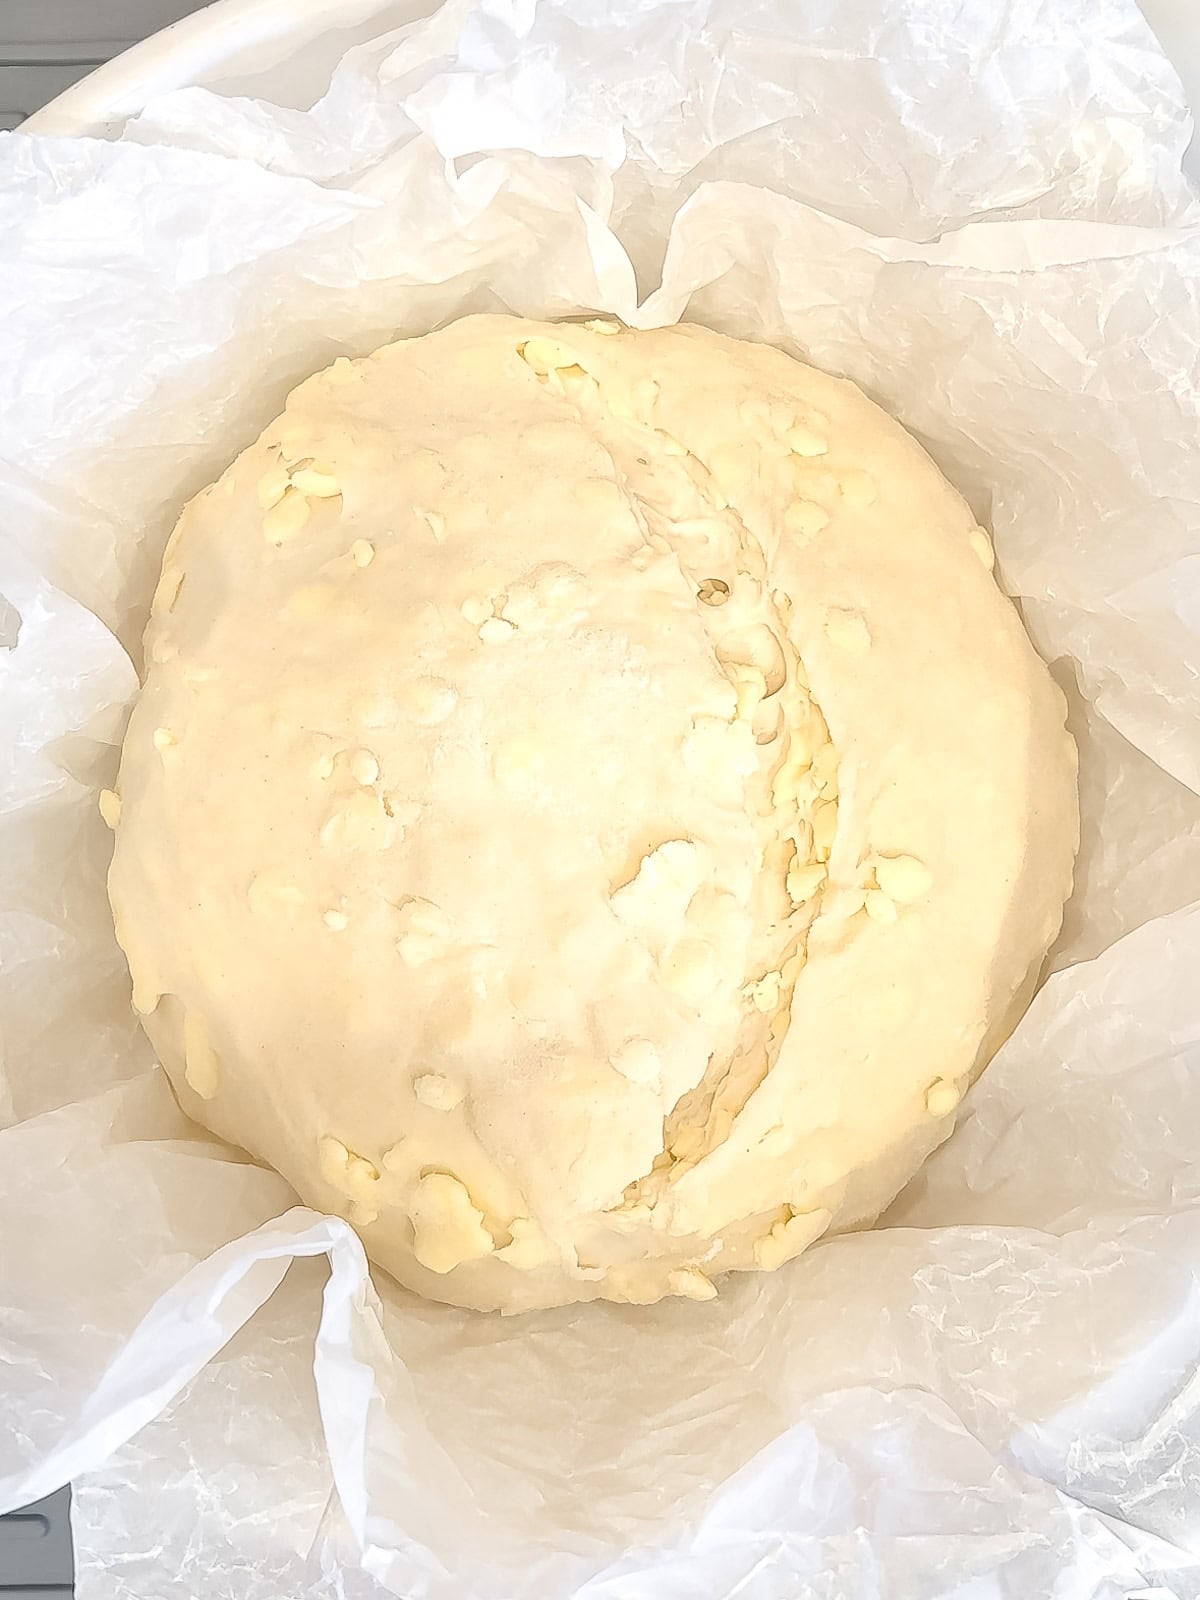
Once it's nicely shaped, place it into a parchment paper lined bowl or proofing basket, and chill in the refrigerator for one hour while you preheat the oven and a medium dutch oven with a lid or a lidded bread pot to 450°F (230°C).
Chill, Score, and Bake
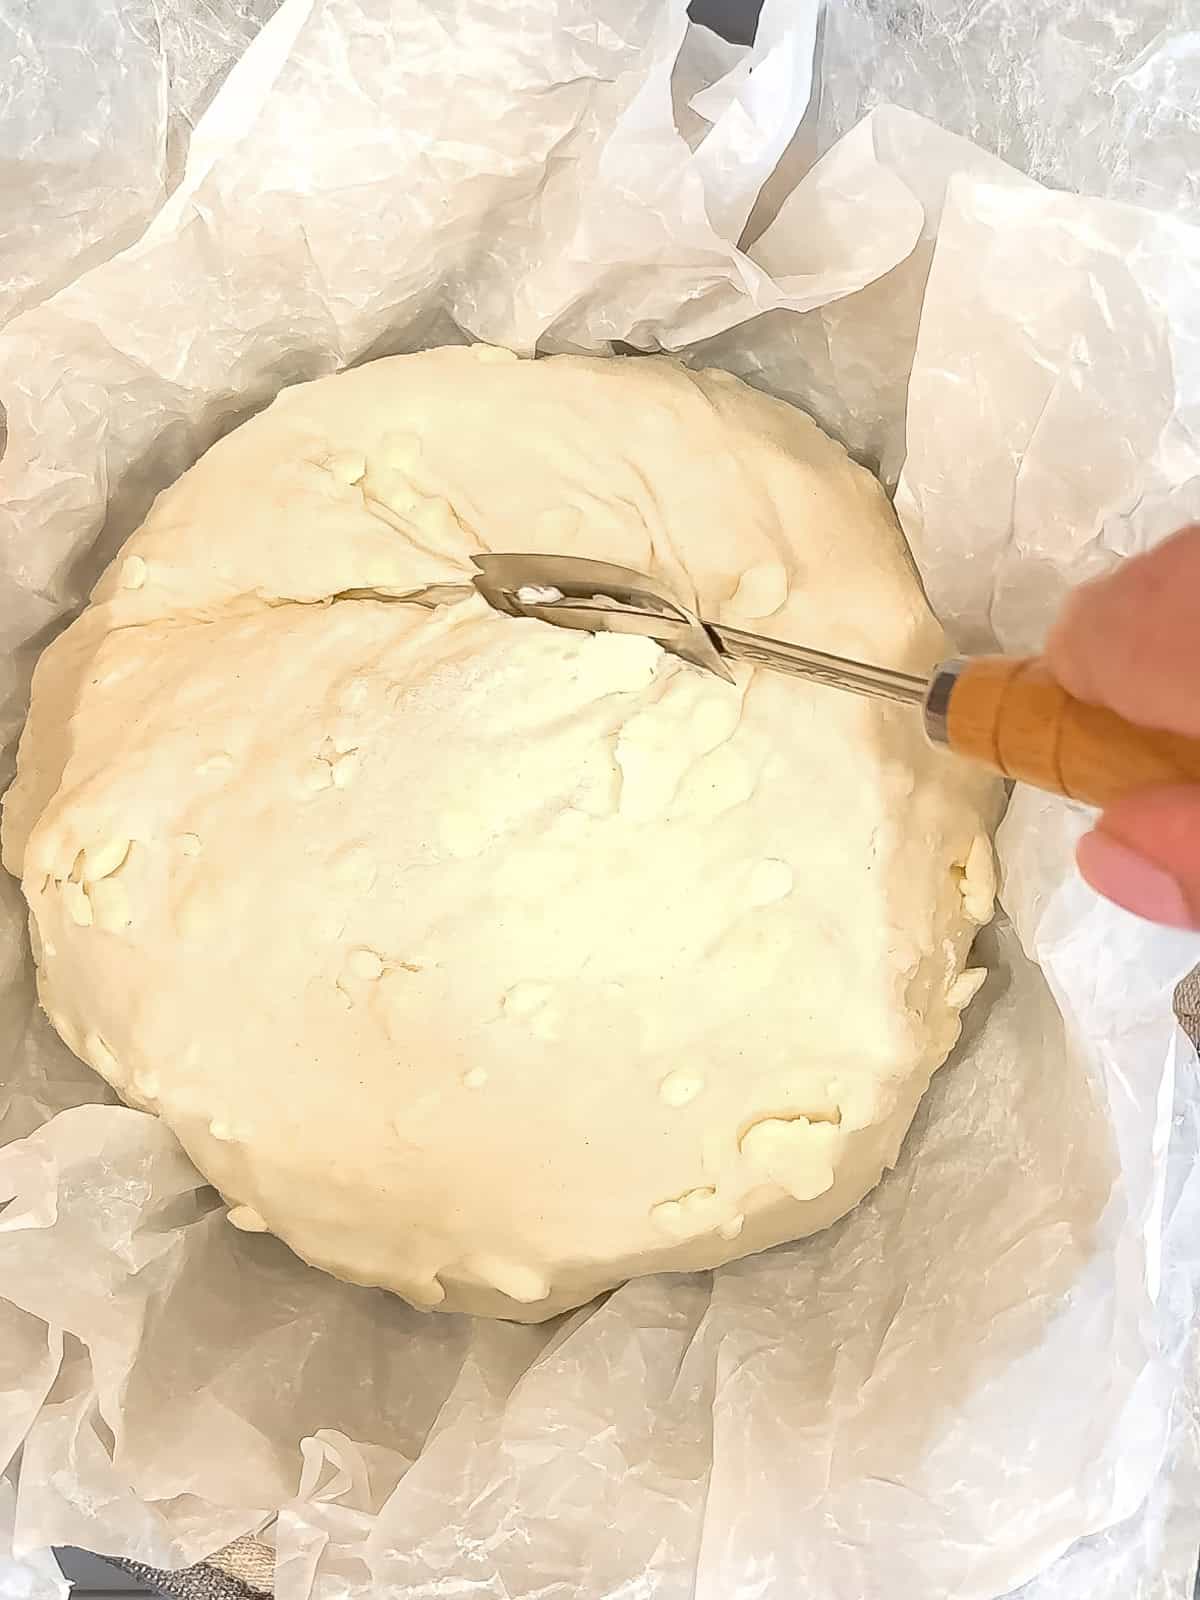
Step 1: If desired, using a very sharp knife, make score marks across the top of the dough. about ¼ to ½ inch deep. This gives the bread a place to open as it expands, allowing for a fuller rise and more airy interior. Remove your medium dutch oven or bread pot from the oven and remove the lid.
Step 2: Use the parchment paper to transfer your boule into the hot baking vessel. Place the lid back on and bake for 30 minutes. Then, carefully remove the lid and bake for another 15-20 minutes, or until the crust is golden brown. To check if the bread is fully baked, insert an instant-read thermometer into the loaf-it should read between 205° to 210°F (95 to 99°C)
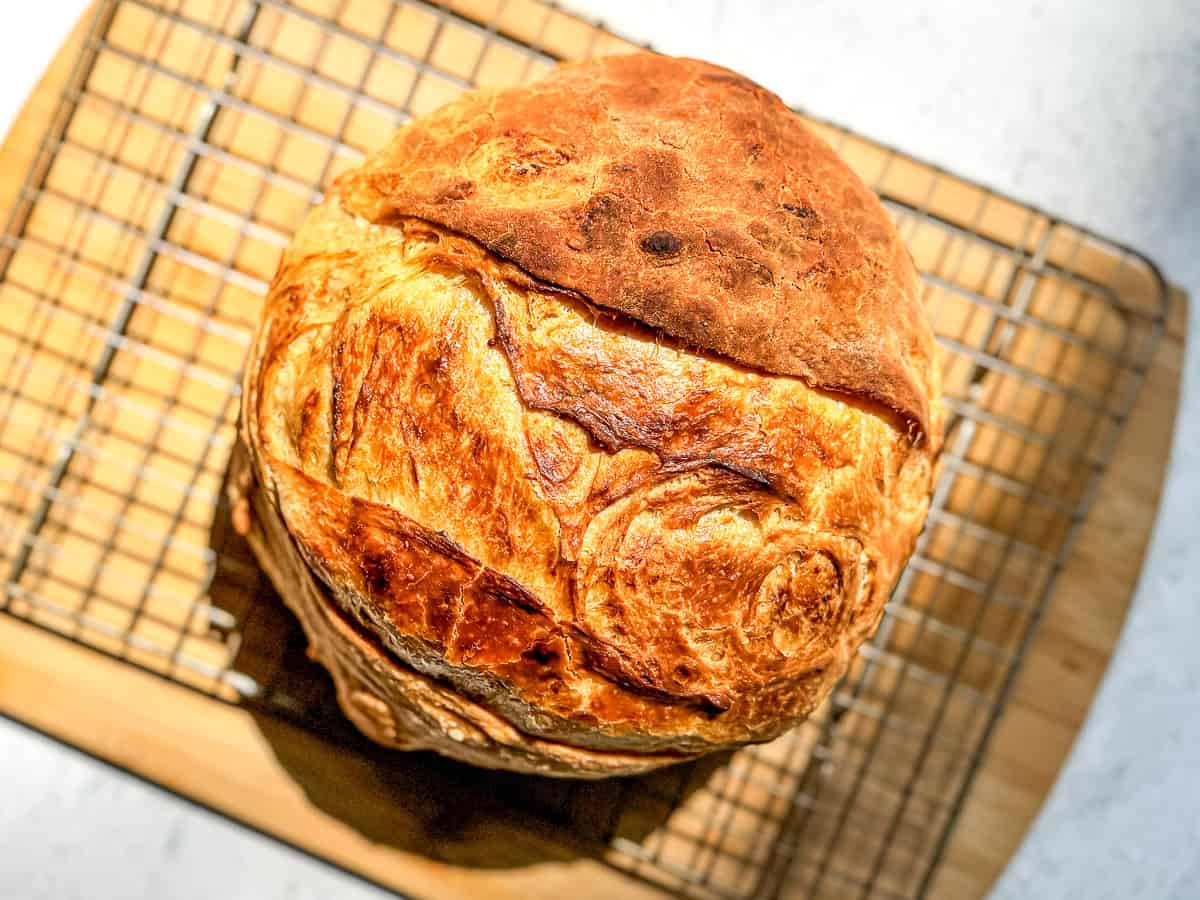
Remove pot from oven and remove bread, using the parchment as a carrier. Place the bread on a cooling rack and allow to cool completely before slicing (I know, it's soooo hard!). Store bread in a paper bag, wrapped in a light kitchen towel, for 2 to 3 days to keep it fresh.
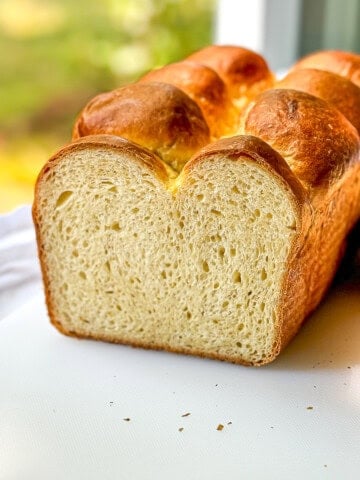
Baking as a Sandwich Loaf
If you prefer, you can shape this as a sandwich loaf and bake it in an 8 inch loaf pan. It won't retain the crispy crust after it cools, but when toasted the outside edge becomes crunchy and flaky and the inside is buttery and delicious. Here's how:
Step 1: After the dough has rested from its final fold, gently pat it into a rectangle with the short side about the length of an 8 inch loaf pan. Begin rolling upwards.
Step 2: Roll the dough tightly into a log, pinching the seam to seal as you go.
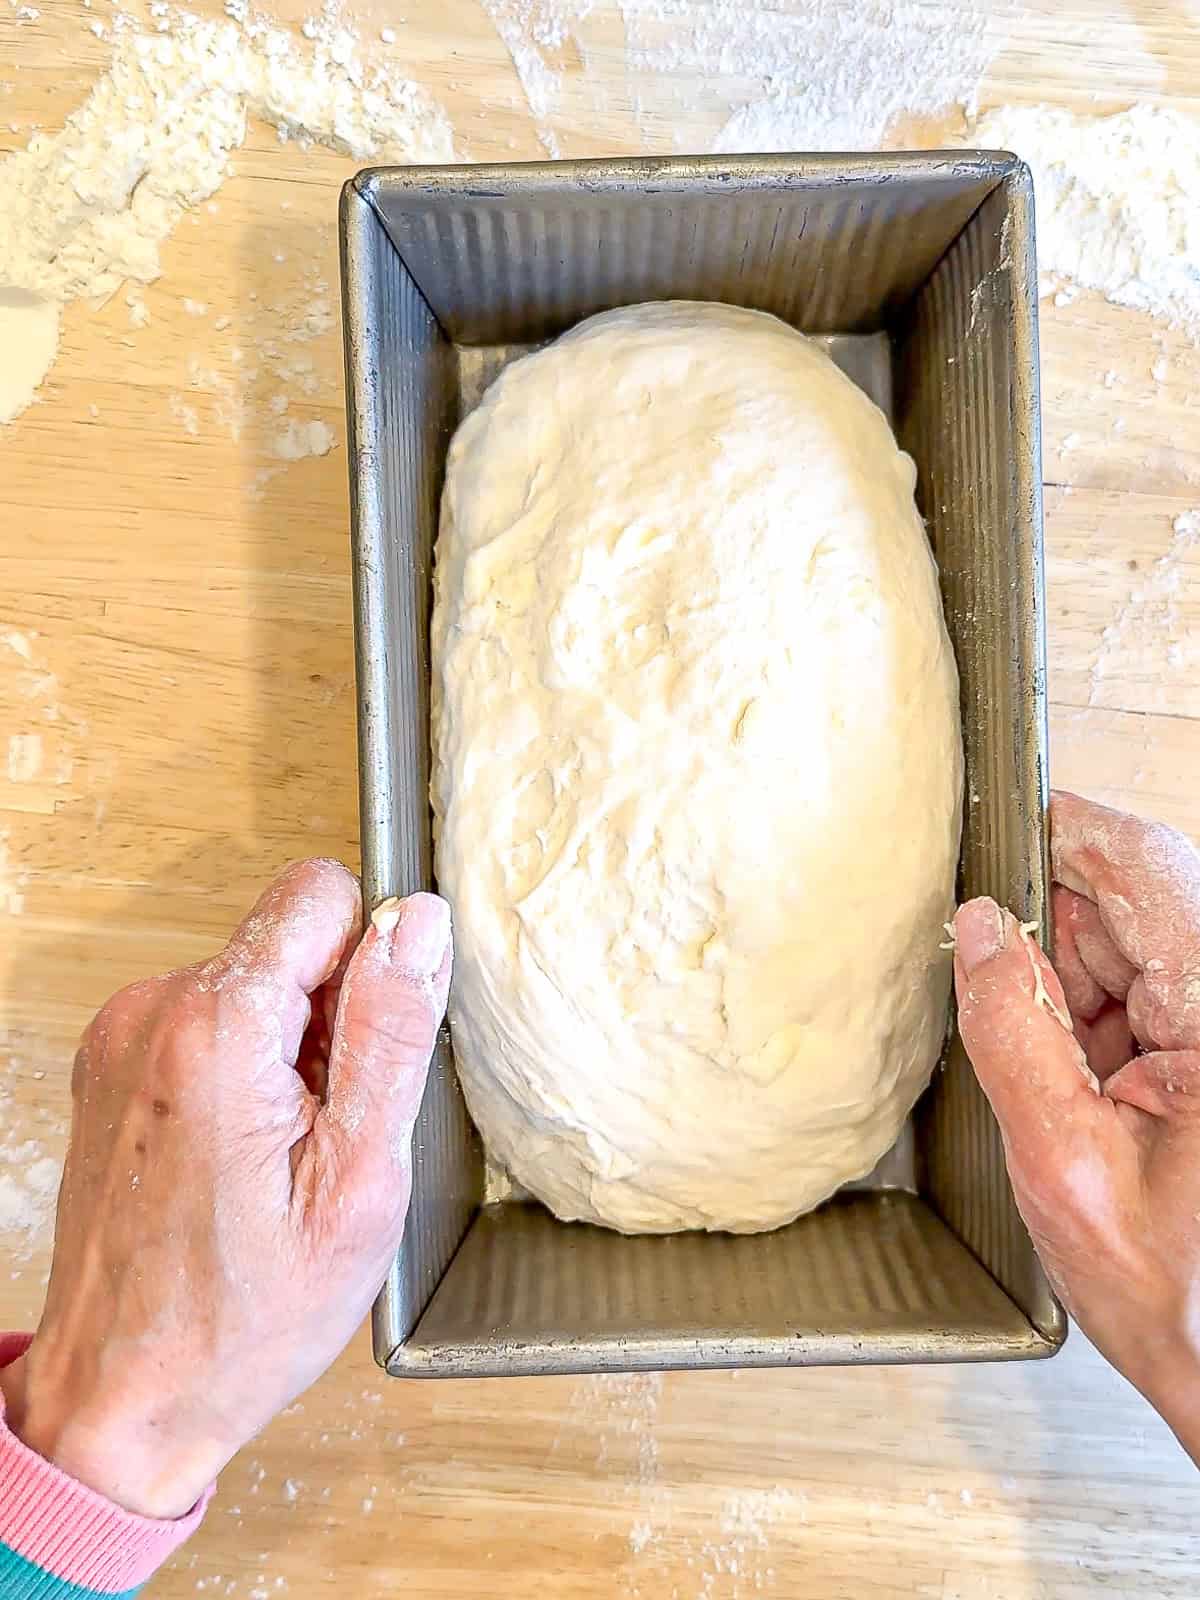
Step 3: Place the loaf seam-side down into a greased pan. Cover and chill in the fridge for an hour while you preheat the oven.
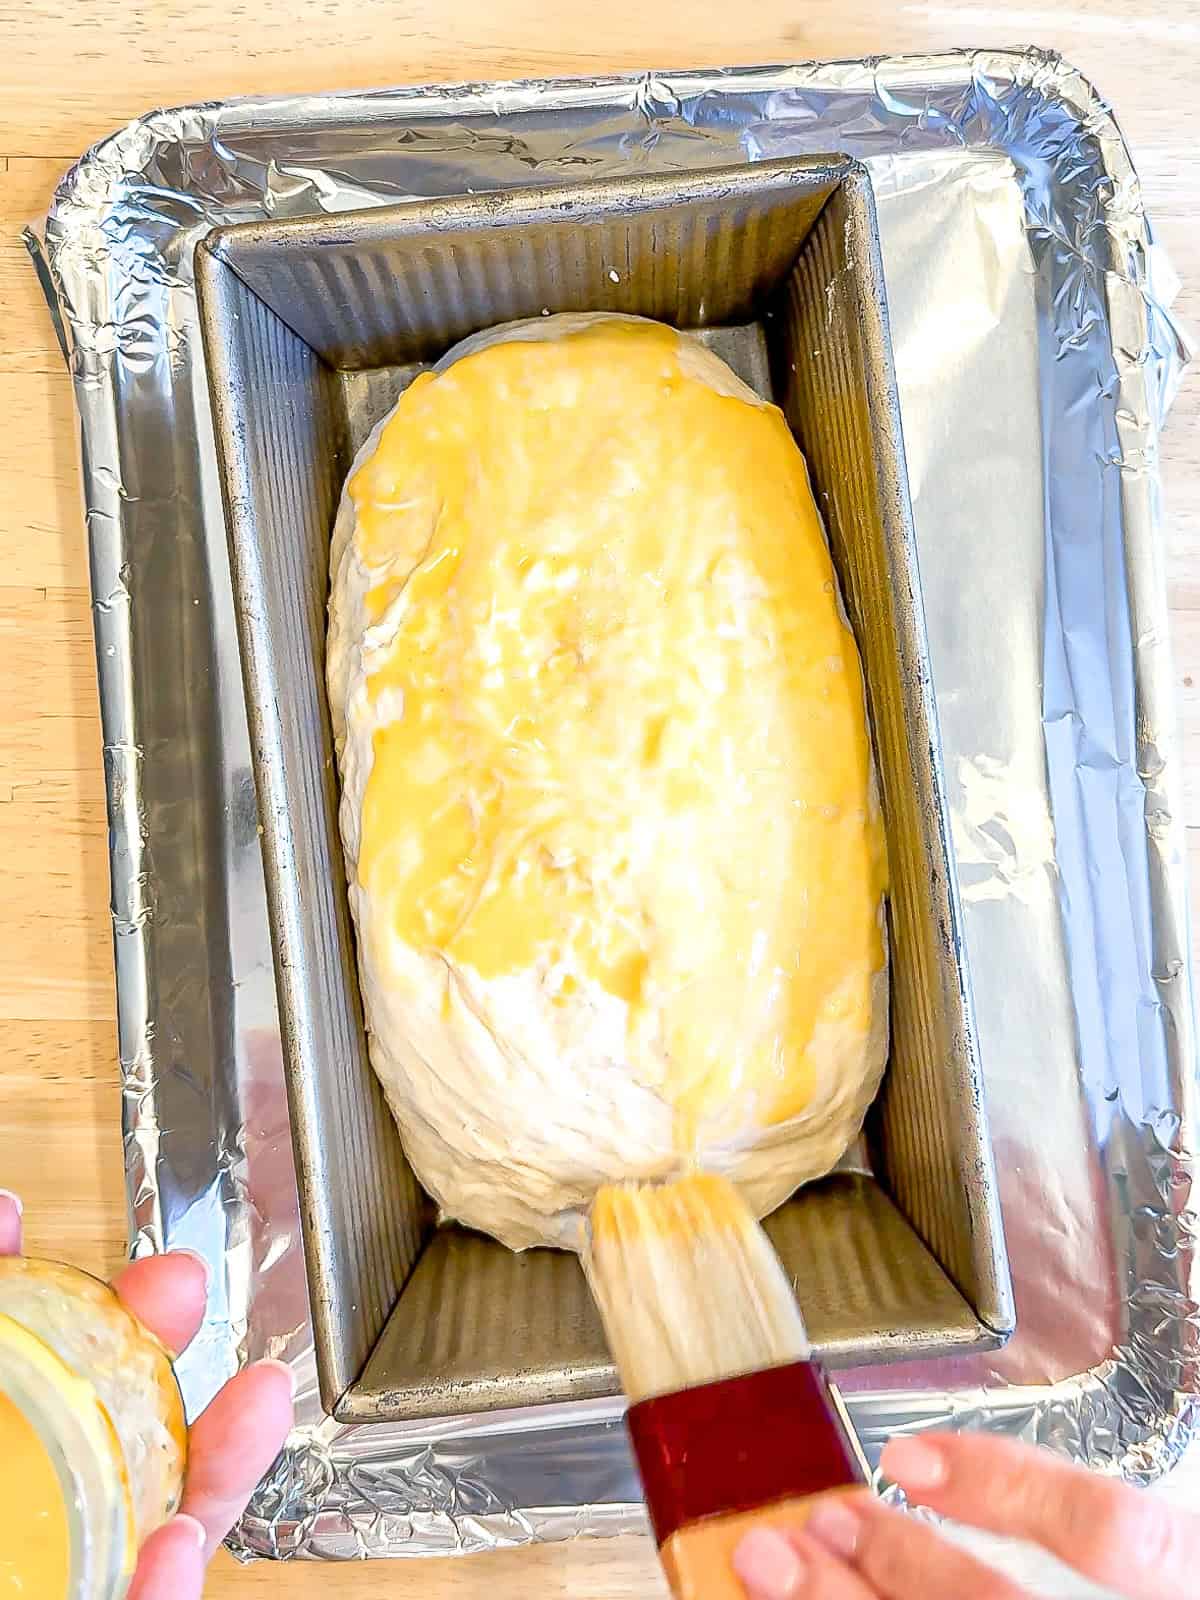
Step 4: Brush with an egg wash made of one egg whisked with one tablespoon of water. Place on a sheet pan to catch any butter that may spill out during baking.
Bake: Bake for 30 minutes, then tent with aluminum foil and bake for another 15 to 20 minutes, or until golden brown and the internal temperature is 205°f to 210°f. Let cool in the pan for 15 minutes, then transferred to a wire rack and cool completely before slicing and enjoying.
Recipe tips
No matter your bread experience level, there is no reason you can't make a delicious croissant loaf, even if it's your first time making any bread! Here are some helpful tips for novice bread bakers to ensure success with your no-knead croissant loaf:
- Use a digital scale: For accuracy in your measurements, especially with flour and water, I measure everything in grams. As always, I include cup measurements, along with weight measurements, but bread baking is much more reliable with precise ratios. I greatly encourage you to invest in an inexpensive food scale, for all your baking endeavors.
- Pay attention to your dough's consistency: No-knead dough should be sticky and shaggy at first, not smooth. Don't worry if it looks a bit messy at first-it will come together after the overnight rise and with the folds. Trust the process.
- Room temperature matters: If your kitchen is too cold, the dough might take longer to rise. Try placing the dough in a warm, draft-free spot, or use the oven with just the light on.
- Be gentle with the dough: When you're folding the dough, avoid pressing too hard. You want to preserve the air bubbles for a light, airy loaf.
- Flour your surface lightly: When shaping the dough, use just enough flour to keep it from sticking. Too much flour can make the dough tougher.
- Chill your dough before baking: The key to developing layers in any laminated dough is for the butter to be very cold when it hits the hot oven. Much like when making my flaky biscuits, when it hits the hot oven, the water in the butter evaporates and pushes upwards, creating layers.
- Check the temperature: For the perfect bake, use an instant-read thermometer. A loaf that's fully baked will reach 205-210°F in the center.
- Let it cool before slicing: This is a hard one, but resist the temptation to cut the bread immediately. Let it cool for at least 30 minutes to set the crumb and avoid a doughy texture.

Recipe FAQs
The dough should have a bubbly, slightly domed top and should stretch across the bowl after the bulk fermentation. If it's not rising, try moving it to a warmer area and allow more time for it to ferment and rise.
Yes, you can refrigerate the dough after the bulk fermentation for up to 24 hours. Just let it come to room temperature before adding the butter, folding, and shaping.
The dough should look bubbly, slightly puffed, and have some elasticity. When you fold it, it should feel stronger but still a bit relaxed-don't worry if it resists at first!
Store the cooled bread in a paper bag or wrapped in a clean kitchen towel (I use both!) at room temperature for 2-3 days. This keeps the crust crispy while preventing the bread from drying out.


Did you try this recipe?
Please consider leaving a comment with a ⭐️ rating below and tell me all about it! It helps me to continue to improve my content and lets others know what you think!
I appreciate it so much!
-Cynthia
📖 Recipe

No Knead Croissant Bread (Without Sourdough)
Ingredients
- 3 cups (360 g) bread flour
- 1 ½ teaspoon (9 g) kosher salt
- ¾ cups (170 g) unsalted butter Divided in three ¼ cup inclusions (1 ½ sticks American sticks)
- 1 teaspoon (3) instant yeast can use active dry yeast
- 1 ¼ cup (300 g) warm water
Instructions
Making Dough and Bulk Fermentation
- Add all purpose flour, salt, and the first inclusion of ¼ cup (½ stick) cold and cubed butter to your food processor and run until the butter is completely incorporated into the flour mixture.
- Add in room temperature tap water and your instant yeast. If using active dry yeast, dissolve in some warm water to activate it before adding to the butter-flour mixture.
- Use a Danish dough whisk, or a sturdy spoon, to mix everything together until all of the dry flour mixture has been incorporated. Cover with plastic wrap, or a disposable shower cap, and leave at room temperature on the counter overnight, or at least 12 hours.
- In the morning, your no-knead dough should look bubbly on top, with a flat or slightly rounded surface that stretches all the way across the bowl.
Incorporating Butter: First Fold
- Add your second inclusion of ¼ cup cold butter, this time grated straight out of the fridge or freezer, on the top of your dough.
- Start your folds by gently grabbing one side of the dough, stretching it up and over the butter, and folding it over to the opposite side.
- Turn the bowl a quarter turn and repeat-stretch up and fold over. Do this two more times, turning the bowl each time, until you've folded all four "sides" of the dough. That's one full set of folds. Cover and let the dough rest for 30 minutes in a warm spot of your kitchen.
Incorporating Butter: Second Fold
- Add the final inclusion of ¼ cup cold grated butter on top of your risen dough.
- Perform another full set of four folds, enclosing as much of the butter as possible. Some of the butter may peek out, but don't get crazy about it. There are two more sets of folds coming. Cover the bowl and let the dough rest another 30 minutes.
Third and Fourth Folds: No Butter Added
- Perform two more more sets of folds, with a 30 minute rest between them. As the dough gets stronger, it may become more resistant to stretching, but that's a good sign-it means the gluten is developing.
- If you find it tough to stretch the dough, try using one hand to gently hold the dough down while you stretch and fold with the other. This will help you maintain control and prevent the dough from pulling away. Cover and let rest another 30 minutes.
Shaping Boule (Round Bread Shape)
- Gently turn the dough out onto a lightly floured counter and use your hands to stretch and fold the edges of the dough inward, starting by folding the top half over. Then pull the two top "corners" or "wings" in towards the center.
- Then bring up the bottom two wings and fold up the bottom half, forming a ball shape.
- Then, flip the dough over so the smooth side is facing up. Using your hands, carefully tuck the edges underneath as you rotate the dough, pulling it toward the center to create tension on the top. This will help form a round, tight shape.
- Once it's nicely shaped, place it into a parchment paper lined bowl or proofing basket, and chill in the refrigerator for one hour while you preheat the oven and a medium dutch oven with a lid or a lidded bread pot to 450°F (230°C).
Chill, Score, and Bake
- If desired, using a very sharp knife, make score marks across the top of the dough. about ¼ to ½ inch deep. This gives the bread a place to open as it expands, allowing for a fuller rise and more airy interior. Remove your medium dutch oven or bread pot from the oven and remove the lid.
- Use the parchment paper to transfer your boule into the hot baking vessel. Place the lid back on and bake for 30 minutes.
- After 30 minutes, carefully remove the lid and bake for another 15-20 minutes, or until the crust is golden brown. To check if the bread is fully baked, insert an instant-read thermometer into the loaf-it should read between 205° to 210°F (95 to 99°C)
- Remove pot from oven and remove bread, using the parchment as a carrier. Place the bread on a cooling rack and allow to cool completely before slicing (I know, it's soooo hard!). Store bread in a paper bag, wrapped in a light kitchen towel, for 2 to 3 days to keep it fresh.


Christina says
I couldn't wait to make this recipe. As all your recipes are fantastic! I finally made this today and it is amazing!! Light and airy and buttery on the inside and crispy on the outside. I will be making this over and over.
Nickole Skembo says
What did I do wrong? Mine came out in a pool of butter
Cynthia Christensen says
Thanks so much for trying the recipe! There will be some pooling of butter in the bottom bottom of the pan, which is why I tell you to line your pan with parchment paper, so the butter won't burn on the bottom. It will absorb as your loaf rests. A pool of butter that doesn't absorb means the dough didn’t quite hold the butter in place during baking. That can happen for a few reasons, but the most common reason is the butter got too soft while you were doing the folds, allowing it to seep out during baking. Try chilling the dough between folds to keep everything cold and remember to chill it for a FULL HOUR after you finish the last fold. If you’d like to send a photo or tell me more about what the dough felt or looked like at different stages, I’d be happy to help troubleshoot further. I want you to get that perfect flaky loaf!
Christine says
This bread was delicious! It was super great dipped in soup! This will definitely be a regular bake in my house! Thank you so much!
Christine says
Hello! I just wanted to check on the butter amounts. It says 340g is 1.5 sticks. But a stick of butter only weighs 113 grams. Just wanting to clarify! Thank you!
Cynthia Christensen says
Great catch! I love you guys so much because you got my back. I typed "1 1/2 cups" and I thought I typed one and a half sticks, which I shouldn't anyway because that doesn't mean anything outside of America. I have changed it. It is 170 g or 3/4 of a cup of butter.
Cynthia Christensen says
My family's new favorite bread!