
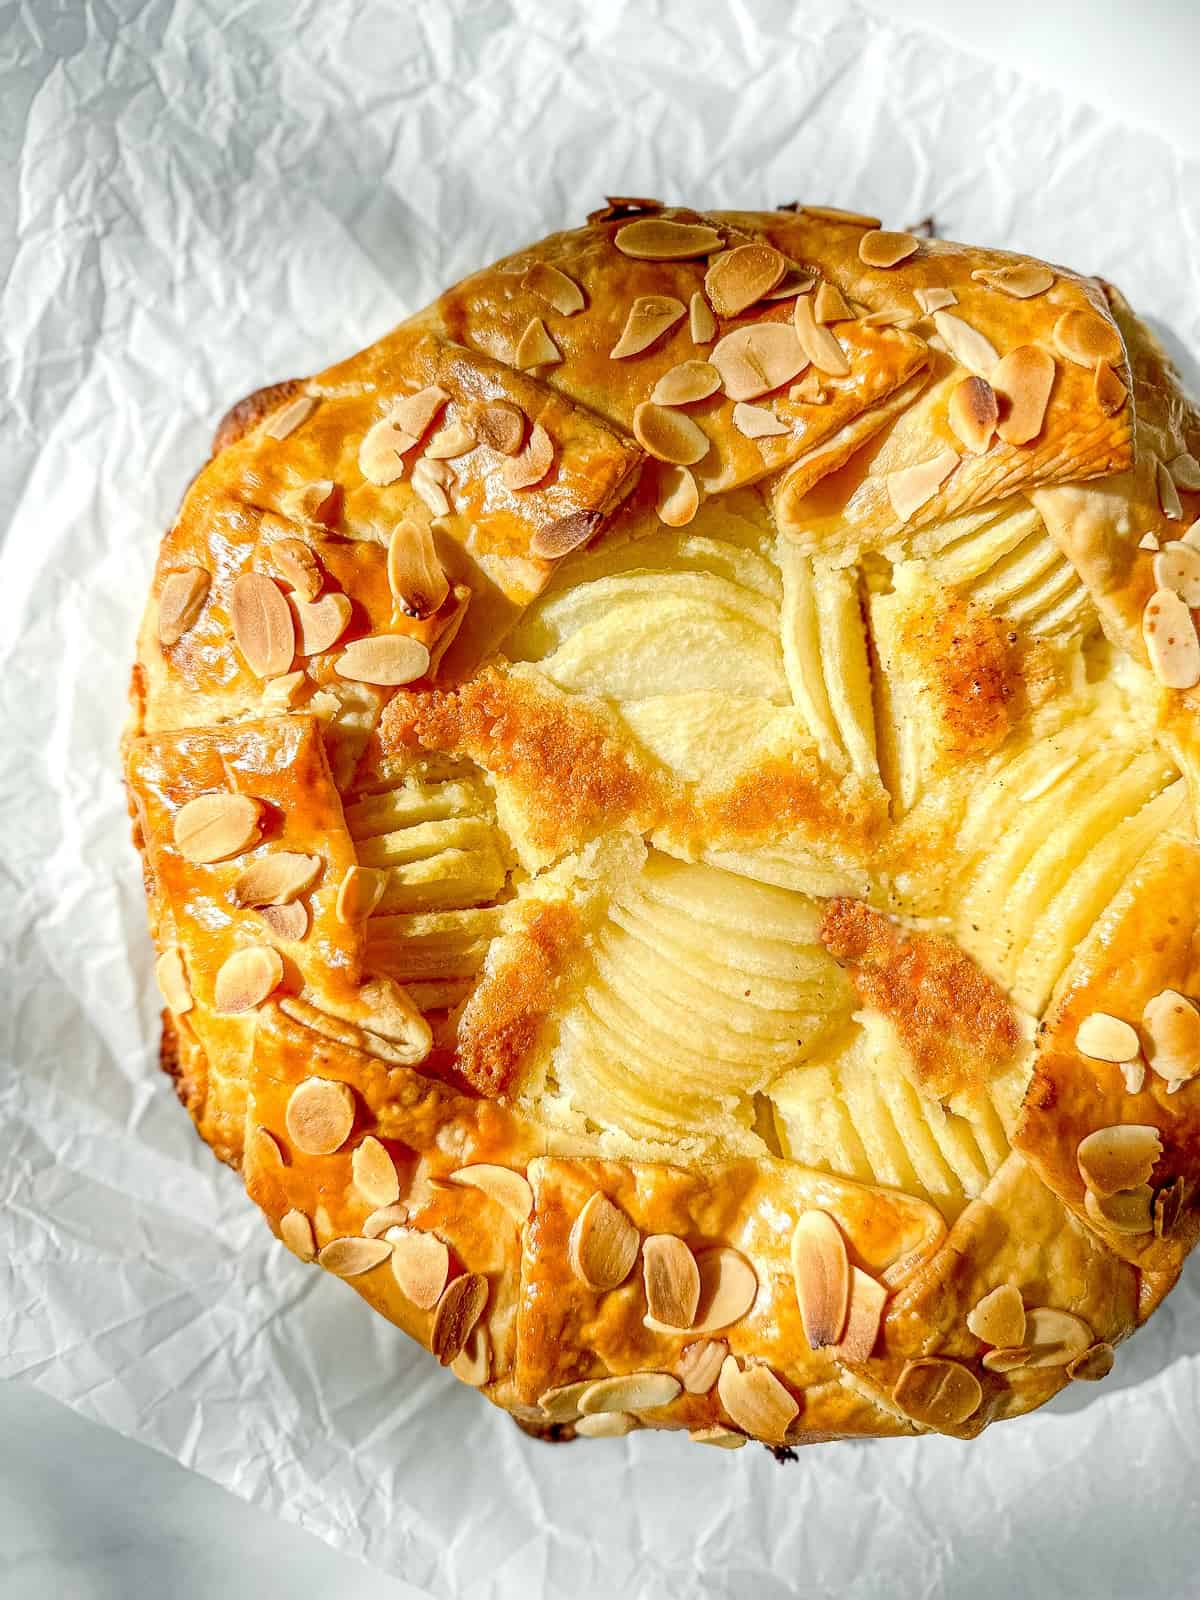
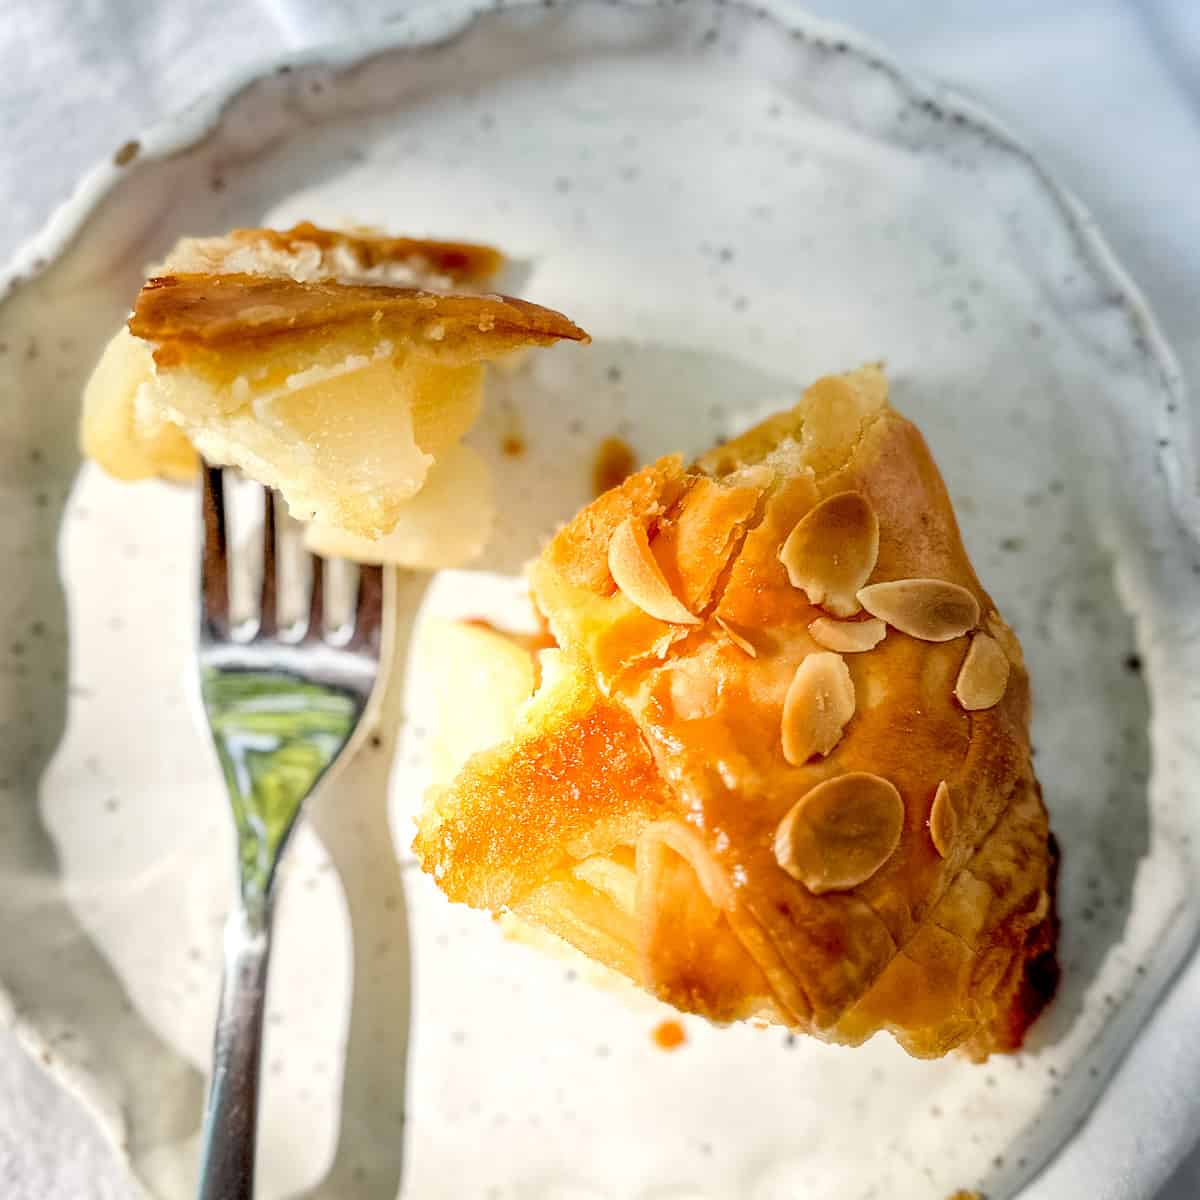
The classic flavors of pear and frangipane are presented beautifully and easily in this free form Pear Frangipane Galette with a buttery crust and a rich almond filling. This is the perfect Fall dessert!
Save This Recipe! 💌
This Pear Frangipane Galette is pretty darn close to being the perfect breakfast or dessert. It just looks so inviting, like a partially opened present, with the gift peeking through the center of the crust. It’s meant to be rustic, which is just a polite way of saying it can, and maybe should, be messy.
The galette dough recipe is practically foolproof. It all comes together in less than a minute in your food processor and it holds all the fillings in a flaky, buttery hug. You can make your own crust or buy one premade (I’m not a dough shamer). The combination of flavors and textures in this galette are absolutely delightful. You're going to love it!
Jump to:
❤️ Why you'll love this recipe
- Quick - While a traditional pie has to bake up to an hour, and needs to rest at least 2 hours before slicing, you can assemble, bake and be eating this Pear Frangipane Galette in less than half the time!
- Easy - With only a single crust that folds up to hug the fruit and frangipane filling, a galette is simple and delicious.
- Crust lover's delight - There is a high crust to filling ratio, for those of us who can't get enough of a crispy, flaky crust.
- No soggy bottom - Having a high crust to filling ratio, and the open top, means that moisture from the filling will evaporate more quickly, ensuring a crispy, not soggy, bottom to your galette.
- Customizable - Pear frangipane is by no means the only thing you can place in a galette crust. Let your cravings and imagination run wild!
Ingredients
As always, I try to make the ingredients in my recipes either ones that you already have in your pantry or are that are easy to find. My goal is to make cooking and baking less intimidating and more approachable. I want you to be able to make delicious food with fresh ingredients and feel confident doing so!

See recipe card below for quantities.
Substitutions
Here are a few easy ingredient substitutions that you can make and still enjoy this Pear Frangipane Galette:
- Flour - When I worked at the bakery, we successfully used King Arthur Baking Company's gluten-free flour to make pie crusts.
- Frangipane - The flavor of frangipane, also known as almond cream, is a perfect base for the pears, but if you are allergic to almonds, but still want frangipane, the almond flour can be replaced with oat flour or coconut flour.
- Pie crust - This recipe includes a simple and delicious buttery crust, but you can absolutely replace it with a store bought crust, such as a Pillsbury pie dough.
Variations
The best thing about a frangipane galette is that you can change things up depending on what's on sale, what you have on hand, or what you're craving!
- Apple - You can absolutely substitute apples for the pears. Use my Apple Galette recipe and add the layer of frangipane beneath the fruit.
- Peach - My Peach Frangipane Galette is a great late Summer galette that can be made year round with frozen peaches!
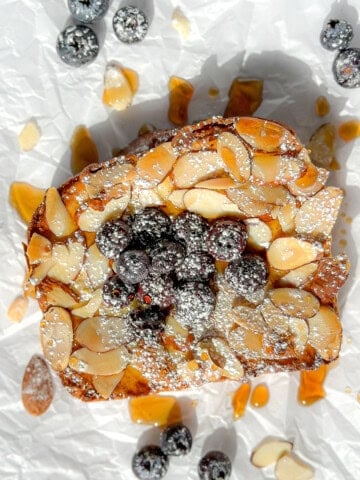
- Berries - Substitute 2 cups of mixed berries for the pears, and just before adding to the galette toss them with 2 tablespoons of sugar, 1 tablespoon of cornstarch, and a squeeze of lemon.
- Citrus - My Winter Citrus Galette has a base of my simple lemon curd and is topped with a variety of seasonal citrus fruits.
- Puff pastry tart - You can also up the fanciness of your Pear Frangipane Galette by using puff pastry in place of the pie crust. Either store bought puff or my simple rough puff pastry will do the trick.
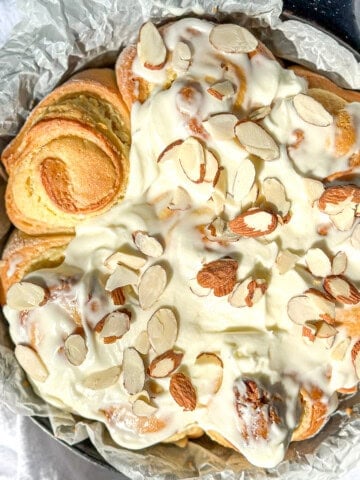
Love almond flavor? Try my Almond Sweet Rolls. A fluffy brioche dough, baked around rich and nutty frangipane, and topped with cream cheese frosting? I'm in!
Equipment
To get the crispiest bottom crust possible, I like to bake my galette on top of my baking steel for the final half of the baking time. A large sheet of steel that resides permanently in my oven, I use it to crisp up the bottoms of my pizzas and focaccias, and its heat retention even helps to regulate the temperature of my oven.
I place my steel on a rack that I have placed in the bottom third of the oven. When you turn the sheet pan with your galette halfway through the baking time, you can place it on the baking steel to ensure a crispy, not soggy, bottom.
Instructions
This recipe is so simple, anyone can do it. Make the crust up to 3 days ahead and keep it in the refrigerator until ready to use and you've already reduced the time loads! Make the frangipane ahead and you're practically done before you start!
Making galette crust
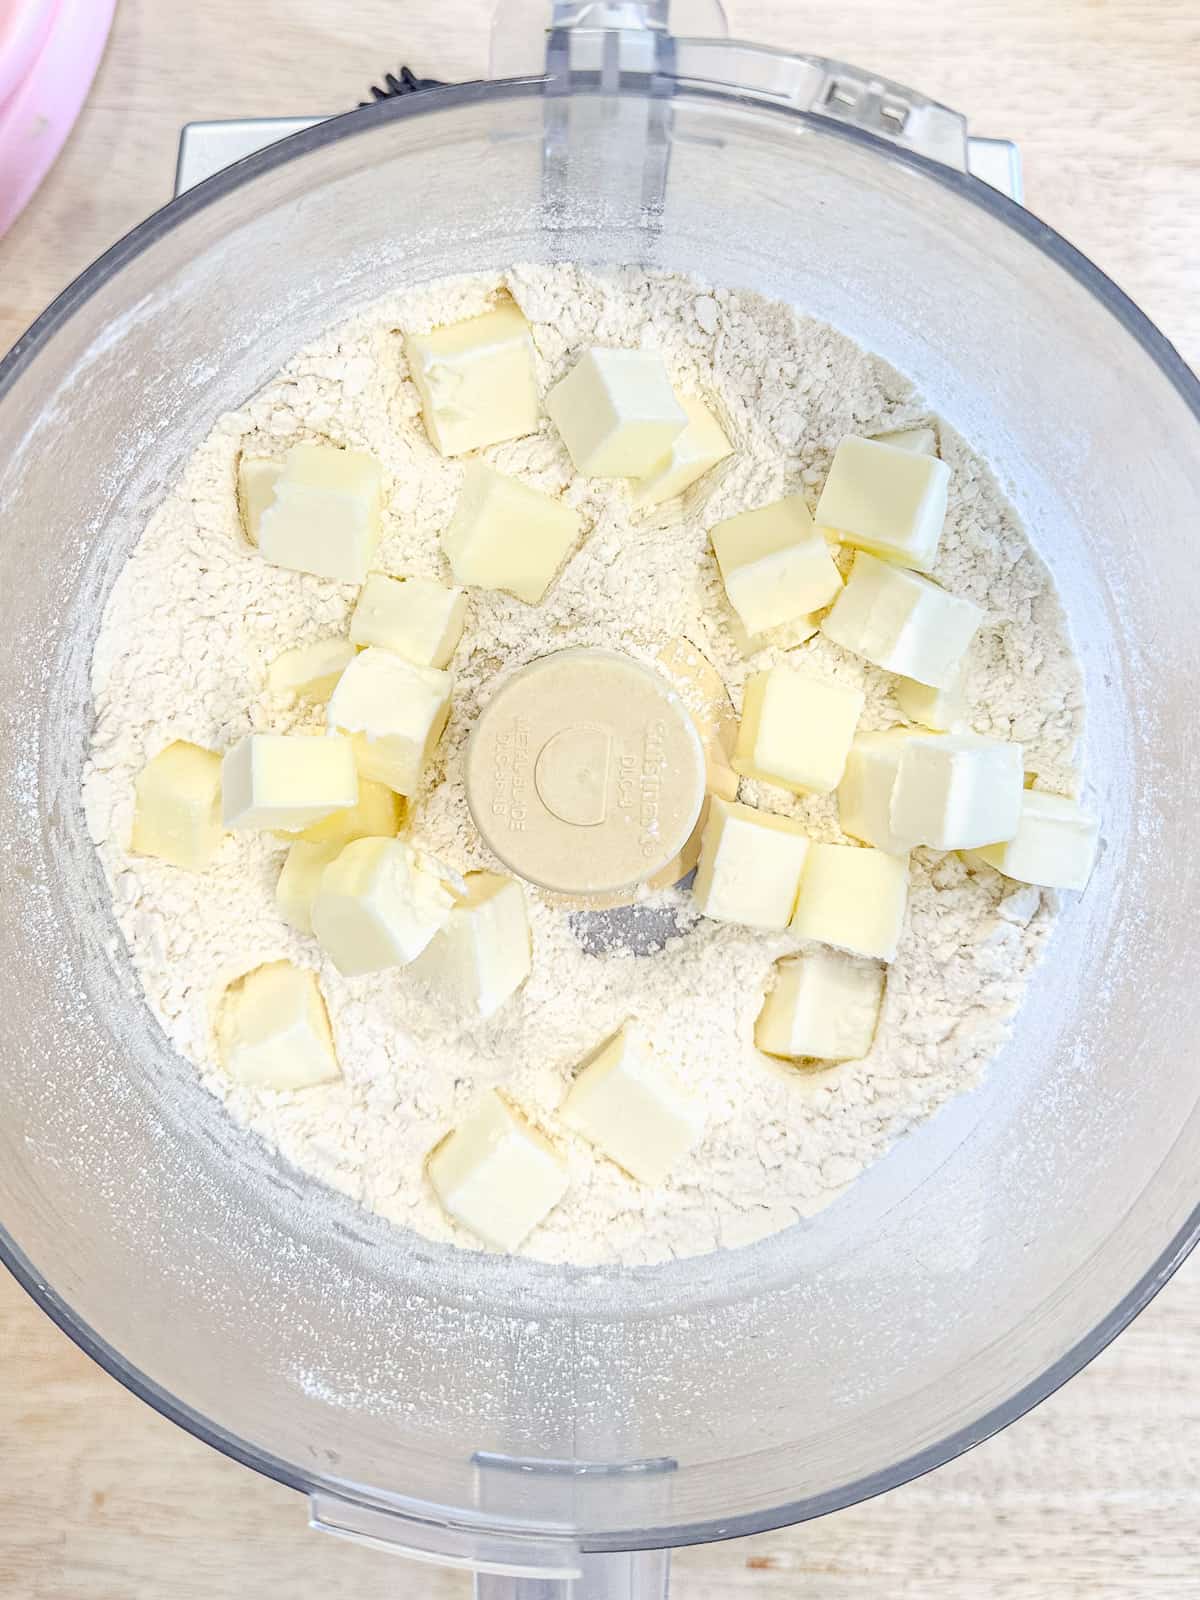
1. Add all the dry ingredients to the bowl of a food processor and pulse for a few times to mix. Add the butter.
2. Pulse the butter and flour together 4 to 5 times, until the butter is about the size of peas. Place ⅓ cup, 80 grams, of water in a measuring cup and add ice to get it as cold as possible. Add 1 teaspoon of lemon juice.

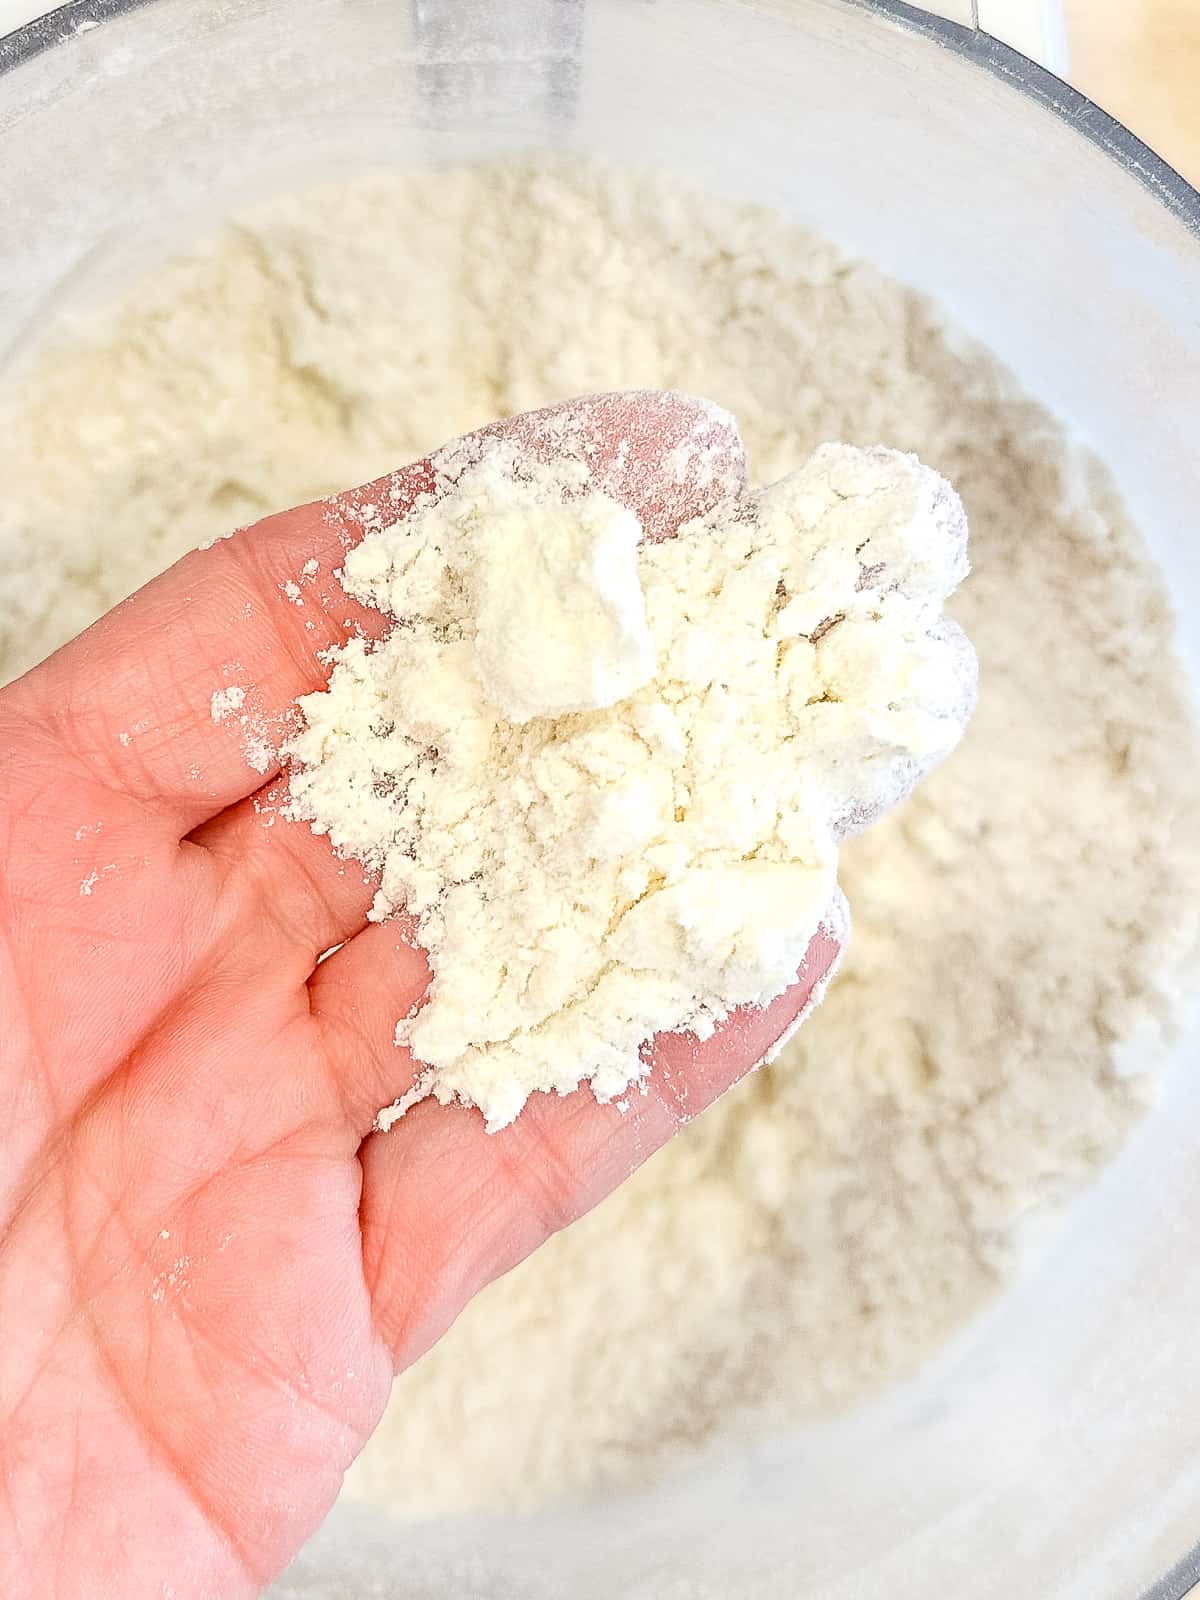
3. Slowly drizzle water/lemon juice into the opening of your food processor, pulsing until the dough just barely comes together. Pinch some of the dough between your fingers. If it clings together, it's done.
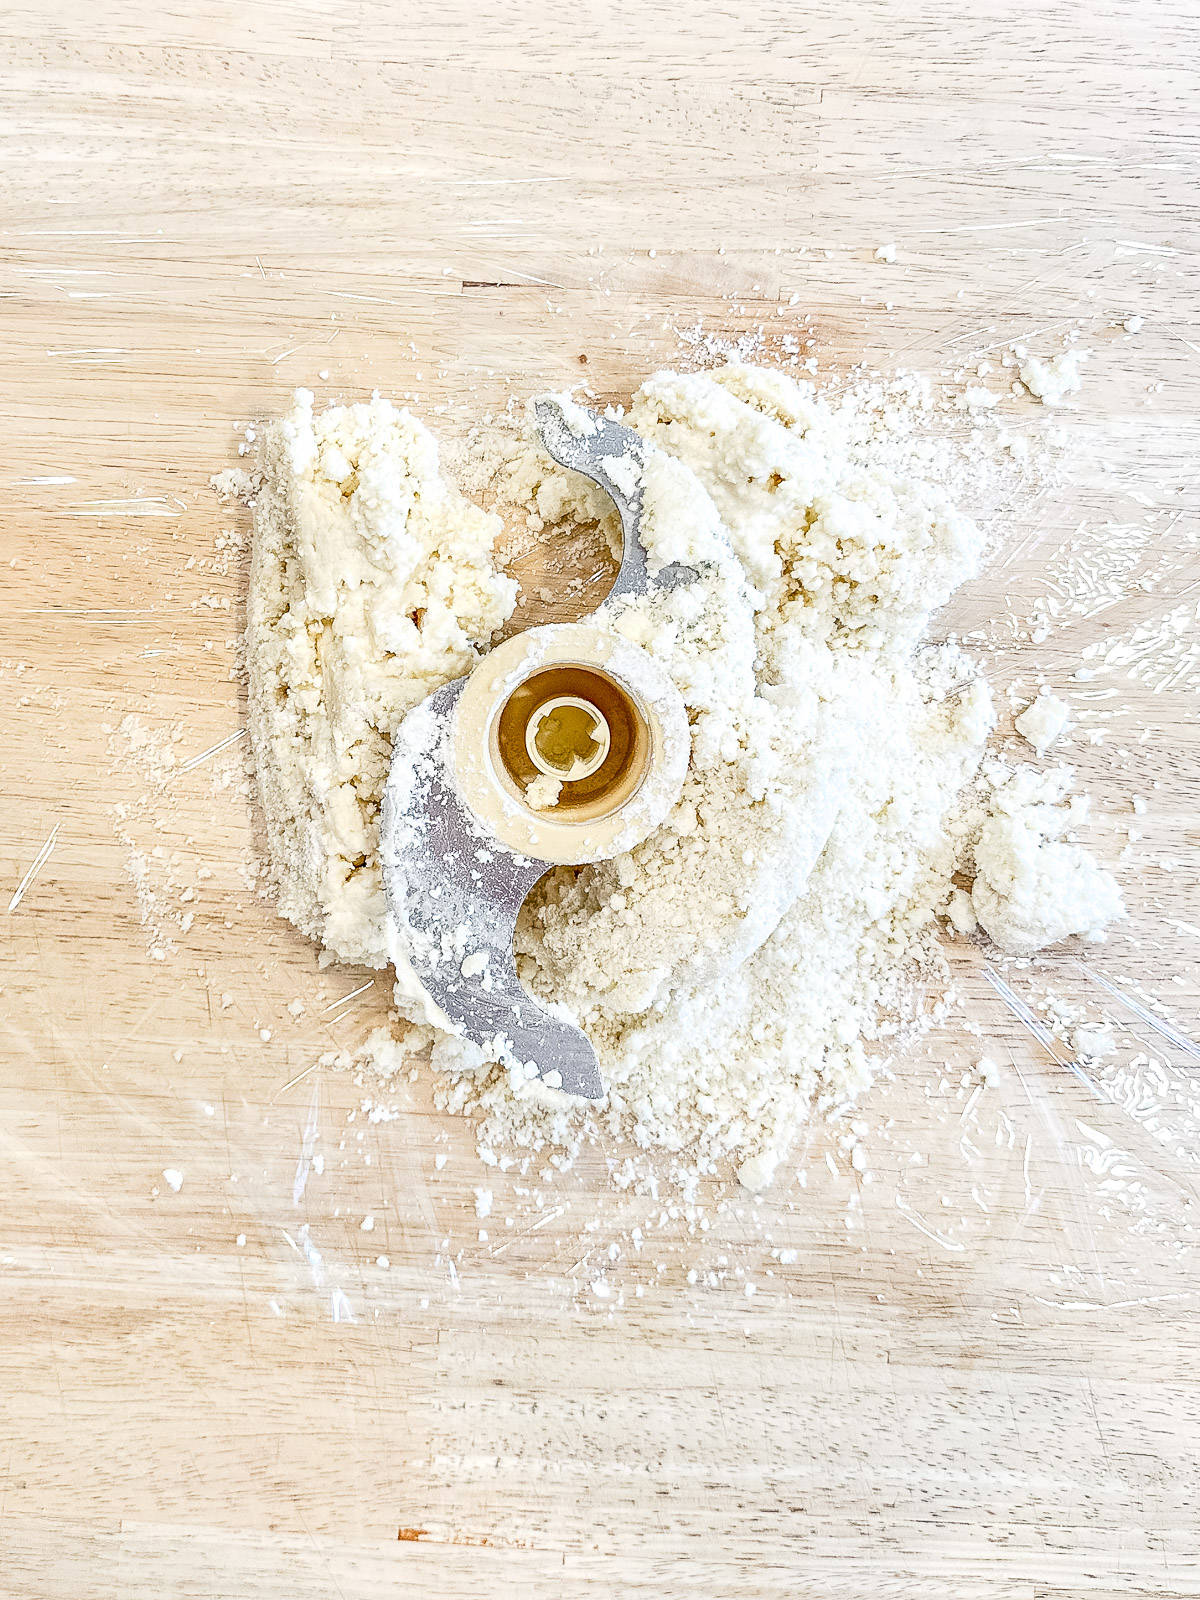
4. Dump all of the dough, scraping the inside of the food processor, onto a piece of plastic wrap on your counter.
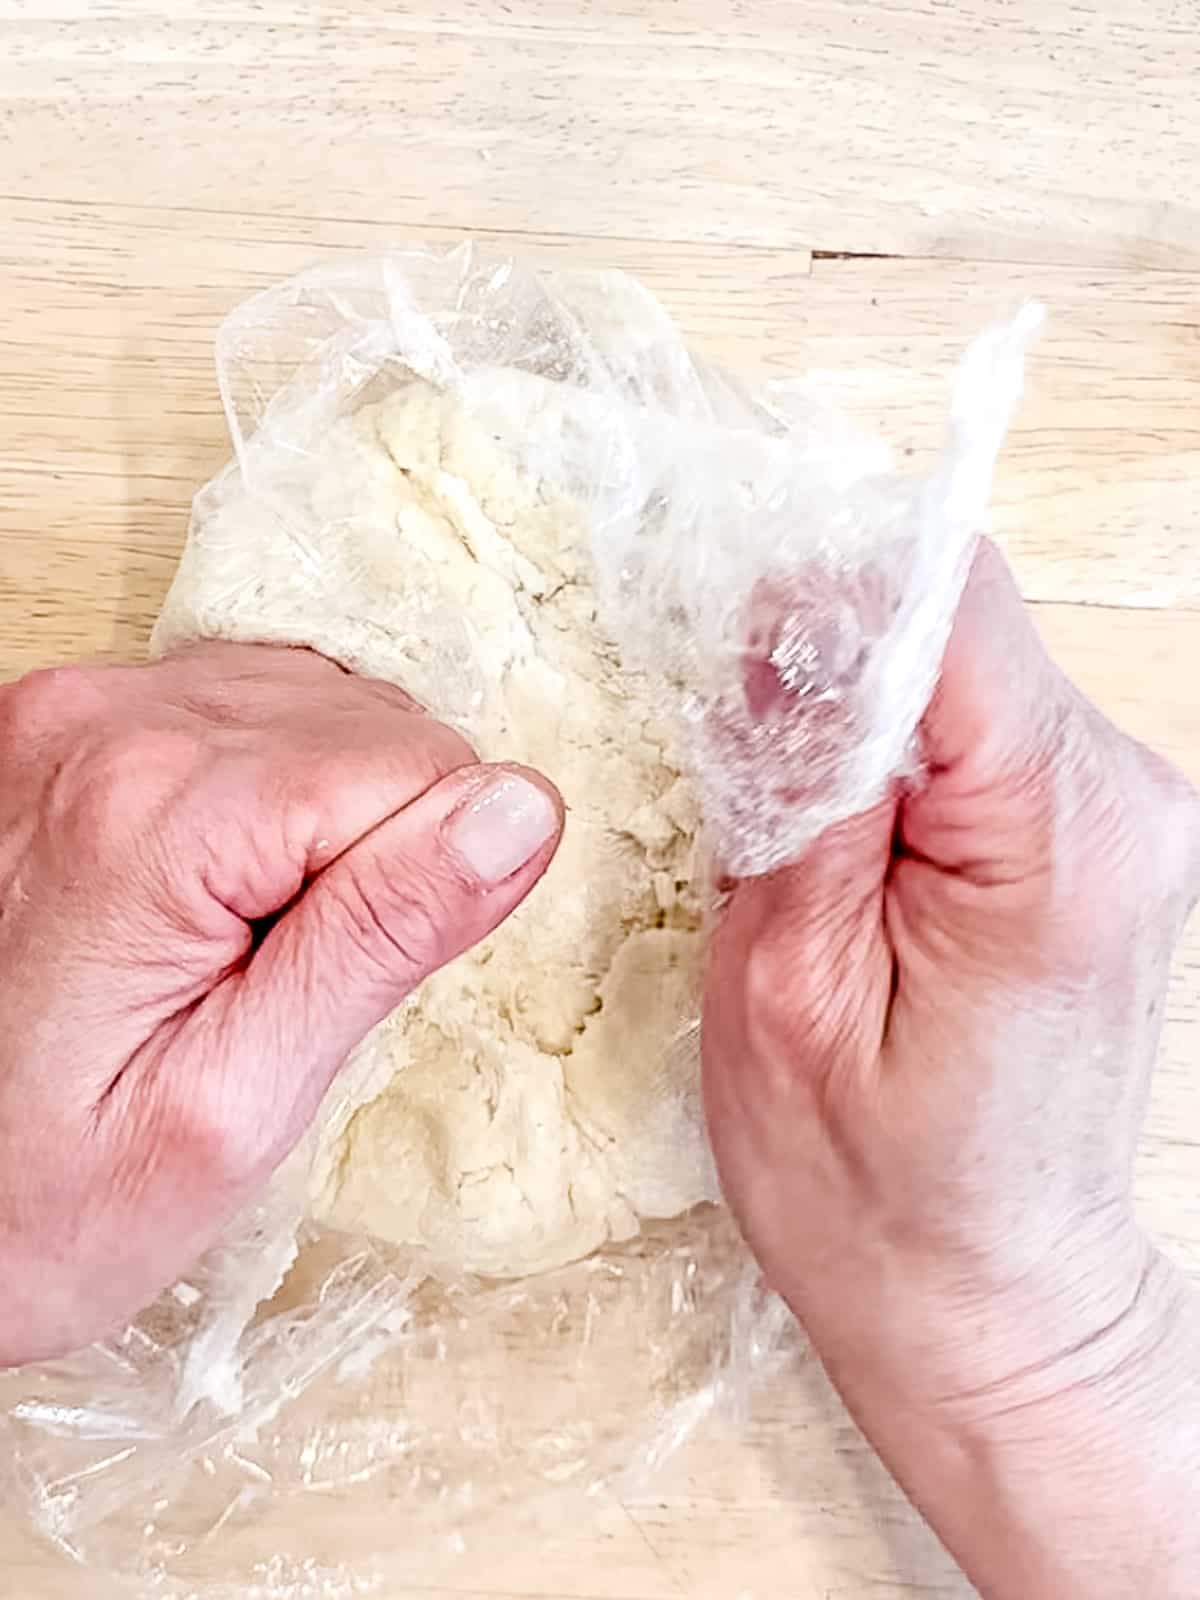
5. Use the plastic wrap to gather all of the crumbly bits together. Bring your hands together and form a ball under the plastic wrap. Wrap it up.
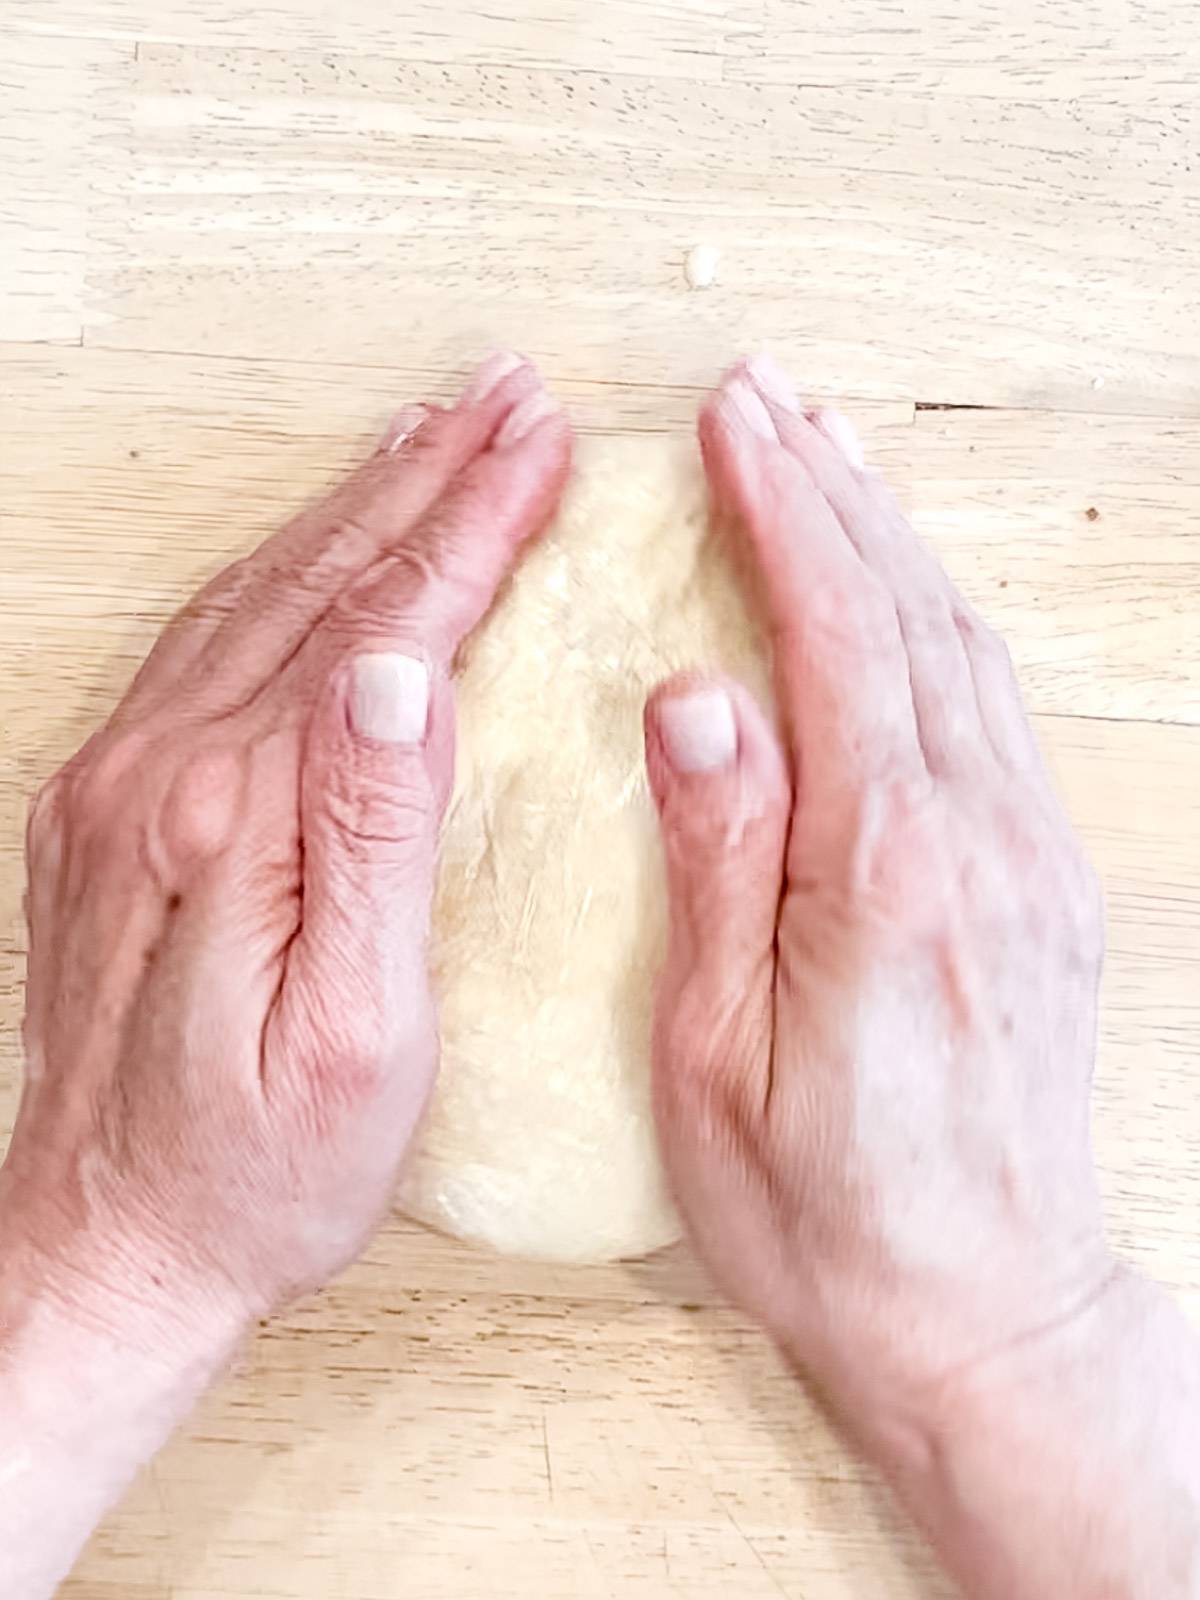
6. Flatten the dough into a round disc and refrigerate at least 1 hour, up to 3 days.
Making frangipane
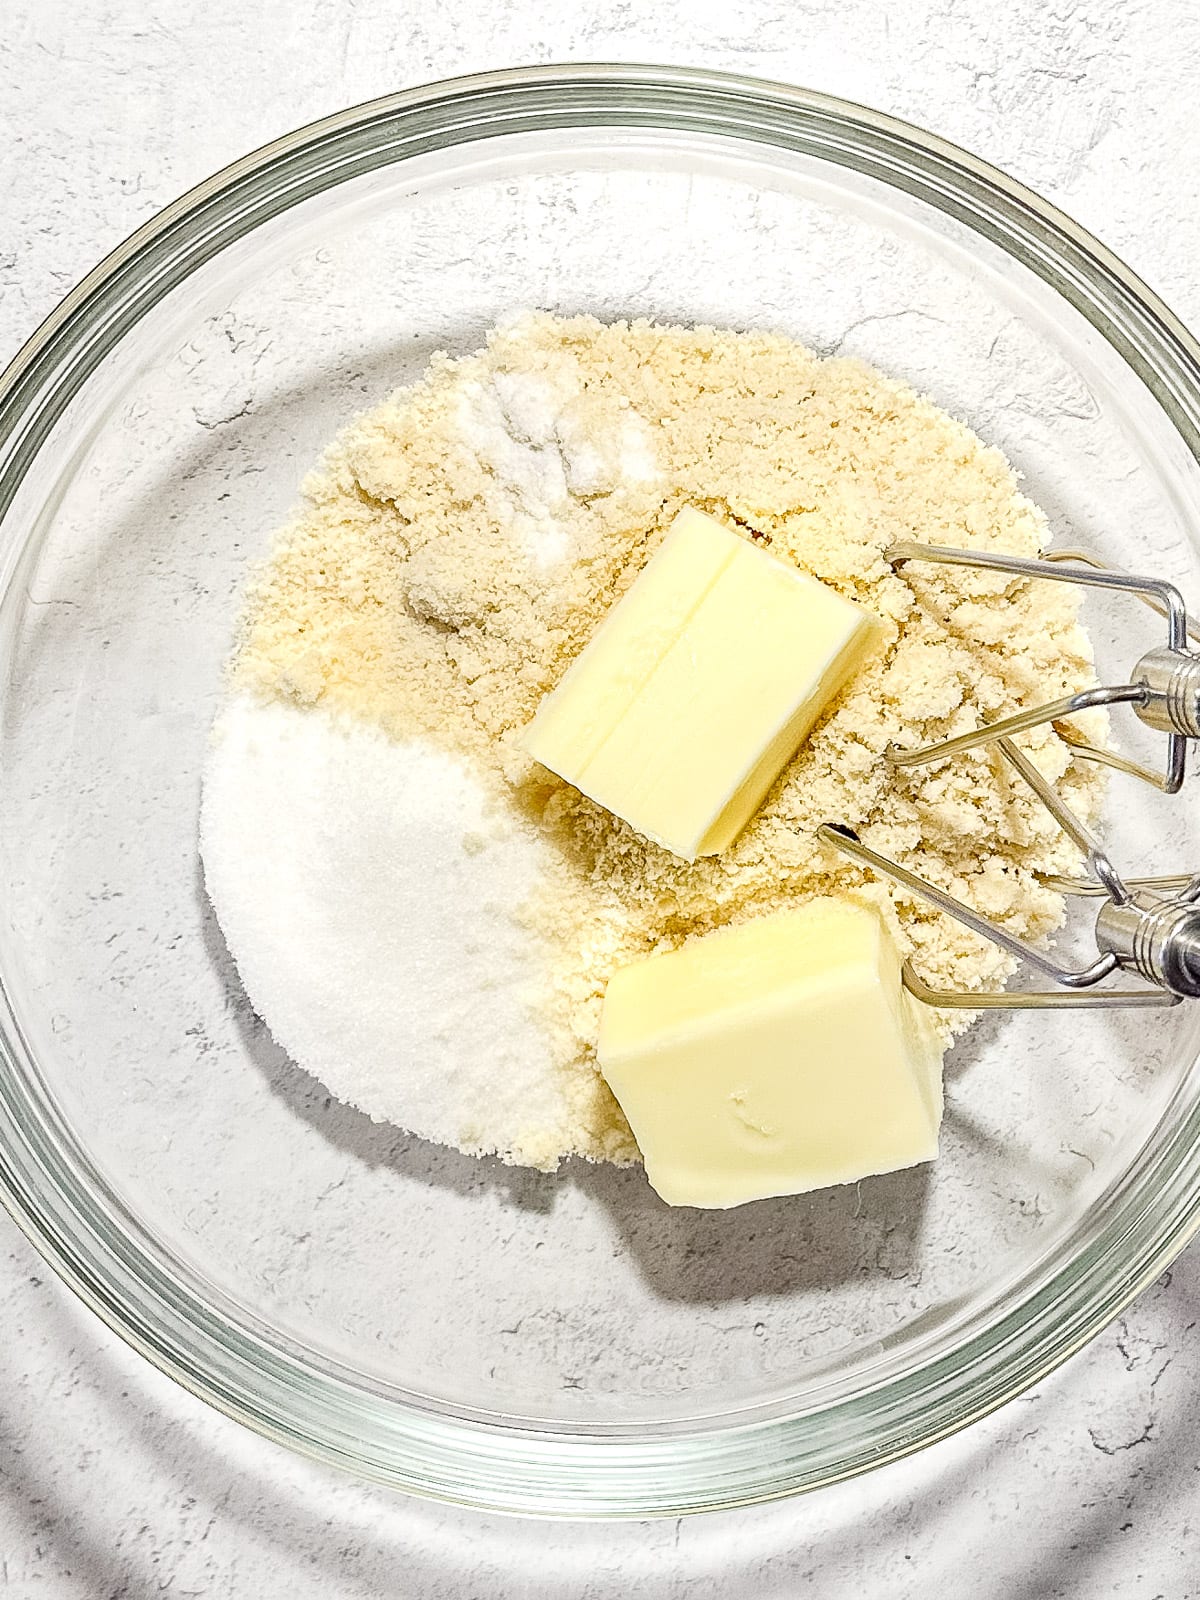
1. To make frangipane, mix together butter, sugar, almond flour, and salt until well incorporated.
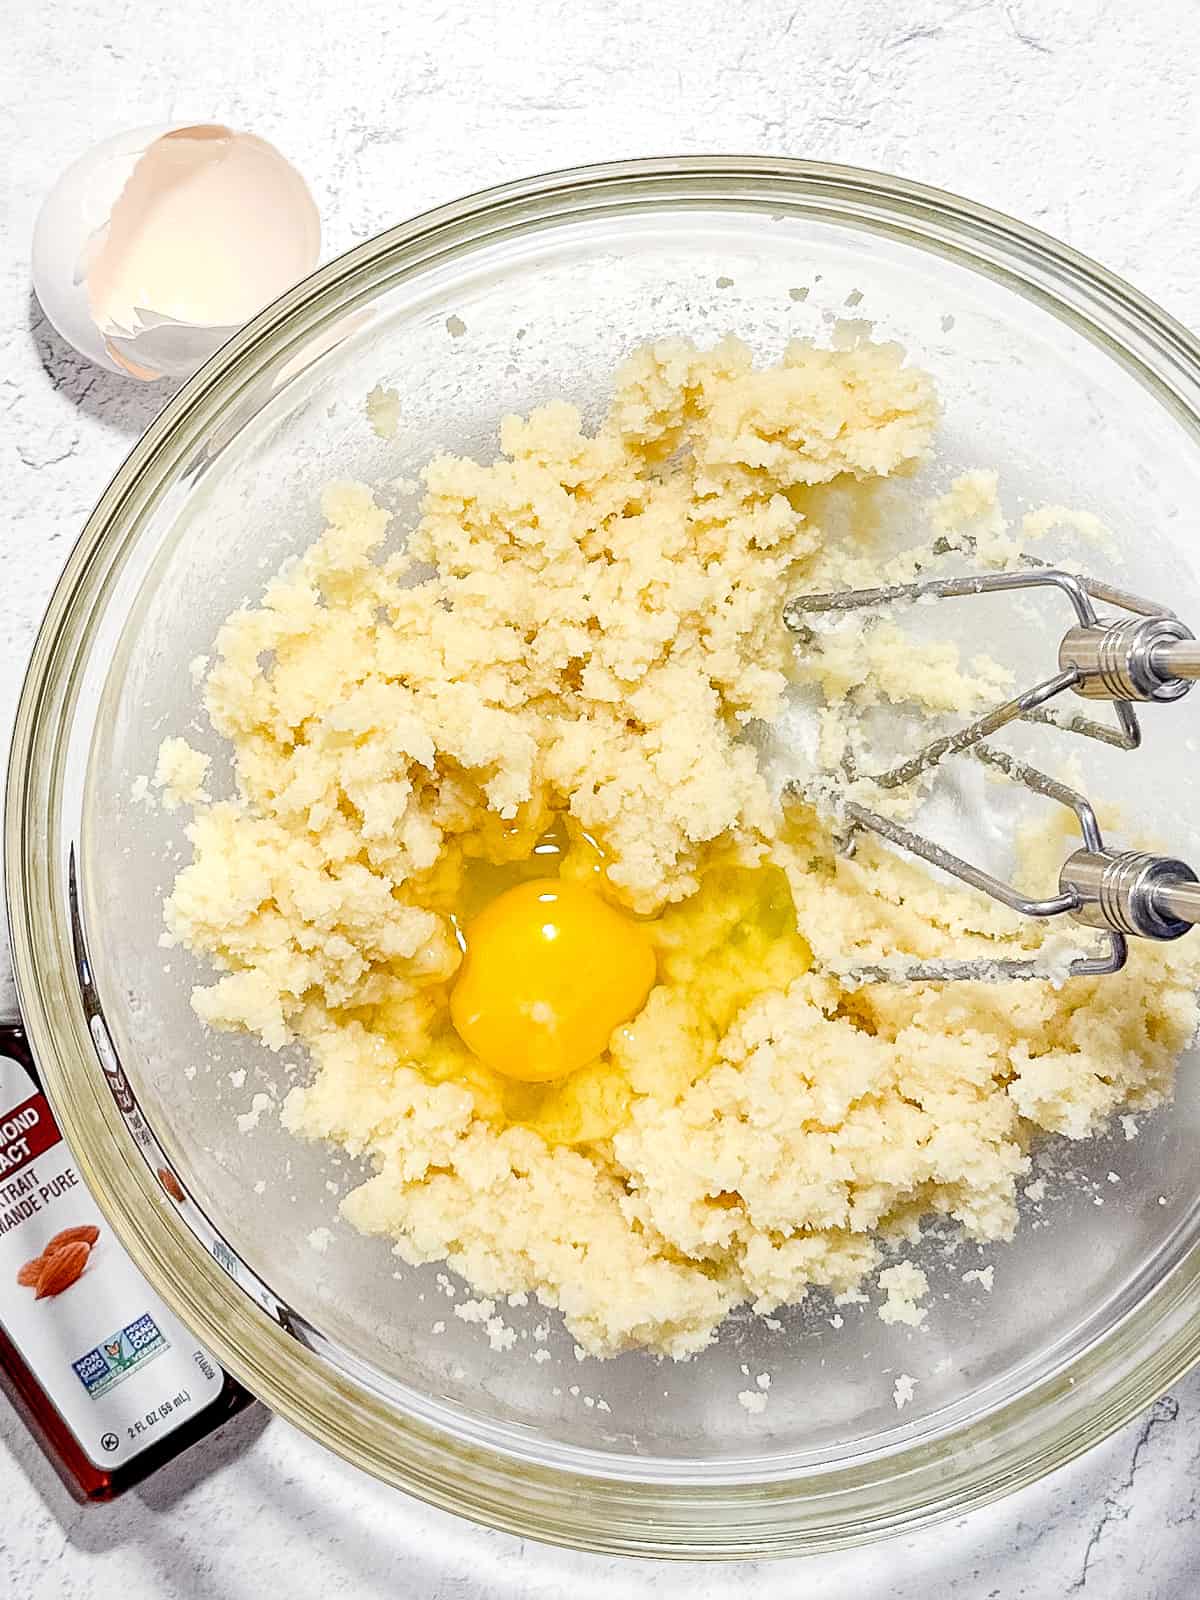
2. Add egg and almond extract and mix on low until combined.
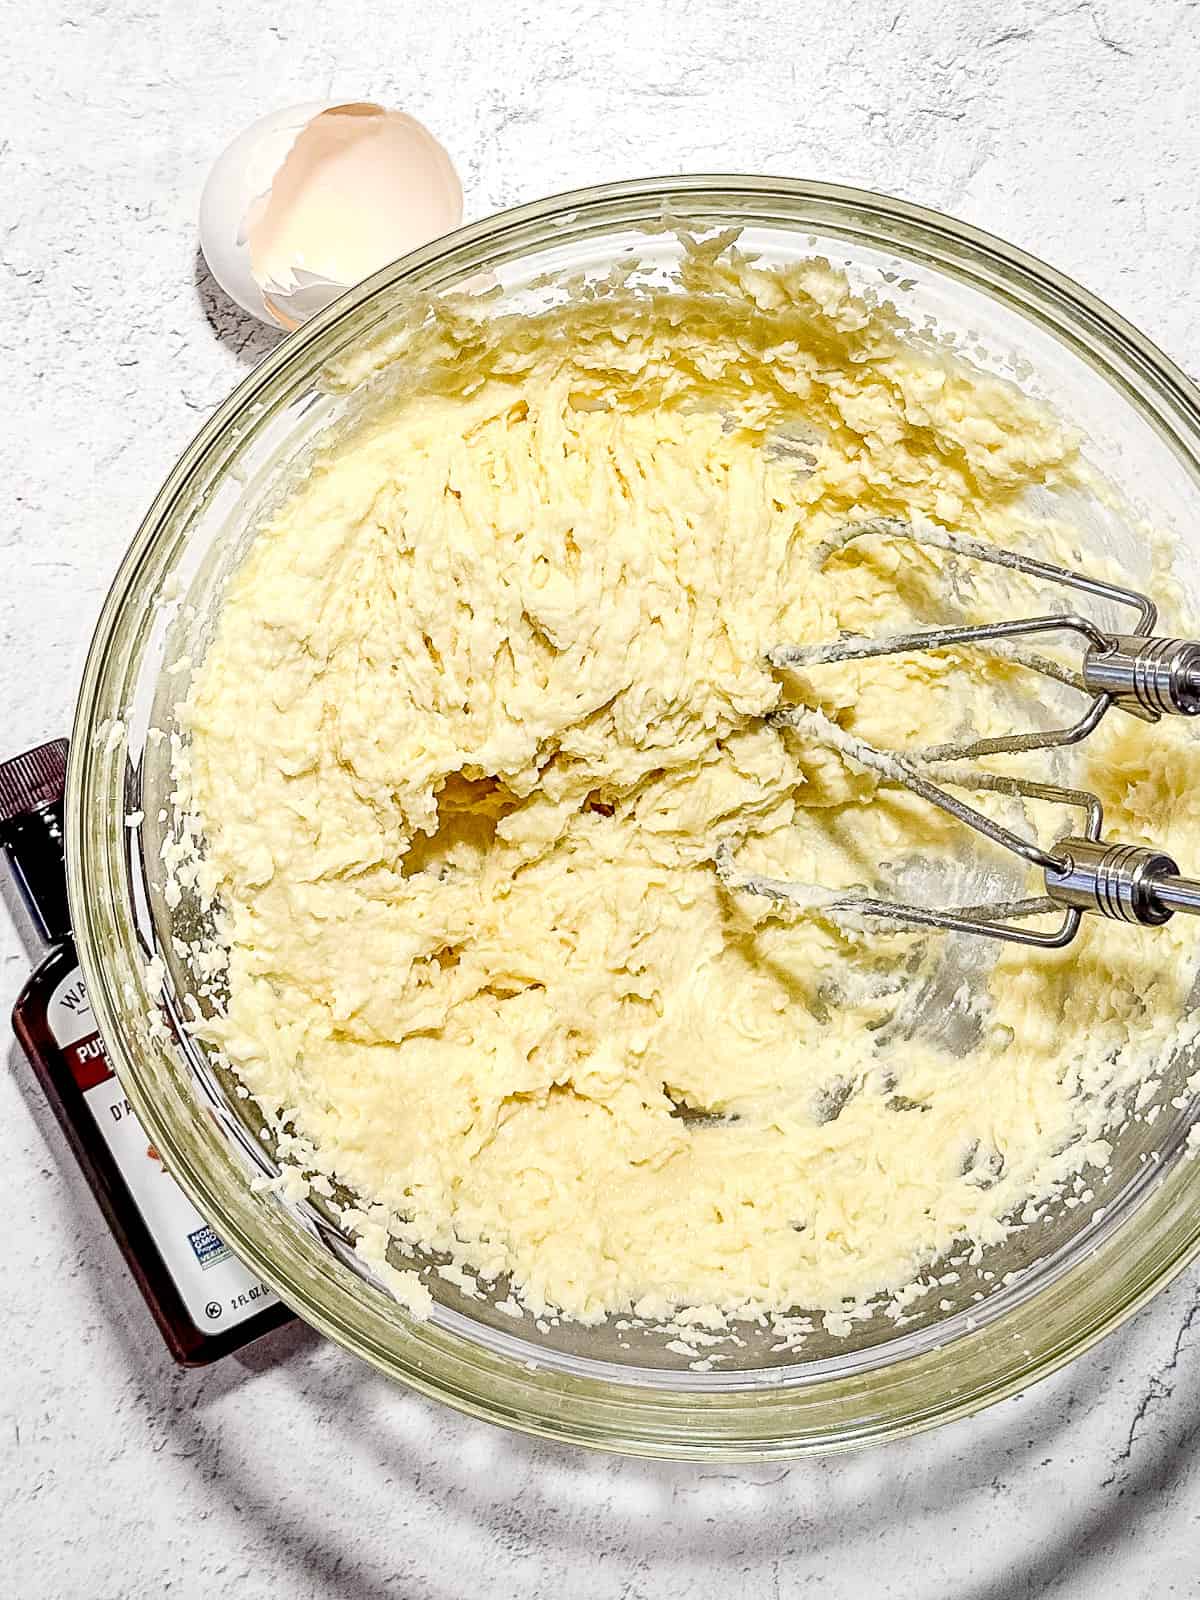
3. Mix on high until the mixture is creamy and fluffy, about 2 minutes. (This part can be done up to 7 days ahead and kept refrigerated)
Slicing pears
Before slicing your pears, prepare a bowl of ice water with a squeeze of lemon juice. You will dip your pears in this solution to prevent them from browing before you assemble your galette.
Try to use firm pears. Fanning out your pears will be too difficult if it is soft or mushy. Wash your pears and peel if desired (not required). Place the pear on a cutting board and slice it in half lengthwise with a sharp paring knife. Use a melon-baller to remove the core.

1. Place one pear half cut side down on the board. Slice it into ¼-inch slices beginning ¼ inch below the top. Leave the top uncut.
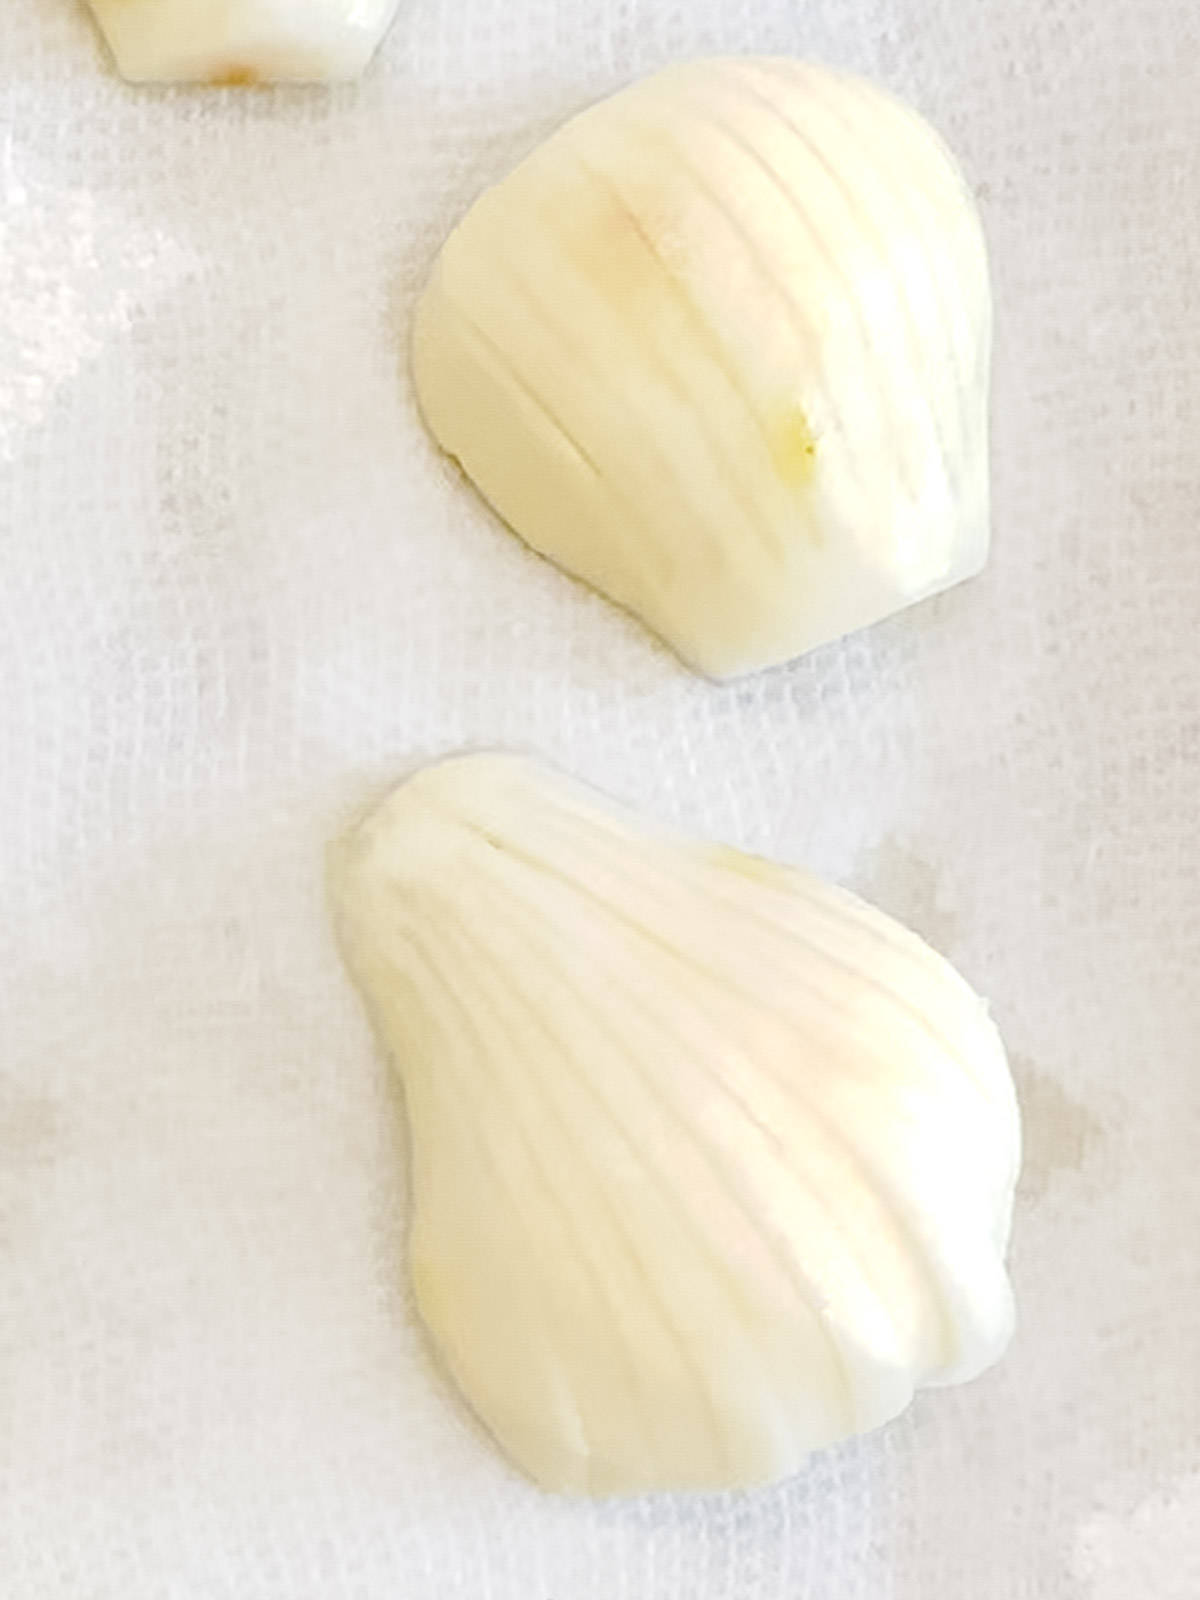
2. Dip the sliced pear in a bowl containing ice water and a squeeze of fresh lemon juice and place on paper towel to dry while you slice the rest of the pears.
Assemble galette
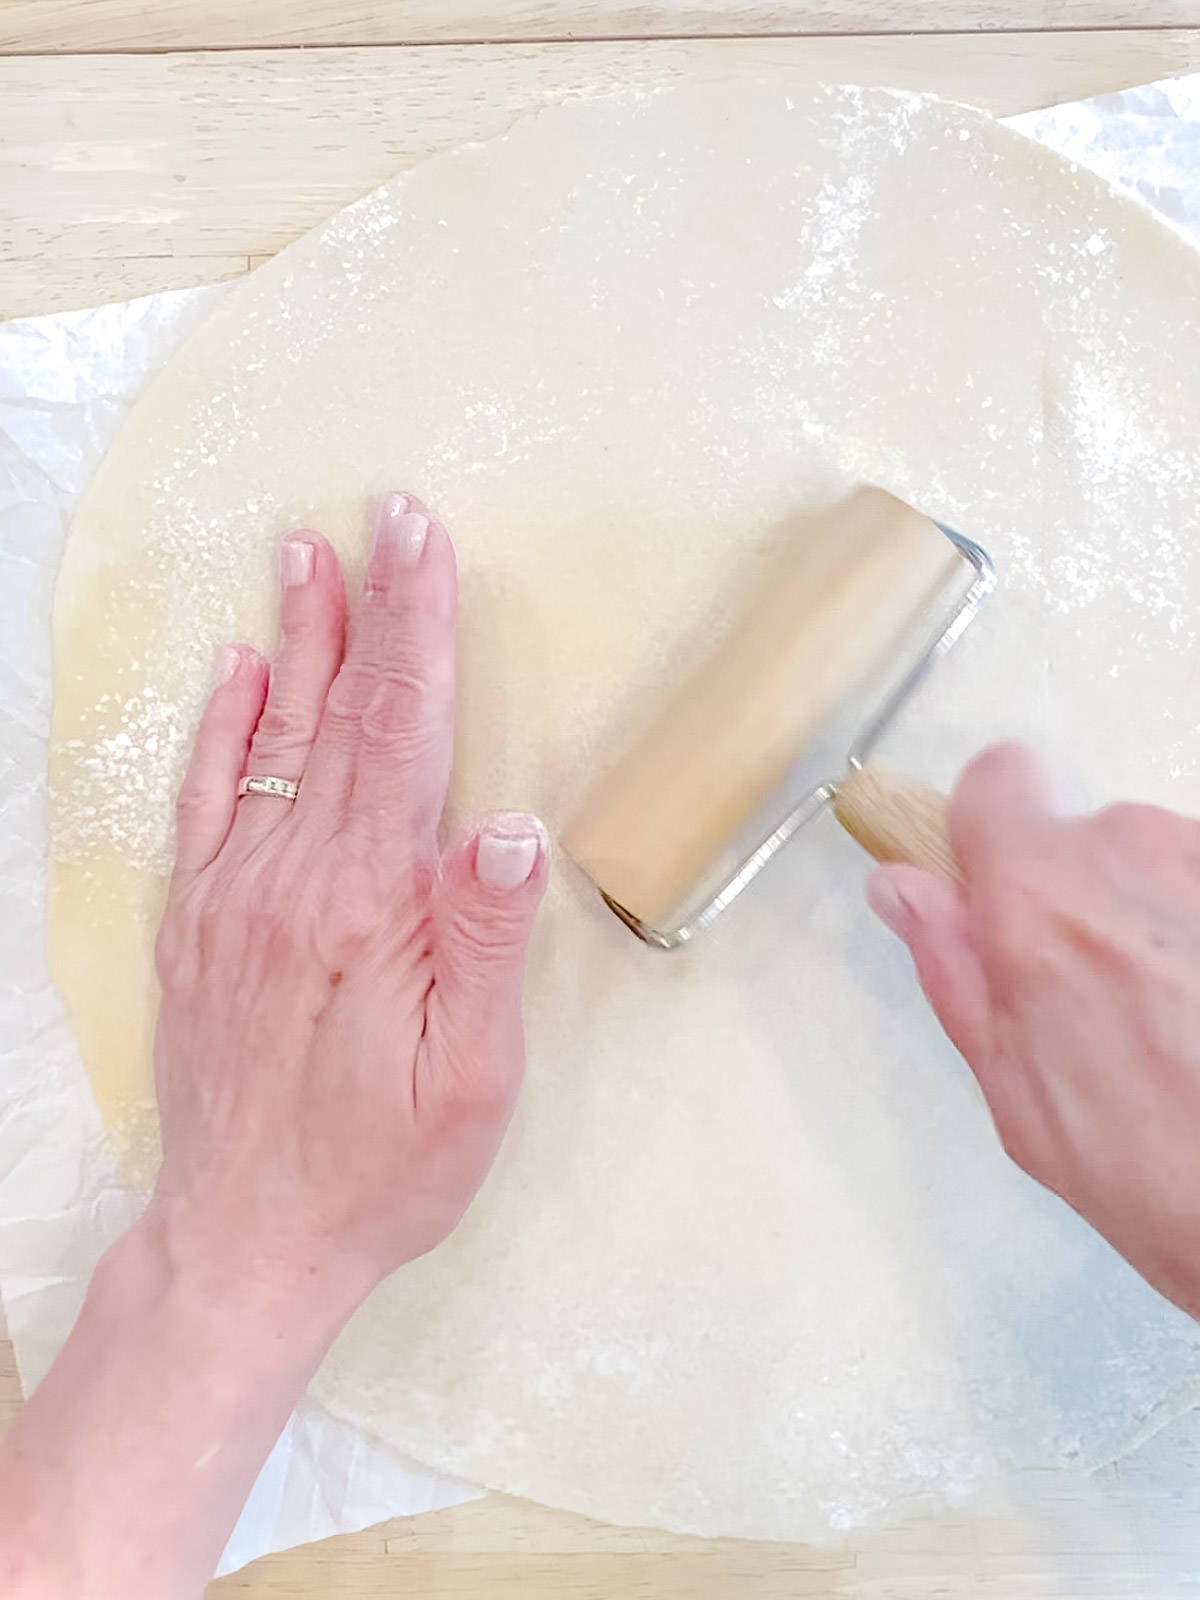
1. Place a piece of parchment paper on your counter. Roll your dough out to a 14 inch circle (conveniently, about the width of your parchment paper). It doesn’t have to be perfect.
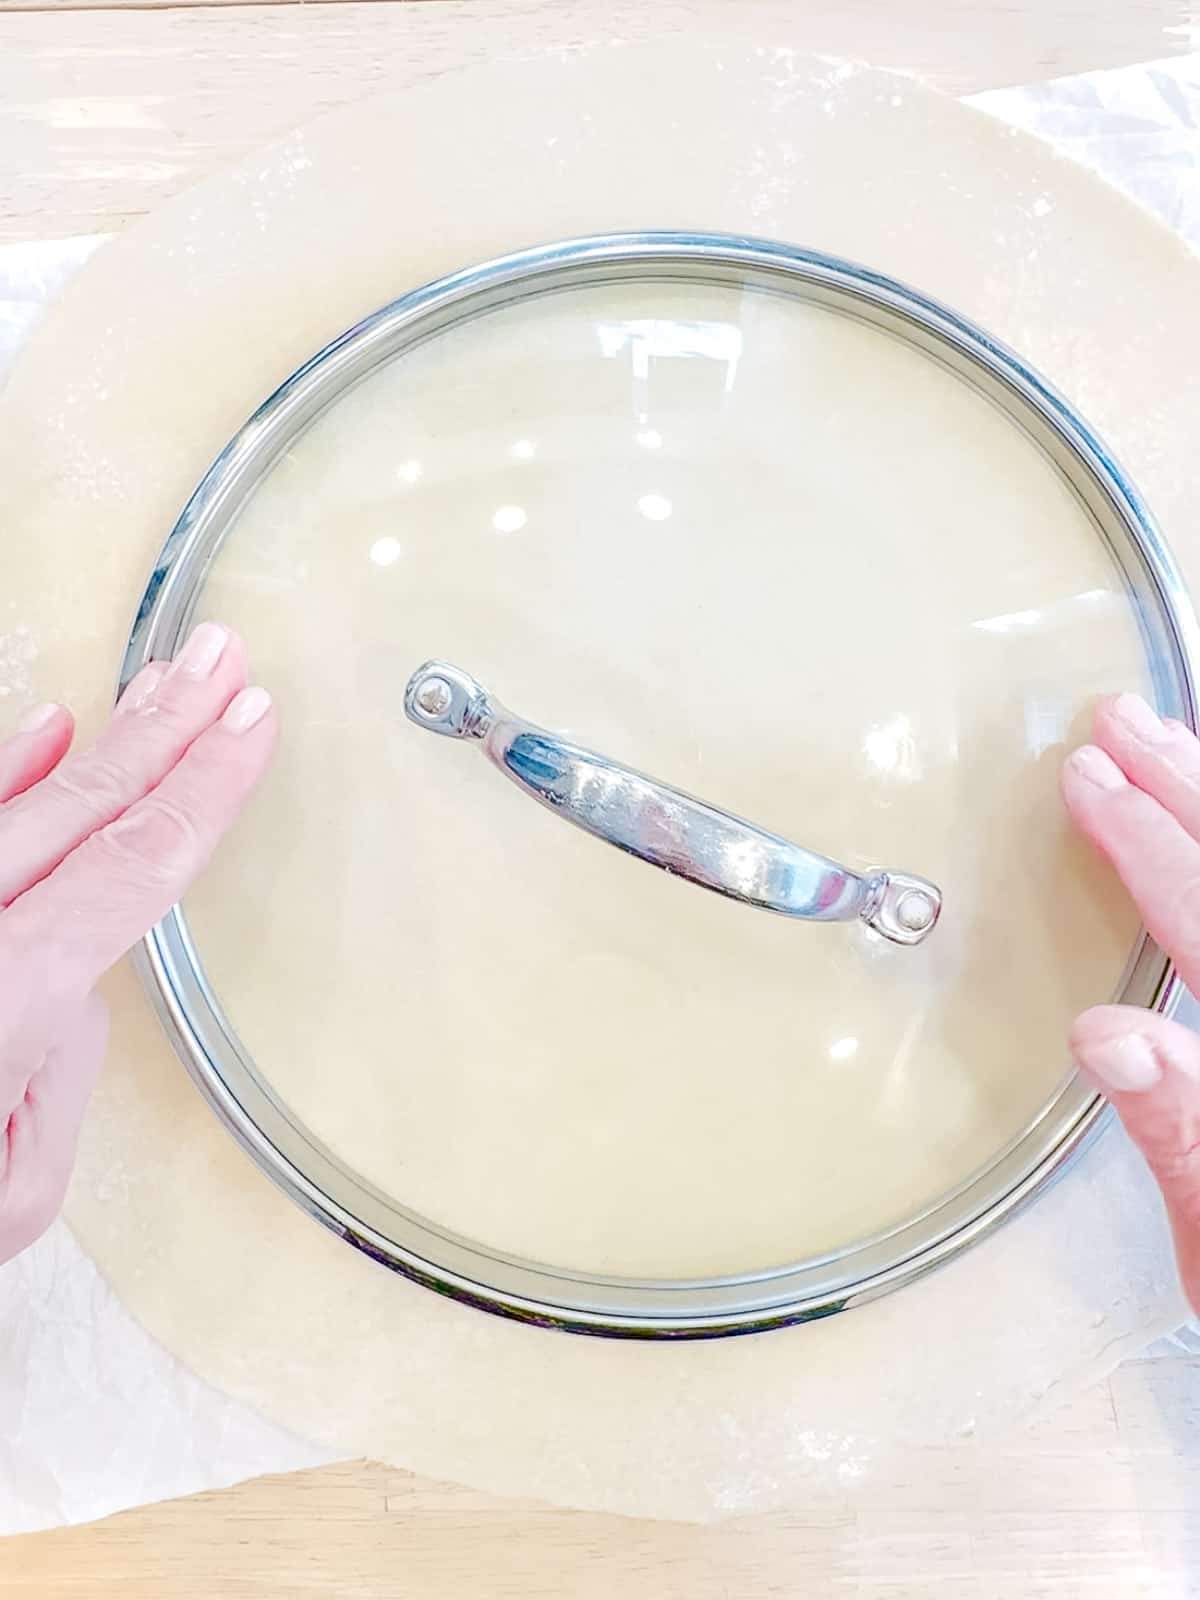
2. Use a pot lid, bowl, or another round object about 10 inches across to gently make a light impression on your dough.
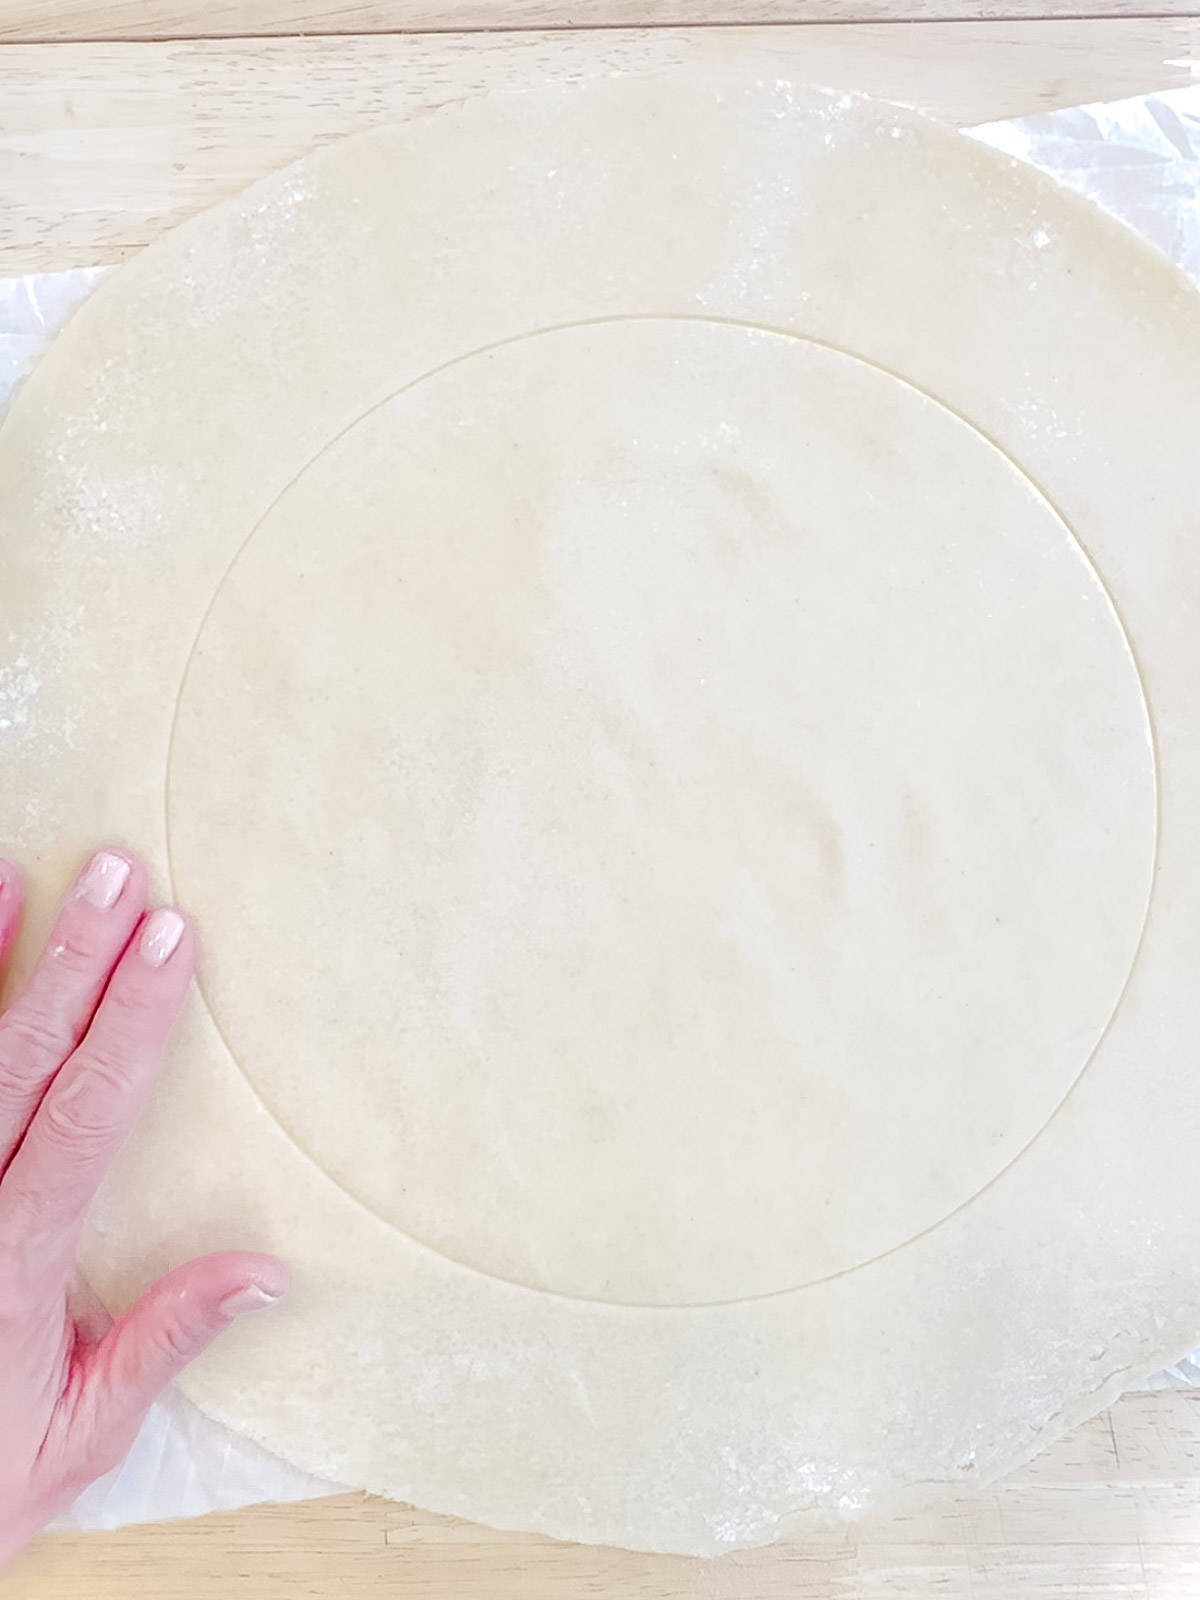
3. This impression will give you a border into which you will spread your frangipane and place your pears.
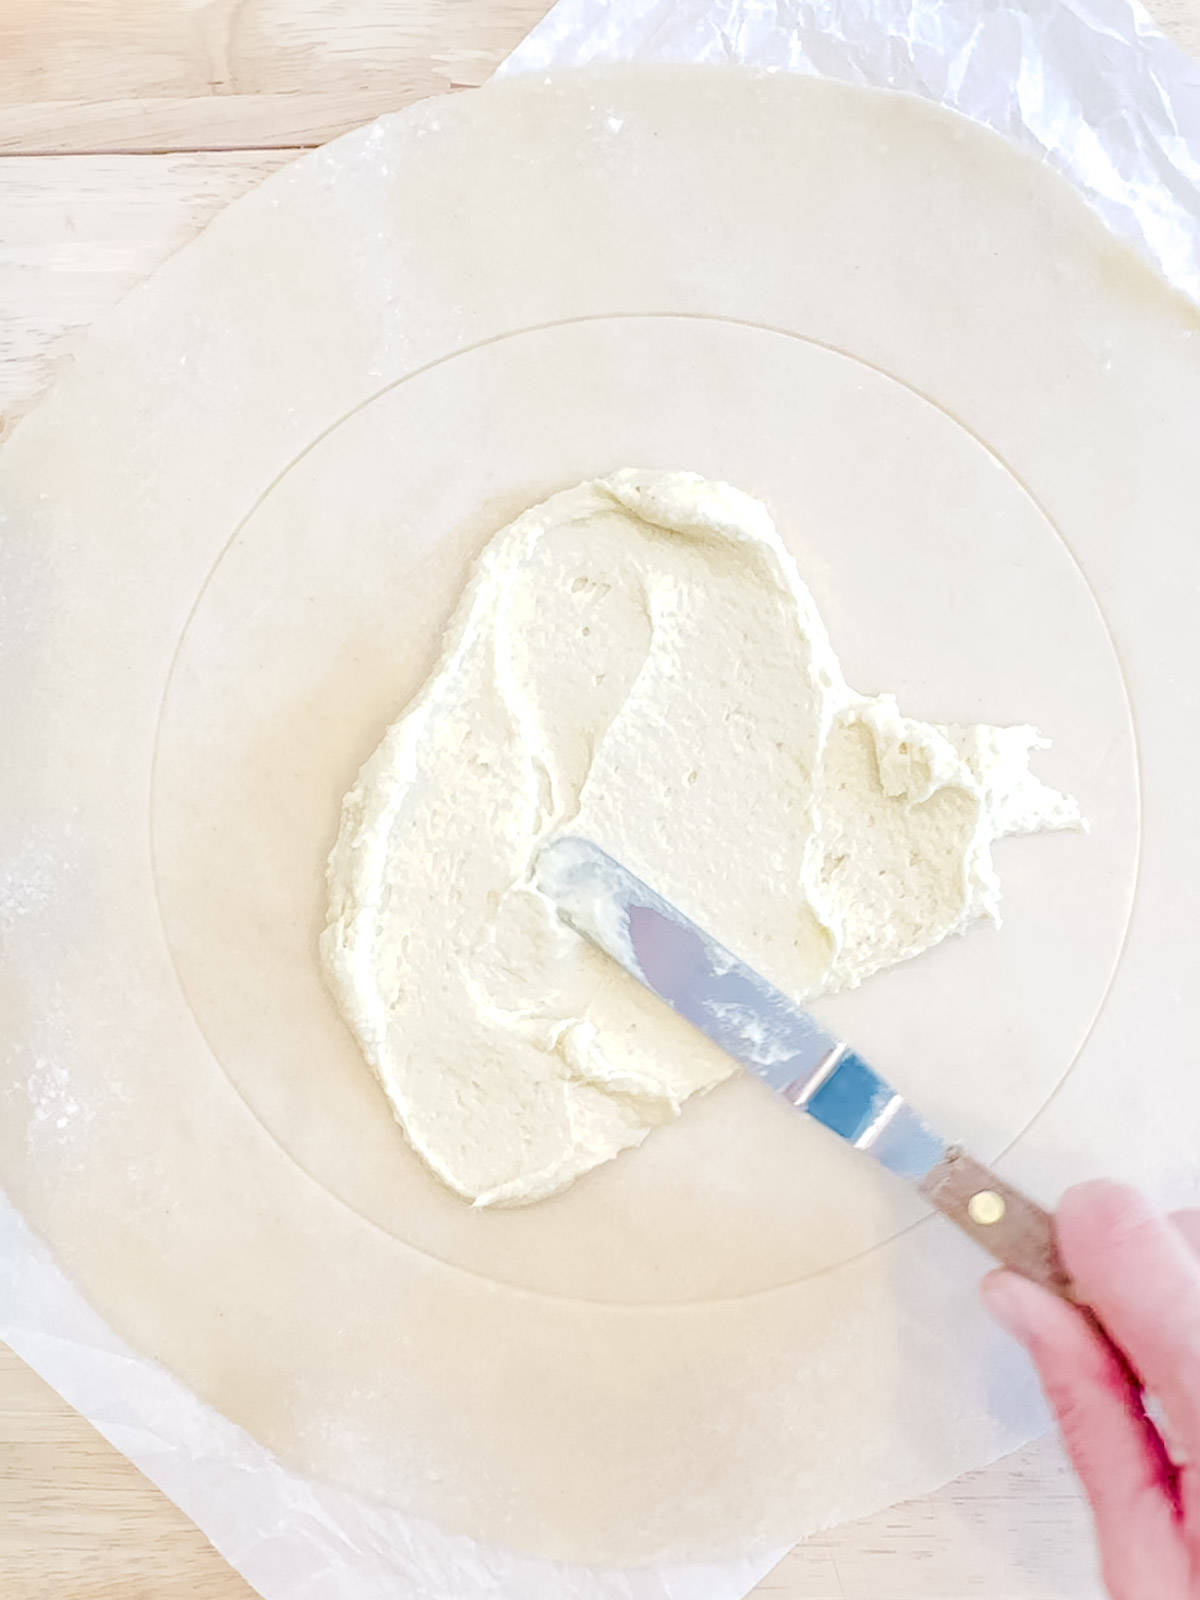
4. Using an offset spatula, spread the frangipane on the center of your dough, leaving about a 2 inch border all around.
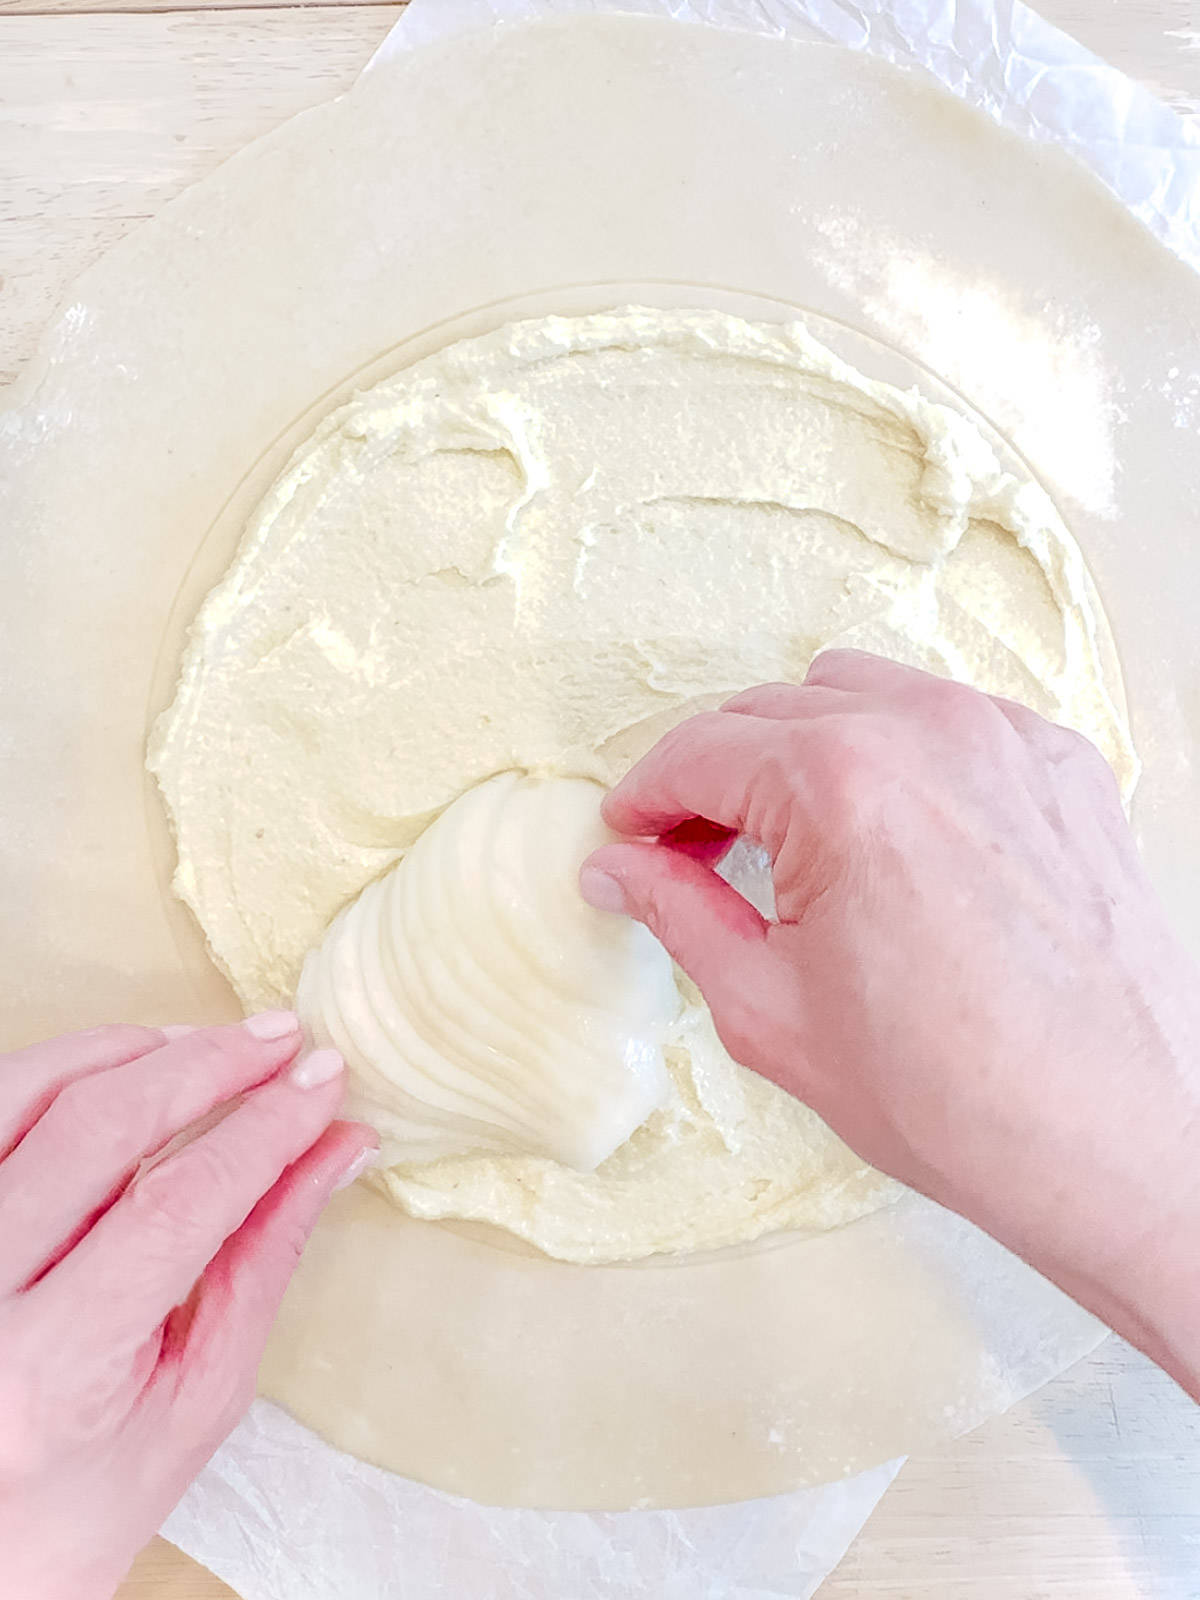
5. Gently fan out your pears and place them on top of the frangipane. Start with 6 pear half fans.
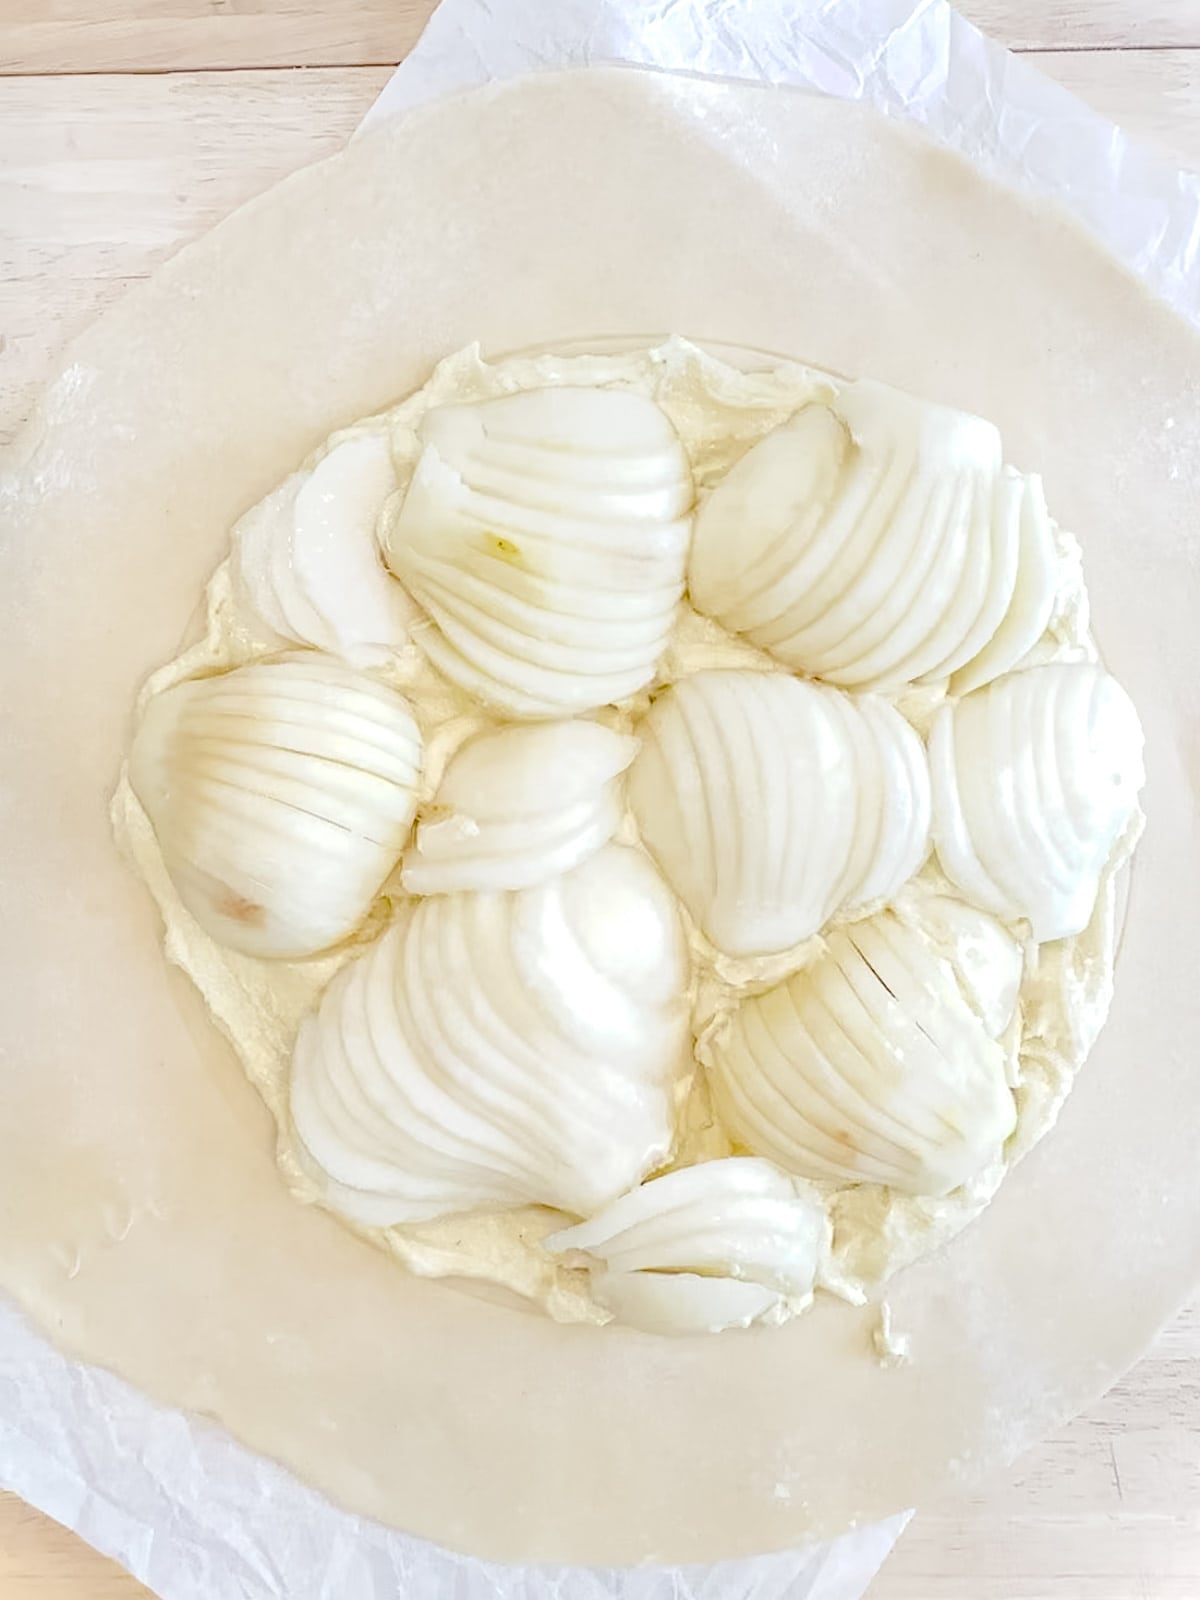
6. Use the last 2 pear fan halves and break them apart to fill in the smaller gaps between full halves, until the entire circle is covered.
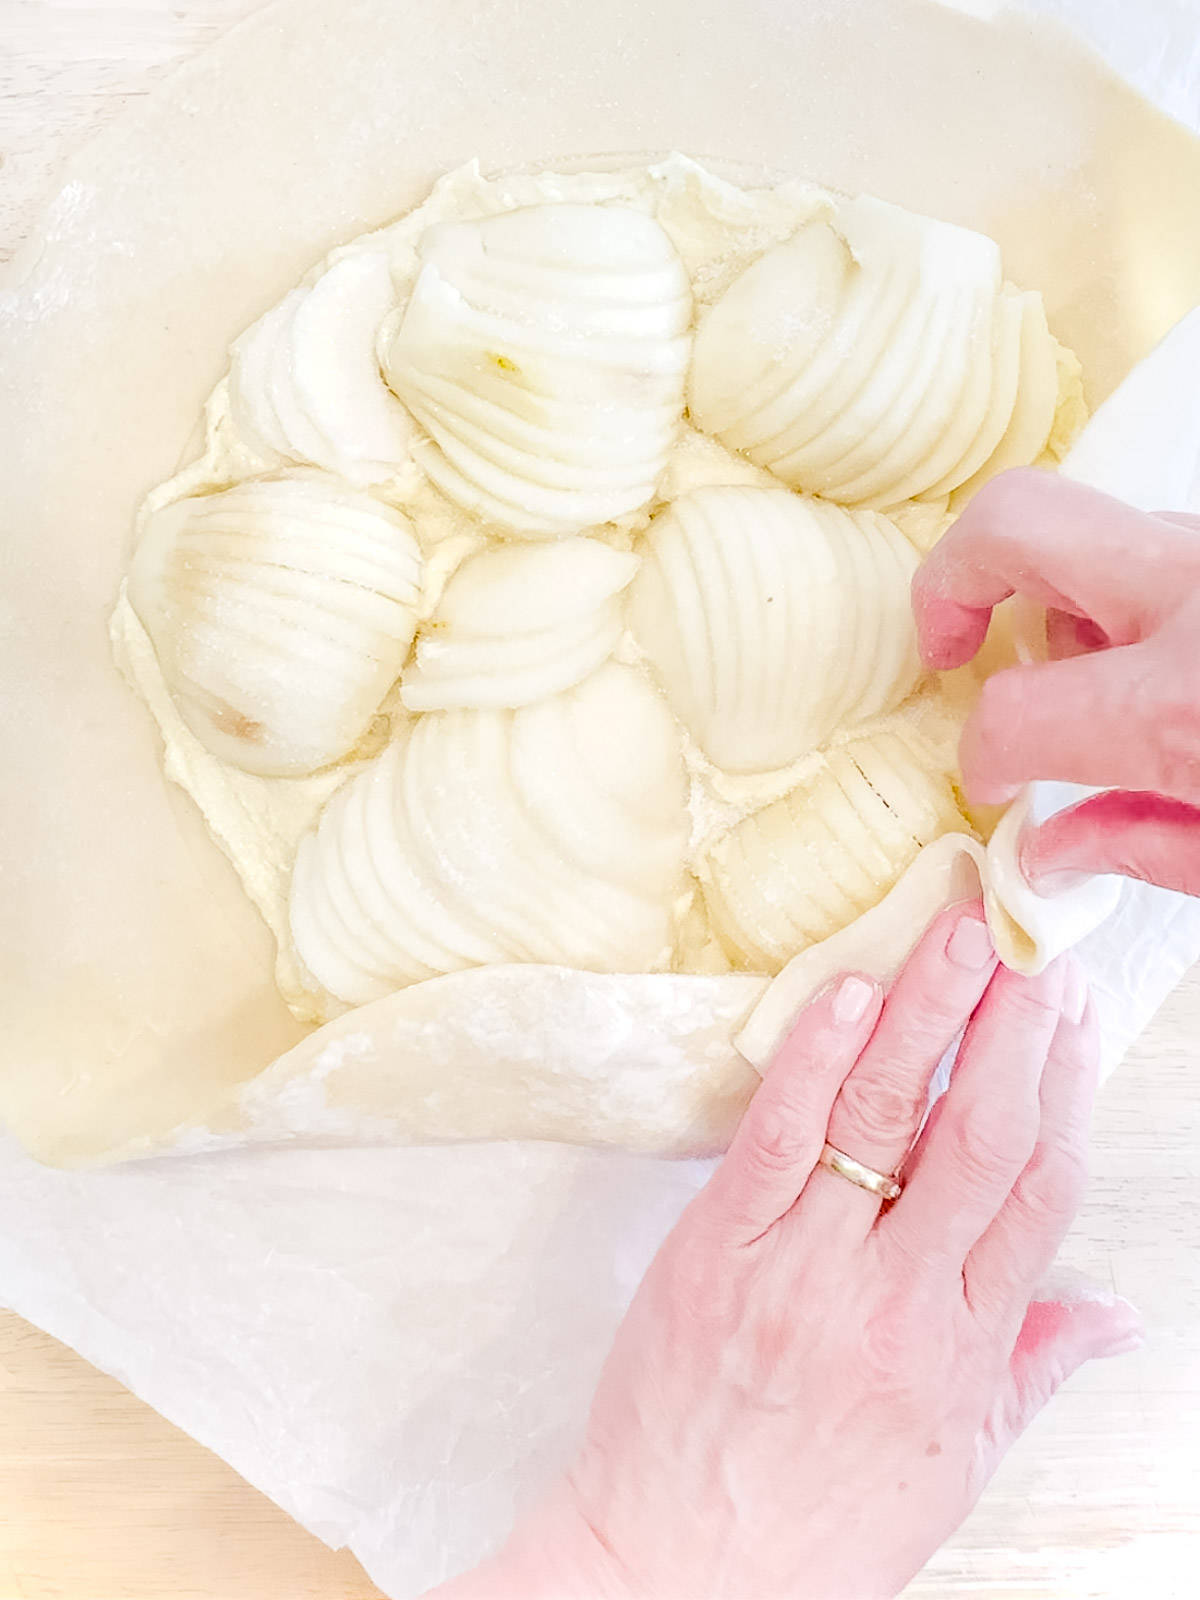
7. Fold the edges of your dough over the filling, kind of overlapping as you go around.
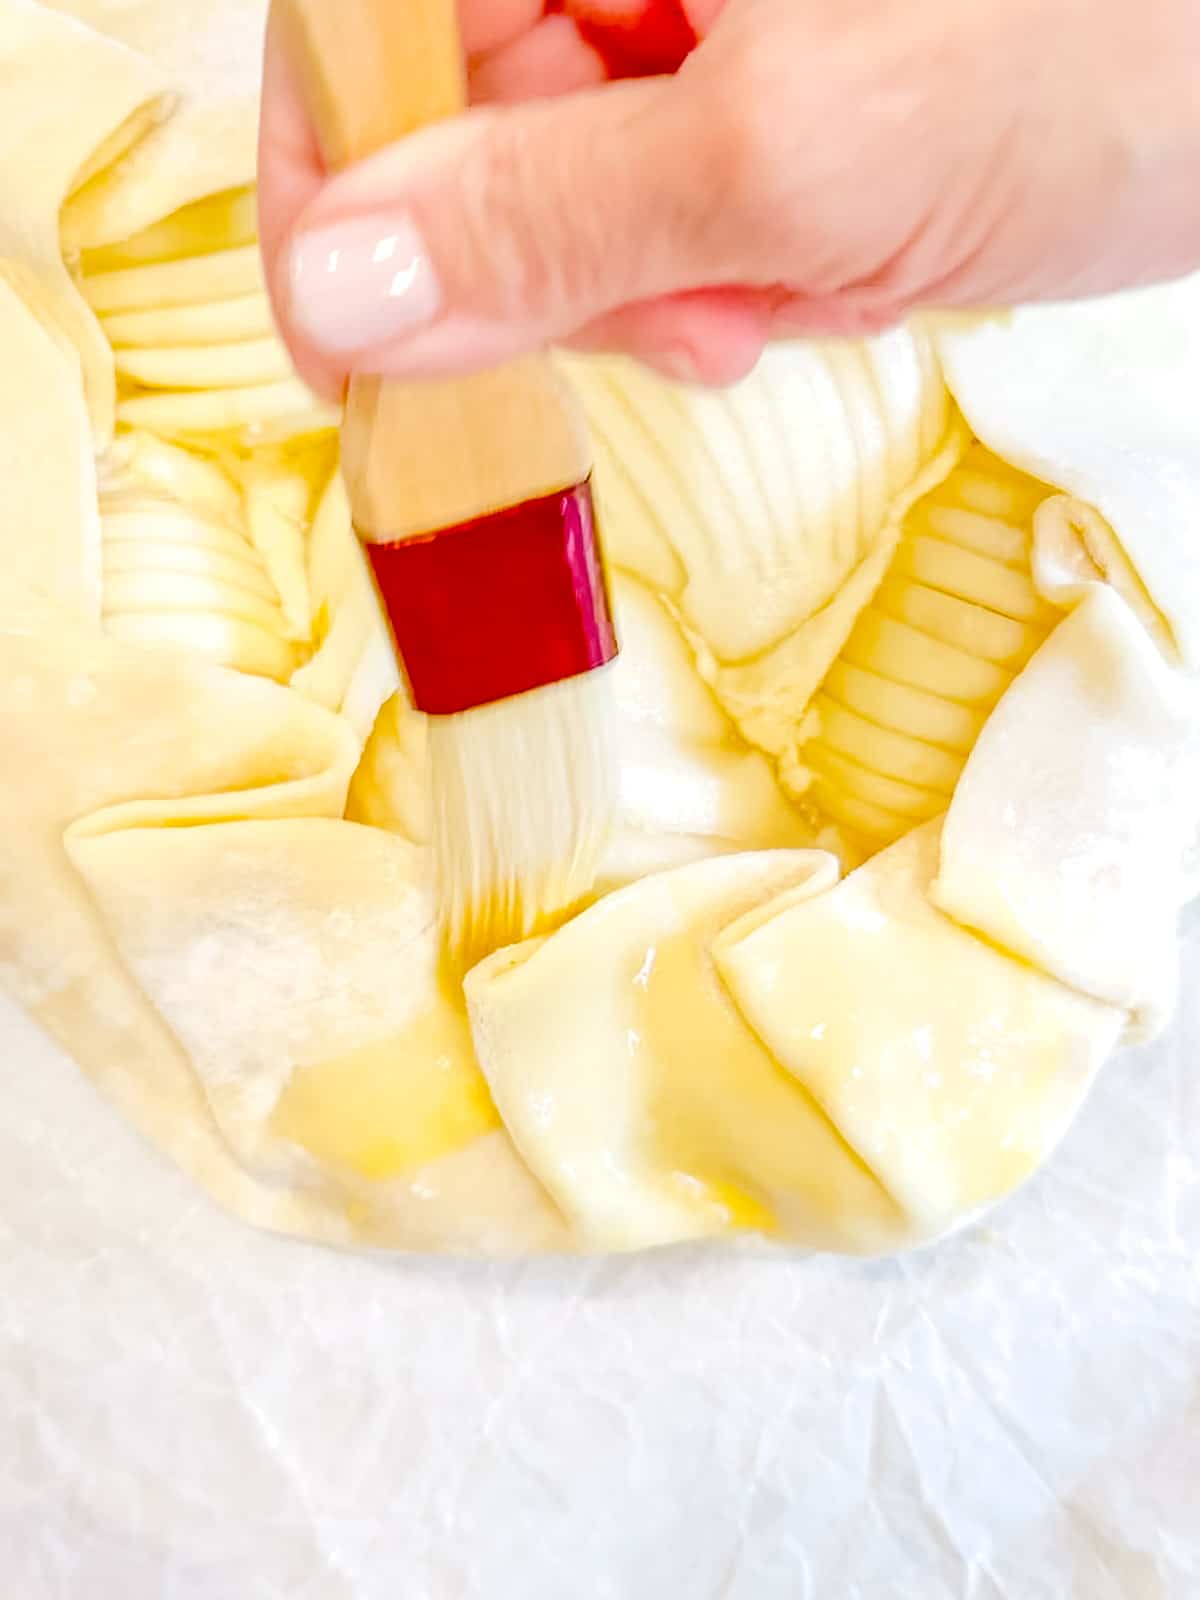
8. Brush the exposed crust with egg wash (1 beaten egg with 1 teaspoon water).
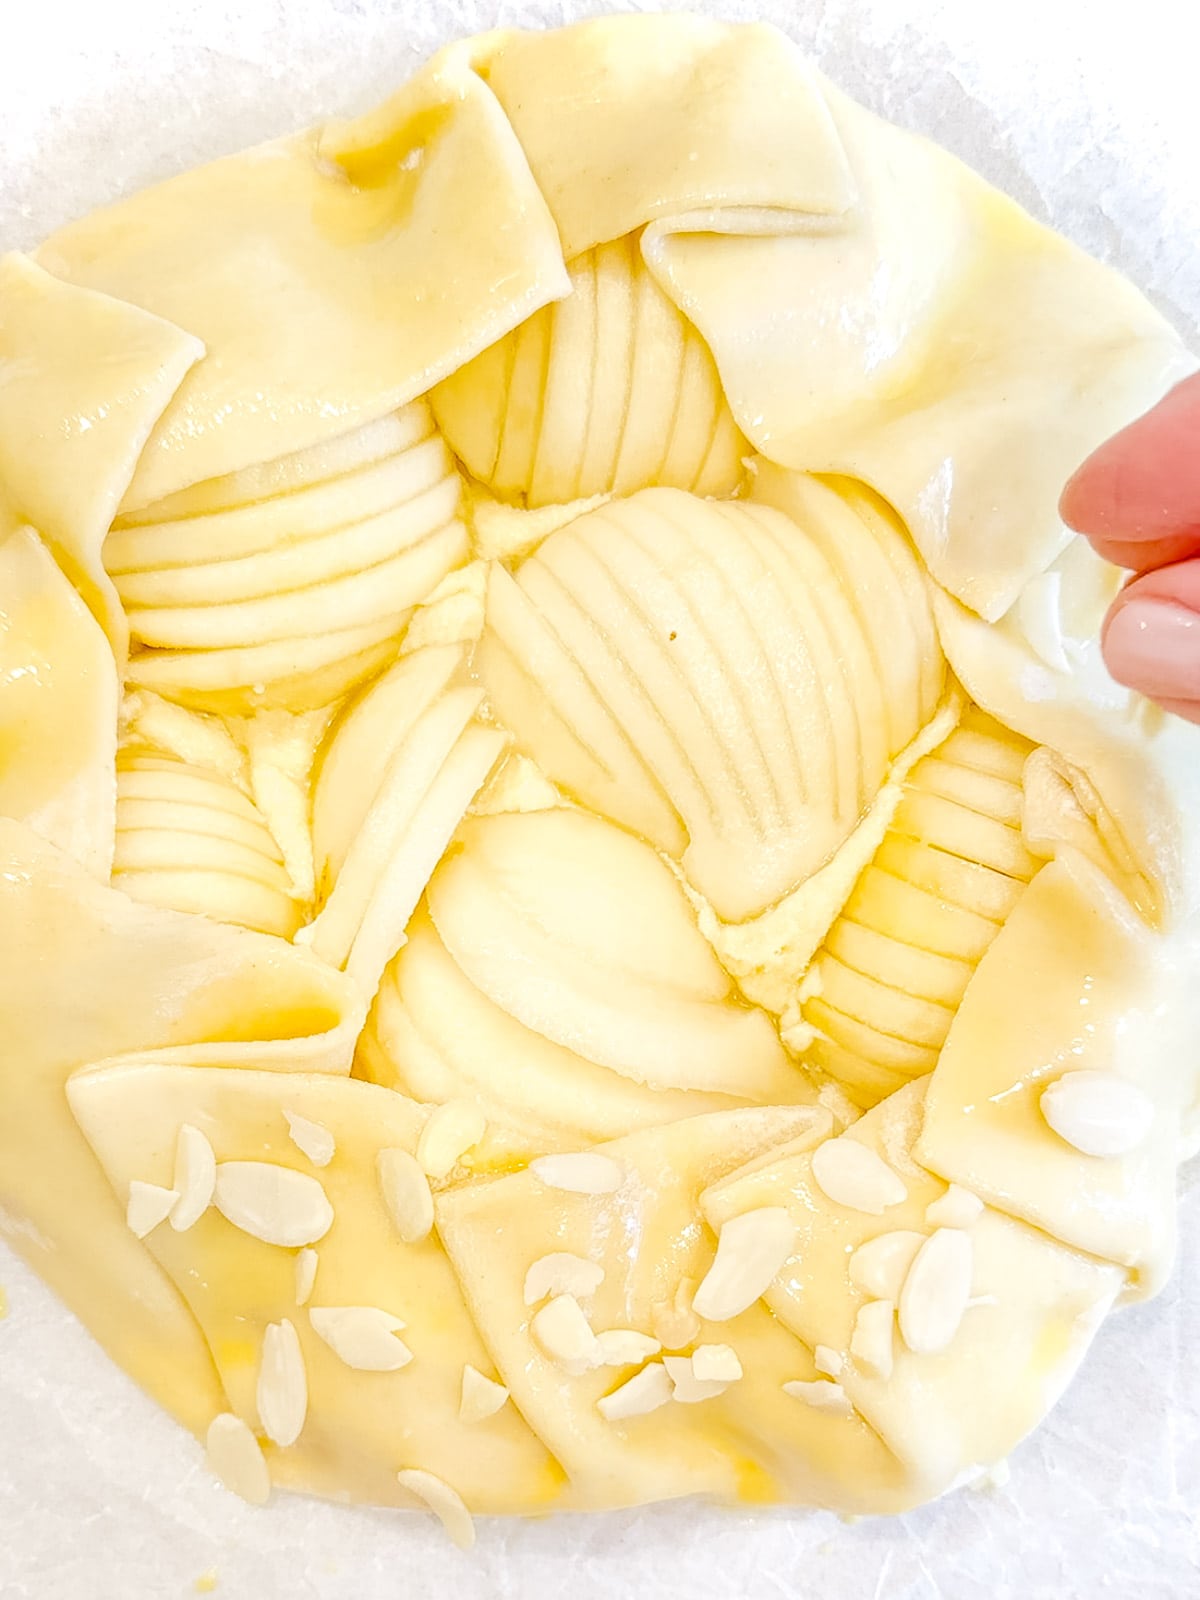
9. Sprinkle the edges of your galette with sliced almonds.
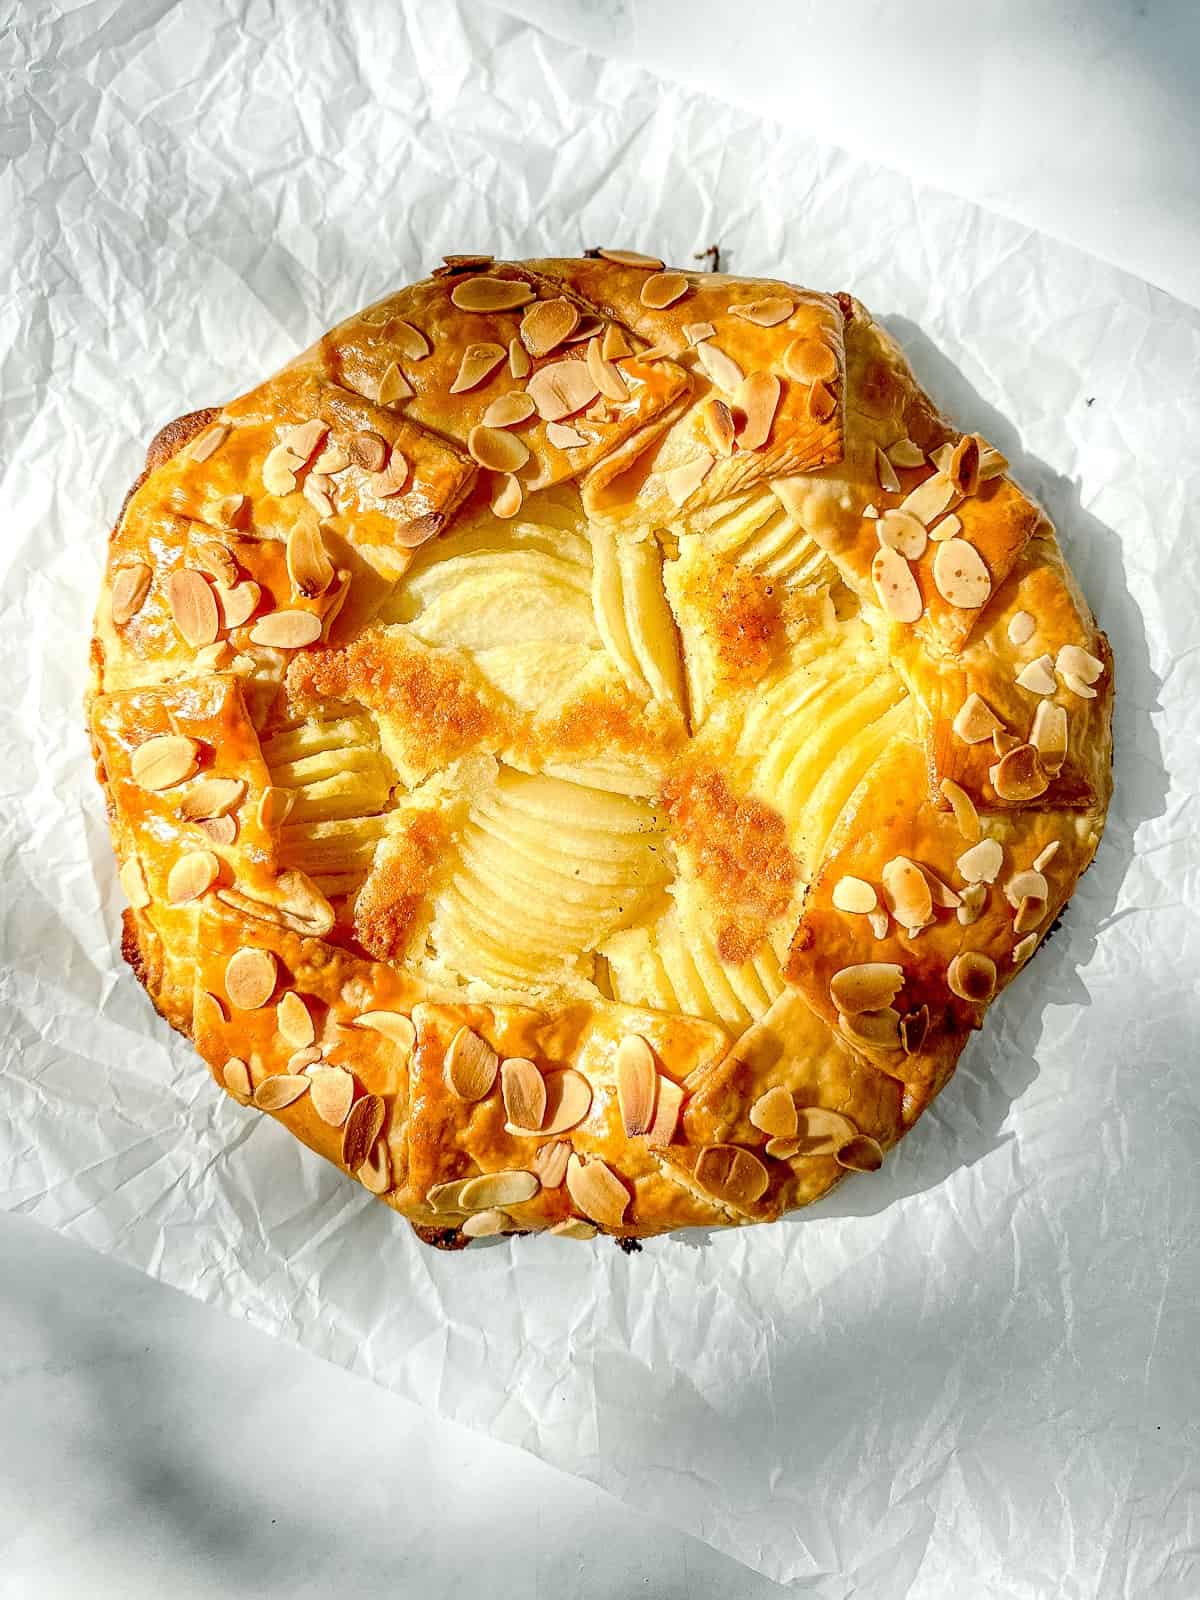
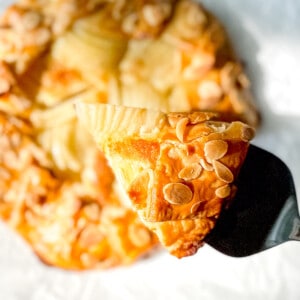
10. Bake at 425° for 40-50 minutes, or until your crust is a nice golden brown and your frangipane is puffy and peeking up between your pears, turning your pan halfway through the time, to ensure an even bake.
Let cool 10 to 15 minutes, then slice and enjoy!

Love even more almond flavors? Try the best cruffin recipe with almonds that taste so much like your favorite French pastries, but in muffin form!
Expert tip
Resting your galette dough for at least one hour is a step that you just can't skip. Here's why:
- It gives time for the flour in the dough to fully hydrate. Otherwise when you try to roll out your dough, it would probably crumble.
- It allows the gluten strand in the dough time to relax, making a more tender crust.
- Both of these things make rolling out your crust much easier as it rolls smoother and doesn't shrink back as you roll
For this reason, I like to make my pie crusts at least one day before I need them. As I'm preparing my fillings, I'll take my crust out of the refrigerator to let it warm up just a touch before rolling. I will often take a random Sunday to make a large batch of my dough and divide it up to keep in the freezer for up to 3 months for pie and galette emergencies!
(p.s. I use the same easy crust to make my Brown Sugar CInnamon Pop-Tarts!)
Recipe FAQ's
Absolutely! Just peel and core them as usual, then slice into ¼ inch slices. When assembling, lay your sliced pears on top of the frangipane in concentric circles, or as prettily as you like.
No. Canned pears have too much moisture and would keep the frangipane layer from setting and the whole thing would be mushy.
Although they are difficult to find, some stores do carry sliced frozen pears. Because they tend to lose moisture in the freezing process, make sure to thaw your pears on a couple of layers of paper towels to draw out the excess water.
Storage and Reheating
STORAGE
Store leftover Pear Frangipane Galette by either wrapping in plastic wrap or storing in an airtight container, such as a cake stand. It will keep for up to 3 days at room temperature, 5 days in the refrigerator.
REHEATING
This Pear Frangipane Galette is delicious at room temperature. If that's not your thing, please reheat. To reheat leftovers and return some crisp to the crust, place in a 350°F for 10 minutes. If you just want to get some pie in your mouth, microwave on high for 20 seconds.


Did you try this recipe?
Leave a comment with a ⭐️ rating below to tell me all about it, and don't forget to tag me on Instagram!
I appreciate you!
-Cynthia
📖 Recipe
Pear Frangipane Galette
Ingredients
Pie Crust
- 1 ½ cups (180 g) all-purpose flour
- 1 tablespoon (12 g) granulated sugar
- ¼ teaspoon kosher salt
- 8 tablespoons (112 g) unsalted butter 1 stick, cold and cut in small pieces
- ⅓ cup (80 g) ice water
- 1 teaspoon lemon juice or apple cider vinegar
Frangipane (almond cream filling)
- 3 tablespoons (42 g) unsalted butter room temperature
- ¼ cup (50 g) granulated sugar
- ½ cup (50 g) almond flour
- 1 large egg room temperature
- 1 teaspoon almond extract
Pears and finishing touches
- 4 pears
- Juice of ½ lemon
- bowl ice water
- Egg wash 1 egg + 1 tablespoon water
- ¼ cup sliced almonds
- 2 tablespoons (42 g) honey warmed
Instructions
Making the crust
- In the bowl of your food processor, pulse together all-purpose flour, butter (cut into small pieces and frozen), sugar, and salt until the butter is about the size of peas, 4 to 5 pulses.
- Add lemon juice to ice water and slowly drizzle into the opening of your food processor, pulsing until the dough just barely comes together. Pinch some of the dough between your fingers. If it clings together, it's done.
- Dump all the dough out onto a piece of plastic wrap, and use the plastic wrap to gather all of the crumbly bits together. Bring your hands together and form a ball under the plastic wrap. Flatten the dough into a round disc. Refrigerate at least 1 hour, up to 3 days. While the dough is resting, let’s make some frangipane.
Frangipane
- Using a hand mixer, cream together the butter and sugar until light and fluffy, about 2 to 3 minutes. Mix in the almond flour. Add in the egg and the extracts, mixing until it’s all combined and fluffy. Set aside.
Slicing your pears
- Before slicing your pears, prepare a bowl of ice water with a squeeze of lemon juice. You will dip your pears in this solution to prevent them from browning before you assemble your galette.
- Place the pear on a cutting board and slice it in half lengthwise with a sharp paring knife. Peel if desired. Use a melon-baller to remove the core.
- Place one pear-half, cut side down, on a cutting board. Slice it into ¼-inch slices beginning ¼ inch below the top. Leave the top ½ inch uncut.
- Dip the sliced pear-half in the lemon ice water and place on paper towel to dry while you slice the rest of the pears.
Galette Construction
- Preheat oven to 425° Place the dough on a lightly floured piece of parchment paper on your counter. The parchment paper will make it easier to transfer the dough to a baking sheet. Sprinkle a little more flour on top of your dough and on your rolling pin. Roll the dough out to a 14 inch circle . It doesn’t have to be perfect.
- Use a 10 inch lid of a pot, or a bowl, to mark a circle on your dough, which will be the border for spreading your frangipane and laying on your pears.
- Using an offset spatula, spread the frangipane on the center of your dough, leaving about a 2 inch border all around.
- Gently fan out your pears and place them on top of the frangipane. Start with 6 pear-half fans (three pears). Don't worry if some of the pear-halves break apart. You can just place them on the galette in a fan shape. No one will know.
- Use the last 2 pear fan halves and break them apart to fill in the smaller gaps between full halves, until the entire circle is covered.
- Fold the edges of your dough over the filling, kind of overlapping as you go around. Brush the exposed crust with egg wash (1 beaten egg with 1 teaspoon water) and sprinkle with raw or granulated sugar.
- Bake at 425° for 40-50 minutes, or until your crust is a nice golden brown and your frangipane is puffy and peeking up between your pears. Remove from oven and cool on a wire rack for at least 15 minutes before slicing and serving.


Steve says
Hi, thanks for posting this recipe. I just completed baking it. This is a keeper recipe for sure. Just one thing: I had to pull the galette from the oven after 35 minutes, as the crust was getting dark, and I found it had gotten kind of hard (huge bummer). Perusing other similar recipes, I saw that others suggest 425 for say 10 minutes, then reducing temperature to 375 for another 25 minutes or so. Unless I made a really deep pile of pear, I think I would recommend changing the time-and-temperature so the galette isn't overbaked.
Cynthia Christensen says
I’m glad you like the recipe, but I’m sorry that you had some difficulty with the timing/temp. I have tested this recipe dozens of times and it has been made hundreds of times by other readers and you were the first to mention the difficulty with timing or temperature. Everyone’s oven runs a little bit differently and I t’s possible that your oven runs a little hot. We moved into our new house I had to adjust our oven temperature by 35°. I’m sure I’ll make this again soon and if I have any difficulties I will definitely update the recipe.
Flicka49 says
I used a store-bought piecrust and Bartlett pears. It was easy to make, delicious and a hit with everyone! I will definitely make it again.
Cynthia Christensen says
That’s awesome! Glad to be in your rotation!
Jenny says
The ingredient list shows 1.5 cups of flour and the instructions say 2 cups. Which is correct?
Cynthia Christensen says
The amount in the ingredient list is correct. Thanks so much for catching that! I removed the amounts from the instructions, not only because you caught my error, but because it becomes even more confusing if you scale the recipe up or down. Thanks again!
Louise says
Do you think I could construct this ahead of time unbaked and bake it from frozen?
Cynthia Christensen says
Yes! You can cook your galette from frozen without thawing it out. In fact, it's better to bake frozen pie directly out of the freezer, so the thawing fuit doesn't become too juicy. You might need to add up to 15 minutes to the baking time. If the crust starts to brown and the fragipane filling isn't set yet, just cover the edges with some foil.
Gabriella Lester says
Made this the other day. It was delicious. The pastry was flaky and buttery. Thank you! I think I will make it again for Thanksgiving!
Cynthia Christensen says
Amazing!