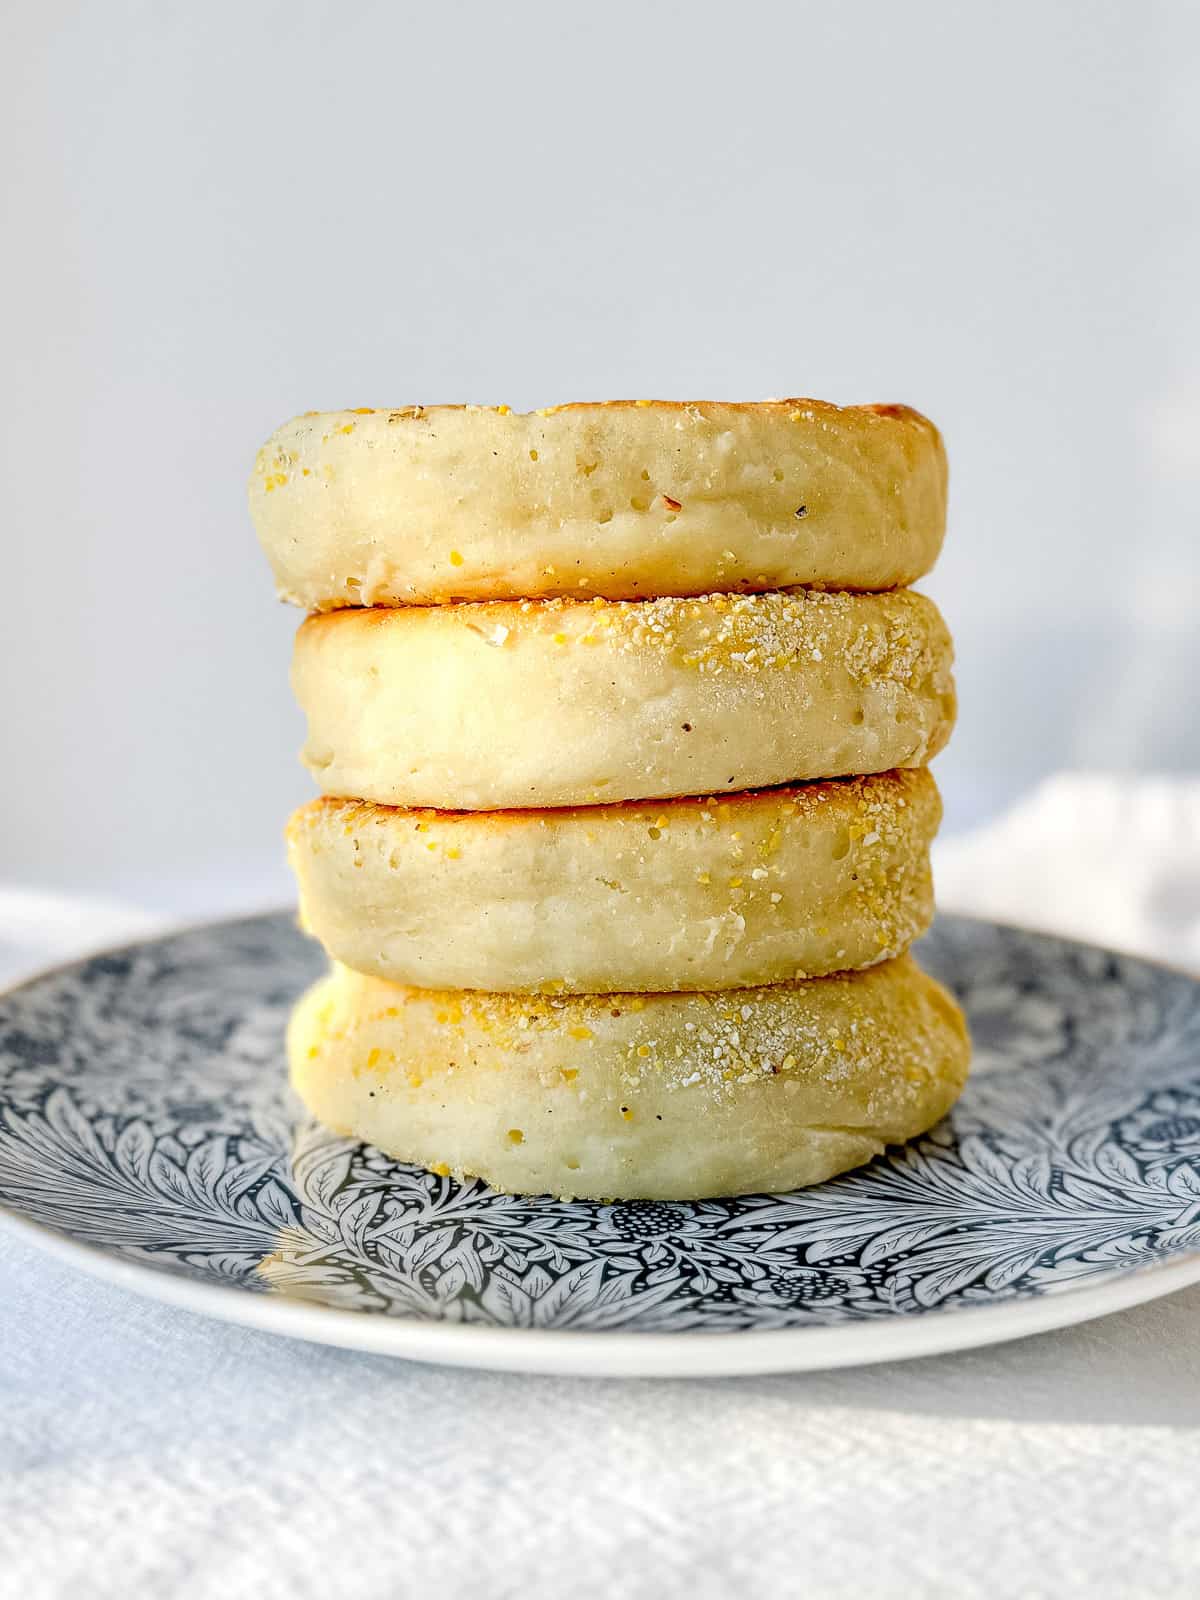
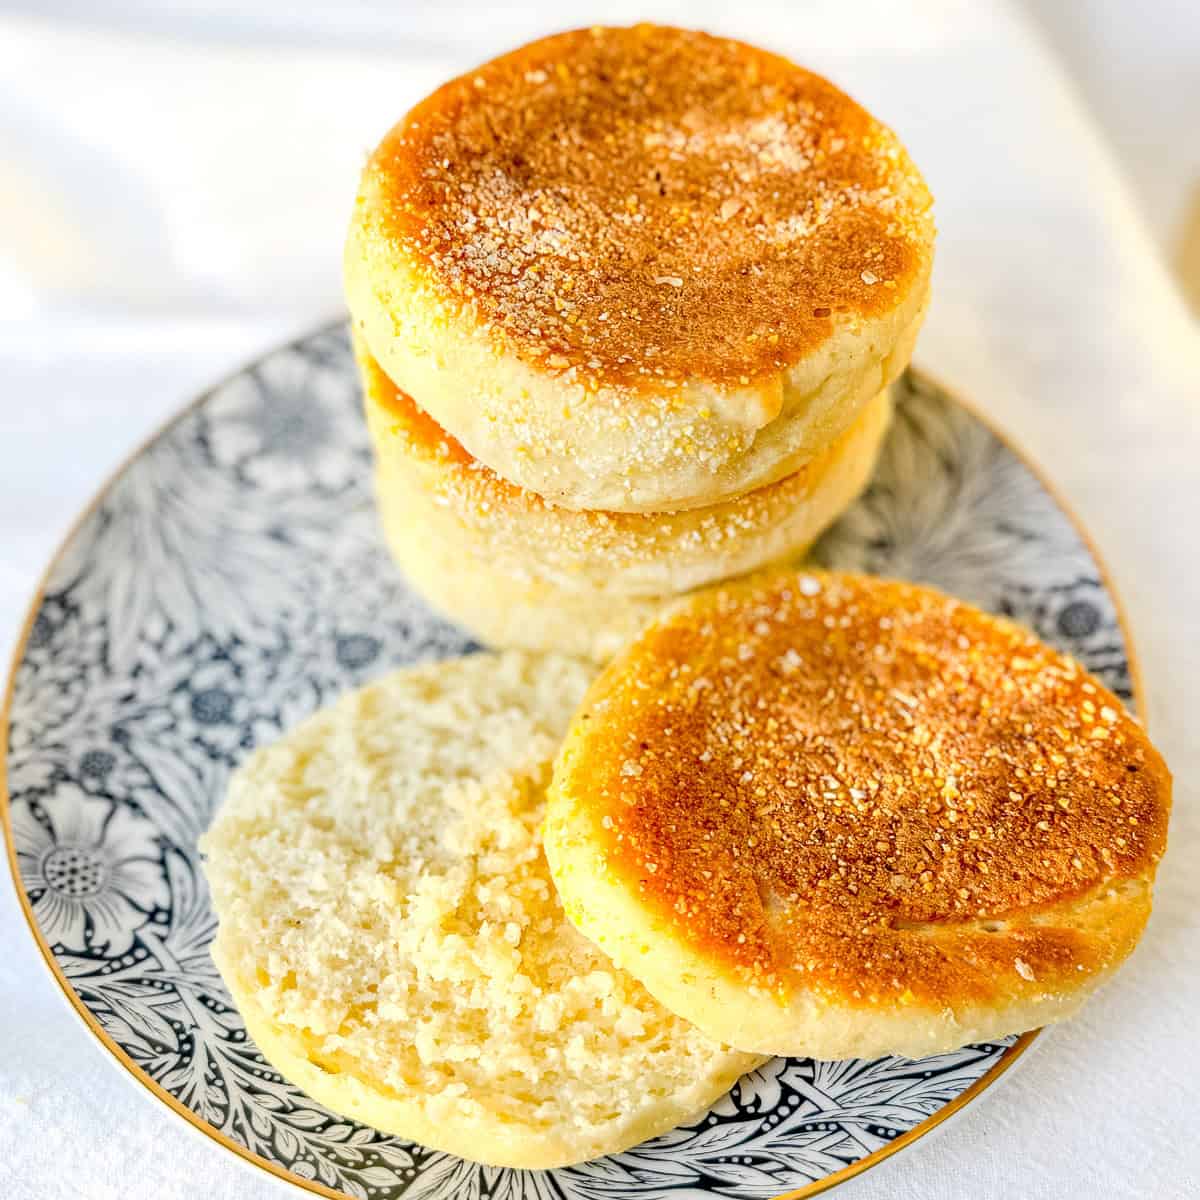
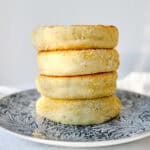
Start your day with a delicious twist on a classic, made effortlessly with just two ingredients: self-rising flour and creamy Greek yogurt. My No-Yeast English Muffins are airy and tender and perfect for toasting, or as the base for your favorite recipes.
Save This Recipe! 💌
As a professional baker, I'm used to spending long hours making breads and croissants, and all the yeast raised confections. But at home, I prefer to use just two simple ingredients-self-rising flour and Greek yogurt-to create a batch of my Quick and Easy English Muffins in less than an hour. Whether you're looking for a quick breakfast fix or a satisfying snack, this no-yeast recipe beats store bought by a mile!
These 2-Ingredient English muffins are amazingly versatile, providing a perfect base for all your favorite schmears, from butter and jam to Eggs Benedict. The combination of self-rising flour and Greek yogurt yields a light, tender texture with a hint of tanginess. Are you ready to enjoy warm, homemade English muffins that are as easy to make as they are delicious to eat? Let's do the thing!
Jump to:
❤️ What you'll love about these English Muffins
- Simple - With just two basic ingredients-self-rising flour and Greek yogurt-these English muffins are incredibly easy to make, perfect for busy mornings or last minute brunches.
- Quick - With no need for instant yeast, active dry yeast, or even sourdough starter, there is no finding a warm place in your cold kitchen and waiting for a dough to rise. You can have fresh, homemade English muffins ready to enjoy about 30 minutes,
- Light and Fluffy - Despite their simplicity, these muffins have a light and fluffy texture, thanks to the self-rising flour, the moisture from the Greek yogurt, and the unique cooking technique.
- Versatility: These muffins are a blank canvas for your favorite toppings like butter and the perfect base for Eggs Benedict and quick breakfast sandwiches.
- Higher Protein: With the added benefit of protein in Greek yogurt, these easy homemade english muffins offer a healthier alternative to a classic english muffin recipe that contains butter or oil.
Ingredients for English Muffins
It doesn't get much more simple than this! You're going to love this homemade English muffin recipe so much that you're going to want to make sure to have both Greek yogurt and self-rising flour in your pantry at all times.
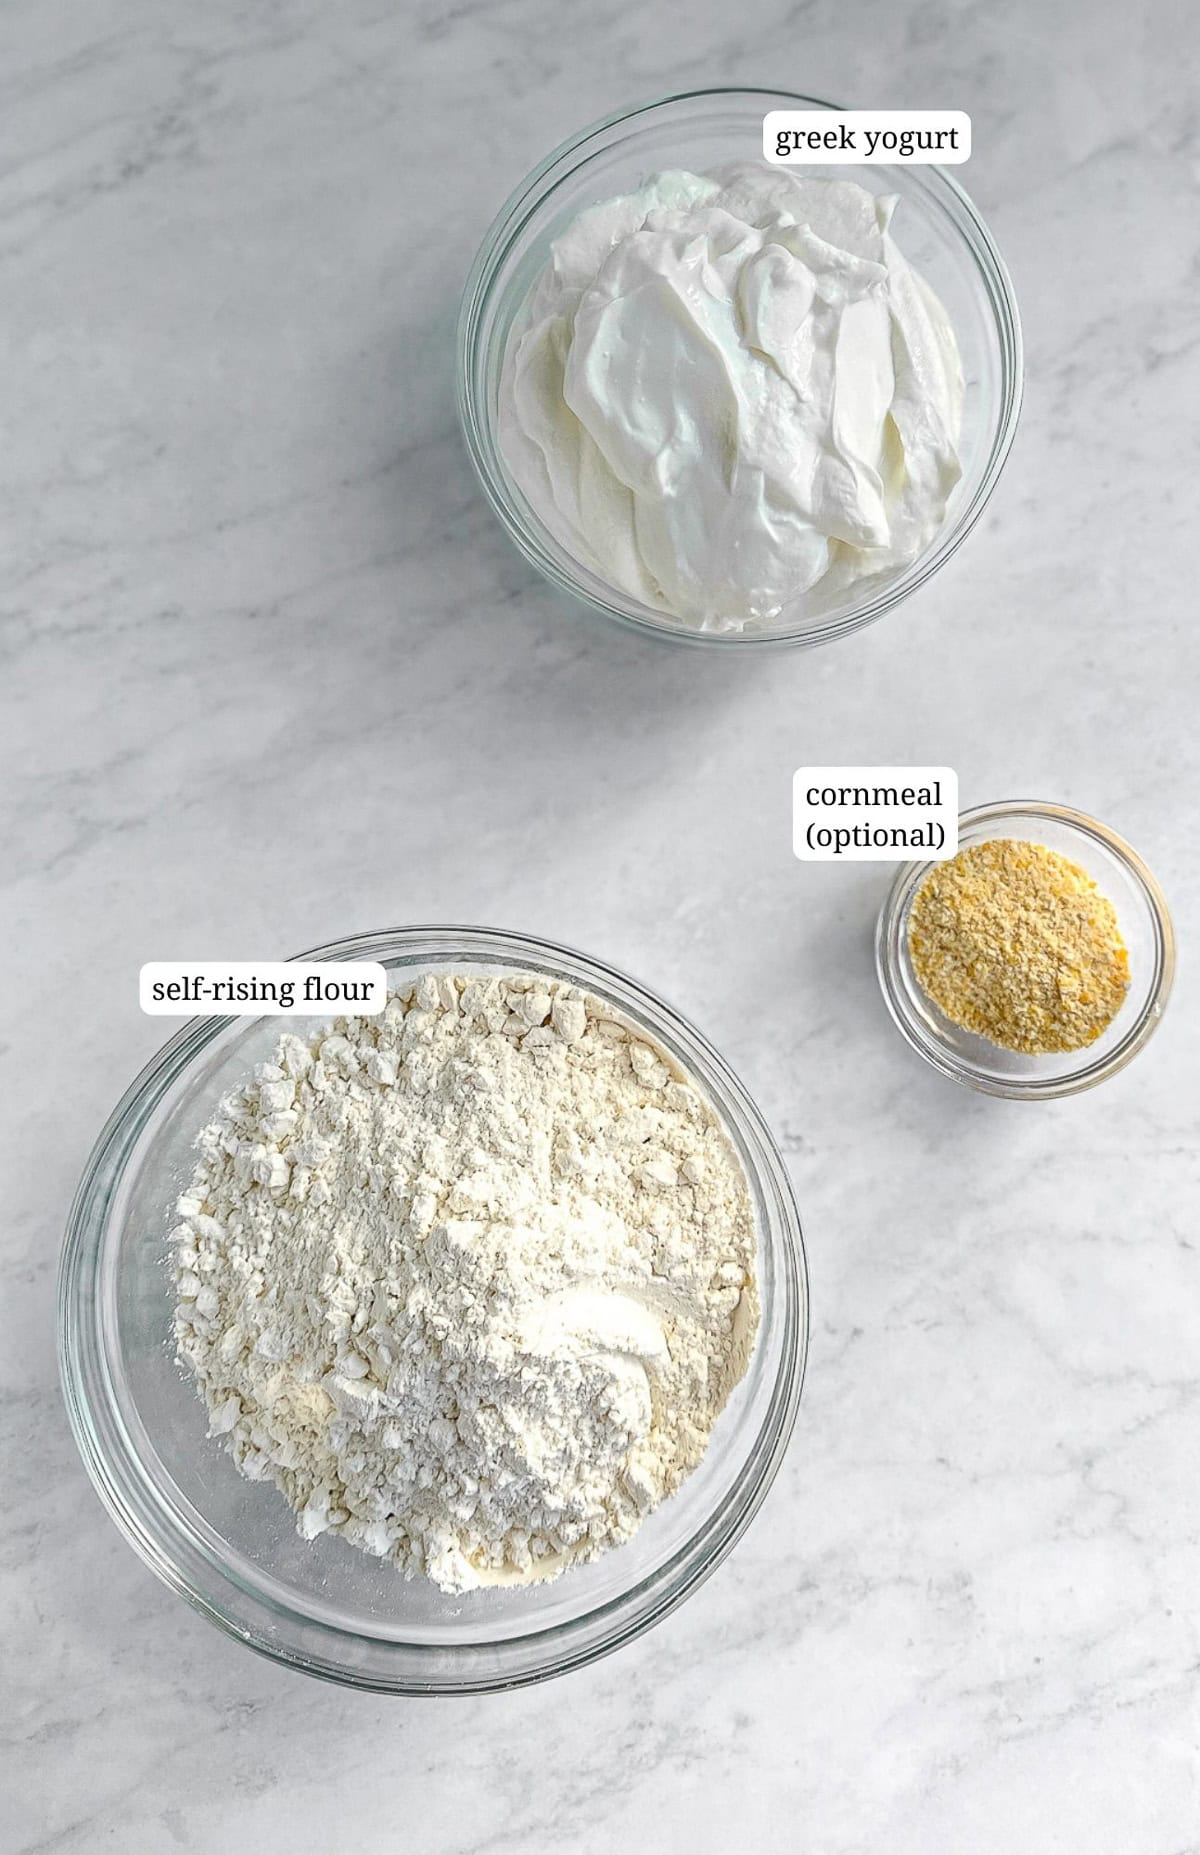
See full recipe below for exact quantities.
Self-rising flour to the rescue! If you're looking for another great recipe to use up your self-rising flour, you've gotta try my 3-Ingredient Stuffed Bagel Bites! Or make my Grandma's Sweet Milk Biscuits made with self-rising flour and whole milk!
What is self-rising flour?
Although similar to all-purpose flour, self-rising flour already contains baking powder and salt, eliminating the need to add either of these ingredients to your recipes. This means you can make light and fluffy muffins, pancakes, waffles, and even old fashioned biscuits quickly and easily.
Making your own self-rising flour
Self-rising flour is quite common in the American South, where we use it to make cornbread and biscuits, and just about everything else. But apparently not everyone keeps self-rising flour in their pantry.
If you don't have self-rising flour, no problem. I've got you covered. For every cup of self-rising flour that you need combine 1 cup of all-purpose flour (120 grams) and add 1 ½ teaspoons of baking powder (7.5 grams) and ½ teaspoon of kosher salt (1.5 grams). If you don't have kosher salt, only use ¼ teaspoon of table salt for best results.
For a chewier English muffin, you can also make your own self-rising bread flour. Just follow the same instructions above, substituting bread flour for all-purpose flour. I have not tried this recipe with any alternative or gluten free flour, so I cannot attest to how that would work. If you do and it's successful, or not, please let me know!
Equipment
As you can see in the photos below, I used English muffin rings, also called crumpet rings, to help form my 2 ingredient English muffins. A traditional English muffins recipe sometimes uses a wetter dough that can spread rather than rise, so cooking them in the rings is important, but our dough isn't like that. I like to use them just for the shaping process because consistency in shape and size means everything cooks up evenly, in the same amount of time, and looks relatively the same.
If you don't own a set of English muffin rings, don't worry about it. You can use wide mouth mason jar rings to shape them, roll out the dough and stamp shapes out with a ring cutter or cookie cutter or even a large cathead biscuit cutter. Finally, you can simply shape and flatten out your muffin pucks by hand. As long as your dough balls are the same size and a consistent shape, I think you'll do just fine.
Quick Recipe Video
Instructions
Making a big batch of homemade English muffins without yeast is so much easier than you could have ever imagined. Follow along and then go make some for yourself!
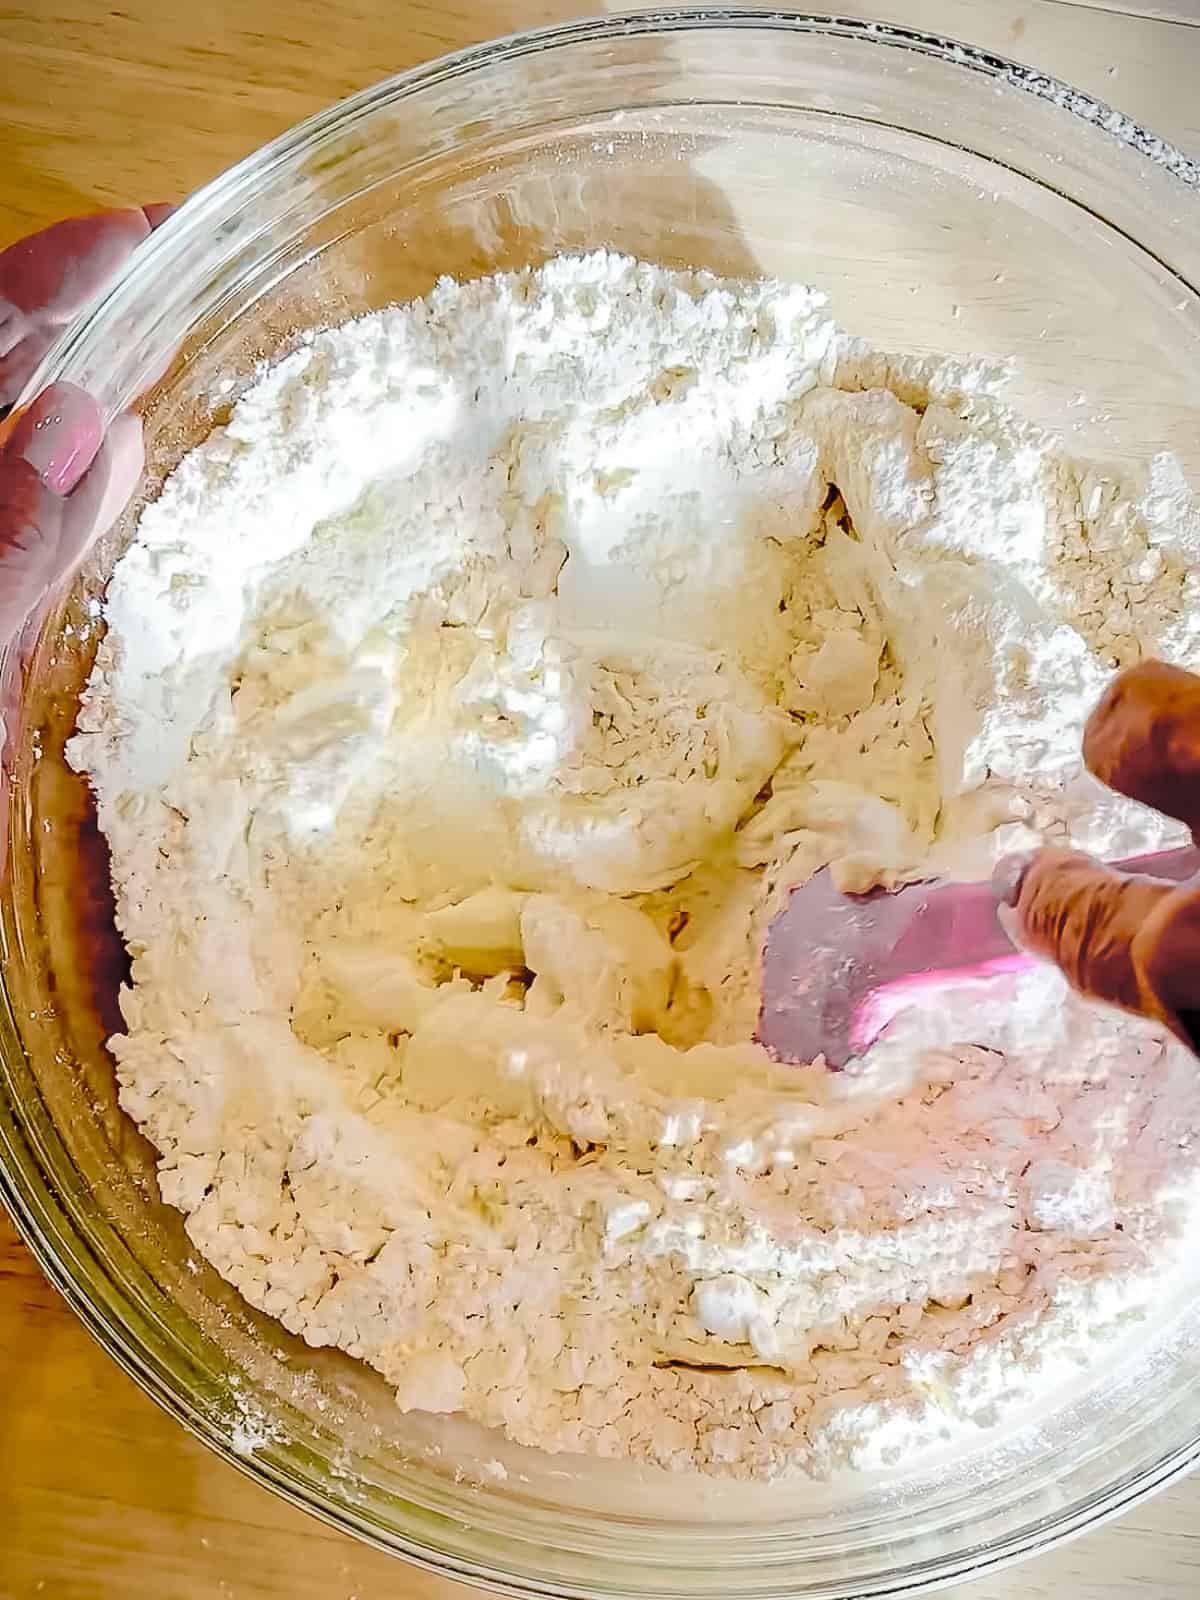
Step 1: Start by placing your Greek yogurt into a large bowl. Sift the self-rising flour into the bowl with the yogurt. Begin mixing.
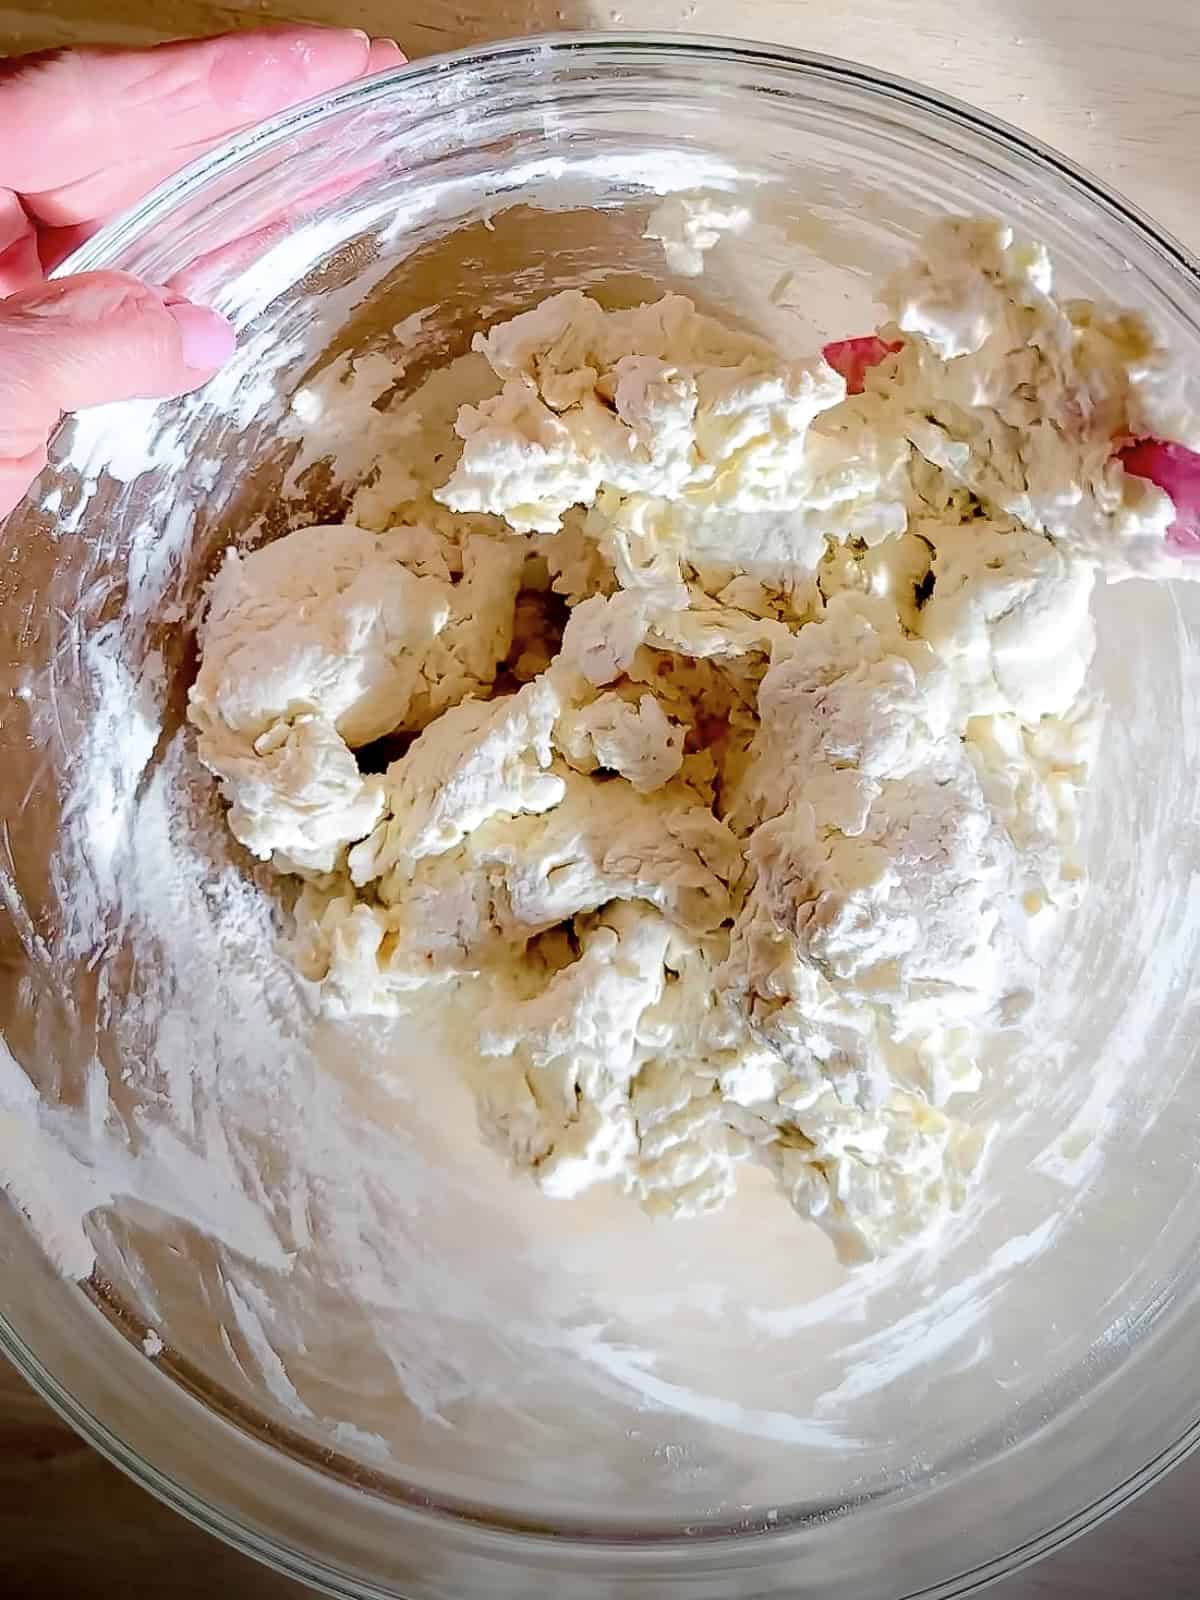
Step 2: Using a silicone spatula, or a wooden spoon, mix until dough comes together, scraping the sides of the bowl. Some stubborn dry bits will linger on the bottom of the bowl. Just use the flat of your spatula to mash the wetter parts into the dry bits and they will incorporate.
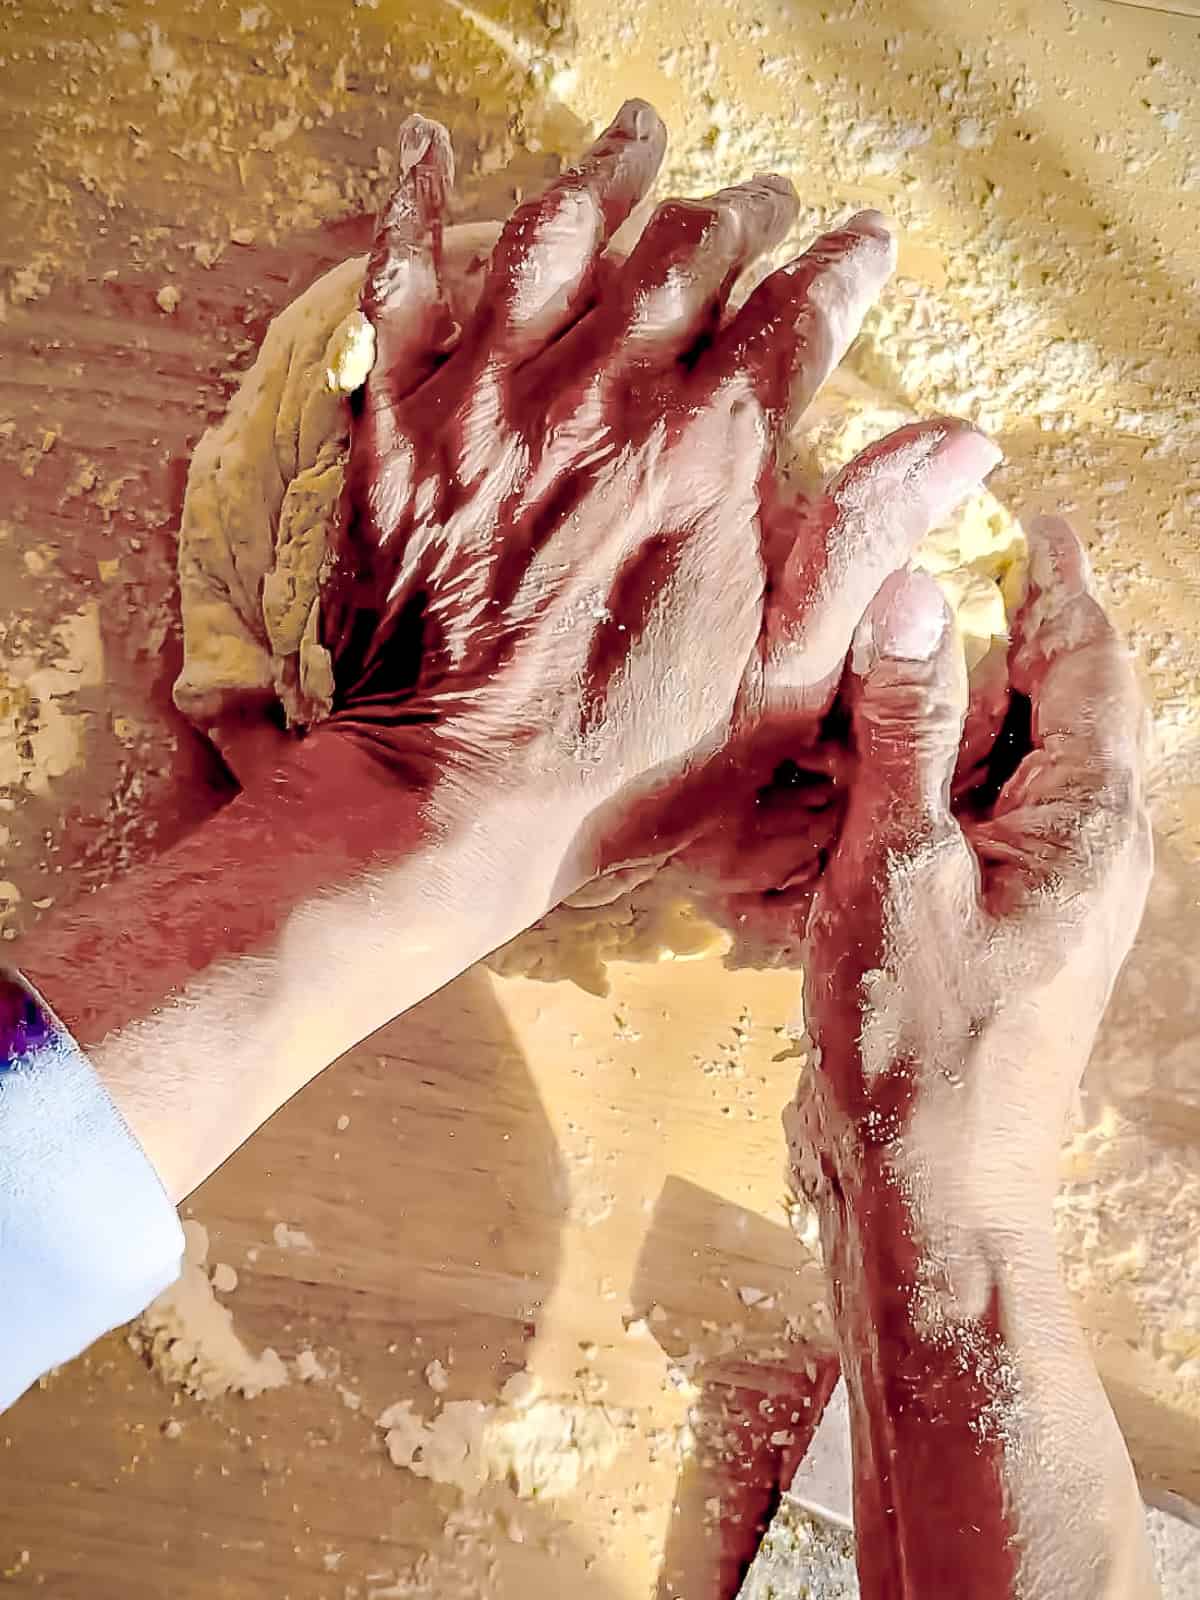
Step 3: Turn dough out of your large mixing bowl and onto a lightly floured surface. Knead until smooth, a few minutes. It will be a sticky dough, but not wet at all. Form into a flat ball.
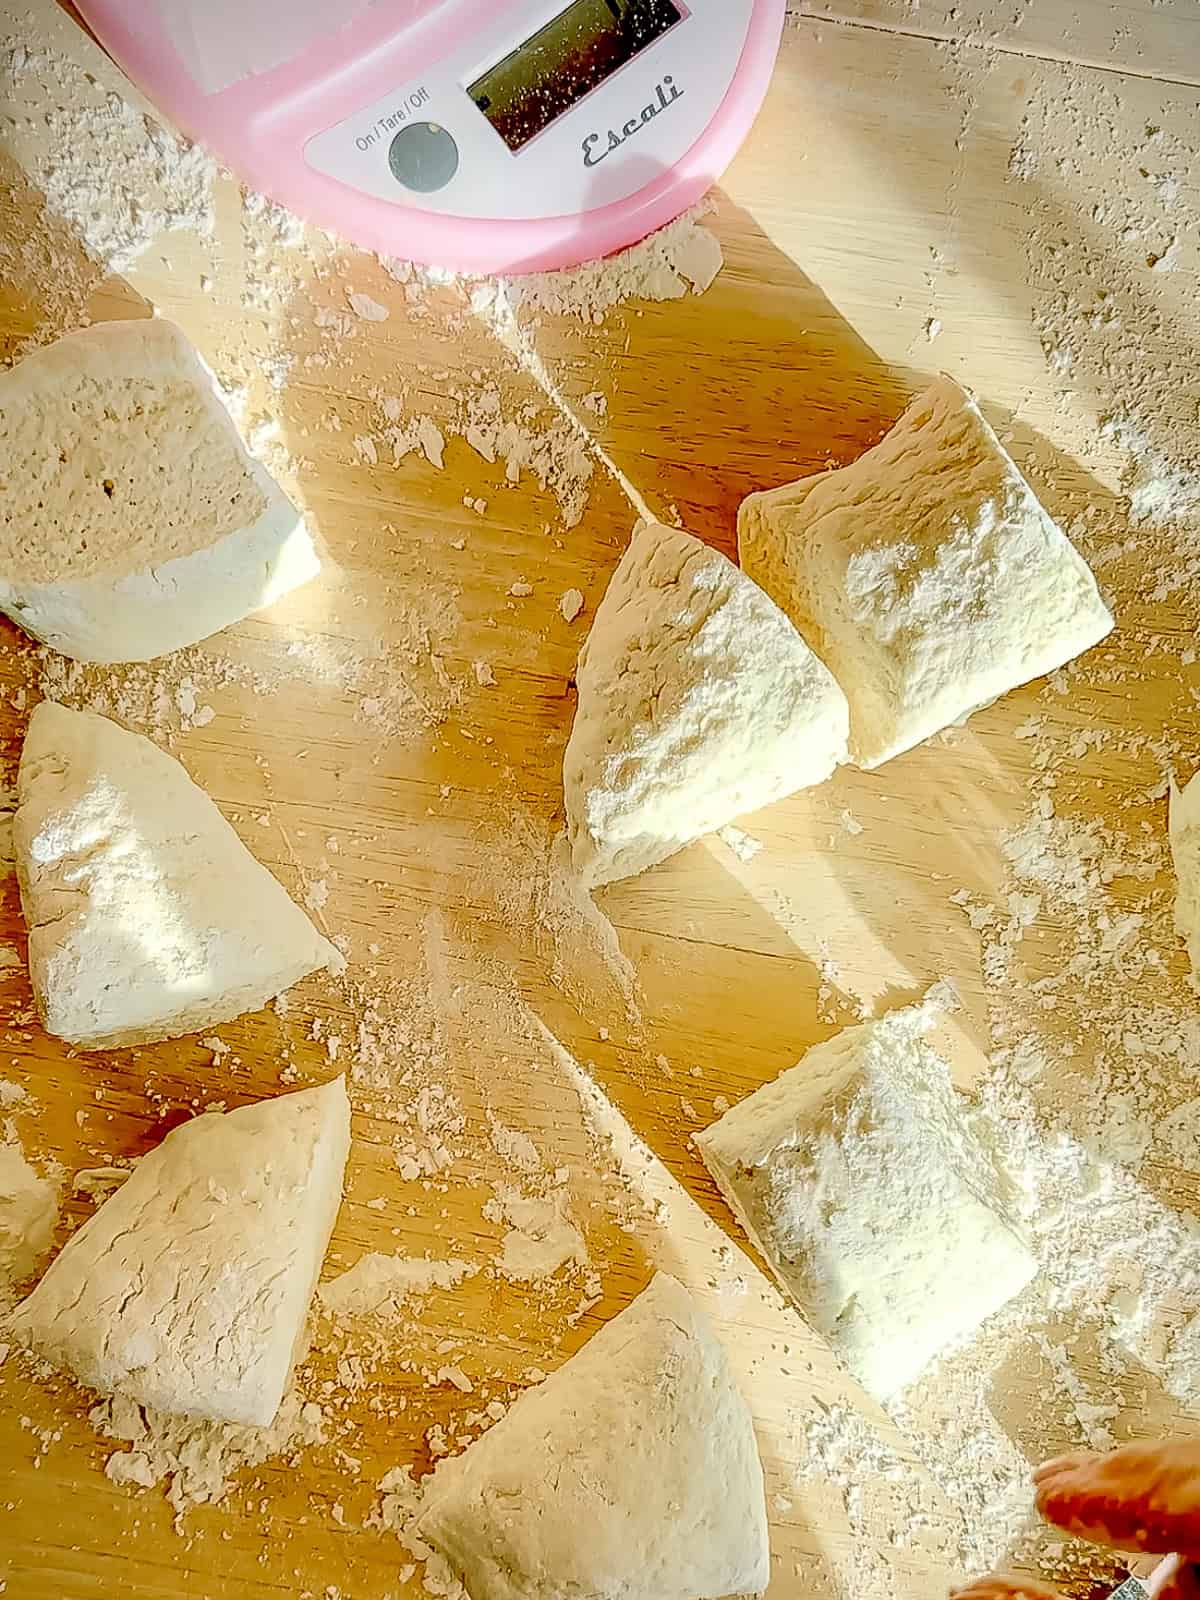
Step 4: Divide your english muffin dough into 8 equal portions. I like to use a scale to weigh mine to ensure they are all equal sized (about 100 to 110 grams each), but you can eyeball it if you like.

Step 5: With lightly floured hands, roll each into a ball. Pat each into a puck shape about 3 ½ inches in diameter and ½ inch thick. You can do this using your hands or by pressing into an English muffin ring or a large mason jar lid.
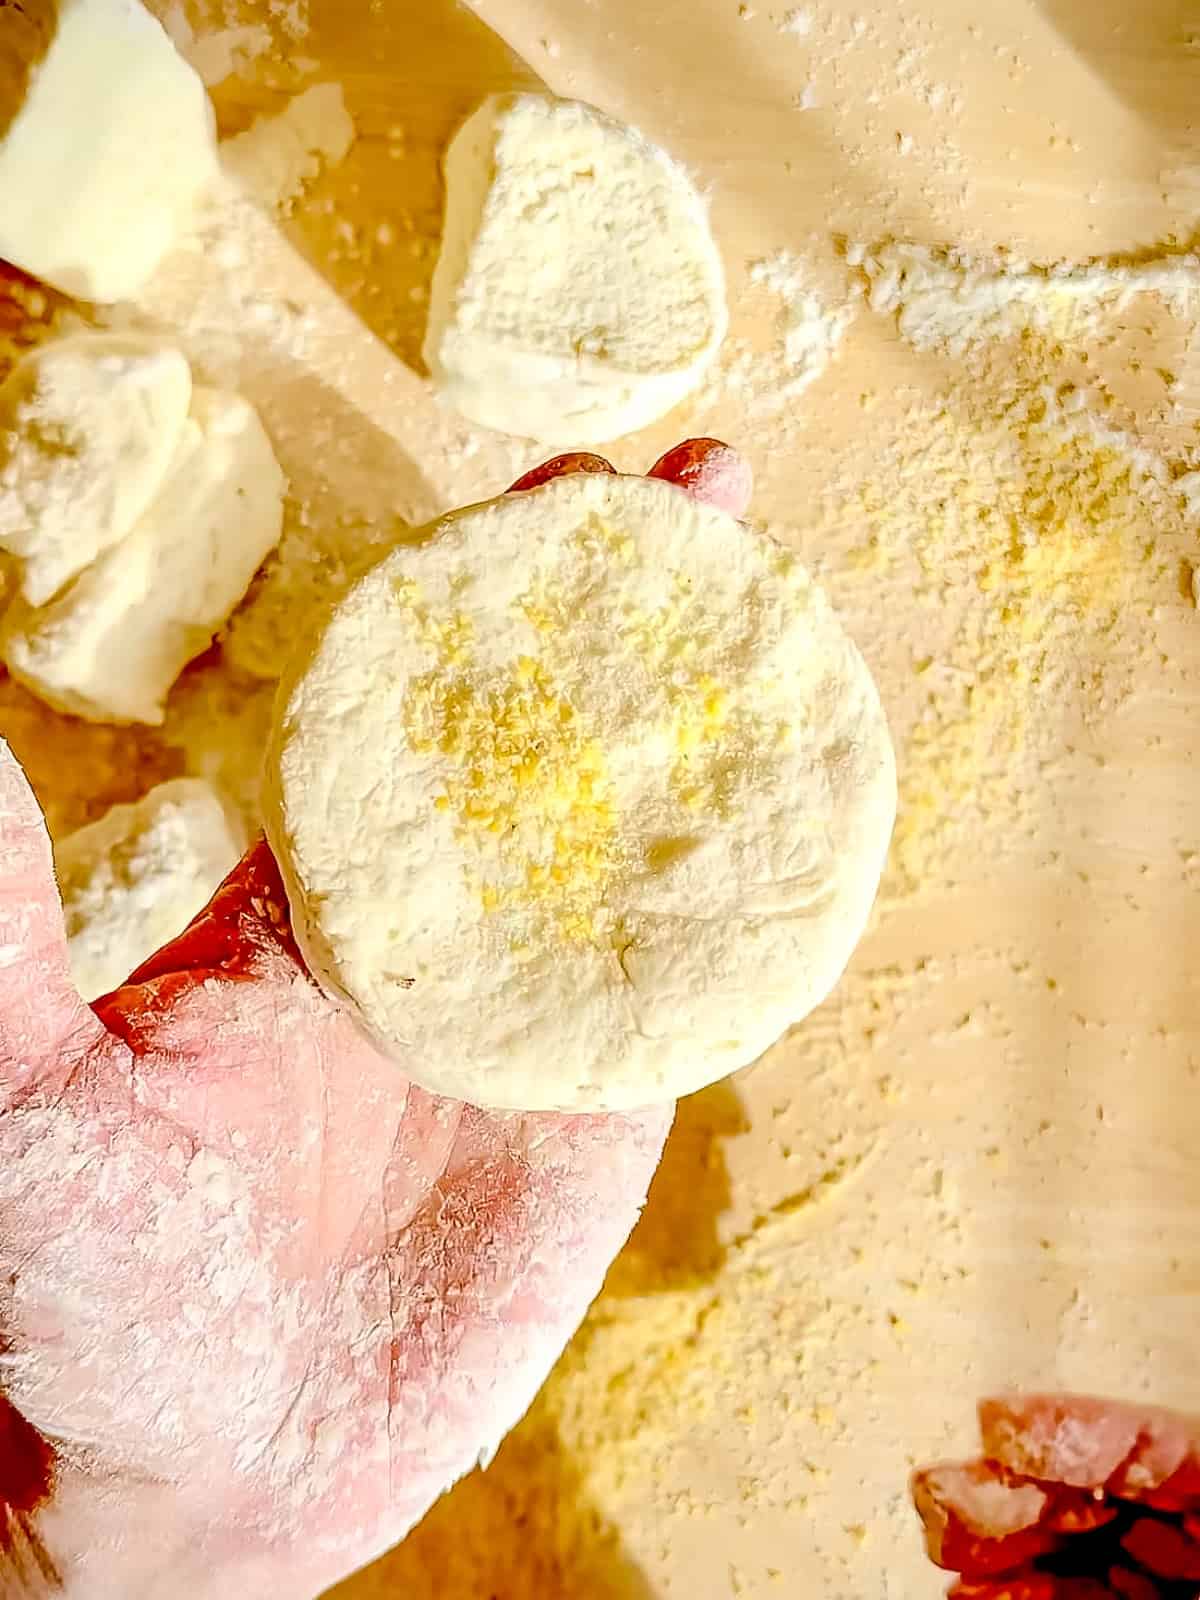
Step 6: Sprinkle corn meal onto a section of the counter and place finished muffins on this area (optional, but traditional). Finish forming the rest of your dough and sprinkle all of them with corn meal. Cover with a clean kitchen towel or plastic wrap and let them rest for 15 minutes.
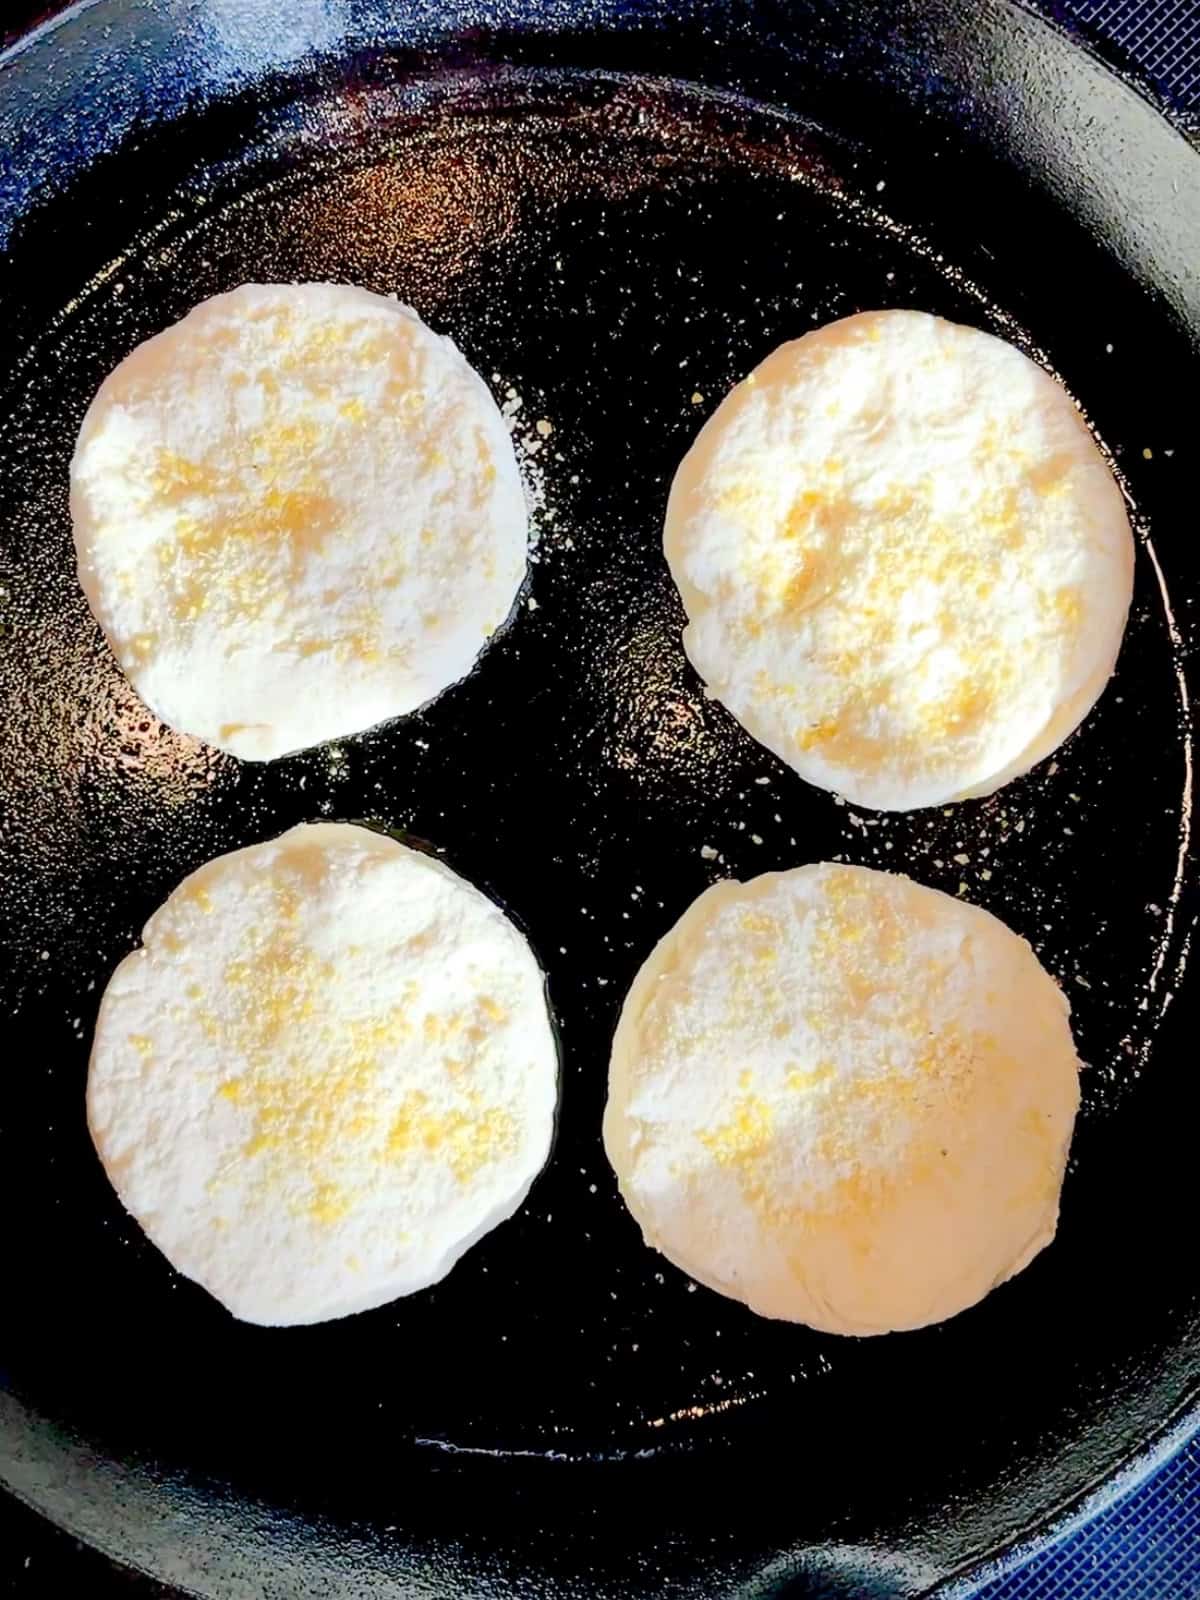
Step 7: Set a large cast iron skillet, or other heavy bottomed skillet, onto the stove and heat over medium low heat. You can also use an electric griddle with a lid.
When fully heated, brush with a very light layer of vegetable oil, about 1 teaspoon. Wipe with a paper towel. Place 4 of your dough pucks onto the pan and cover with a lid. Let cook for 10 minutes without opening the lid. (see note below for a fun little hack)

Step 8: Flip each muffin over, cover, and cook until golden brown on each side and hollow-sounding when thumped, about another 10 to 12 minutes, or at least 200°F with an instant read thermometer.
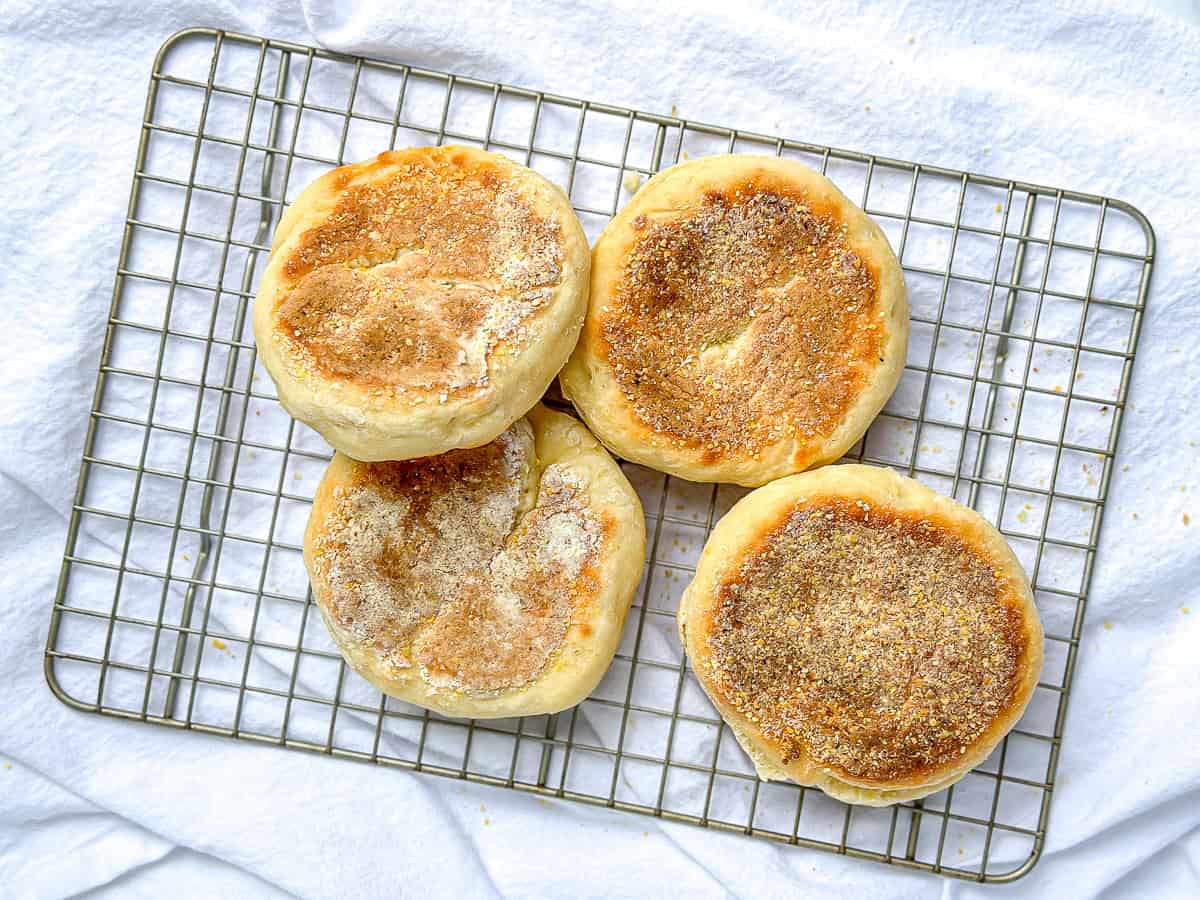
Step 9: Place finished muffins on a wire rack to cool completely while you cook the remaining ones.
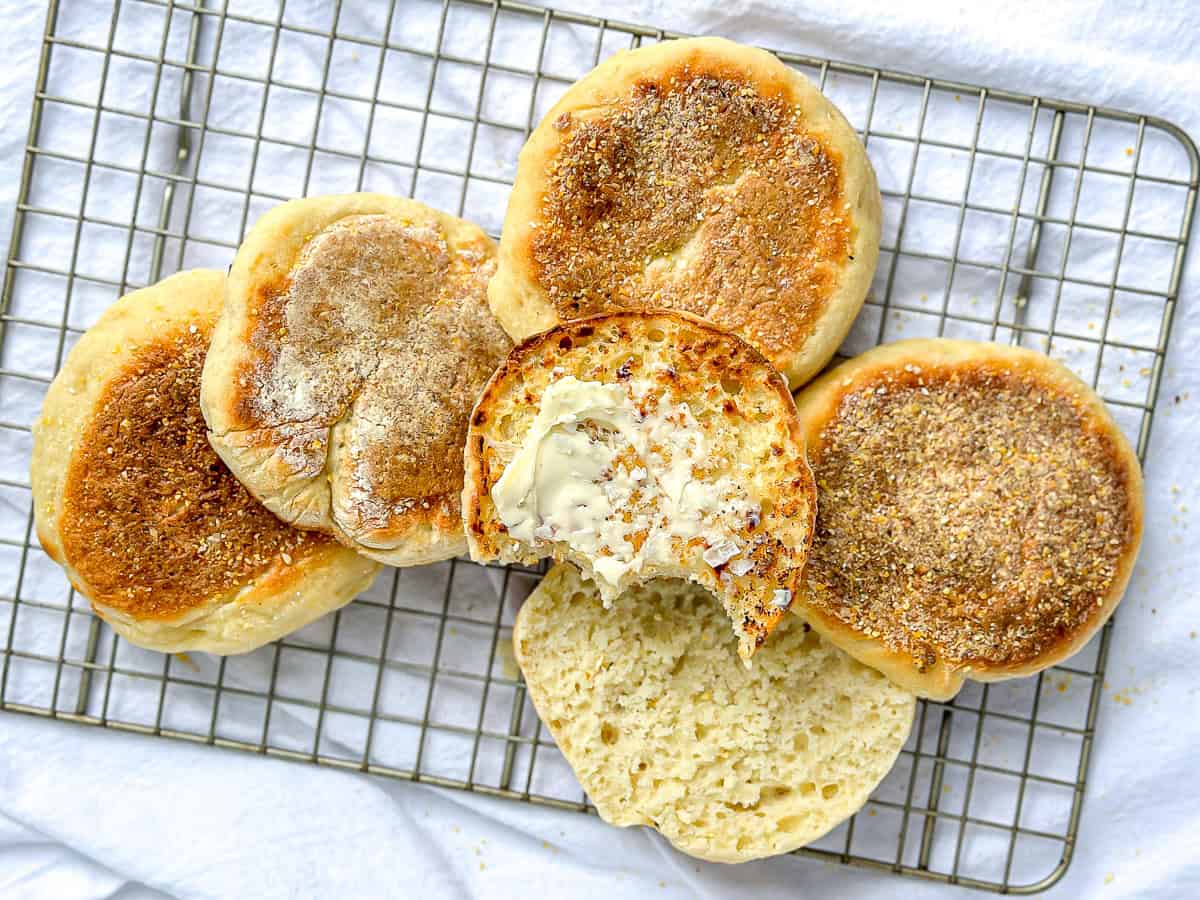
Step 10: When fully cooked, use the tines (pointy bits) of a fork to split open a muffin. Toast, if you like, and I do. Slather your nooks and crannies with butter. Enjoy your delicious homemade english muffins!
Expert tip: covering your pan
Covering your pan is an important part of making the best English muffins because the steam is needed to make them light and airy, but the condensation dripping onto the tops of your muffins can make them soggy. I like to tie a clean kitchen towel onto my pot lid to collect the excess moisture. Here's how:
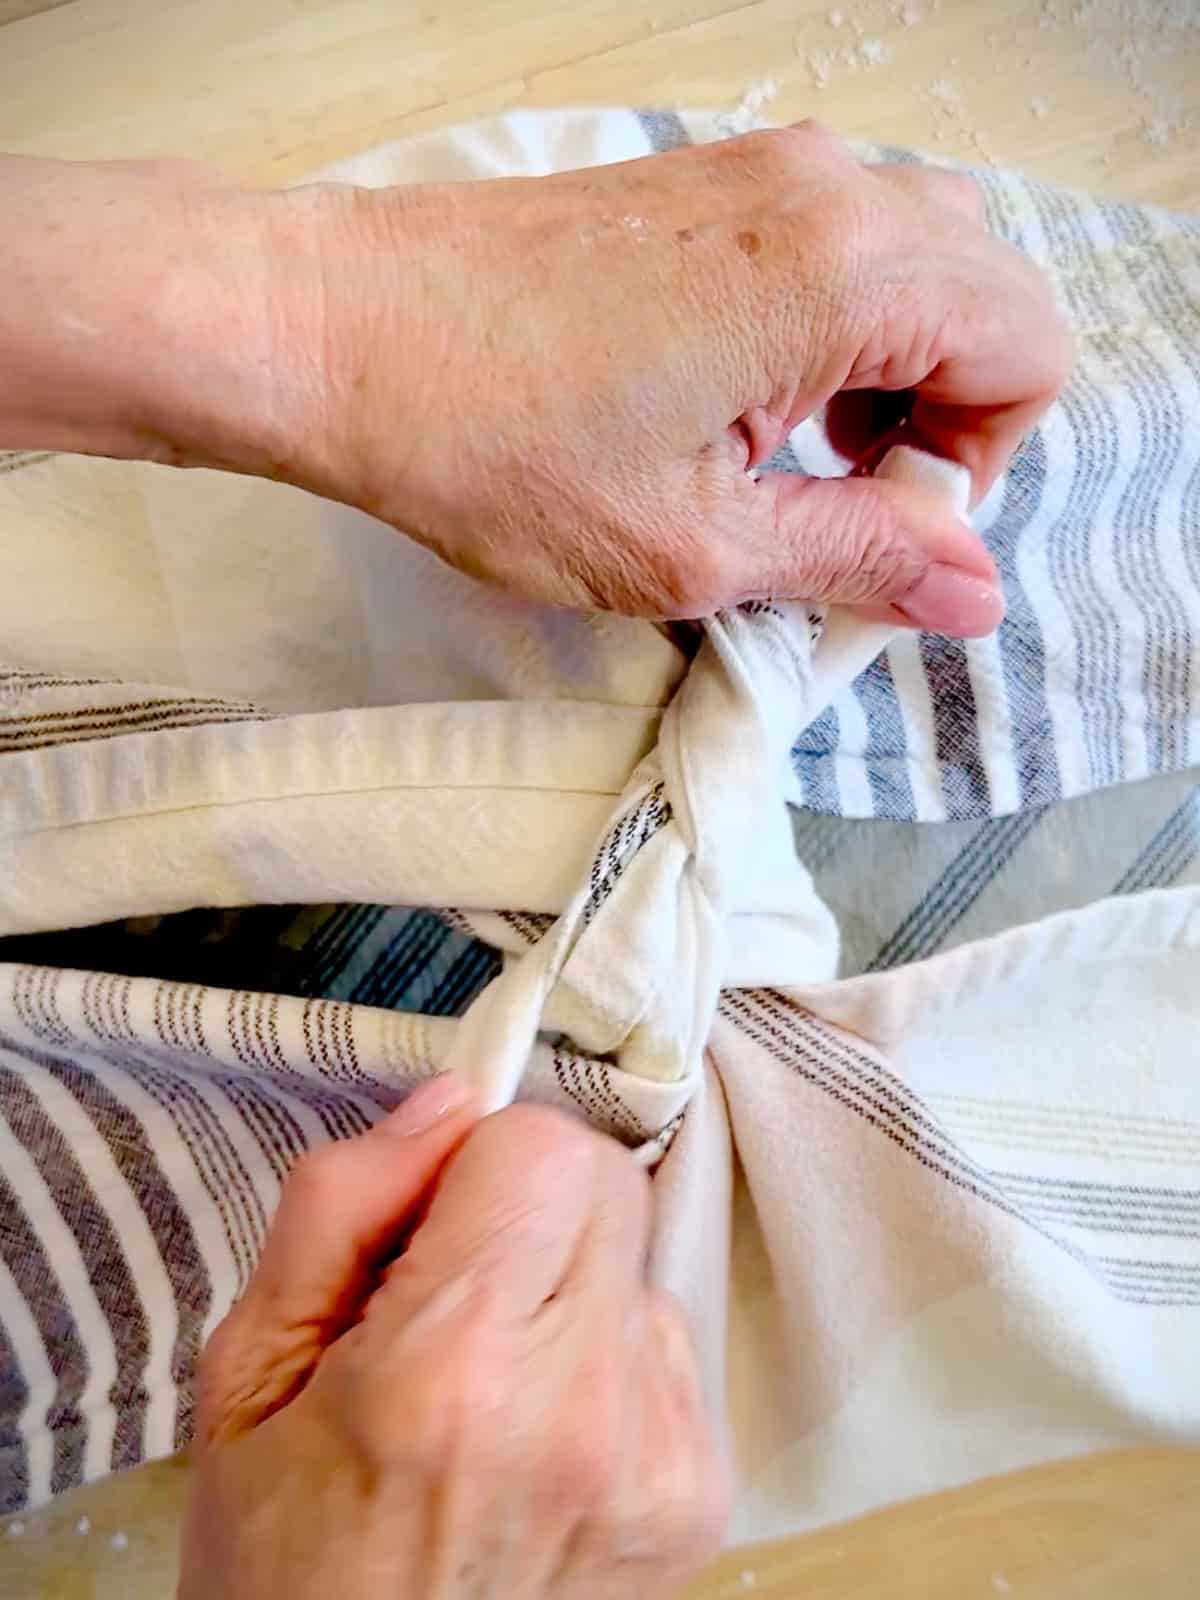
Step 1: Lay a large kitchen towel on the counter and place your lid in the center. Bring up two corners and tie them over the top.
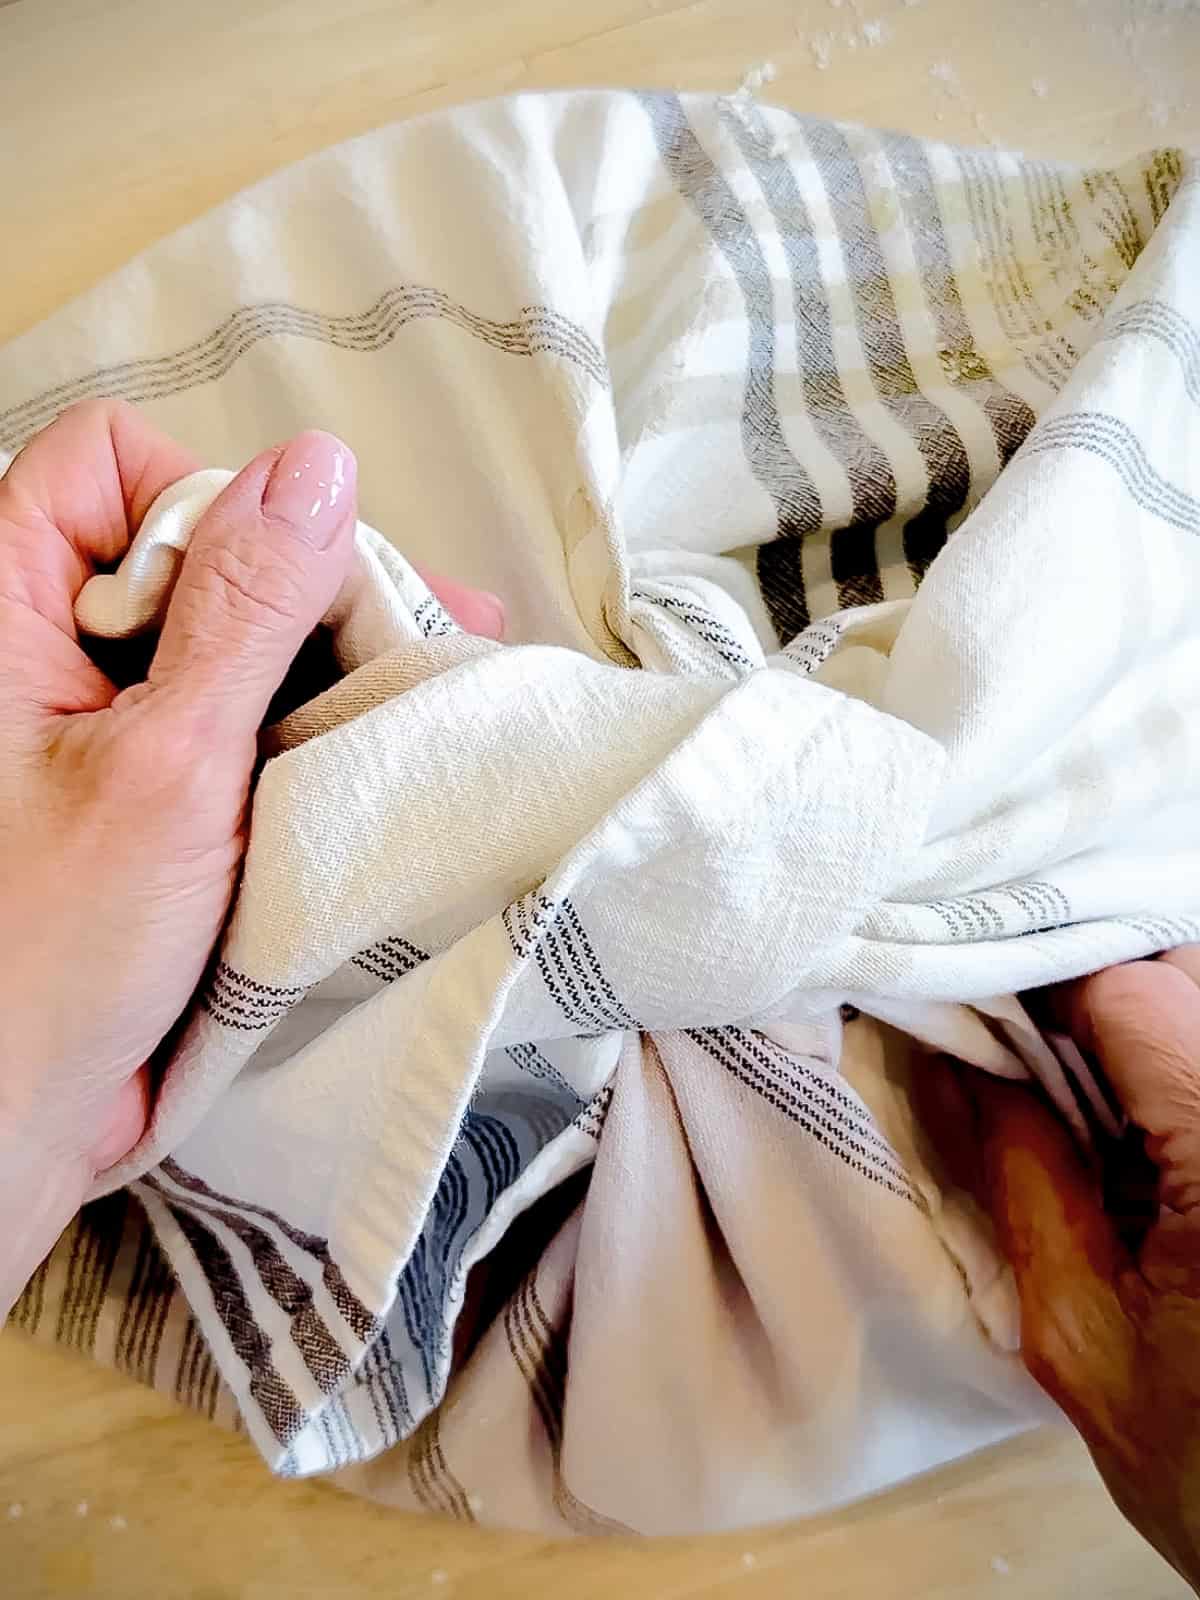
Step 2: Bring up the other two corners and tie them as well. Make sure any excess fabric is tucked into the tied portions so they won't drop onto the cooking surface
If you don't have a dish towel large enough, you can cover the pot with a piece of parchment paper and place the lid on top. Use caution when removing the lid as the parchment paper will be quite damp and there may be a lot of steam trapped underneath the paper. Just grasp the edges of the parchment paper and lift straight up and off to the side to discard. After flipping over your English muffins, use a new piece of parchment to cover.
Serving suggestion
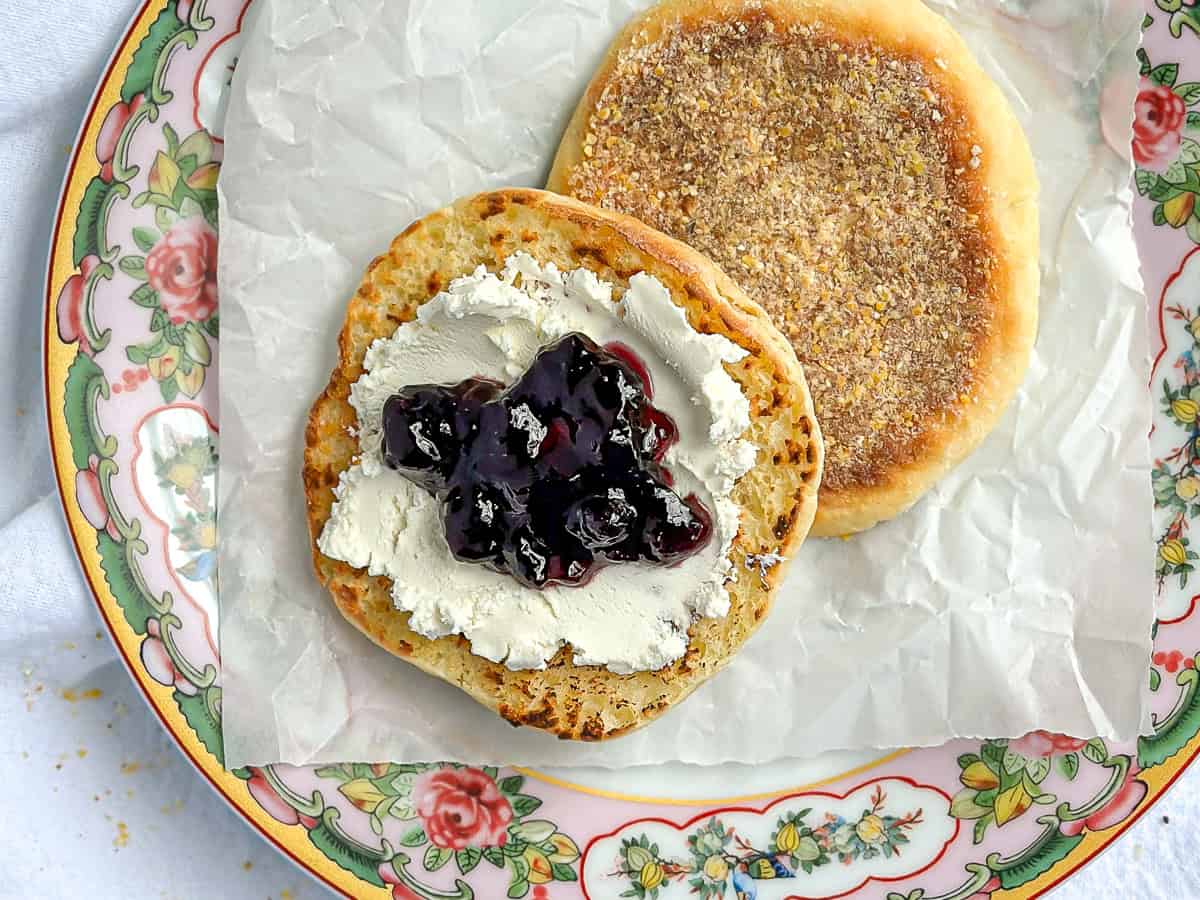
I love my English muffins simply toasted with butter or with cream cheese and jam. My husband thinks they were invented to make a classic Egg McMuffin. Or you can go old school and replace the potatoes in my hash brown eggs benedict with English muffins. Just don't forget the classic hollandaise sauce.
Recipe FAQs
Yes! You can replace the Greek yogurt with coconut cream (not milk). Because of its extreme thickness you may need to dilute it with water. Start with 1 ½ cups of coconut cream and add water until you get a good doughy consistency.
I did test these by baking a batch in the oven. Set your oven to 400°F and place your muffins on a prepared baking sheet (lined with parchment paper or aluminum foil). Bake on the lowest rack for 12 minutes, flip, and cook for another 12 to 15 minutes. English muffins cooked on a baking tray will not get as golden as pan cooked muffins, but will still taste delicious.
Use the tines of a fork to split any remaining muffins, but don't open them. Place into an airtight container and store on the counter for 3-4 days or in the refrigerator for a week. Can be frozen up to three months and still toast up like they are fresh. Let thaw on the counter before splitting them open, toasting, and enjoying.
If you have an insert thermometer, the inside of your English muffin should read 200° or more. If you feel that your English muffins are the correct color, but are still unsure if they are fully cooked inside, place them on a wire rack in a 350°F oven, cover with aluminum foil, and bake for five minutes. Leave covered and let cool completely.

Did you try this recipe?
Please consider leaving a comment with a ⭐️ rating below and tell me all about it! It helps me to continue to improve my content and lets others know what you think!
I appreciate it so much!
-Cynthia
📖 Recipe
Quick and Easy 2-Ingredient English Muffins (No Yeast!)
Ingredients
- 3 cups (360 g) self-rising flour
- 2 cups (500 g) plain Greek yogurt
- 2 tablespoons (20 g) corn meal (optional)
Instructions
- Place your Greek yogurt into a large mixing bowl. Sift the self-rising flour into the bowl with the yogurt. Using a soft spatula, mix until dough comes together, about 30 seconds. Some stubborn dry bits will linger on the bottom of the bowl. Just use the flat of your spatula to mash the wetter parts into the dry bits and they will incorporate.
- Turn out onto a lightly floured work surface. Knead until smooth, a few minutes. Form into a flat ball.
- Divide dough into 8 equal pieces. With lightly floured hands, roll each into a ball. Pat each into a puck about 3 ½ inches in diameter and ½ inch thick. You can do this using your hands or by pressing into an English muffin ring or a large mason jar lid.
- Alternatively, you can roll the dough out to a ½ inch thickness and cut out muffins with a ring cutter, biscuit cutter, or cookie cutter.
- Sprinkle corn meal onto a section of the counter and place finished muffins on this area (optional, but traditional). Finish forming the rest of your dough and sprinkle all of them with cornmeal. Cover with a clean kitchen towel and let them rest for 15 minutes.
- Set a large cast iron pan, or other heavy bottomed skillet, onto the stove and heat over medium-low heat.
- When fully heated, brush pan with a very light layer of oil, about 1 teaspoon. Wipe with a paper towel. Place 4 of your dough pucks onto the pan and cover with a lid. Let cook for 10 minutes without opening the lid.
- Flip each muffin over, cover and cook until golden brown on each side and hollow-sounding when thumped, about another 10 to 12 minutes, or at least 200°F with an instant read thermometer.
- Place finished muffins on a wire rack to cool completely while you cook the remaining ones.
- When fully cooked, Use the tines (pointy bits) of a fork to split open a muffin. Toast, if you like, and I do. Slather your nooks and crannies with butter and jam. Enjoy.









Raquel Elias says
The instructions are clear and easy to follow. Love making homemade English muffins
Cynthia Christensen says
I'm so glad you like the recipe!
FK says
I can't believe how good these turned out. I've tried many English muffin recipes and they're always a little disappointing, so I didn't have high expectations. These turned out perfectly!
Meghan says
Just tried this recipe for the first time today. Was super nervous to make English muffins because there are so many complicated recipes out there. This was so foolproof, I was able to get great English muffins without precise measurements or biscuit cutters. Incredibly easy and fun recipe!
Cynthia Christensen says
That’s great! I love a success story 🙌
Jenny says
I made ½ a recipe, the dough was too sticky & wet to knead. Even when I added flour it remained wet & my hands & spatula were covered.I was afraid to add more flour thinking there wouldn't be enough levening. I threw it out. lm blaming it on the yogurt bc I've been baking for 54 years.
Cynthia Christensen says
I suspect that there was something off in your measurements because if anything this dough is dry and people may have a harder time because of that. I'm wondering if you didn't add enough flour to begin with or that you didn't use a thick Greek yogurt. If you used regular plain yogurt, it's too wet and you would end up with a wet dough as you described. I hope you try again!
Rachel Macreadie says
Just made these with Wholemeal self raising flour… added a little baking powder just incase the Wholemeal is a little dense. Currently resting… fingers crossed they work!!
Cynthia Christensen says
I’m sure they’re gonna be great! So glad you found my recipe ❤️
Katherine says
Do you cover them when you cook for the second time after you flip them?
Cynthia Christensen says
Yes, cover them after flipping. Thanks for the heads up that I forgot to add that step! I have made the correction. I love my readers' sharp eyes!