

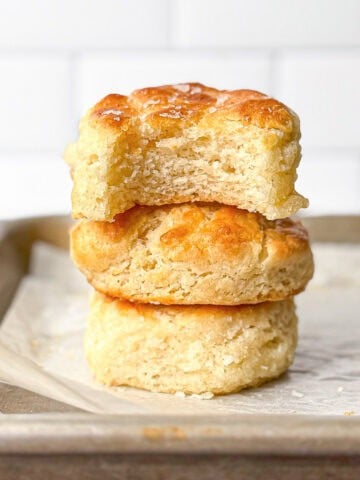
Salty Pecorino Romano cheese and spicy, floral black pepper make these Cacio e Pepe Biscuits taste just like the classic Italian pasta dish. Flaky, buttery, cheesy, and slightly spicy - you've found your new go-to biscuit!

Save This Recipe! 💌
Cacio e Pepe, translated to "cheese and pepper", is one of the most beloved pasta dishes in Italy, one of the four great Roman Pastas. Being married to an Italian-American, it became a kind of personal mission to bring those flavors to my Biscuits.
These Cacio e Pepe Biscuits are loaded with a generous amount of salty, sharp Pecorino Romano cheese along with spicy, floral black pepper for a cheesy, spicy, buttery, and flaky meeting of Italy and the American South.
Jump to:
❤️ What you'll love about these biscuits
- Flaky - My cut and stack biscuit technique builds the most amazing flaky layers
- Tall and fluffy - Buttermilk helps create big tall biscuits with a soft, fluffy interior.
- Great flavor - Freshly ground cheese and pepper enhance the salty, spicy, cheesy flavor
- Easy - This recipe uses easy to find ingredients for biscuits on demand
- Quick - Simple recipe and high oven temperatures means you can have delicious Cacio e Pepe Biscuits in about 30 minutes
Ingredients
Except for the cheese and the buttermilk, everything we use in this recipe is a pantry staple, so no last minute store runs for you! And once you taste these cheese and pepper biscuits, you'll be sure to have the Romano and the buttermilk on hand at all times!
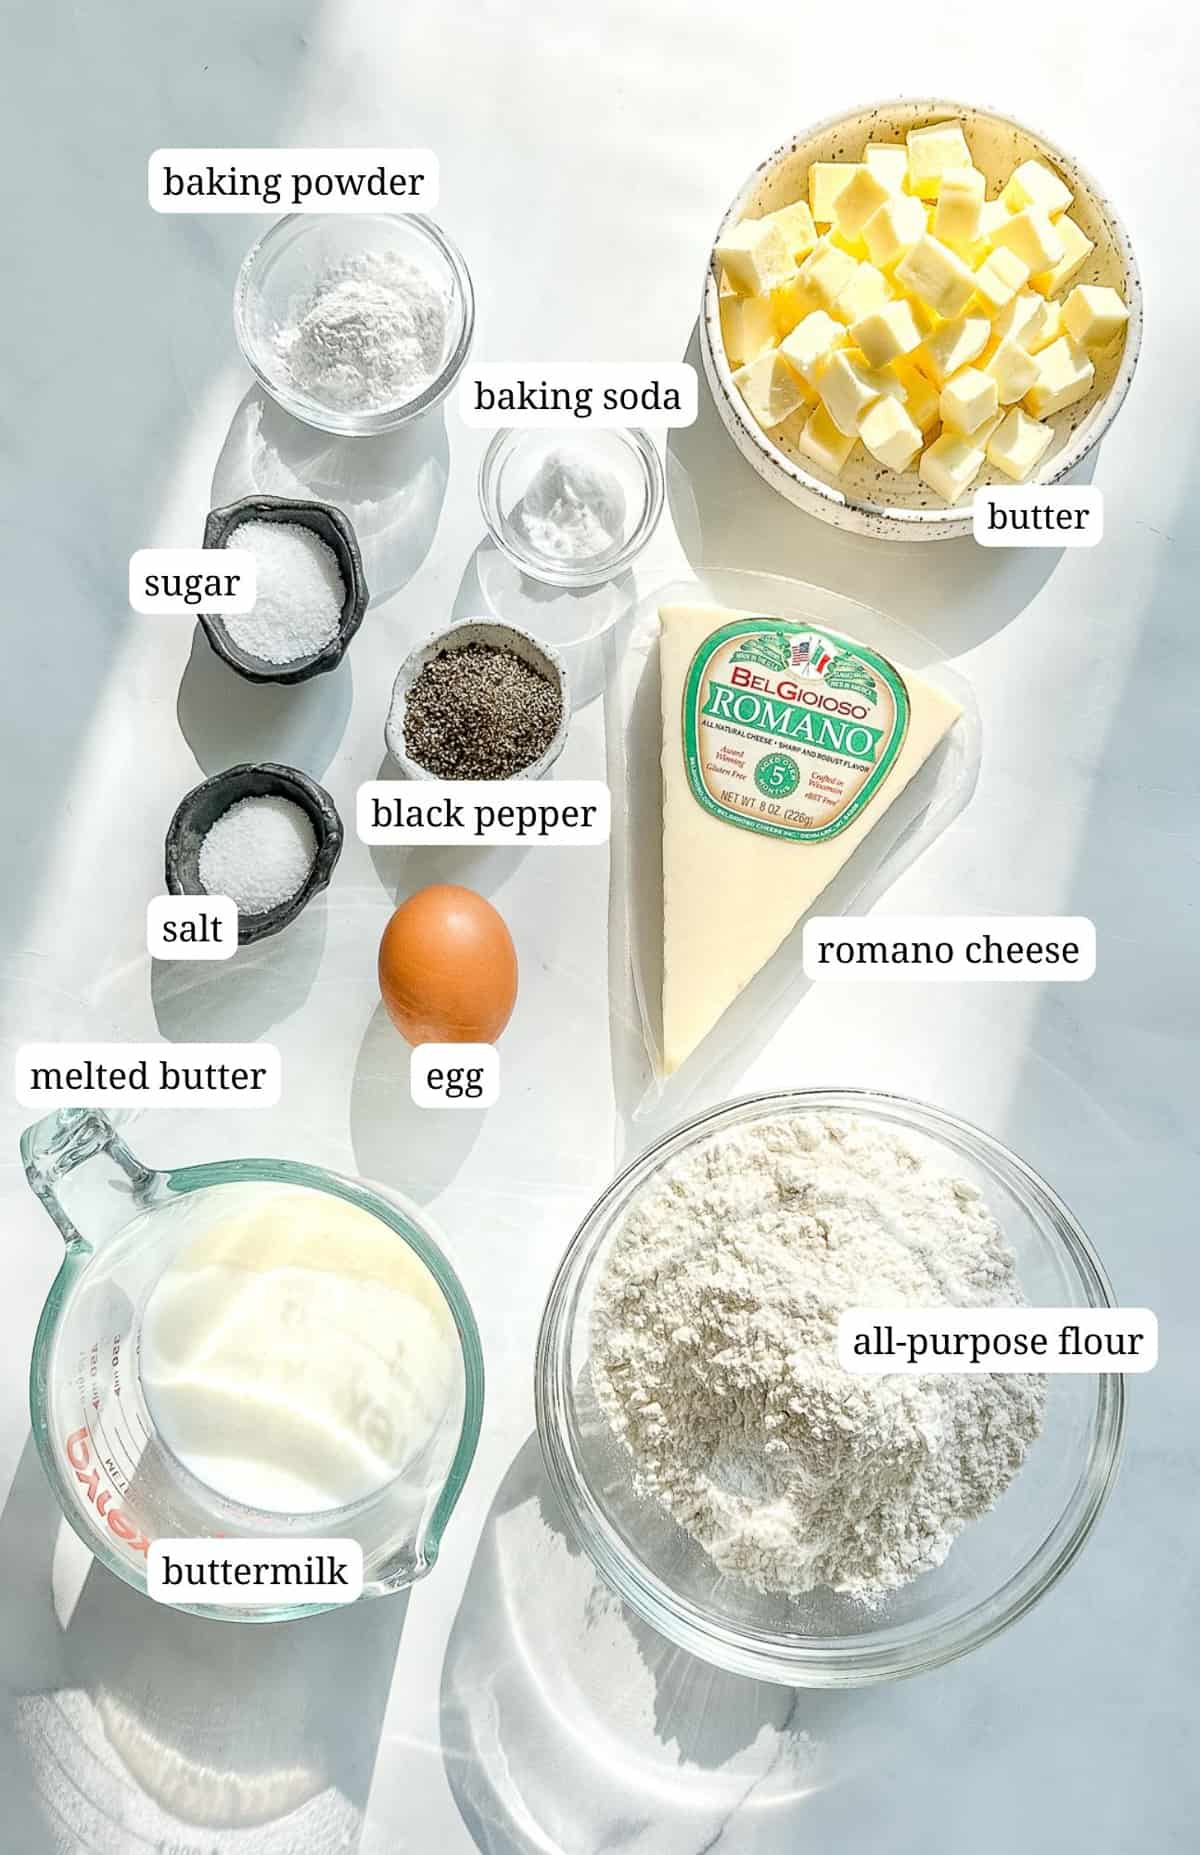
Note on buttermilk - There are a lot of compelling reasons to use real buttermilk in your biscuits. Low fat or whole fat, the acidity adds a subtle tang to your biscuits and also helps to snip the gluten strands, creating a softer and fluffier interior. It also reacts perfectly with the small amount of baking soda to give your biscuits a better rise than you would get with milk or cream.
Note on salt: Whenever I call for salt, I am specifically referring to Diamond Crystal Kosher Salt. Why? Bon Appetit has an article that really dives into the whole salt story, but in my case, this is what I've found works best for me and I use it consistently throughout all of my recipes. I am a loyal salt bae.
See recipe card below for quantities.
Substitutions
With only a few ingredients, two of them in the recipe's actual name, there aren't many places to substitute, but here are the highlights:
- Pecorino Romano cheese - There are times I forget to add romano to my shopping cart. It happens. In those cases, I use grated parmesan, which is milder in flavor than Romano, but still makes an amazing cheese and pepper biscuit. Once, in a pinch, I used the pre-grated stuff in the green plastic container. You know the one 😉 Still delicious.
- Black pepper - Of course you can use pre-ground black pepper, but freshly cracked black pepper has more distinct floral and peppery notes than the canned kind. That is because after commercial pepper is ground, its moisture quickly evaporates, and that moisture carries some of the flavor with it. If you don't have a pepper grinder, you can use a coffee grinder, or even a rolling pin on a zip top bag of peppercorns. It really makes all the difference.
Buttermilk substitutions
Buttermilk - I get that not everyone has buttermilk in their refrigerator, although with its long shelf life, you really should. But, if you don't have access to buttermilk, you can replace it with either plain or Greek yogurt or kefir. Because of the thickness of Greek yogurt, you'll need to thin it a bit with milk or water. Check out my Easy Yogurt Biscuits for all the details!
In a pinch, you can make your own substitute, although it won't give the same amount of lift or flavor as buttermilk or my preferred substitutes. For every 1 cup of milk, stir in 1 tablespoon lemon juice or vinegar. Let the mixture stand for 10 minutes. You can scale the formula up or down depending on how much buttermilk the recipe requires.
Equipment
Food processor - Sometimes I have mobility issues with my hands, making cutting the butter in with my fingers difficult. On those days I utilize my food processor to incorporate the butter into the dry ingredients. Here's how I do it:
- Measure all of the dry ingredients into the bowl of your food processor. Pulse a few times to mix it all together. Add cold, cubed butter to the dry ingredients and pulse 5 to 6 times, or until most of the butter is in pea sized or smaller pieces. Pour into a mixing bowl and proceed with the rest of the biscuit recipe.
Biscuit cutter - I've read some articles that suggest that you can cut biscuits with any old round thing you find laying around your kitchen. I disagree wholeheartedly. The technique I use to build flaky layers is amazing. Using a rounded-edge drinking glass to cut out the biscuits would ruin that. The dull edge would seal the biscuit edges, keeping them from rising to their full potential.
For best results, use a sharp metal edge, like a biscuit cutter, or a even a knife, to cut clear, sharp edges to your biscuits. To avoid sealing the edges, do not twist your cutter. Press straight down and lift straight up.
Instructions
Making biscuits is a learned skill. Like any new skill, practice makes perfect. I'm telling you, my technique gets the best flaky biscuits and yours are going to get better every time! And these Cacio e Pepe Biscuits are so good - I see A LOT of practice in your future!
Grating the cheese
Although you can use a cheese grater to make nice shreds of Romano, I prefer to use a food processor. The final result yields a variety of sizes and textures, adding to the amazing cheese flavor on the inside and the crunchy cheesy bits on the tops.
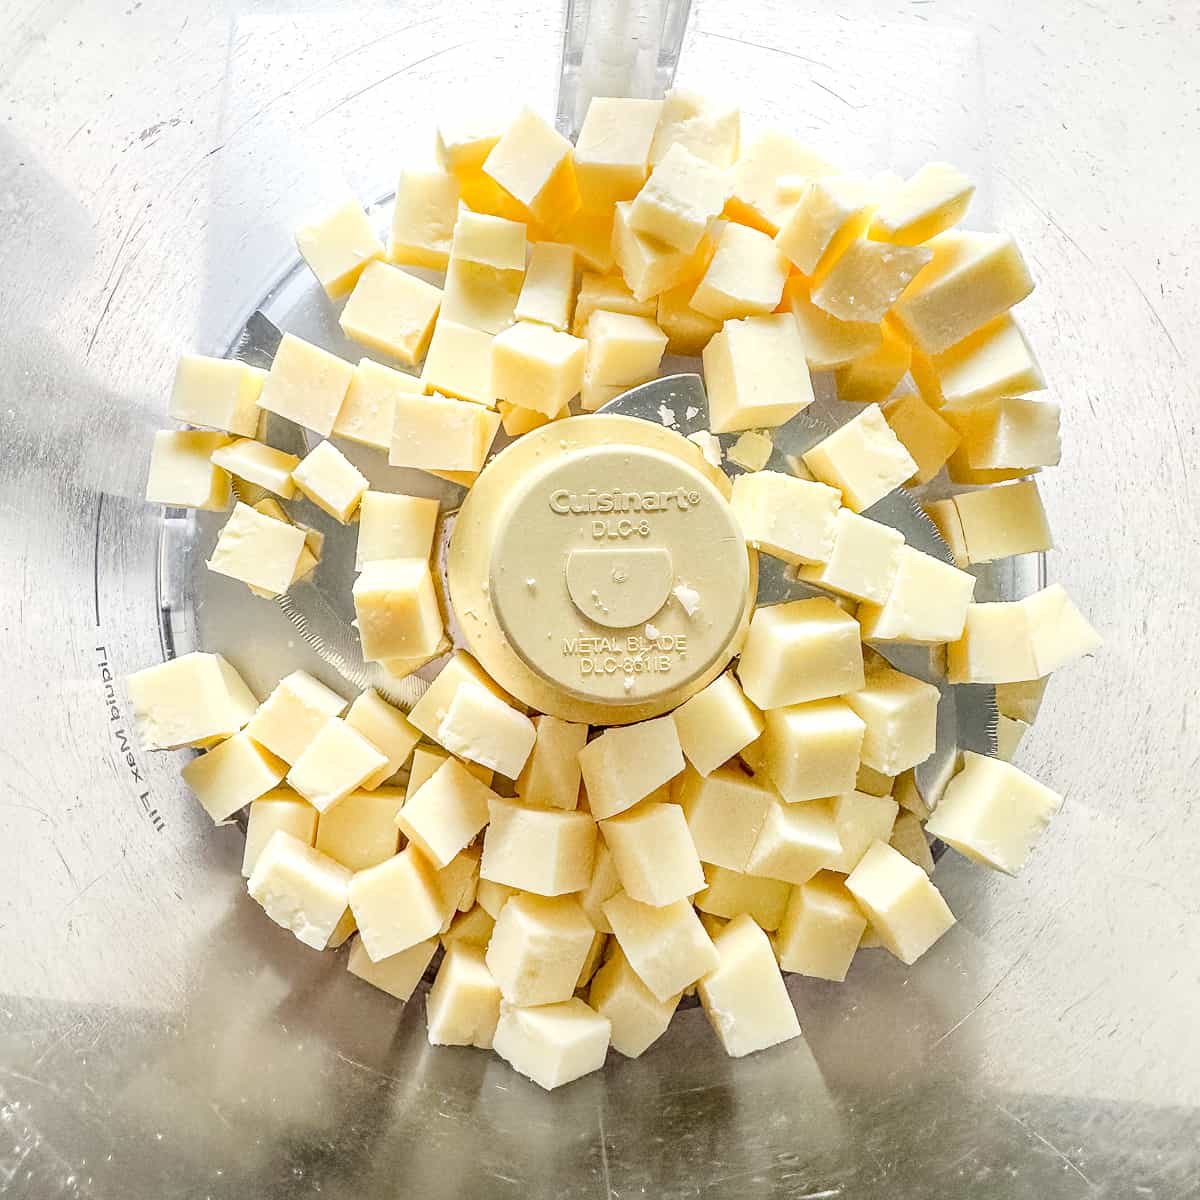
1. Cut your Romano cheese into ¼ to ½ inch chunks and place in the bowl of your food processor.
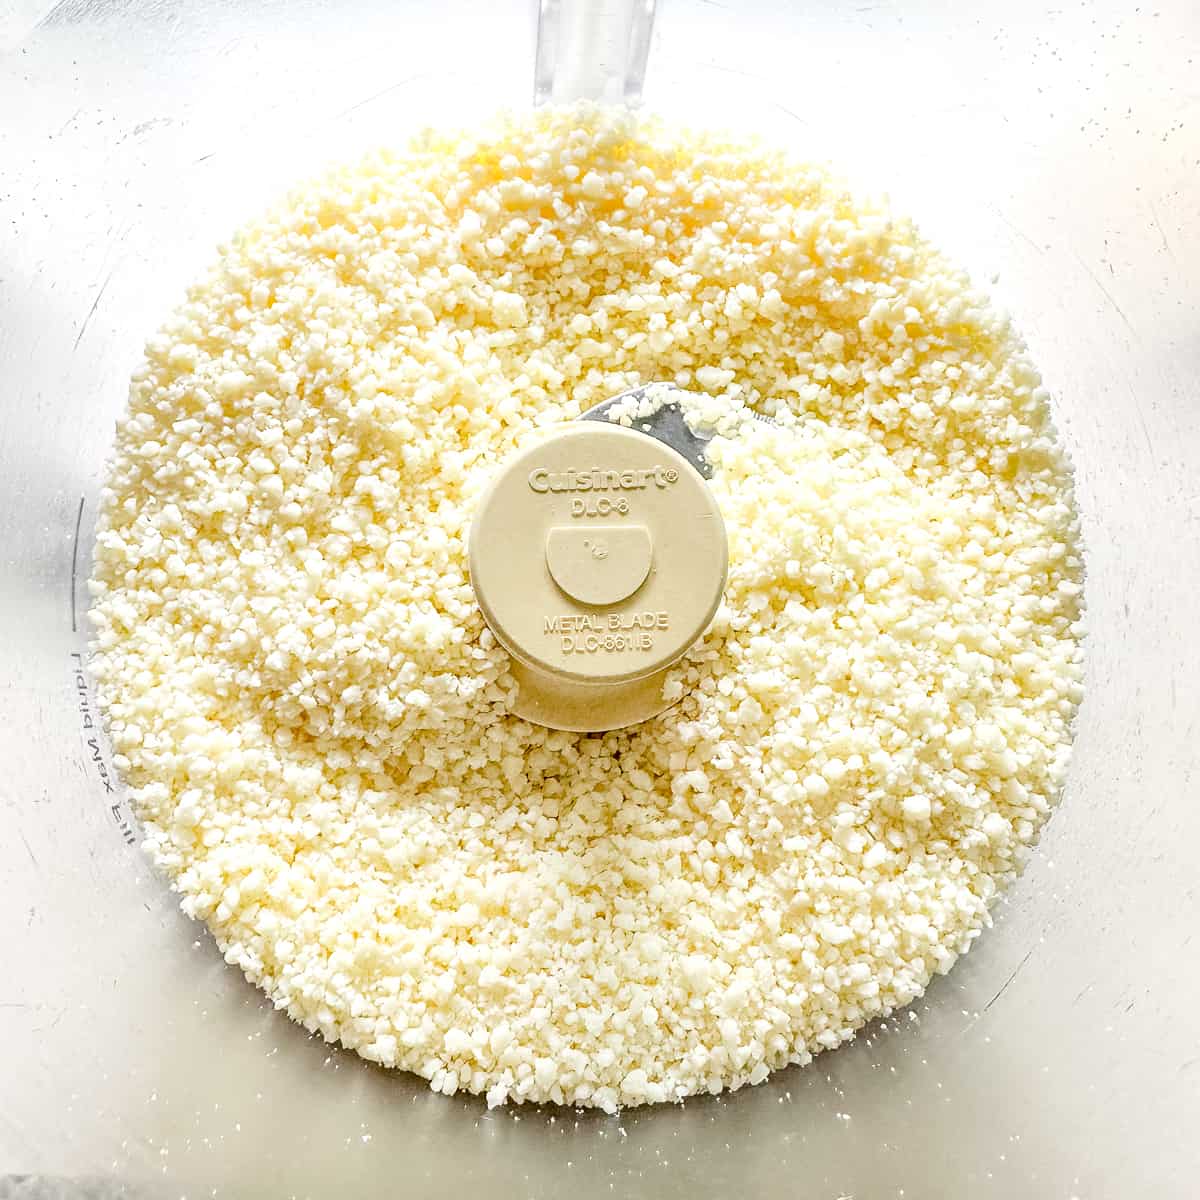
2. Let the food processor run until completely broken down into a nice fine grind with some larger and some smaller pieces.
Making the biscuits
Making biscuits is something my Grandma Olga Mae, and a lot of Grandmas, did every single morning. If they could do it, we can do it! I add a couple of extra steps for maximum flakiness, but once you make them a few times, it'll be like you've been making them forever.
Many biscuit recipes have you start with frozen butter, or worse, grated frozen butter. I mean, wth? I do have you start with cold, cubed butter, but I don't want you to freak out about it. Most of the steps are hands off and I have you chill the biscuits again before baking, so your butter will be plenty cold. Don't you worry.
Start by preheating your oven to 450°F and lining a large sheet pan with a piece of parchment paper.
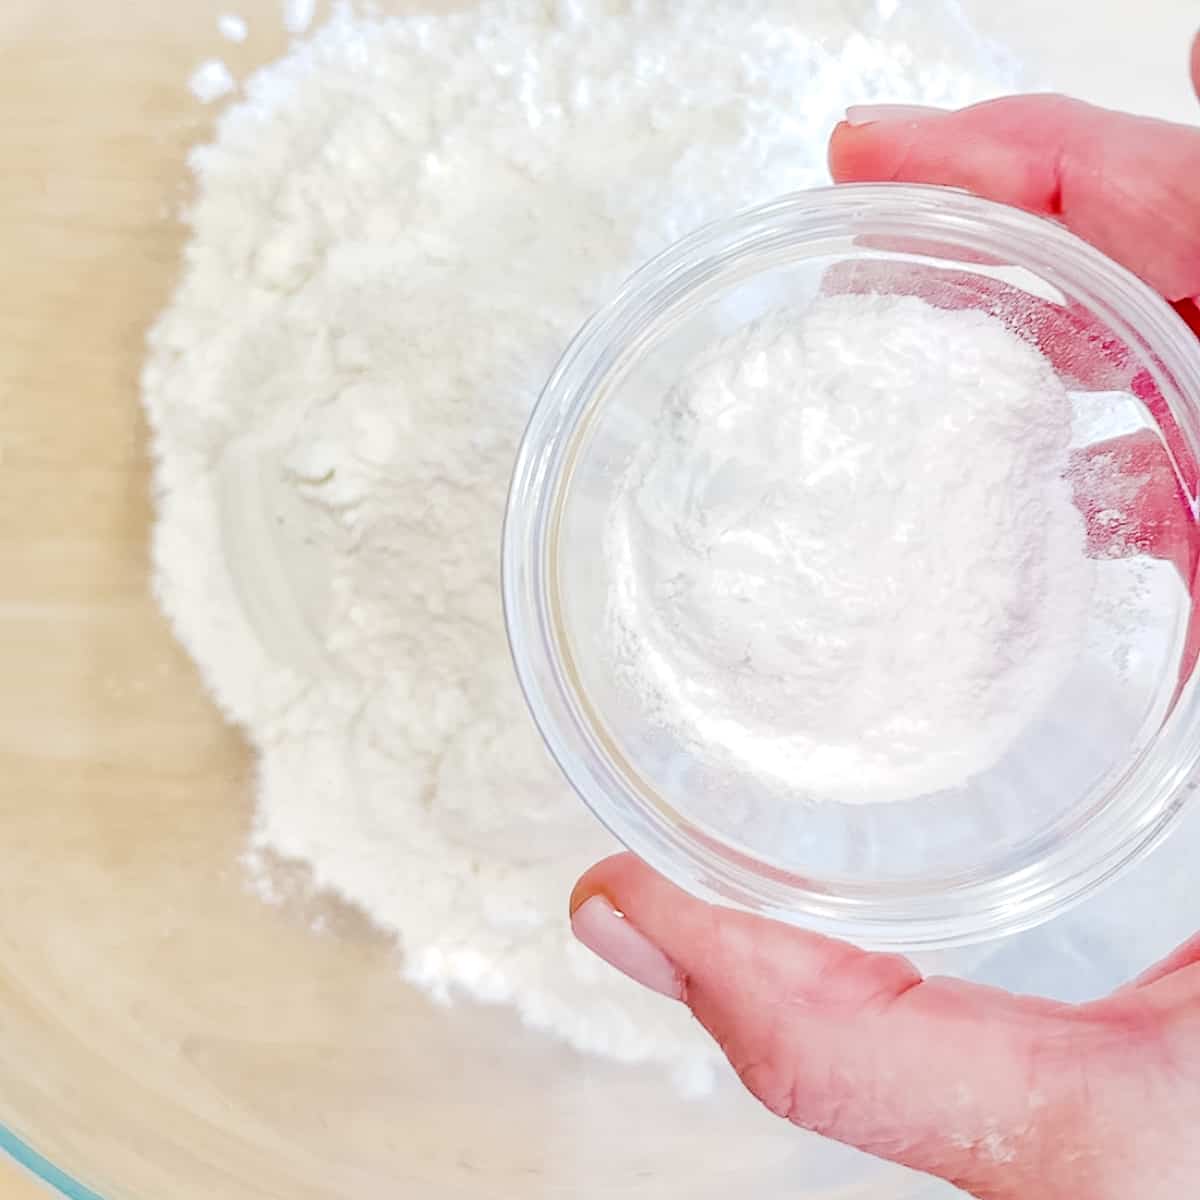
1. Combine all the dry ingredients in a large bowl, including flour, leavening agents, and salt.
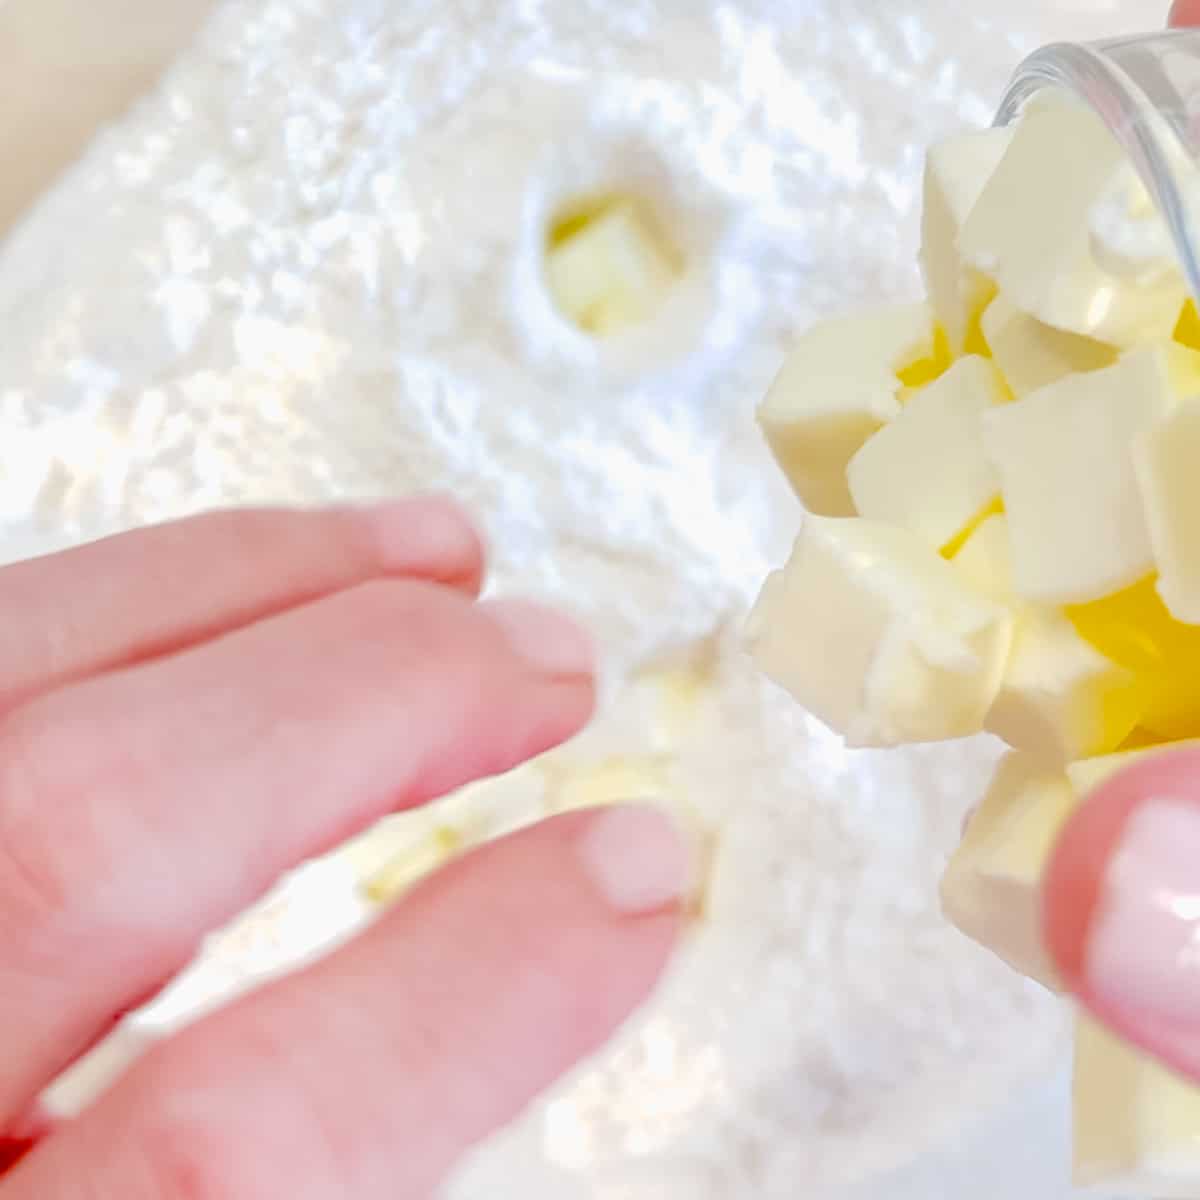
2. Add cold, cubed butter to the dry ingredients.
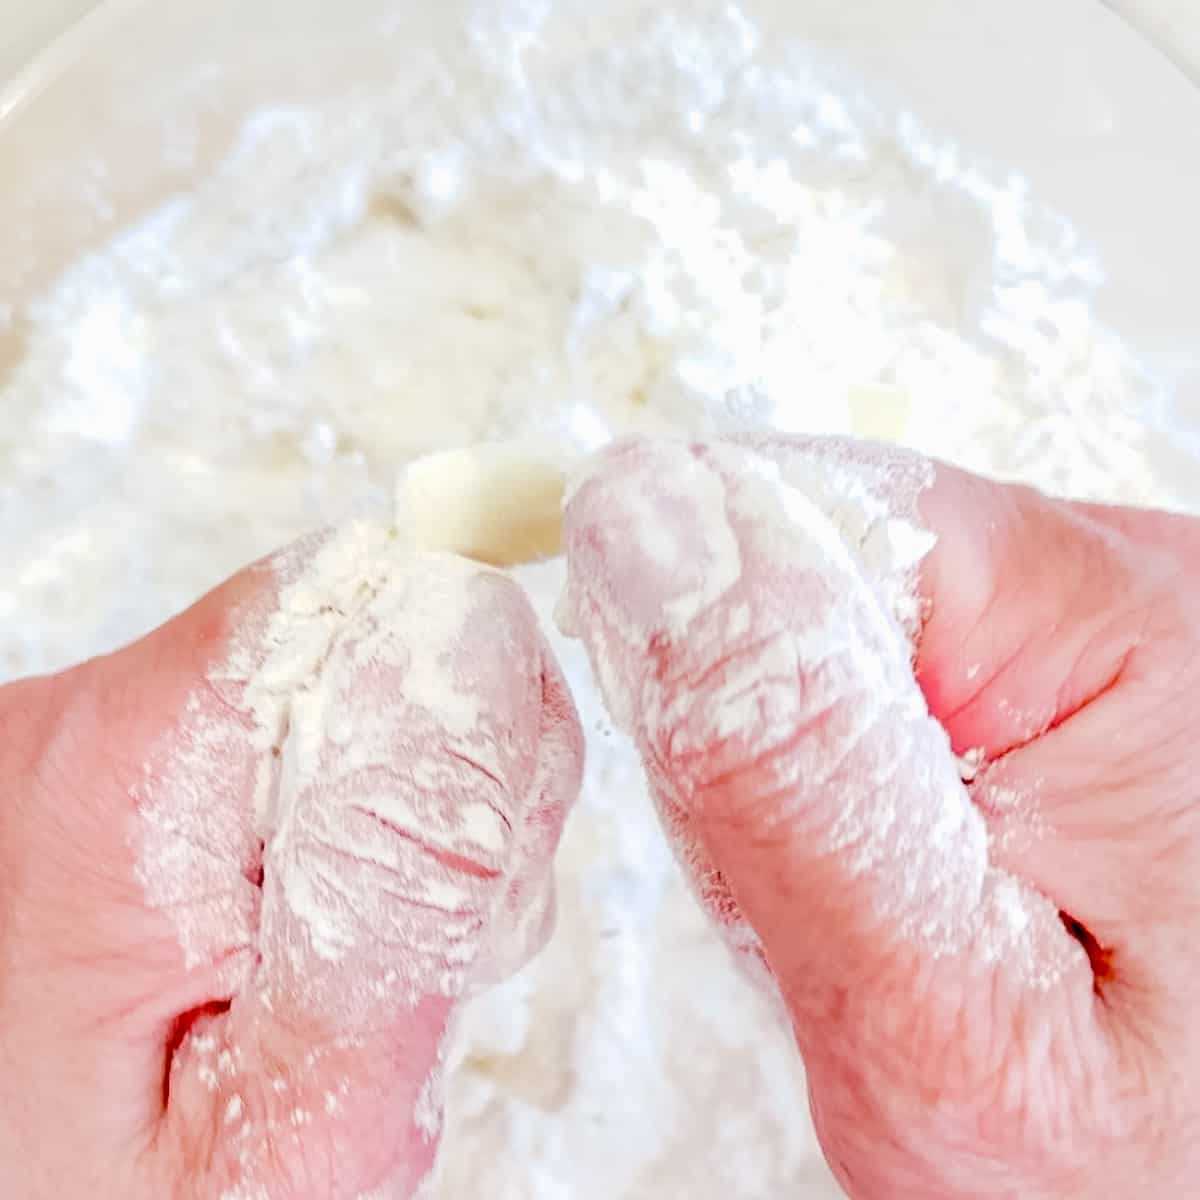
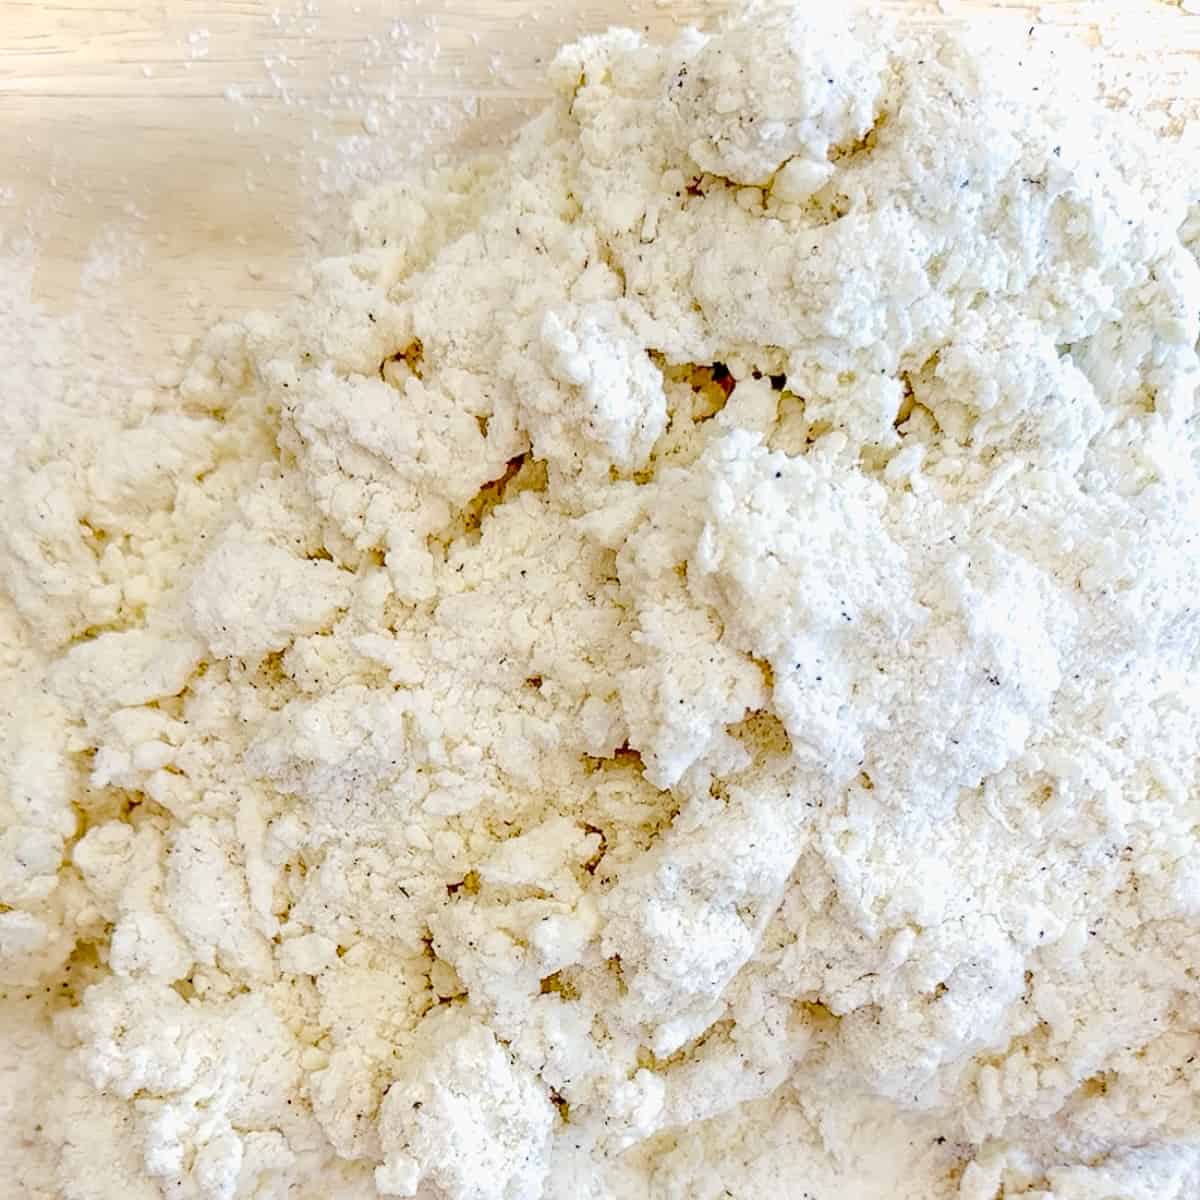
3. Using a finger snapping motion, work together the flour and butter.
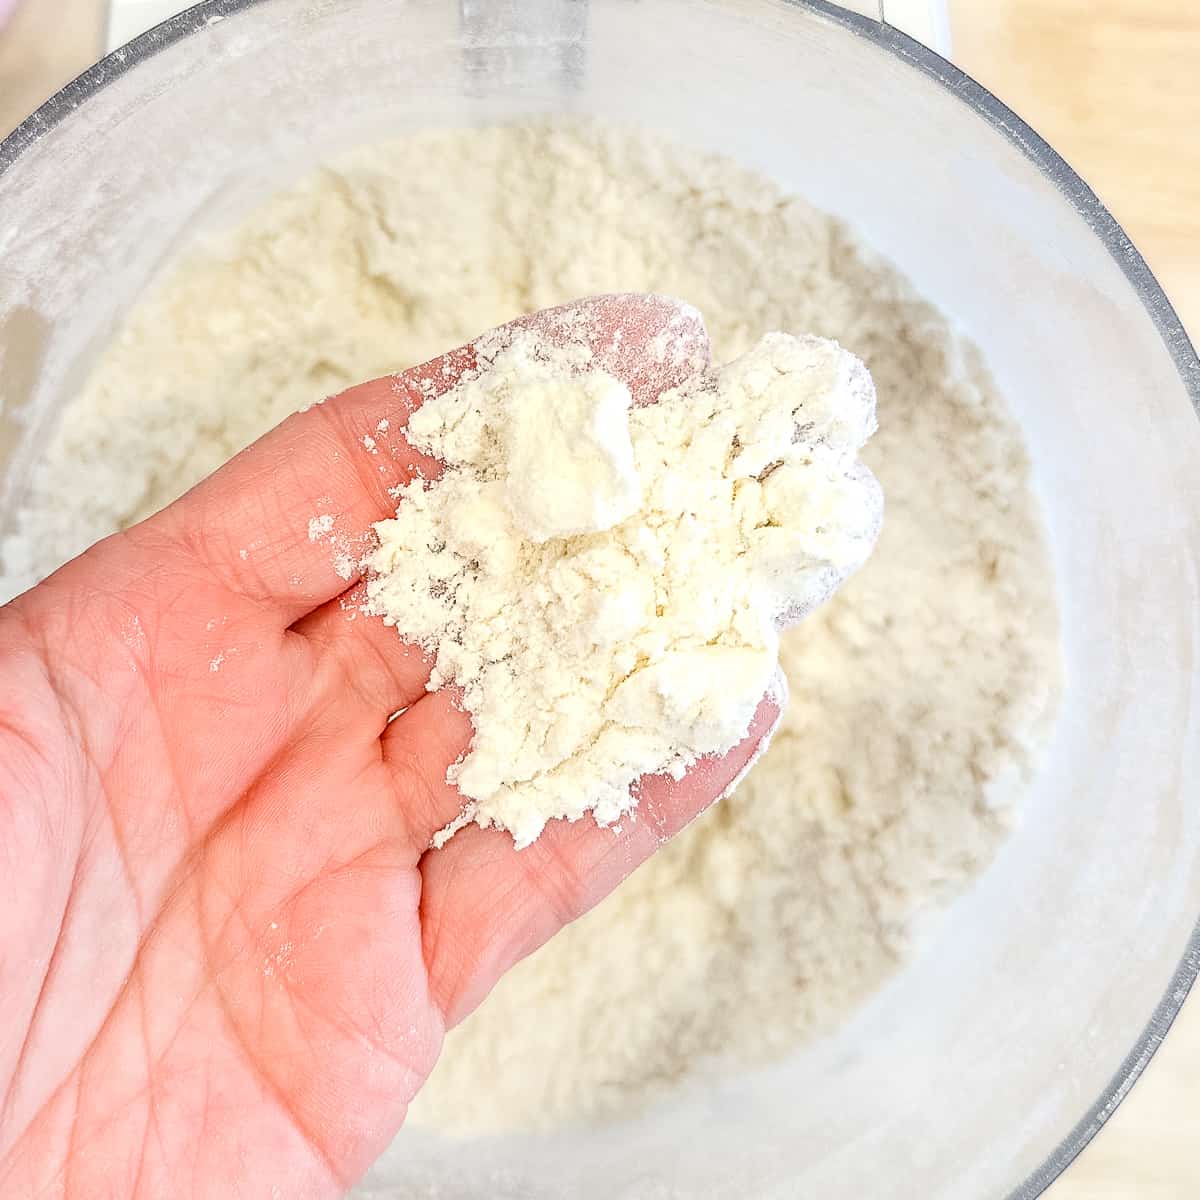
4. Continue working the butter in until you have a variety of large (pea size), small, and flat pieces mixed into the dry ingredients.
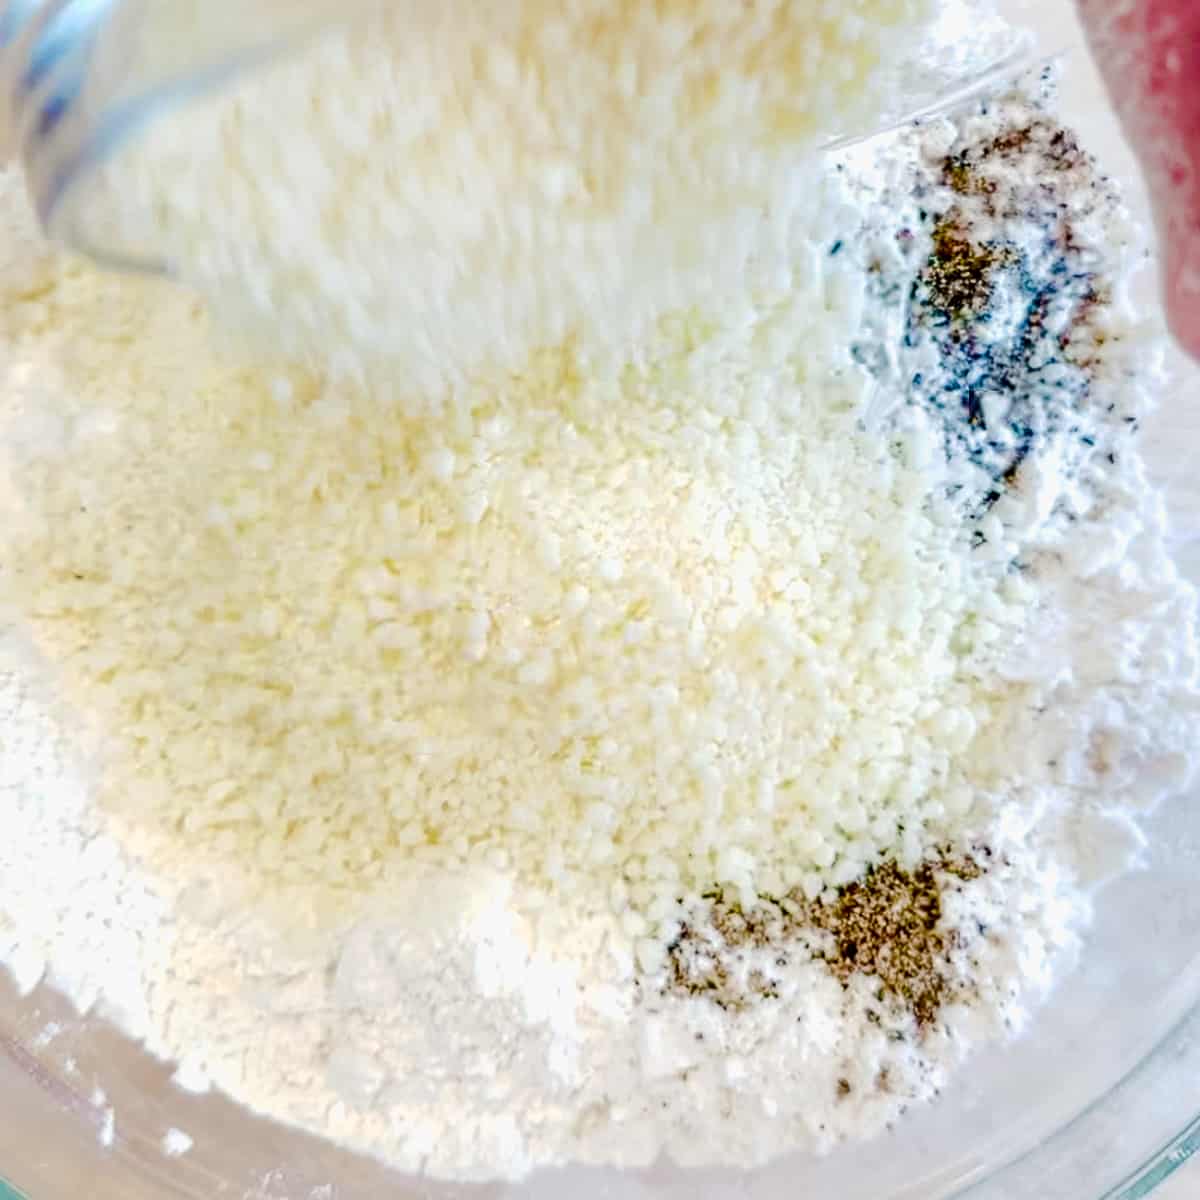
5. Add in your black pepper and one cup of grated Romano cheese, saving ¼ cup of cheese for the tops of the biscuits.

6. Add in buttermilk and use a dough whisk or spatula to combine with the butter and flour mix to a shaggy dough. It will look dry and not fully combined, and that's the way it should look at this point.
7. Dump the dough onto a lightly floured counter.
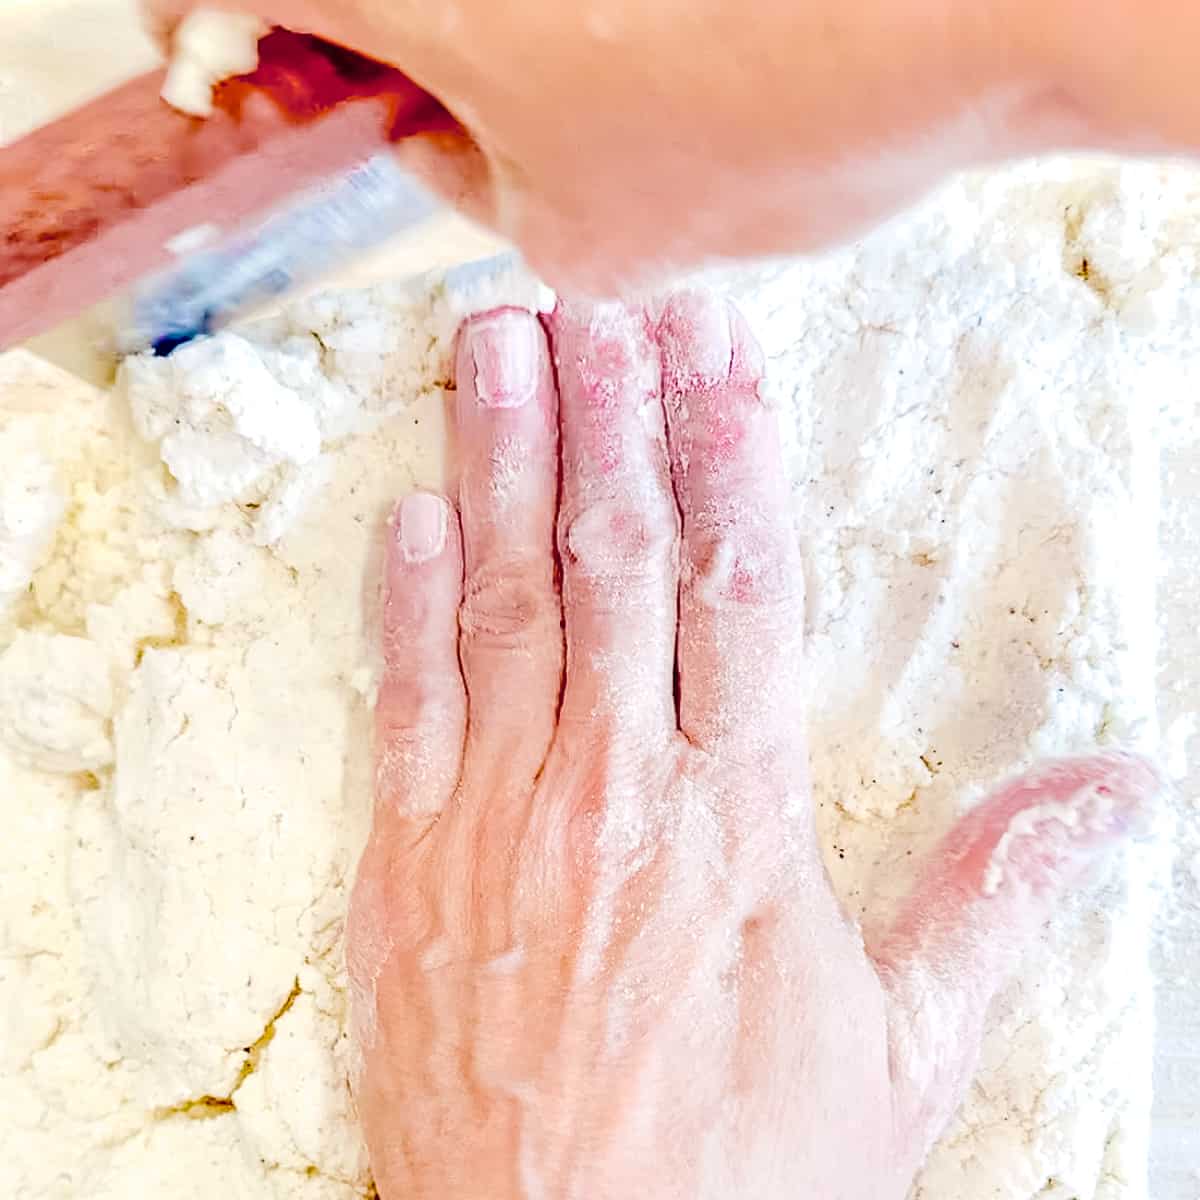
8. Use your hands and a straight edge, like a bench scraper, to shape the dough into a rough square. It will still be very loose.
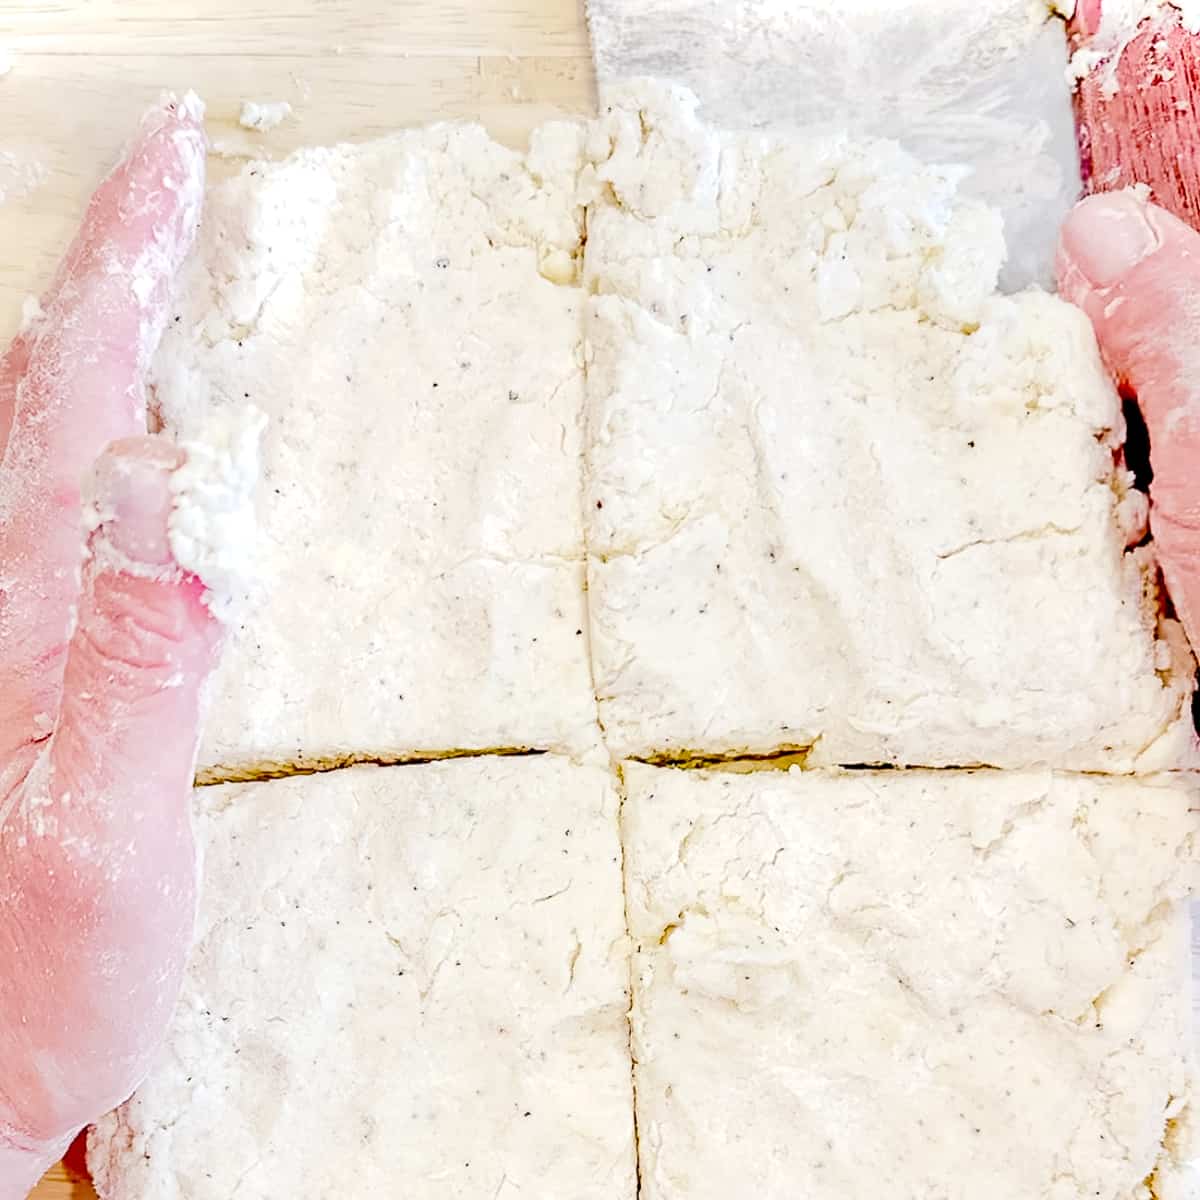
9. Use your bench scraper, or a knife to cut into four pieces. Stack them all on top of each other and press back down into a square. Repeat this 2 more times. The dough will come together more with each cut and stack.
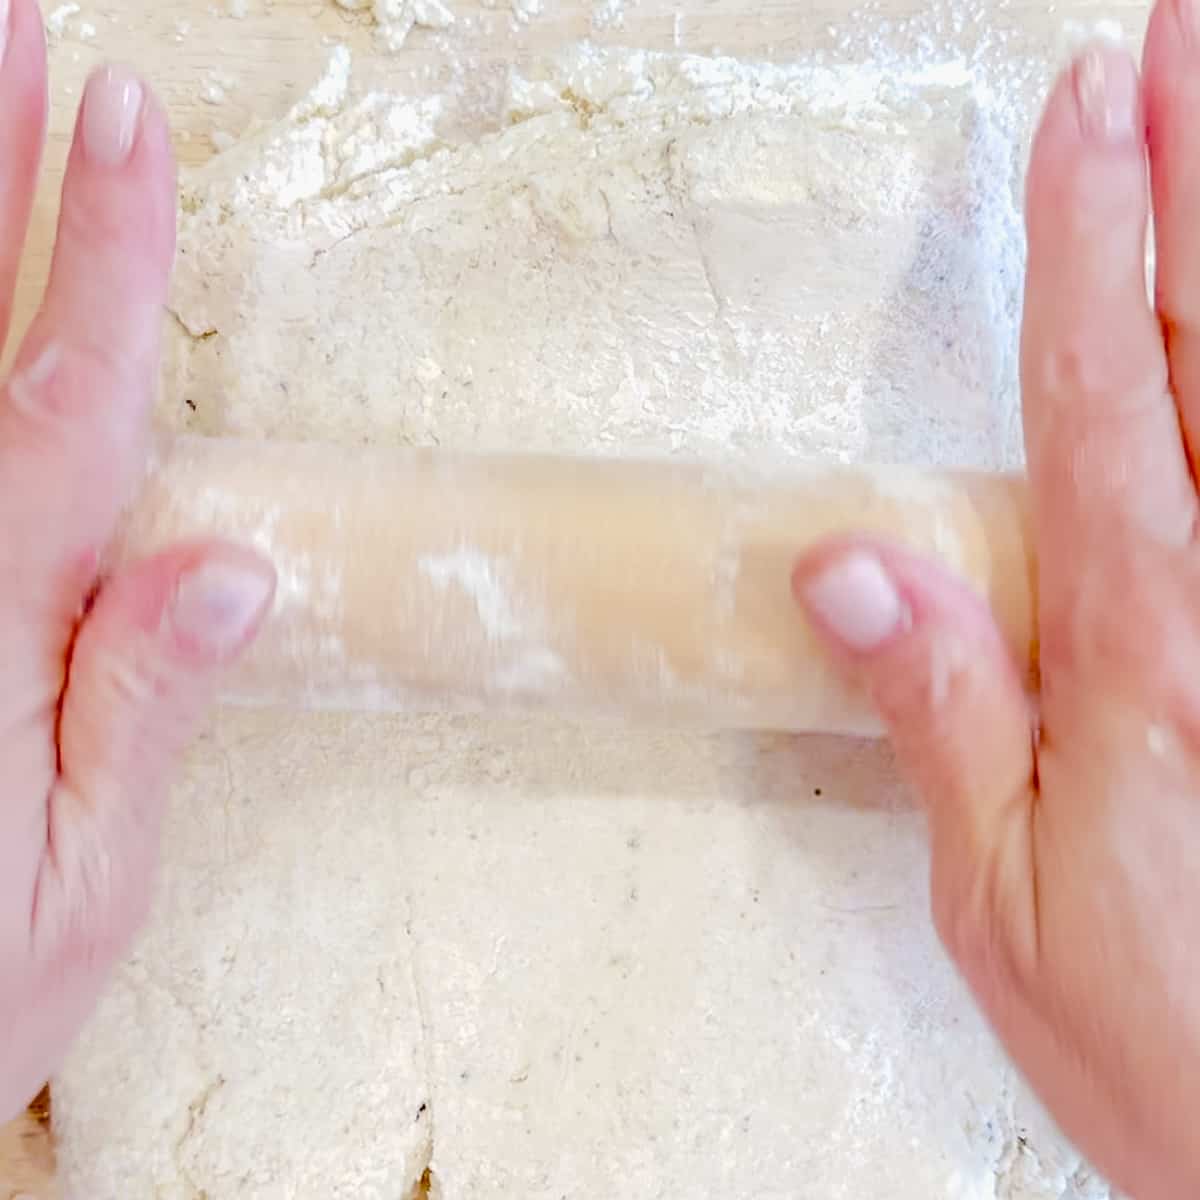
10. Roll your dough out into a rectangle about ½ inch thick.

11. Dip your biscuit cutter in flour and cut out as many biscuits as you can. Gather up the scraps and gently pat them out in order to cut out more biscuits. Place the biscuits on a parchment paper lined large sheet pan and place in the freezer while you preheat your oven to 450°F.
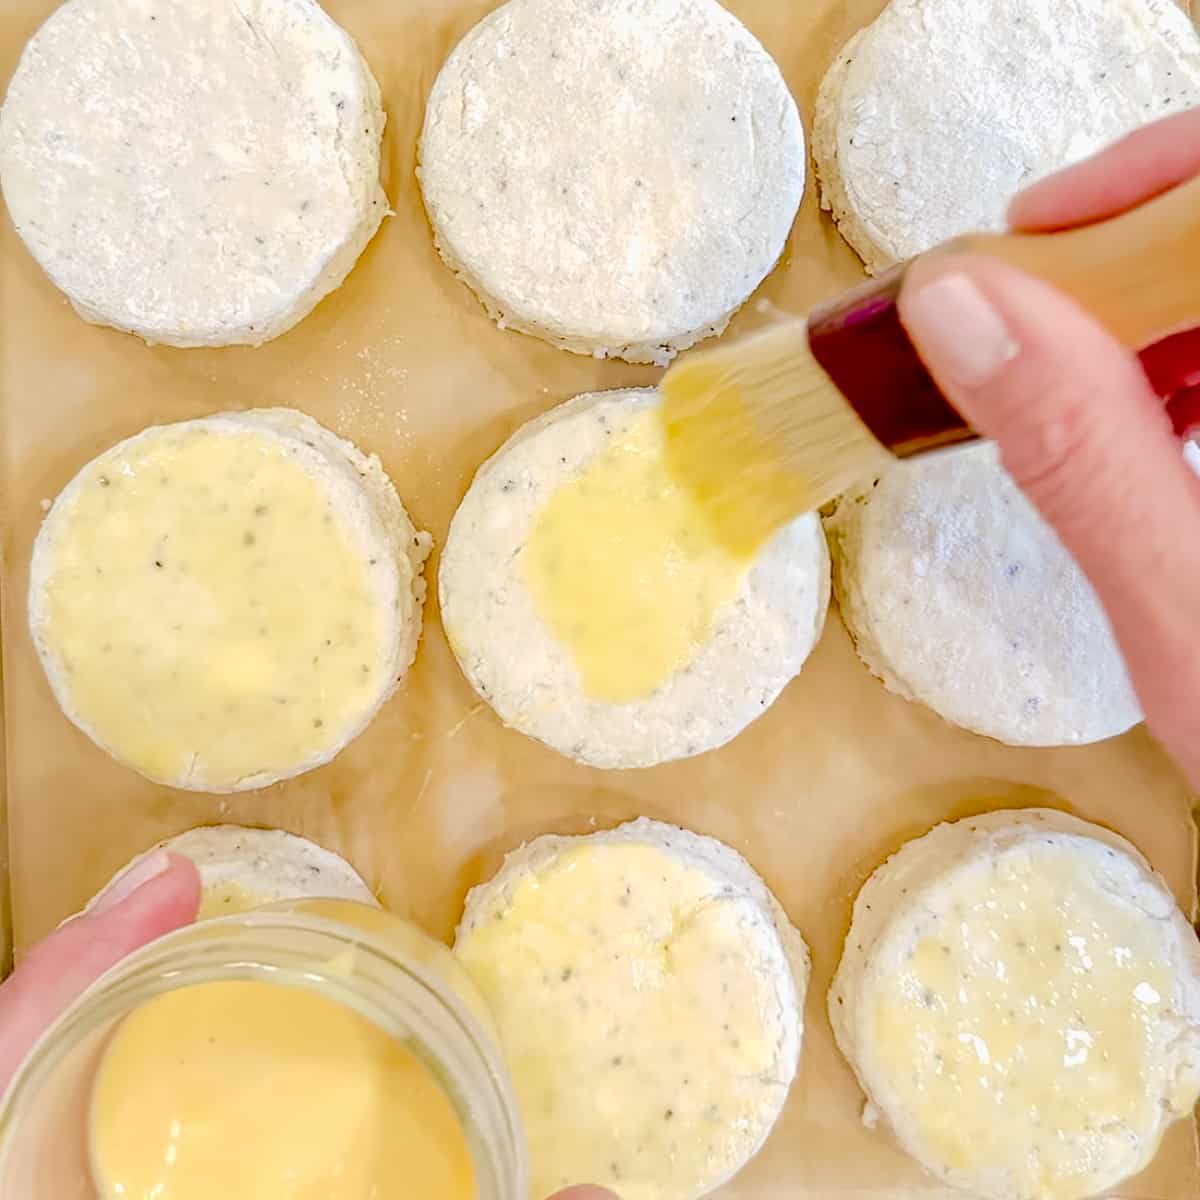
12. Remove the sheet pan from the freezer and brush each biscuit with an egg wash made of one egg whisked with 1 tablespoon of water or milk.
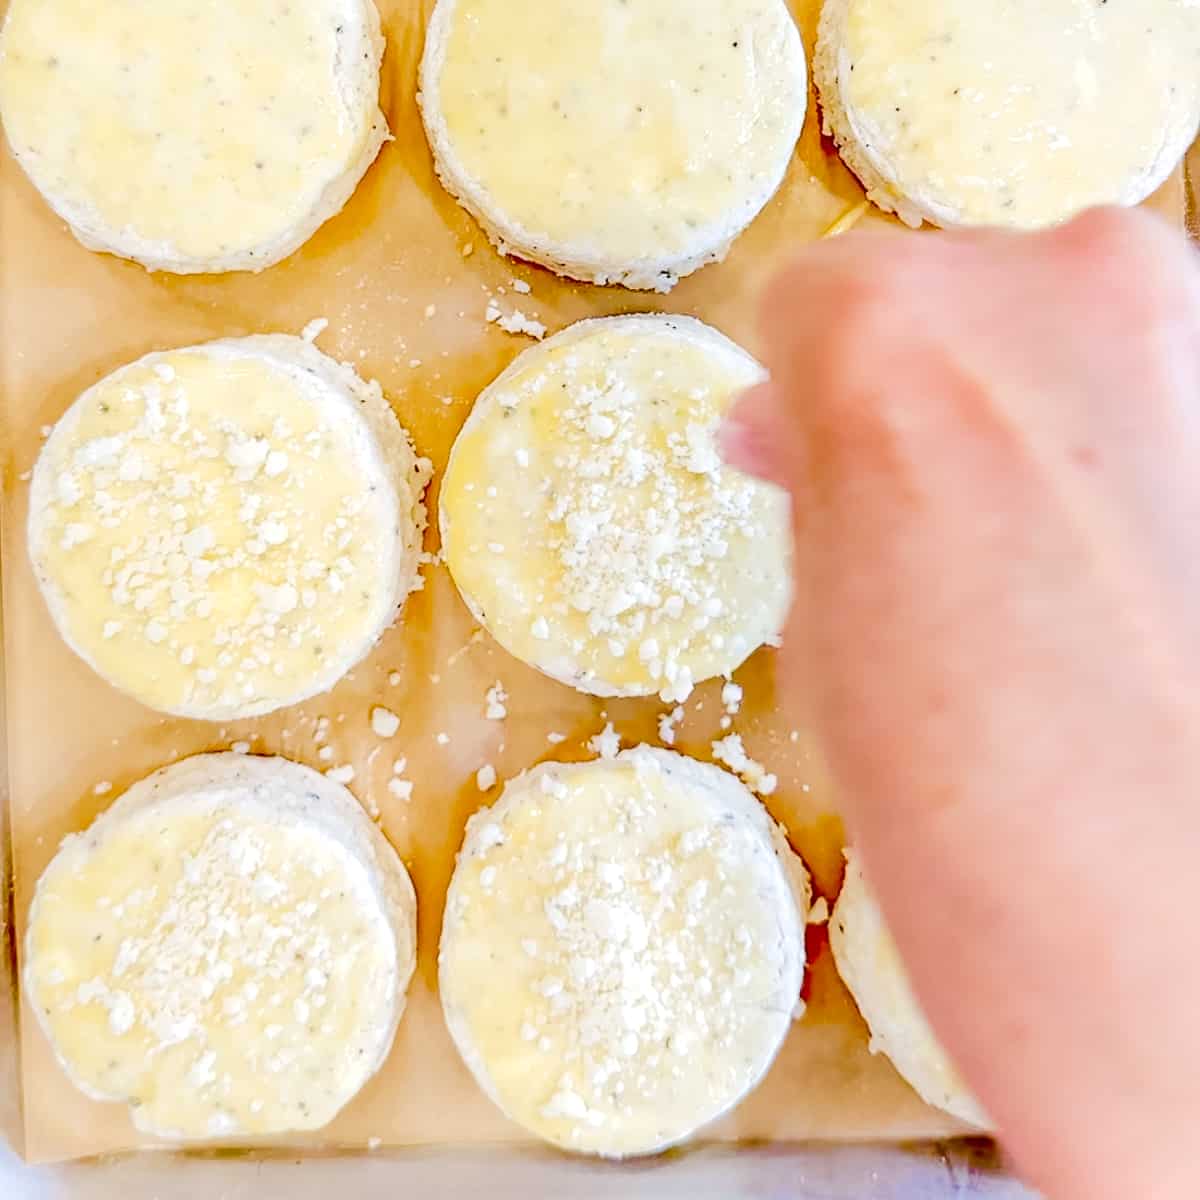
13. Sprinkle the top of each biscuit with about a teaspoon of grated Romano cheese.
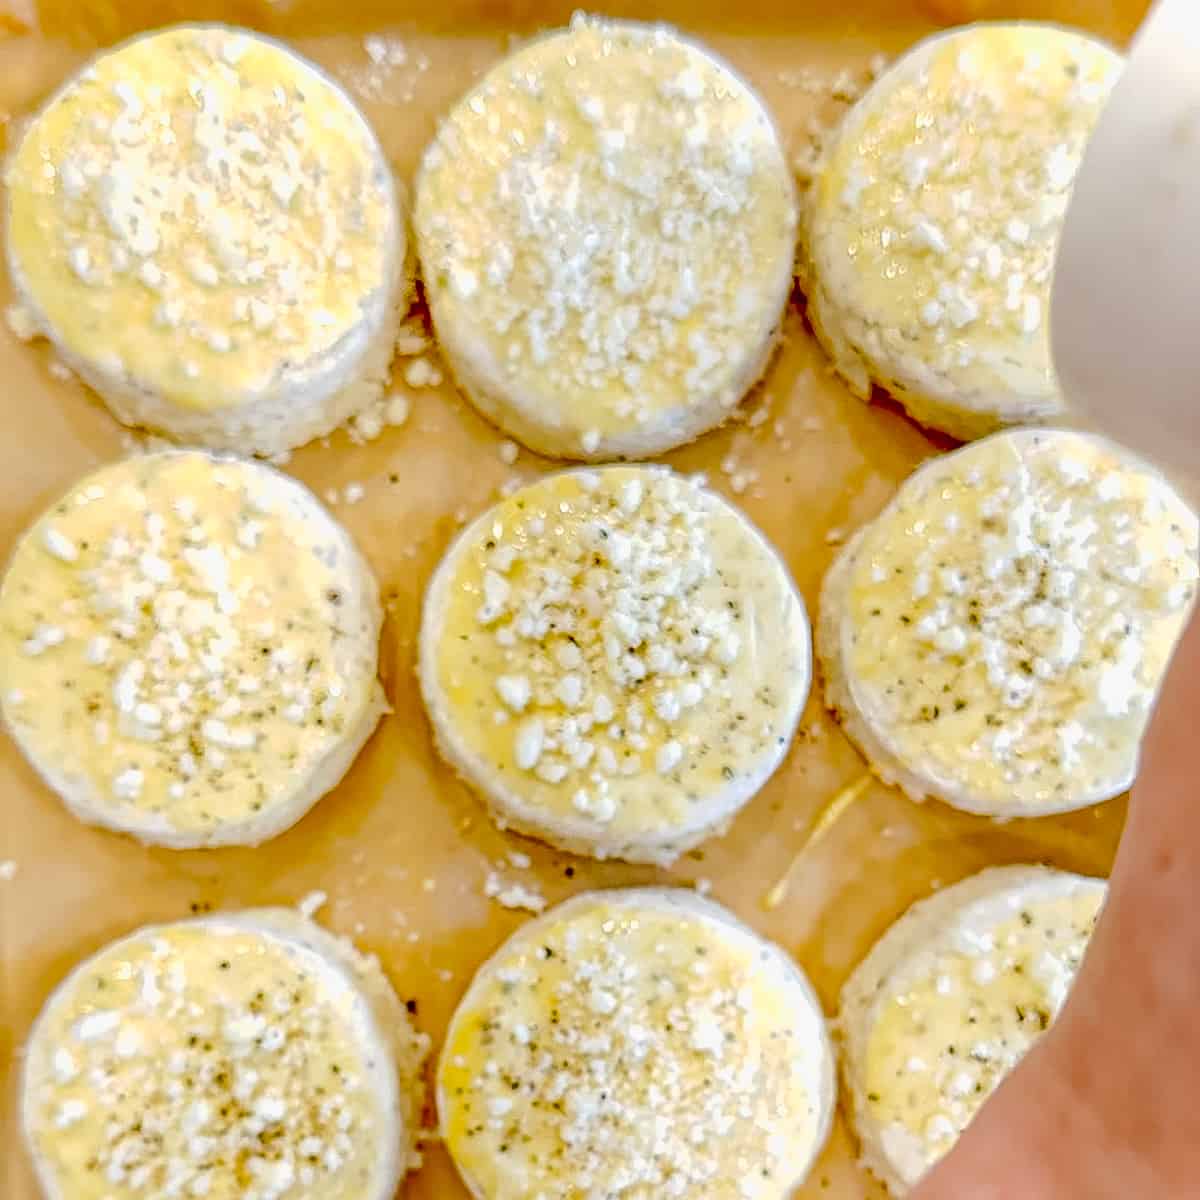
14. Crack some black pepper on top of each biscuit.
Place the biscuits in a 450°F oven for 18 to 20 minutes, or until golden brown and the aroma starts driving you crazy!
Hint: If you want your biscuits more golden, turn on the broiler for a minute or two, but watch carefully so you don't burn them!

Work smarter, not harder For those days when everything is just a lot, try making my Quick and Easy Biscuits. All the work is done in your food processor, so that all you have to do is cut, and bake!
Serving suggestions
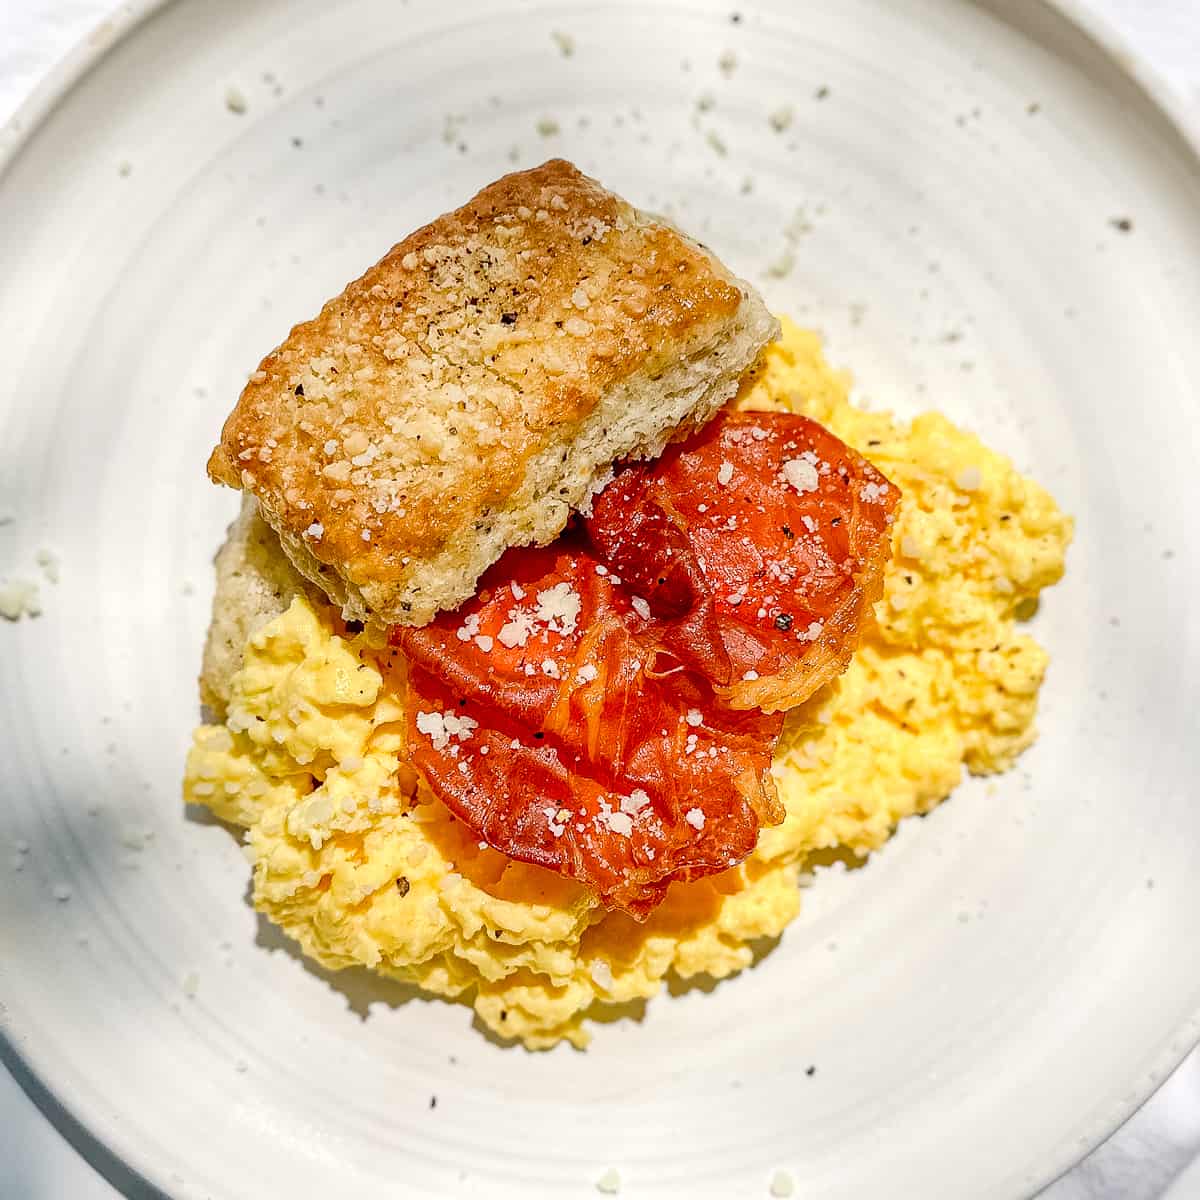
Keep it Italian and use your Cacio e Pepe Biscuits as the base for my Ricotta Scrambled Eggs with crispy prosciutto. To make prosciutto, lay pieces of prosciutto on a parchment paper lined large baking pan. Bake at 400°F for 10 to 12 minutes.
Sunday Brunch is a great time to catch up with family and friends over great food. Bring home the dream of an Italian Inspired Brunch, including this recipe!

Expert tips
As I stated before, I know a lot of other recipes have you use grated frozen butter, but I am not a fan of that method, and I'll tell you why:
- Having grated frozen butter listed as an ingredient assumes that you are going to remember to put butter in the freezer the night before biscuits. No more last minute biscuit spontaneity!
- Have you ever held an unwrapped stick of butter? Go ahead and do it. I'll wait. Even if it's half wrapped and frozen, that thing is going to start getting soft and melty and slippery on you as you try to grip the last nubbin while running it along a box grater.
- The uniformly small pieces of butter that a grater produces almost completely disappear into the flour and melt more quickly in the hot oven.
- My preferred method of cutting in the butter by hand or with a pastry cutter leaves you with a variety of small, large, and flat pieces, all of which will evaporate their water at different rates, giving you flakier, more buttery tasting biscuits.
- Placing your biscuits into the freezer while you preheat the oven allows the butter in your biscuits to re-harden, so you never have to worry about having frozen butter on hand. Be free!
Want more flavorful biscuits? Try my Everything Seasoning Cream Cheese Biscuits!
Recipe FAQ's
There could be a couple of reasons. First, check the expiration dates on your baking powder and baking soda. If they are at or near the expiration, get rid of them and buy fresh. Second, make sure that you don't overmix your biscuit dough. Just combine until all the buttermilk is mixed in. It will look dry and not coming together and that's exactly right. It will come together when you do your cut and stacks.
Yes, you can and should! My suggestion is to follow the instructions in my Freezer Biscuit Recipe to freeze some, or all, of your biscuits ahead and bake them from frozen when you have a biscuit emergency!
In my opinion, biscuits should be reheated before eating. Butter, in its natural state is a solid. When eating cold biscuits, they will eat as though they are dry. Reheating them, even for a few minutes, will soften the butter and return them to their original delicious flavor.

Storage and Reheating
Storage
Store leftover biscuits in an airtight container at room temperature for up to 4 days. I do not recommend refrigerating biscuits as that can change the texture.
Reheating
I recommend wrapping the desired number of biscuits in aluminum foil, and reheating in a 400°F oven for 5 to 8 minutes. Unwrap and heat another 3 to 4 minutes. You can also microwave them for about 20 seconds on high.


Did you try this recipe?
Please consider leaving a comment with a ⭐️ rating below and tell me all about it! It helps me to continue to improve my content and lets others know what you think!
I appreciate it so much!
-Cynthia
📖 Recipe

Cacio e Pepe Biscuits
Ingredients
- 3 cups (360 g) all-purpose flour
- 1 ½ tablespoons (18 g) baking powder
- 1 teaspoon (4 g) sugar
- ½ teaspoon baking soda
- 1 ½ teaspoon (9 g) salt
- 12 tablespoons (170 g) butter
- 1 cup (100 g) Pecorino Romano + ¼ cup for the tops
- 1 tablespoon (6 g) black pepper + more for the tops
- 1 ¼ cup (300 g) buttermilk
Egg wash
- 1 large egg
- 1 tablespoon water or milk
Instructions
- Preheat oven to 450°F. Line a large sheet pan with parchment paper or foil and set aside. In a mixing bowl, whisk together flour, baking powder, sugar, baking soda, and salt.
- Toss cold butter cubes into the dry ingredients and, using a pastry cutter or your fingers, mix in the cold butter until you have a mixture of flat pieces and crumbly, pea sized bits of butter mixed into the flour. Toss in 1 cup of your grated Romano cheese and 1 tablespoon of freshly cracked black pepper or coarse ground pepper.
- Make a well in the center of the mixture and add the cold buttermilk. Gently mix the buttermilk and the dry ingredients together until you have a fairly uniform, loose dough. The flour won't look all mixed in and that's okay. It will come together.
- Dump the shaggy dough out onto a lightly floured surface. Using your hands, gently bring it everything together into a rough square.
- With a bench scraper or knife, cut into four smaller squares. Stack the pieces of biscuit dough on top of each other. Smush it all down into a square again. Repeat this cutting and stacking procedure 2 more times.
- Pat the dough into a rectangle at least ½ inch thick. Using a biscuit cutter or cookie cutter, cut out your biscuits. Gather your scraps as you go and gently re-form them together and cut as many biscuits as you can. Place sheet pan in the freezer for 10-15 minutes while you preheat your oven.
- Remove biscuits from the freezer. Brush the tops of the biscuits lightly with an egg wash and sprinkle with more grated Romano cheese and black pepper. Bake in a 450° oven for 18 to 20 minutes, or until golden brown.


Sindia says
Hi Cynthia, these biscuits look delicious!! Would you recommend using convection oven setting or traditional bake setting when baking these biscuits?
Cynthia Christensen says
I have only tested these on a conventional bake setting, but often used convection baking in the professional bakery. If you need to go that route set your temperature 25° lower and check your biscuits at about 12 minutes and keep an eye on them. Because of the way convection ovens work, they will probably cook more quickly and brown more darkly.
Sindia says
Hi Cynthia, I just noticed I accidentally checked off 4 stars instead of 5. Could I reverse the rating to 5? My apologies!
Cynthia Christensen says
I changed it for you!
Sindia says
Thank you!
Cynthia Christensen says
You’re welcome!