


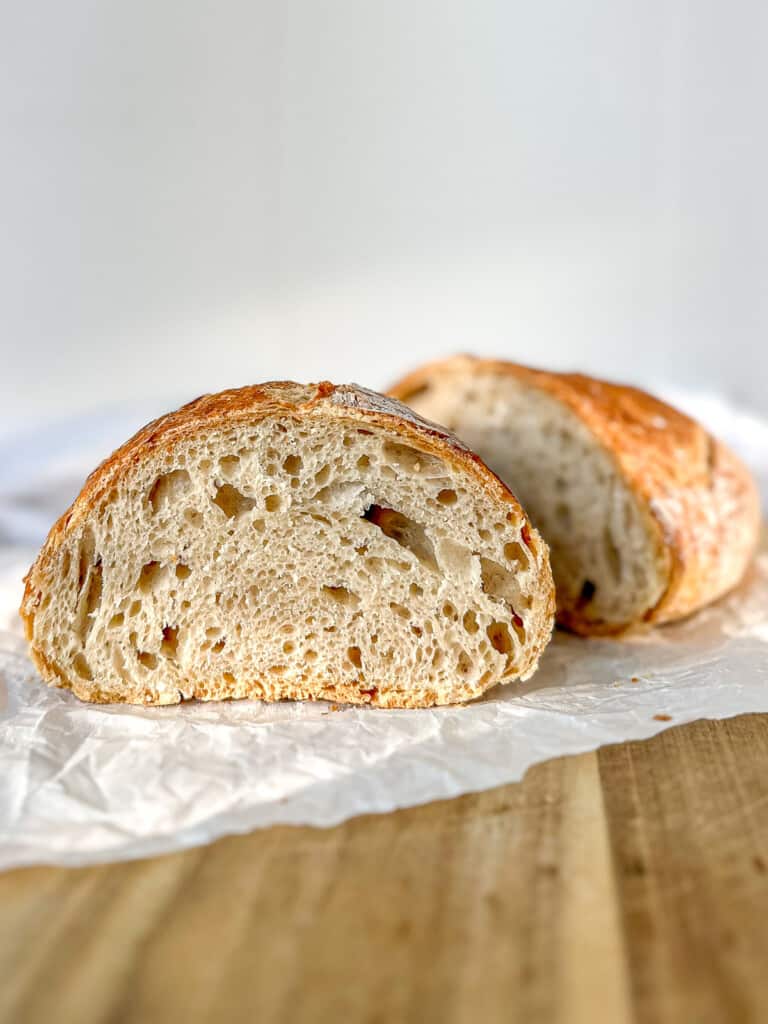
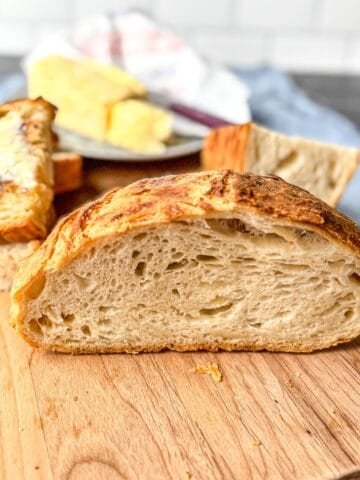
With this easy No-Knead Bread recipe, you can create a wide variety of delicious breads! With very little effort, and a just little bit of hands-on time, you can have fresh bread any day of the week!
Save This Recipe! 💌
Second only to potatoes, bread is my favorite carb indulgence. Before I started making this Super Easy No-Knead Bread, I would occasionally splurge on a loaf of Dave's Killer Bread, or a sourdough from the local bakery, but there is nothing like a warm loaf of fresh baked bread to please a carb lovers heart. I used to love to make my own bread the traditional way. It took awhile for me to get the motion of kneading dough just right, but once I got into the rhythm of it, I found it to be quite relaxing. Almost meditative.
But as I've gotten older (I'm no Spring chicken - more of an Autumn turkey 😂), I find that I don't have the same grip strength that I used to, and kneading bread can be difficult. I'm also a little too short to add my body weight to the kneading process without a stool. I even tried using my stand mixer, but the rocking motion made my stand mixer practically walk off the counter. I started looking for a bread making process that was more friendly to the differently-abled. Enter no-knead bread!
Jump to:
What is no-knead bread?
The idea of making bread without kneading was first brought to light by Mark Bittman, who wrote an article about baker Jim Lahey and his now infamous no-knead bread. Mr. Lahey found that with a long bulk fermentation period, 12 to 18 hours of rising, you could skip the hand kneading process altogether. Instead, over time, the yeast and its enzymes would do the work of lining up all the glutens in their proper structure. Great bread with less work? I'm in!
❤️ What you'll love about this recipe
- Easy - Just mix, rest, and bake. No special knowledge or skills required. Just basic ingredients and time.
- Simple Ingredients - There are no unrecognizable, unpronounceable ingredients like ethoxylated mono-diglycerides, sodium stearoyl lactylate, or azodicarbonamide. No googling necessary.
- Inexpensive - The base recipe calls for flour, yeast, salt, and water. Affordable and easy to find ingredients that almost everyone has in their pantry.
Ingredients in this no-knead bread

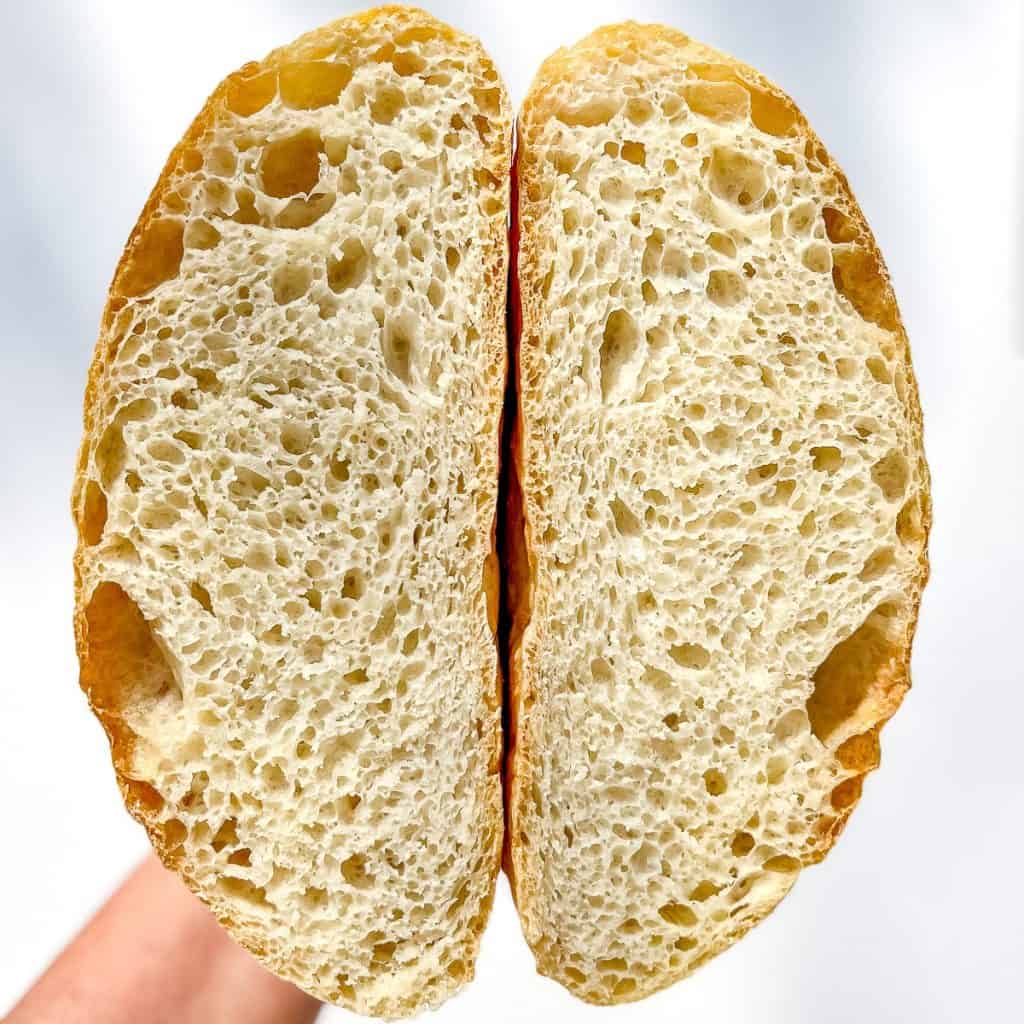
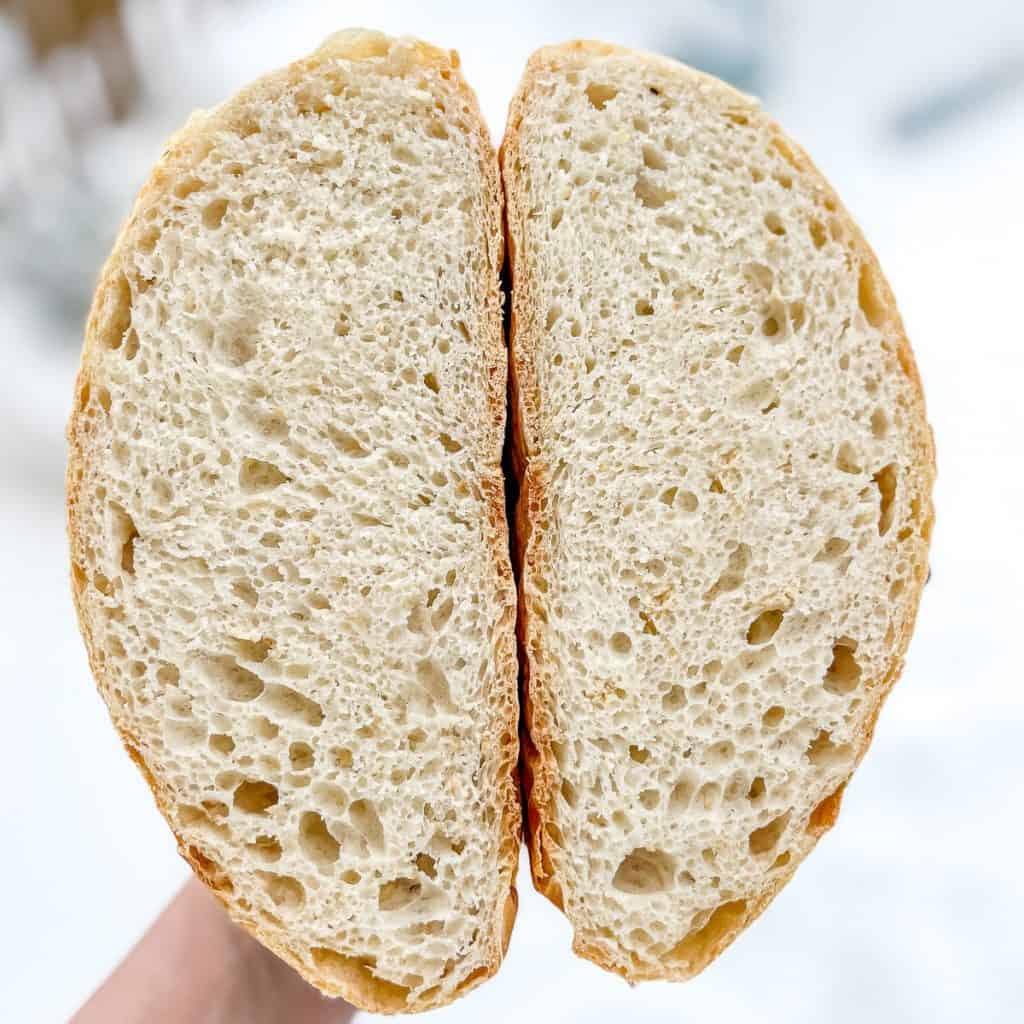
- Bread flour I find that using bread flour leads to an end product that is more stretchy and chewy, with a crunchier crust - the way I want my bread to be. The higher protein in bread flour also adds to the rise before baking, leading to a loftier loaf. You can use all-purpose flour, and it will still be delicious and airy, but might not rise as high as it would with bread flour. Use what works for you!
- Salt I exclusively use Diamond Crystal Kosher salt in all of my recipes. Morton's Kosher salt is actually more salty than Diamond Crystal, so if that's what you have, use half the amount listed in the recipe. I never recommend using table salt, as its small structure makes your food so much more salty. That being said, if that's what you have available, use ⅓ the amount listed.
- Yeast In this recipe I used instant yeast, but if you only have or can only find active dry yeast, check out my tips below for the best results.
- Warm water Unless you are using active dry yeast, you don't need to worry about getting your water into a specific temperature range. Just warm, not hot, tap water is fine.
Tips for using yeast
- For best results, buy and use yeast before the expiration date. Yeast loses its potency over time, resulting in longer rising times, or no rise at all. I now use instant yeast most often, but if you use active dry yeast, you need to determine whether it is still alive. To do this, add your yeast to the warm liquid that your recipe calls for. If your yeast doesn't start to foam up within 5 minutes of adding it to the liquid, your yeast is dead. You'll need to buy more, then start again.
- Make sure the liquid you are using to proof your yeast is between 100°F and 110°F. Any hotter and you risk killing the yeast; colder and the yeast won't wake up. If you don't have a thermometer, the liquid should feel warm to the touch - not too hot and not too cold. Goldilocks.
- If you aren't using active dry yeast, you can use the same amount of instant yeast, at least in this recipe. Instant yeast may also be labelled as bread machine yeast or rapid rise yeast. They're all the same, just different names. Instant yeast does not have to be proofed. Just add it to the dry ingredients and go!
Instructions
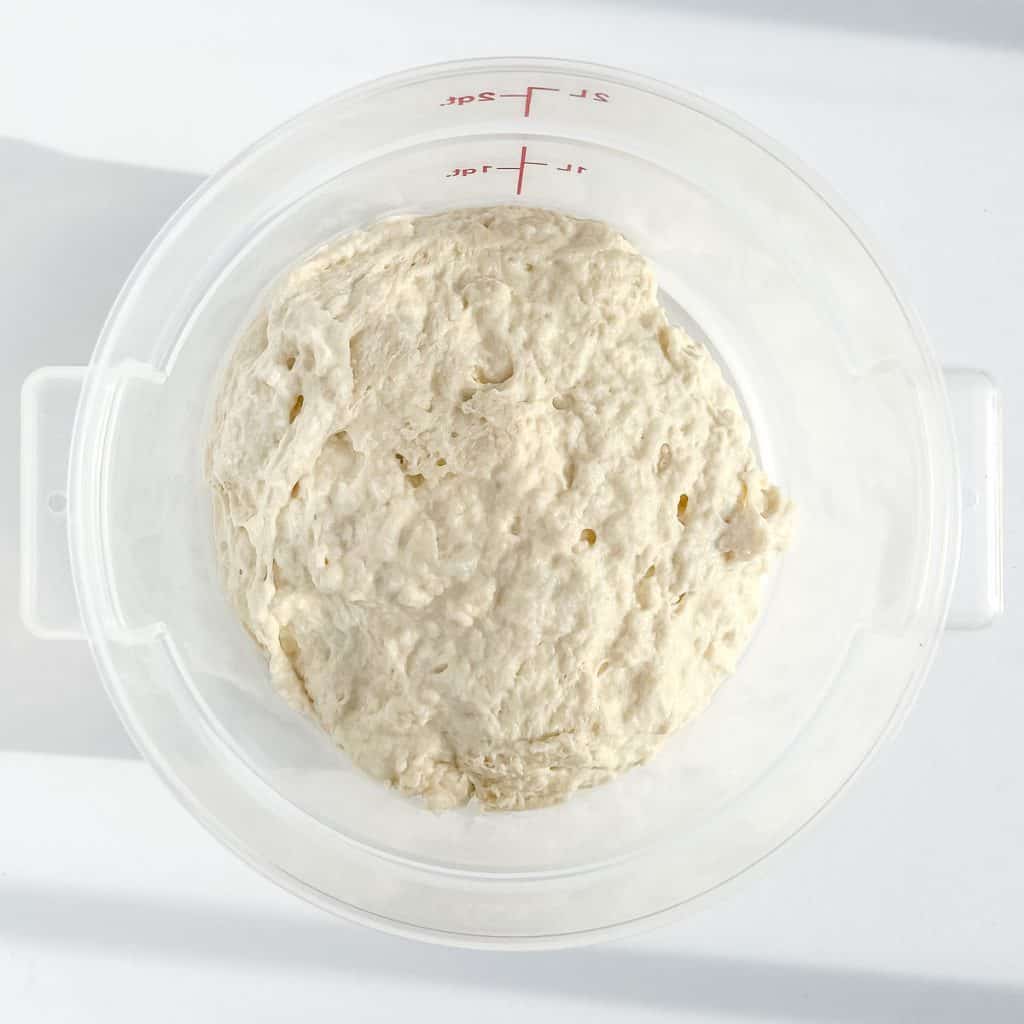
- Mix ingredients Measure your flour into the bowl. Add salt to one side of the bowl and yeast to the opposite side. They are not friends and do not get along. Actually, salt can inhibit the activity of yeast, so we just don't want them mixing until we add the water. Use a danish dough whisk or a stiff wooden spoon to mix the ingredients into a stiff, tacky looking dough. Cover bowl with plastic wrap (I like to use a clear plastic shower cap) or transfer to a container with a tight fitting lid.

What is a danish dough whisk?
A Danish Dough Whisk is a mixing tool with multiple stiff metal loops that makes mixing anything from pancake batter to bread dough easy and efficient. Its spaced-loop design mixes from the bottom of the bowl and throughout without overworking the glutens or your arm muscles! It's also ideal for baked goods with fruit or chocolate chips since its low surface area prevents the ingredients from being broken up during mixing, as they pass right through!
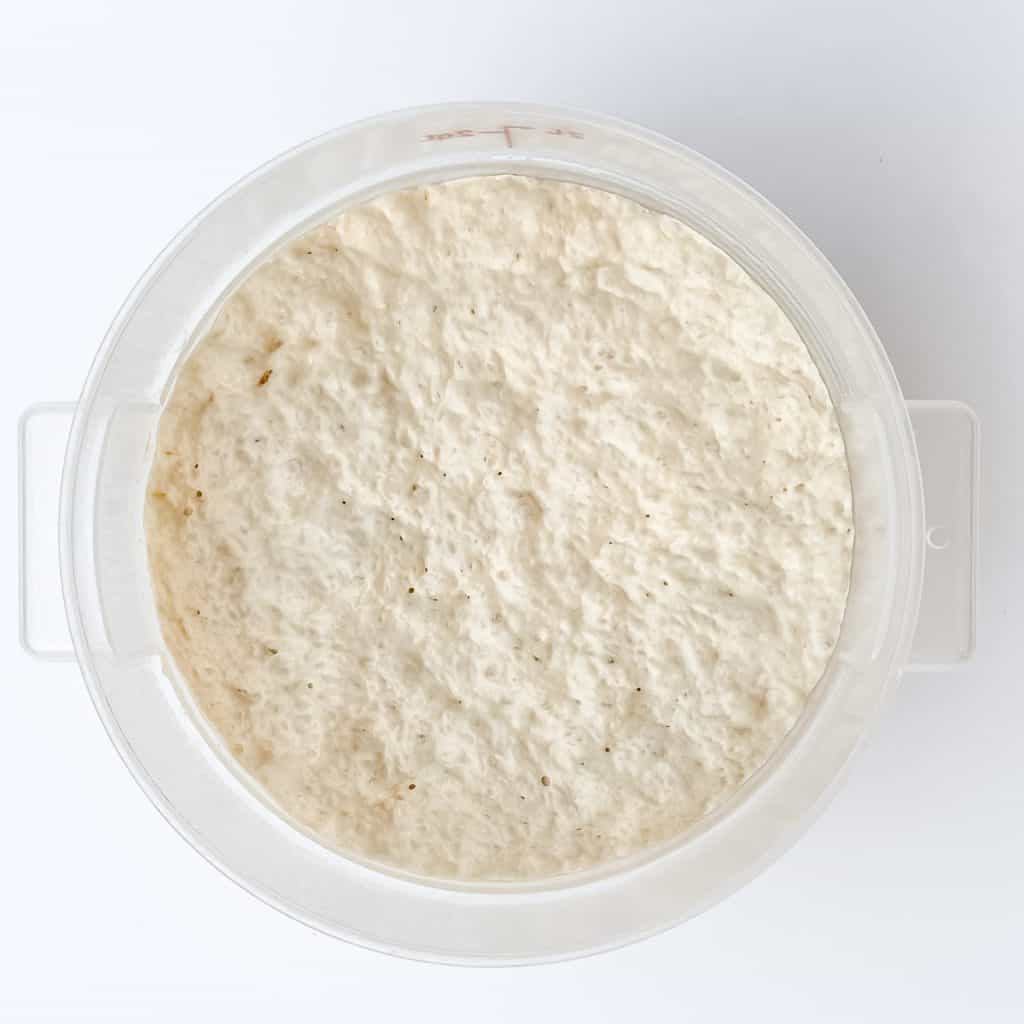
Allow to rise Set the covered container of dough on your counter to ferment and rise for at least 12 hours, and up to 18 hours. I find 15 hours to be my sweet spot. I don't get a whole lot more rise after that and my patience really starts to run out by then. You can also keep your dough in the refrigerator for up to a week, removing it and allowing the dough to come to room temperature before you shape it. The resulting bread will actually have a flavor closer to sourdough after such a long rest.
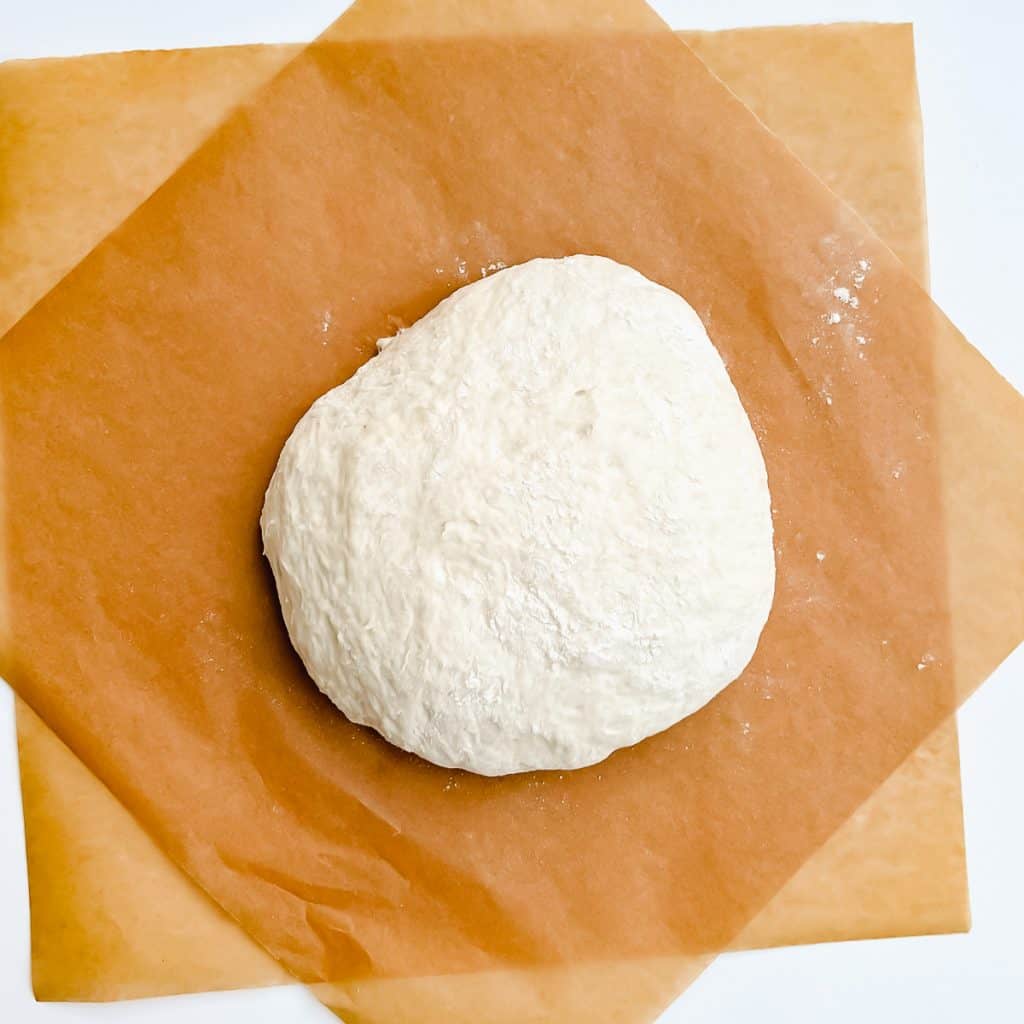
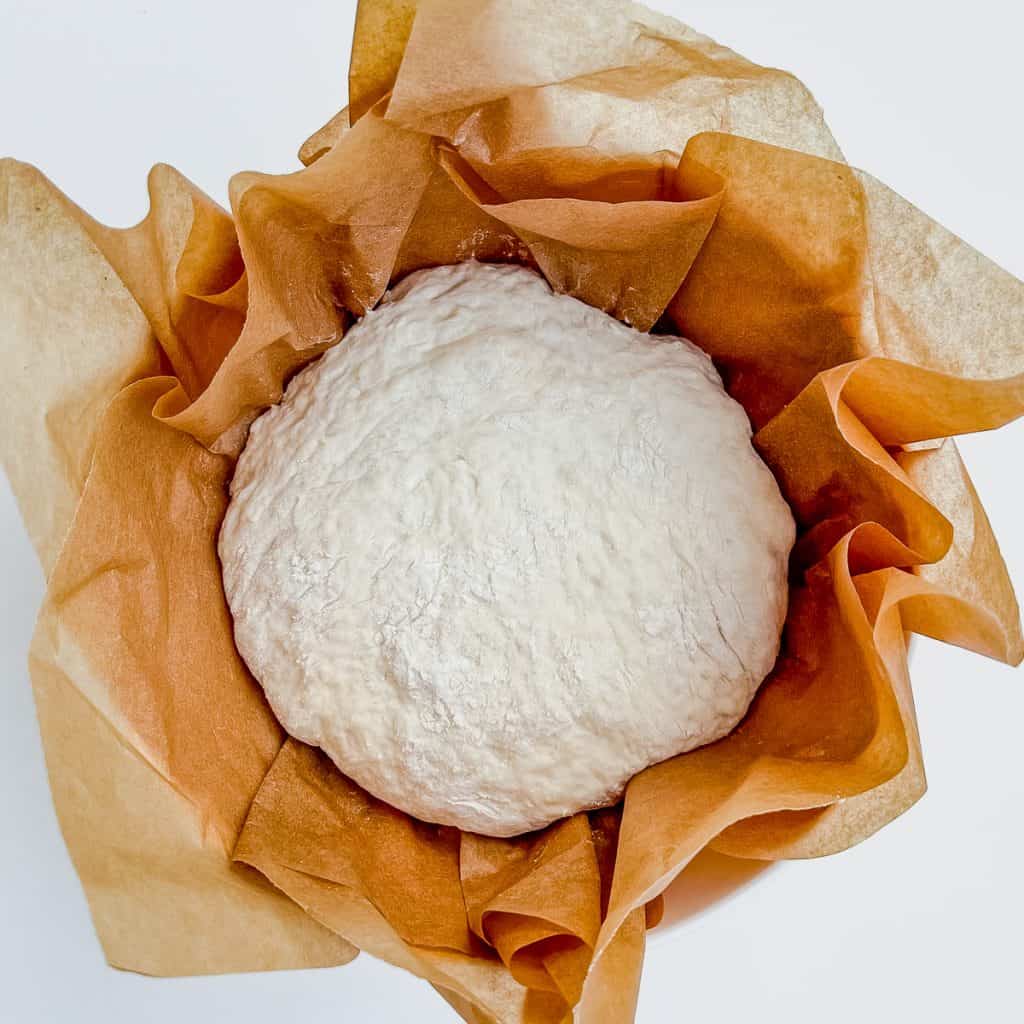
When you are ready to bake, lightly flour your counter or cutting board and turn the dough out of the bowl. Flouring your hands, or a flexible plastic dough scraper, lift the edge of the dough and gently fold it over to its opposite side (don’t press all the air out. Be gentle.) Turn it 90 degrees and do it again until all four sides have been folded inward and it is in the rough shape of a ball.
Turn the dough over and place it in the center of a piece of parchment paper. Place dough, parchment and all, into a large bowl, about the same size as your dutch oven. This will allow it to start taking the shape you want. Allow to rise again for an hour.
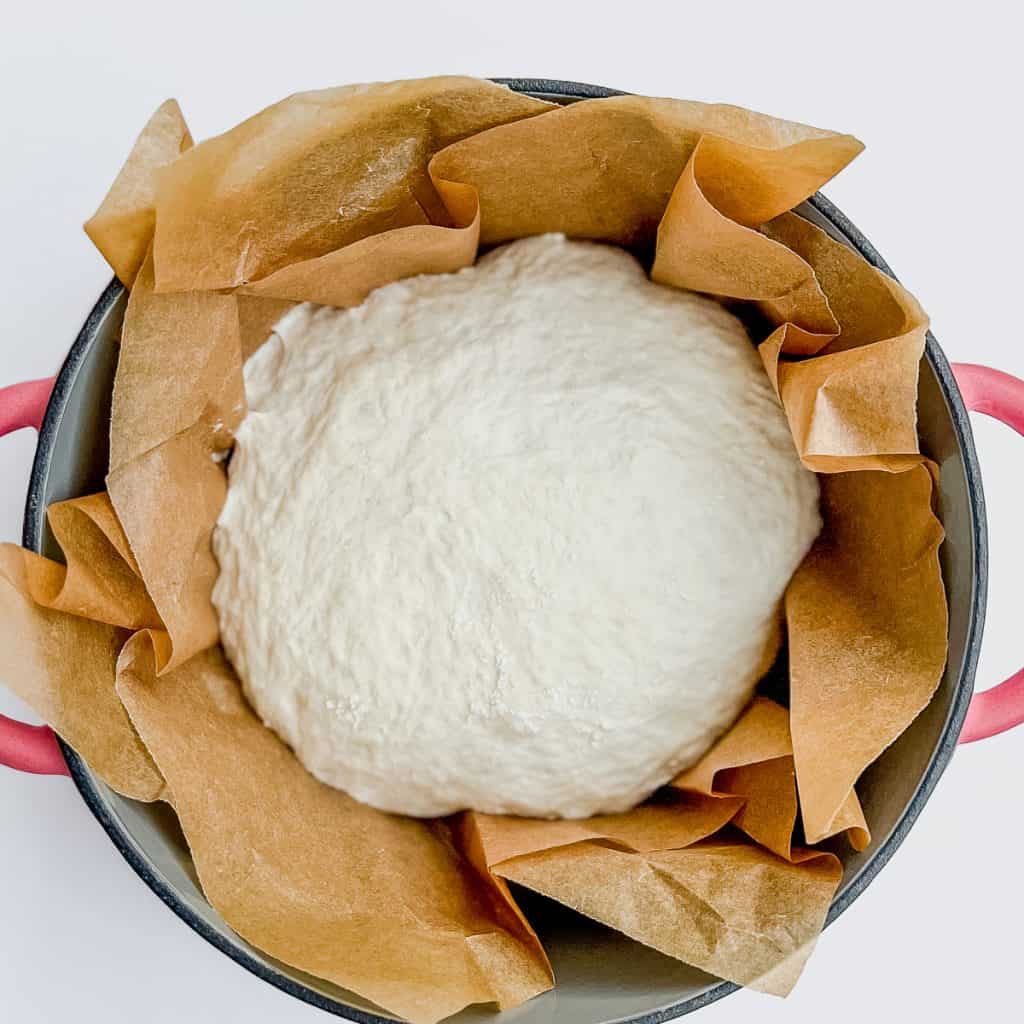
- Heat dutch oven Turn oven to 500°F and place covered dutch oven into oven to heat up. Allow to stay in the oven at least 30 minutes after the oven has reached the proper temperature. After 30 minutes, turn the temperature down to 450°F and remove the dutch oven. Grabbing the edges of the parchment paper, plop the dough right into the pot, paper and all. If desired, using a very sharp knife, make score marks across the top of the dough. about ¼ to ½ inch deep. This is not required and is just for aesthetics. It's pretty.
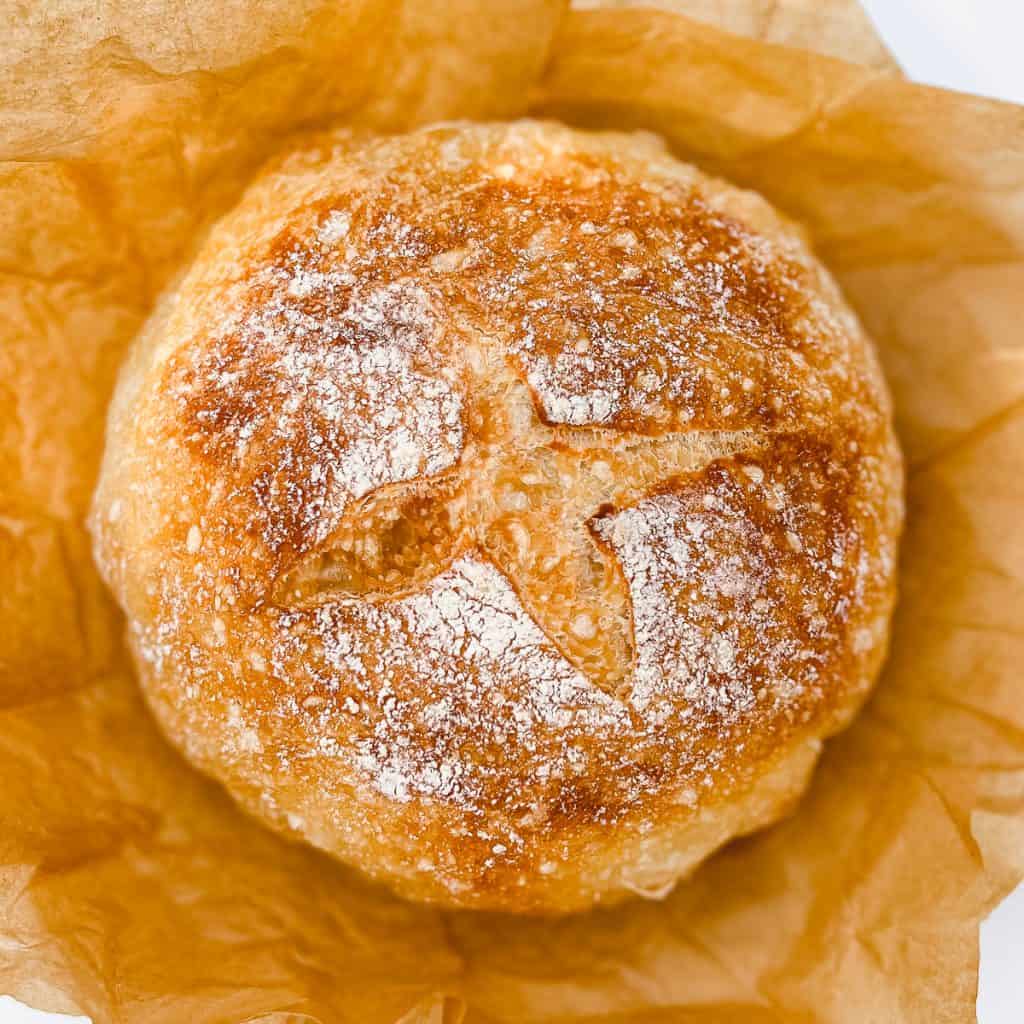
- Bake Place the lid back on the pot and return to the oven to bake for 30 minutes. At that time carefully remove the lid, and place the pot back into the oven to bake the bread another 15 to 20 minutes, or until the crust is golden brown. If you want to be sure your bread is done, place an instant read thermometer into your loaf. It should read at least 205 to 210°F.
Remove pot from oven and remove bread, using the parchment as a carrier. Place the bread on a cooling rack and allow to cool completely before slicing. Store bread in a paper bag, wrapped in a light kitchen towel, for 2 to 3 days to keep it fresh.
Variations
This is just a small list of bread variations that I have made, using my base recipe. It is by no means an extensive list. Because additions to bread have a chance of affecting the rise of your dough, I invite you to experiment with your own bread. Don't be afraid to play with your food!
You need to be mindful of adding anything that absorbs or increases moisture, and adjust your water, flour, or when you add the ingredients accordingly. For instance, using whole wheat flour, which absorbs more water, means you need to increase your water by about 1 teaspoon per cup of the wheat flour. Adding fruit of any kind can make your dough wetter, so I would add them to the dough after the initial rise. Same with any larger nuts or dried fruits; they are best added into the dough after the initial rise.
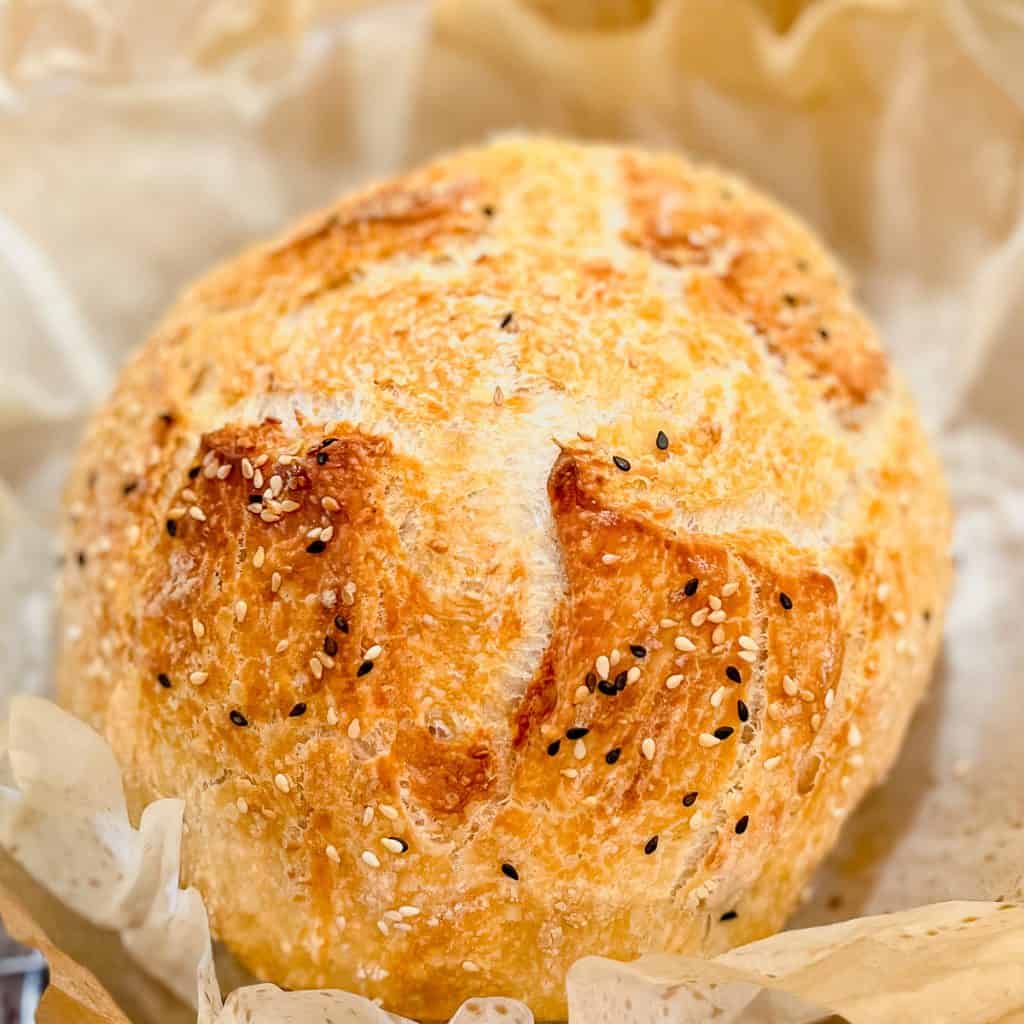
- Sesame loaf With sesame oil and toasted sesame seeds in the dough, and a sprinkling of sesame seeds on top, this bread is amazing in sandwiches! When toasted, the inside seeds get toasty as well, giving you a light nutty taste and texture!
To make: add one tablespoon of toasted sesame seeds and one tablespoon of sesame oil to the dough. Before baking, brush the top of the loaf with just enough water to help a quick sprinkle of sesame seeds to adhere. Rise and bake as directed in the recipe card.
- Rosemary Olive Oil With good quality extra virgin olive oil and fresh chopped rosemary, this loaf tastes like someone combined all the best arts of focaccia and no knead bread.
To make: add 2 tablespoons of finely chopped rosemary and 3 tablespoons of olive oil to the recipe and carry on with the recipe as written.

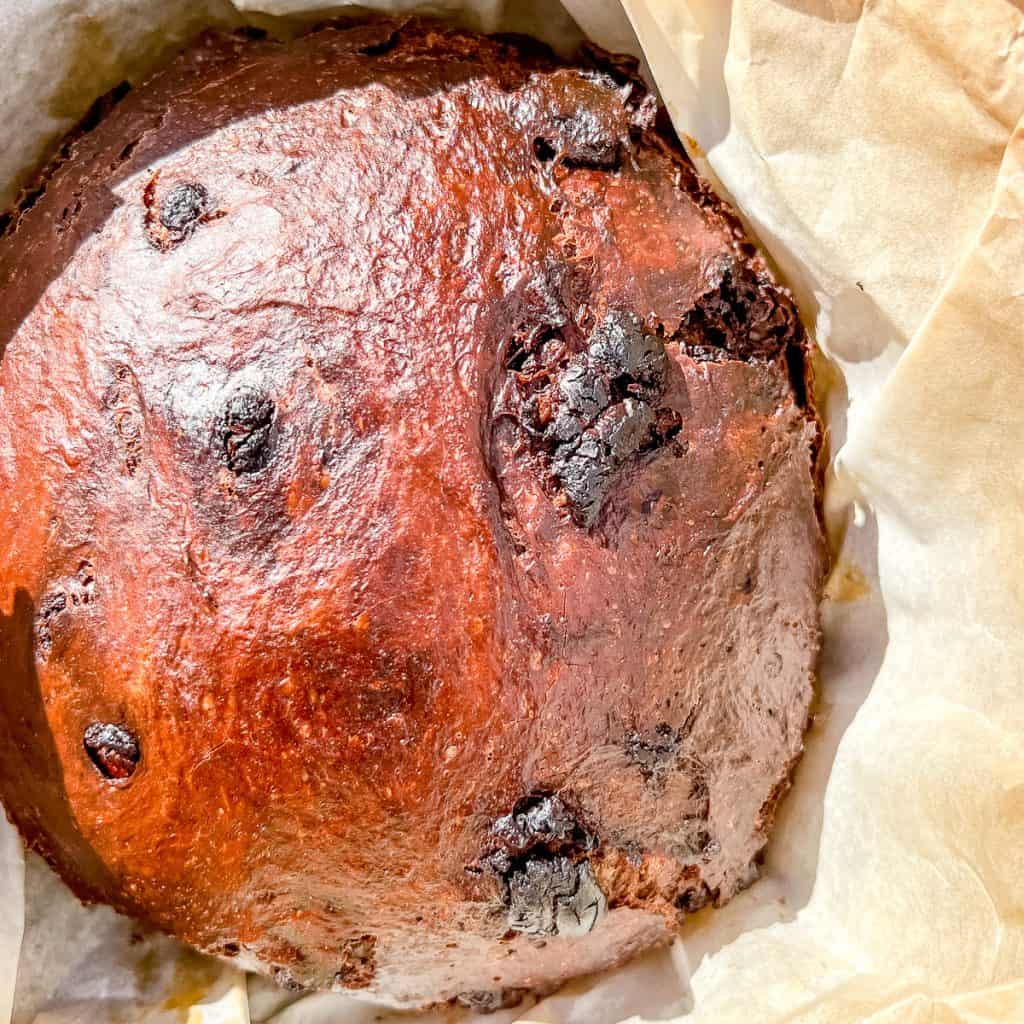
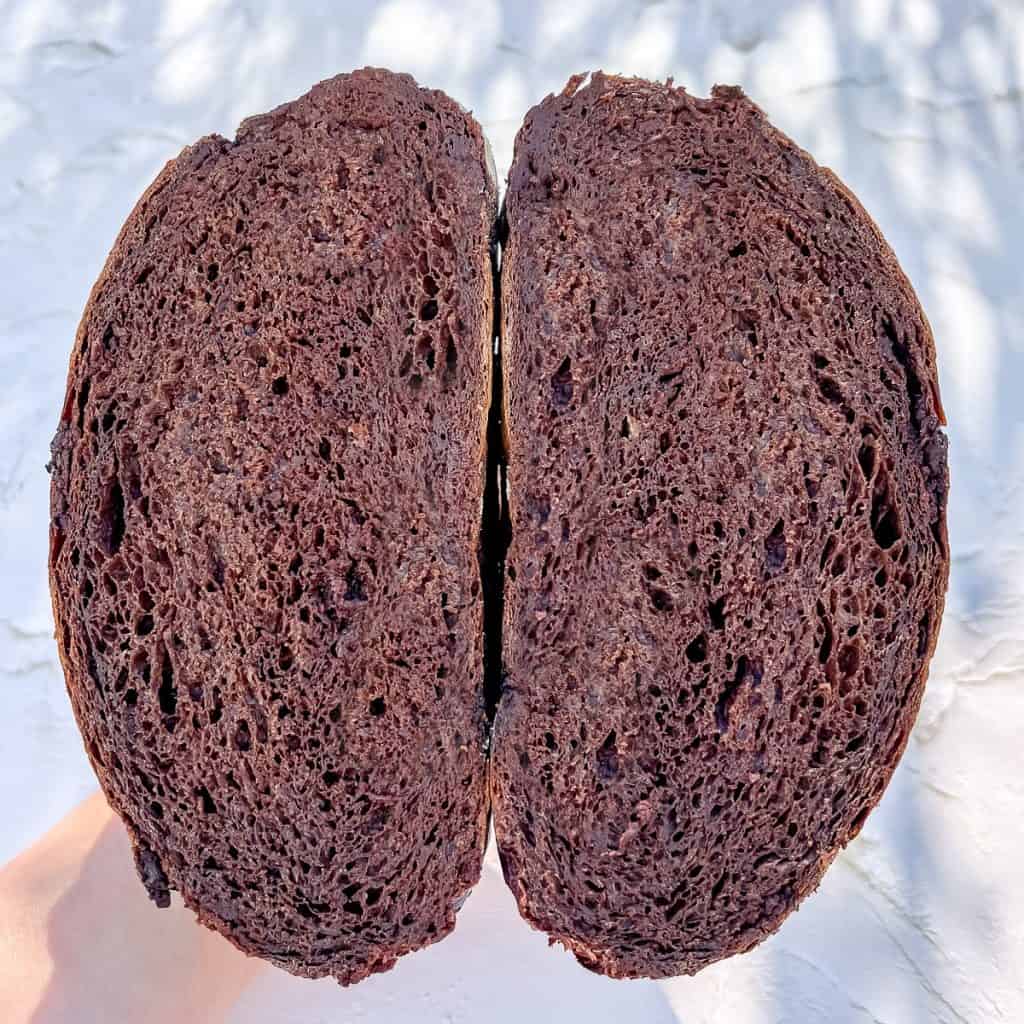
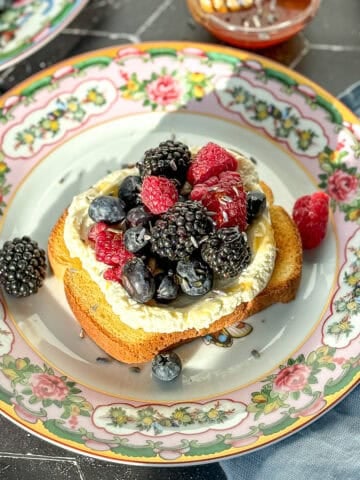
- Double chocolate loaf This bread has cocoa powder and chopped dark chocolate, for a rich chocolaty flavor that you'll absolutely love! Toast this bread, top with creamy ricotta, and drizzle with honey for an amazing breakfast or dessert, but don't forget the flaky sea salt on top!
To make: add ¼ cup (25 grams) of cocoa powder to 2 ¾ cups (330 grams) of bread flour. Mix 4 ounces (113 grams) of chopped chocolate into the dough. Rise and bake as directed in the recipe card.
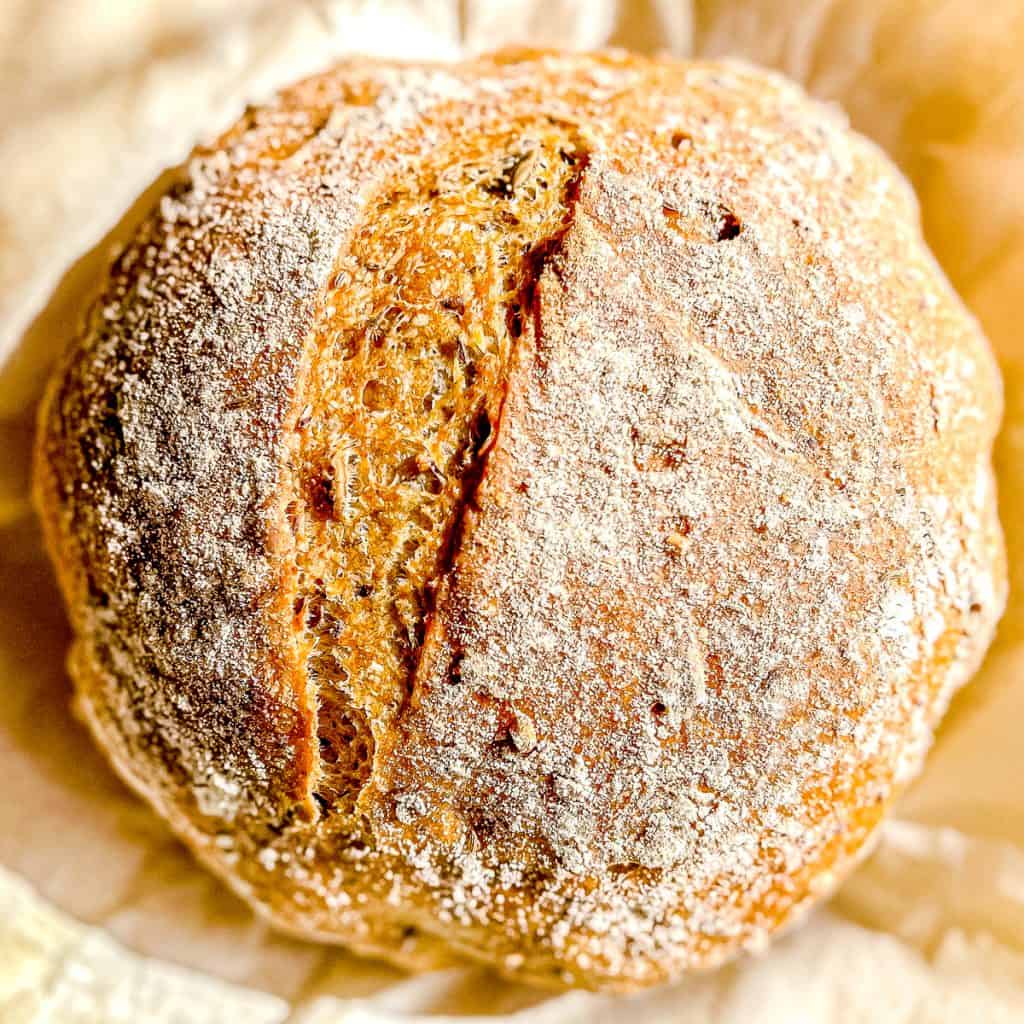
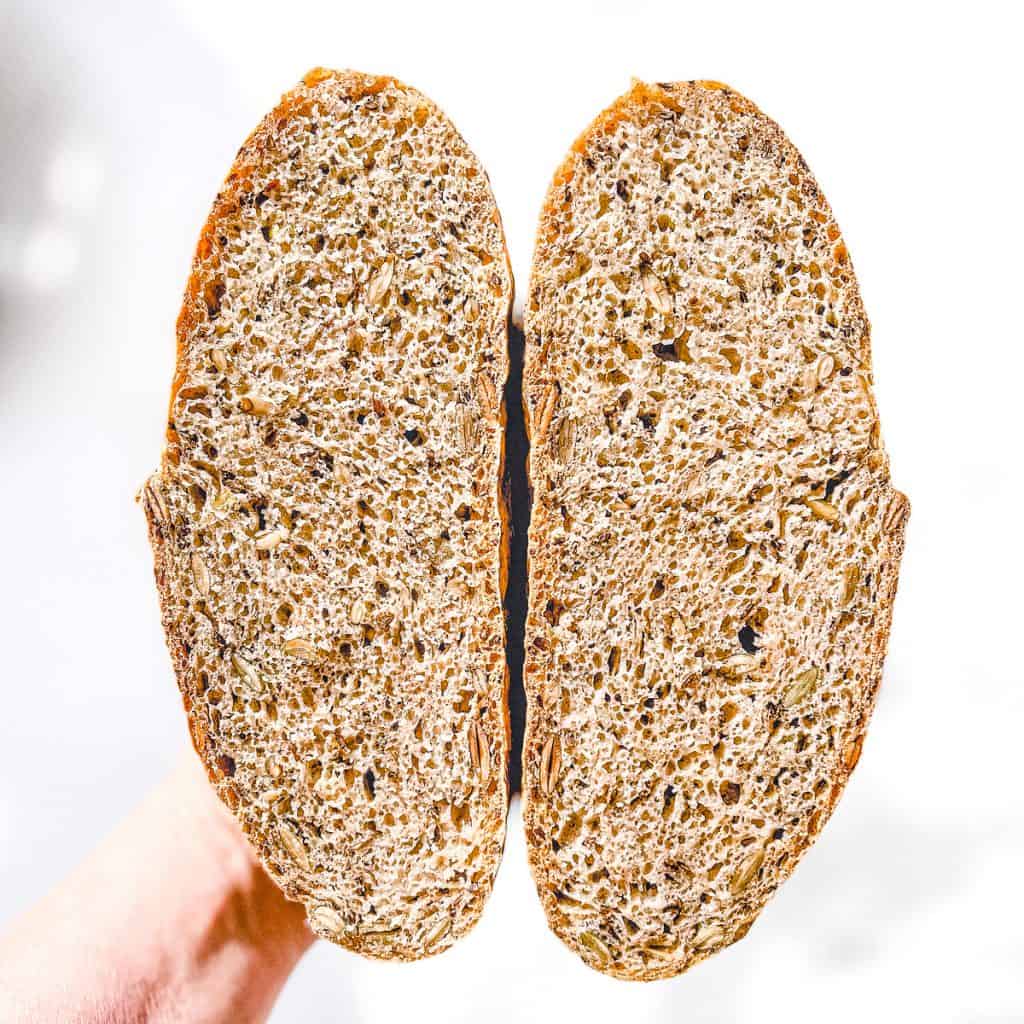
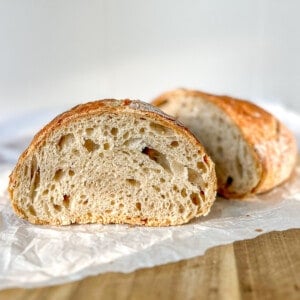
- Seeded rye bread This rye bread has a deep, slightly sour taste - in a good way, and the added seeds and nuts adds an amazing taste and texture that you won't be able to forget.
To make: add ¾ cup (90 grams) dark rye flour to 2¼ cups (270 grams) of bread flour. Add 2 tablespoons each of sesame seeds, and pumpkin seeds, and 1 tablespoon of caraway seeds. You can use any other blend of seeds and nuts, not to exceed ½ cup total. Add 1½ teaspoons of molasses to warm water before mixing with dry ingredients. Mix, rise, and bake as directed in the recipe card.
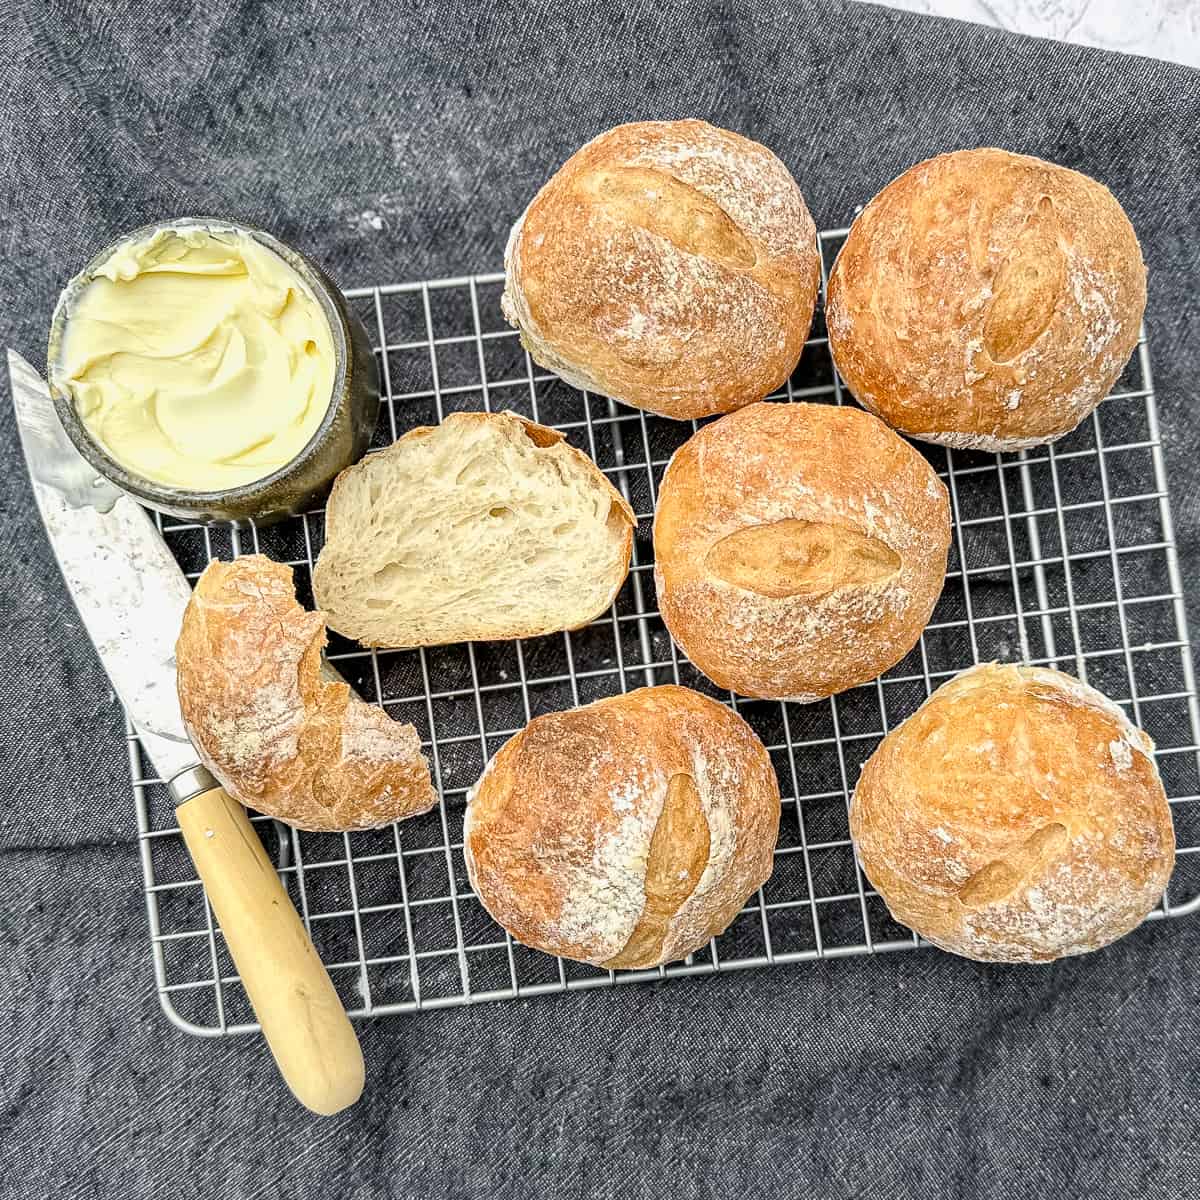
Love this no-knead bread, but want them in roll form? Try my No Knead Crusty Roll recipe. You can customize these as well!
These are only the tip of the no-knead iceberg! Try adding buttery layers, like in my no knead croissant bread. I use some of the techniques found in my rough puff pastry, along with simple folds that incorporate the butter for a flaky buttery loaf of deliciousness!
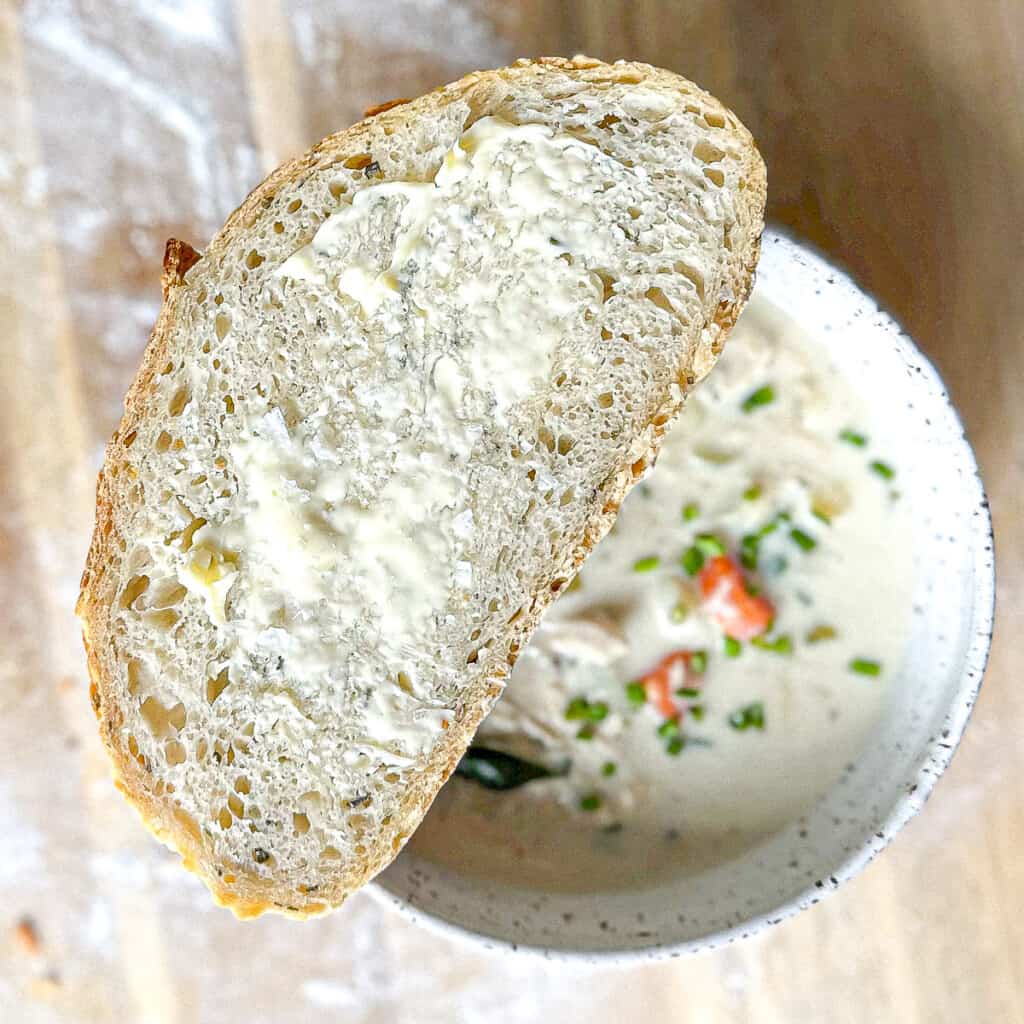
Top it! Try toasting a slice of your no knead bread and using it to make my creamy mushroom toast. Top it with a poached egg and you have a perfect breakfast, brunch, or even dinner!
Storage and freezing instructions
Fresh bread is best eaten within 2 to 3 days. Although your first instinct will be to wrap it in plastic, like a store bought loaf, that only encourages mold growth and a gummy texture to your leftover bread. Place the bread, cut side down, in a paper bag, or wrapped in parchment. Wrap that bag in a kitchen towel and leave on the counter. If you have cut your loaf in half, place the cut sides together and wrap as instructed.
To freeze your bread, slice into individual slices and freeze with parchment paper between the slices and placing the whole thing in a freezer bag. Take out individual slices when needed and toast. You can also freeze a whole loaf wrapped tightly in plastic. Remove the loaf from the plastic, place in a paper bag, and allow to defrost in the refrigerator. To refresh the loaf, place in a 325°F oven for 15-20 minutes.
📖 Recipe
Super Easy No Knead Bread
Equipment
Ingredients
- 3 cups (360 g) bread flour
- 1 teaspoon instant yeast
- 1 ½ teaspoon kosher salt
- 1 ¼ cup (300 g) warm water
Instructions
- Place flour in a large bowl. Place yeast and salt on top of the flour, on opposite sides of the bowl. Make a well in the center and stir in water using a large sturdy spoon or a danish dough whisk, Mix together until all the flour is incorporated. The dough will be very sticky and wet. This is normal. Cover the bowl with plastic wrap (I use a new plastic shower cap) and leave to rise in a warm spot in your kitchen for 12-18 hours.
- Flour your counter or cutting board lightly and turn the dough out of the bowl. Flouring your hands, or a flexible plastic dough scraper, lift the edge of the dough and gently fold it over to its opposite side (don’t press all the air out. Be gentle.) Turn it 90 degrees and do it again until all four sides have been folded inward into the rough shape of a ball. Turn the dough over and place it in the center of a piece of parchment paper. Place dough, parchment and all, into a large bowl and cover with plastic or a barely damp towel. Allow to rise again for an hour.
- While it is rising, preheat your oven to 500° and place a covered cast iron Dutch oven into the oven. Allow to continue heating for 30 minutes after the oven has reached temperature. After 30 minutes, turn the temperature down to 450°F and remove the dutch oven. Grabbing the edges of the parchment paper, plop the dough right into the Dutch oven, paper and all.
- If desired, using a very sharp knife, make score marks across the top of the dough. about ¼ to ½ inch deep. Replace the cover and bake for 30 minutes. Remove the lid and continue baking until crust is fully golden brown, about 15 to 20 minutes. Remove pot from oven and remove bread, using the parchment as a carrier. Place the bread on a cooling rack and allow to cool at least 15 minutes before slicing. Store bread in a paper bag, cut side down, wrapped in a light kitchen towel, for 3-4 days to keep it fresh.


Pati says
Sure looks ease and yummy 😋!!
Cynthia Christensen says
Thank you! You need to try it!
Joe L says
Do you have a recipe to make no knead sourdough bread with sour dough starter.
Cynthia Christensen says
No, I don't. I haven't taken the leap to sourdough yet, but I hope to soon!
Flora G says
Easy to follow, no hassle recipe with fantastic results. Made the original AND the Parmesan and poppyseed version as I was entertaining family and they were both demolished within seconds!
Cynthia says
That’s fantastic! I’m so glad your bread was a hit!
Kristen says
Sooo good! I made this today and added a cup of shredded cheddar cheese plus grated fontina on top and it was delicious! My kitchen is a bit cool so it didn’t rise as much as I wanted so next time I’ll find a better spot in my kitchen to see if we can get a little more lift. Yum!
Cynthia says
I’m glad it was so delicious! If your kitchen is a little bit cold try turning on just your oven light and placing your dough into the oven overnight. That little bit of warmth from the oven light will actually help rise your dough.
Pamela says
Absolutely loved the bread, I even had to put in the refrigerator for 2 days because life happened, and brought the dough to room temperature and cooked as directed, it rose, had a crunchy crust, and moist bread.
Cynthia says
I can't tell you how happy I am that you enjoyed this recipe so much!
Pedro says
Can I use Almond flour ?
Cynthia says
I’ve never tried, so I have no idea 🤷🏻♀️ but I’m sure someone on the internet would know!
Sharon says
I'm confused...Instructions say to combine flour and yeast and the next line says to place yeast and salt on opposite ends. How is that possible if the yeast has already been combined with the flour?
Cynthia says
As I state in the body of the post, salt can inhibit the activity of yeast and affect the rise of your dough. Therefore I have you place them on opposite sides of the bowl before adding in the water and mixing. I’m sorry if that wasn’t clear in the recipe card. Thanks for the heads up! I’ll clarify the language in that part of the recipe!
Sarah says
Delicious!!! Perfectly chewy on the inside and crusty/crispy on the outside. I have made No-knead bread before... however it only worked once. Thanks to this recipe, and the accurate measurements (in grams), it worked perfectly!! And I will be making this bread routinely now. Can't wait to try some other variations too. 😋
Cynthia says
That’s great to hear! I’m so happy you liked the recipe!
Sarah says
do you think this could be baked in a loaf pan? maybe 2 8x4s??
Cynthia Christensen says
I baked this in a loaf pan. It’s kind of fun, but it really doesn’t have the same texture as a traditional loaf of bread.